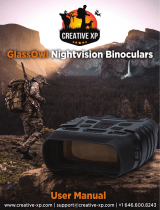
TX-141

Technaxx TX-141 User manual

  • Hello! I am an AI chatbot trained to assist you with the Technaxx TX-141 User manual. I’ve already reviewed the document and can help you find the information you need or explain it in simple terms. Just ask your questions, and providing more details will help me assist you more effectively!
Technaxx® * User Manual
Nightvision Camcorder TX-141
The Declaration of Conformity for this device is under the Internet link:
www.technaxx.de/ (in bottom bar Konformitätserklärung). Before using
the device the first time, please read the user manual carefully.
Service phone No. for technical support: 01805 012643 (14 cent/minute
from German fixed-line and 42 cent/minute from mobile networks). Free
Email: support@technaxx.de
Keep this user manual for future reference or product sharing carefully.
Do the same with the original accessories for this product. In case of
warranty, please contact the dealer or the store where you bought this
product. Warranty 2 years
Enjoy your product. *Share your experience and opinion on one of
the well-known internet portals.
Features
IR-viewer for dark envoirements
Built-in display
HD resolution
Photo and video mode
Digital magnification of 4 times
Viewing distance in full darkness of up to 300m
MicroSD card support up to 32GB
Product overview
1
Lens with manual focus
6
Power Button
2
USB port/Micro SD card slot
cover
7
Mode Button
3
IR Up/Zoom in/Up Button
8
Menu Button
4
IR Down/Zoom out/Down Button
9
Display Screen
5
Shot / Enter
10
Battery Cover
Specifications
Image Size
1M(1280x960) / VGA (640x480)
Video Size
960P(1280x960@30FPS) / 640(640x480@30FPS)
Aperture
Lens Angle
Display Screen
Digital Zoom
Storage Media
Viewing Distance in all dark
Up to 300M
Viewing Distance in weak light or day time
3M~infinity
IR LED
USB Port
Power Source
Operating Temperature
Storage Temperature
Dimension
Weight
Insert or replace batteries
Remove the battery cover on the right side of the device. Slide it gently
down to open the compartment. Insert five AA (1.5V LR6) batteries.
Observing the correct polarity indication. Close the battery compartment
with the battery cover.
Insert MicroSD card
Please prepare a Micro SD card (up to 32GB) in advance. Open the card
slot cover. Insert the Micro SD card into the slot (2). Make sure the
direction is right. Never insert the card forcibly. Format the Micro SD
card, this can improve the battery life and shutter speed. To remove the
card from the memory card slot of the device, press the edge of the
memory card in gently, the card will pop out. Then remove the card.
Starting up
Keep pressing the power button (6) for 3 seconds to turn on the device.
Keep pressing the power button (6) for 3 seconds again to turn off the
device.
Changing the modes
The night version has 3 different modes: photo mode, video mode and
playback mode. Press the mode button (7) to change modes.
Taking pictures
1. Turn on the device, the default is photo mode. If not, press the mode
button (7) to switch to photo mode.
2. Zooming:
Keep pressing the or button (3 / 4) to zoom in or zoom out. The
value of magnification level appears on the LCD screen.
3. Take a still photo.
- View your subject via the LCD screen.
- Press the shot button (5) to take a photo.
Photo Mode
For taking still photos
Video Mode
For recording video
Playback Mode
For playing the recorded files
Recording video
1. Turn on the device, press the mode button (7) to switch to video mode.
2. Zooming:
Keep pressing the or button (3 / 4) to zoom in or zoom out the
image. The value of magnification level appears on the LCD screen.
3. Start to record video.
- View your subject via the LCD screen.
- Press the shot button (5) to start to record. The record duration will be
shown on the LCD screen.
4. Finish recording.
- Press the shot button again to stop recording.
- The device will stop recording automatically once capacity of the
memory card is full.
Note: If you are too close or too far from the target, the quality of the
photos or videos will not be optimal. Rotate the lens to the left or the
right to focus the observation object. There is no sound in the video
files. Because the observation distance is far, the sound cannot be
transmitted.
IR LED (Night vision function)
In photo/video mode, if you have to view the darkness environment,
please short press IR UP button to activate the IR LED, the image will
change to black and white. The IR LED have seven levels, short press IR
UP button to up the level, short press IR DOWN button to down the level.
Note: If the battery voltage is not enough, the IR LED level will down
automatically. IR level can up to 7 levels when the battery power is full.
If only left half power, the level just can up to 5. If only left 25% power,
the level just can up to 3. If the battery power is lower than 25%, IR
LED cannot be activated.
Settings in photo and video mode
Press menu button in photo or video mode to change the settings.
Menu
Function
Photo Resolution
Set the photo resolution to 1M 1280x960 or VGA
640x480
Video Size
Set the video resolution to 960 1280x960 or VGA
640x480
Night vision
sensitivity
Choose the night vision sensitivity
Power Frequency
Set the light source frequency to prevent interference
50Hz or 60Hz
Power Save
Set the time to shut down the device
3min / 5min / 10min / OFF
Date & Time
Set the date and time of device
Date Stamp
Add the date stamp on the photo or video files
Off / Date / Date & Time
Language
Set menu language.
Format
Format your SD card. It will delete all files including
the protected files
Reset All
Restore the setup to factory default
FW Version
User can see the firmware version information.
Playback
1.Turn on the device, press the mode button to switch to playback mode.
2.Press Up/Down button to view photos and video files.
3.Playback the video
- Press the shot button to start playing the video files.
- Press the shot button again to have a pause.
- Press menu button to stop the current video playing.
Press menu button in playback mode, the screen will display the
playback menu. Press Up/Down button to scan lock or delete. And press
shot button to select one to enter the submenu.
Download files to PC
There are two ways to download files from the device to a computer:
By inserting the memory card into a card reader.
By connecting the device to a computer using the supplied USB cable.
Using a Card Reader
1. Eject the memory card from the device and insert it into a card reader.
Then connect the card reader to a computer.
2. Open [My Computer] or [Windows Explorer] and double-click the
removable disk icon that represents the memory card.
3. Copy images from the card into a directory of your choice on the
computers hard disk.
Connecting the device to a PC through the USB cable
1. Turn on the night vision. Connect it to a computer through the supplied
USB cable.
2. When connecting to the computer, it will appear MSDC on the
screen.
3. Open [My Computer] or [Windows Explorer]. A "Removable Disk"
appears in the drive list. Double-click the "Removable Disk" icon to view
its contents. Files stored on the camera are located in the folder named
"DCIM".
4. Copy the photos or files to your computer.
Care and maintenance
Clean the device only with a dry or slightly damp, lint-free cloth.
Do not use abrasive cleaners to clean the device.
This device is a high-precision optical instrument, so in order to avoid
damage, please avoid the following practice:
Use the device in ultra-high or ultra-low temperature.
Keep it or use it in moist environment for long.
Use it in rainfalls or in water.
Deliver or use it in strongly shocking environment.
Hints
The device is intended exclusively for private and not for commercial
use. Only use this device as described in this user manual. Do not
place any part of this device in water or any other liquid. Do not handle
the device with wet hands. When disconnecting the cable, always pull
at the plug. Do not pull on the cable itself. Prevent it comes into
contact with hot surfaces. Keep it away from heat sources to avoid
deformation of plastic parts. Do not put out the memory card during the
video recording process. This can damage the video files and the
memory card. Please remove the battery after use.
Safety Instructions
Children should only use the device under adult supervision. Keep
packaging material, like plastic bags and rubber bands, out of the reach
of children, as these materials pose a choking hazard. Do not place
the device, particularly the lenses, in direct sunlight. The concentration of
light could damage the device. Do not disassemble the device. Do
not expose the device to high temperatures. The device is intended
only for private use. Please heed the privacy of other people. Do not
use this device to look into apartments, for example.
Hints for Environment Protection: Packages materials are
raw materials and can be recycled. Do not disposal old devices
or batteries into the domestic waste. Cleaning: Protect the
device from contamination and pollution (use a clean drapery).
Avoid using rough, coarse-grained materials or
solvents/aggressive cleaner. Wipe the cleaned device
accurately. Distributor: Technaxx Deutschland GmbH &
Co.KG, Kruppstr. 105, 60388 Frankfurt a.M., Germany
/