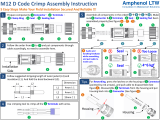
Aruba JW041A Installation guide

Type
Installation guide
AP-AC-MLX-EX AC Connector Kit
Installation Guide
0512260-02 | March 2022 1
Package Contents
Housing x1
Crimp terminals x 6
20A2F cable gland x 1
AC extension tube x 1
AP-AC-MLX-EX installation guide
Customer Supplied Equipment
UV-resistant, outdoor-rated three-wire AC cable (18 AWG) with outside cable diameter of 6-12mm
and inside wire diameter no more than 3.1mm
Wire stripper
Crimp tool
Extraction tool (for removing terminals from housing)
Sliding Cable Gland over AC Power Cable
1. Remove the cap on the AC power port.
2. Slide the sealing nut, seal A, seal B, gland body, O-ring and AC extension tube over the cable. See Figure 1.
Figure 1 AC Power Cable, AC Extension Tube and 20A2F Cable Gland
Only three crimp terminals are needed to assemble the AC connector. We include 6 crimp terminals in the
package in case the crimp terminals are damaged during assembly.
The opening of the gland is smaller than the AC housing, so you need to slide the sealing nut, seal A, seal B,
gland body, O-ring and AC extension tube over the AC cable before assembling the AC housing on the cable.
AC Cable
O-ring
Gland Body
Seal B Seal A
Sealing Nut
AC Extension Tube
2AP-AC-MLX-EX AC Connector Kit | Installation Guide
Assembling AC Power Cable
1. Use a wire stripper to peel 20 mm length of the outer sheath of the AC cable and then peel 3-3.3 mm length
of inner insulation off each wire of the AC cable. See Figure 2.
Figure 2 Stripping the AC Cable
2. Use a crimp tool to crimp the bare part of the AC wire to the opening end of the crimp terminal. See Figure 3.
Figure 3 Crimping the AC Wire to the Terminal
3. Insert the three terminals into the housing. The AC wires are color-coded, the terminals (connected with the
AC wires) must be inserted into the appropriate housing. See Figure 4.
Figure 4 Inserting the Terminals to the Housing
4. The AC power cable assemble is completed. See Figure 5.
Figure 5 AC Cable
Connecting AC Power Cable
1. Insert the power cable connector into the AC power interface and ensure it clips into place.
AC Wires
AC Wire
Terminal
Neutral
Line
Ground
If a terminal is damaged during assembly or is inserted into the wrong housing, you can remove the terminal
from the housing by following the instructions in “Removing Terminals from Housing” on page3.
1
3
AP-AC-MLX-EX AC Connector Kit | Installation Guide 3
Figure 6 Inserting AC Cable Connector into AC Interface on AP
2. Screw the AC extension tube into the AC port and tighten to a torque of 88 in/lbs (10 Nm). See Figure 1.
3. Place the O-ring on the gland body, and ensure it is in place.
4. Thread the gland body into the AC extension tube and tighten to a torque of 70.5 in/lbs (8 Nm).
5. Push the seal B and seal A into the gland body and tighten the sealing nut onto the gland body to a torque of
53 in/lbs (6 Nm).
Figure 7 AC Power Cable, AC Extension Tube and 20A2F Cable Gland installed to AP
Removing Terminals from Housing
1. Insert the extraction tool(4) into the housing(2). See Figure 8.
2. Use the slots(3) located on the inside of the housing to guide the extraction tool blades into the housing until
contact is made with terminals(1).
For more details on the 20A2F cable gland such as conditions of use, installation instructions and technical
data, please refer to CMP website:
https://www.cmp-products.com/Installation%20Instructions/CMP%20A2F.pdf
4AP-AC-MLX-EX AC Connector Kit | Installation Guide
3. Continue to insert the tool, always checking to see that the blades of extraction tool are on the outside of the
contact. See Figure 9.
4. Continue to insert extraction tool into housing until the locking tabs have snapped out of their locked
position. If the locking tabs are still not totally depressed, hold on tight to the wire and push it toward the
extraction tool. This will completely depress the locking tabs. See Figure 9.
5. Grasp the terminal by the wire, and gently pull it out from the housing.
Figure 8 Removing Terminals
Figure 9 Removing Terminal from Housing (Housing Removed)
Extraction Tool
Terminal
Locking Tabs Repressed
When a terminal is removed in this manner the locking tabs are damaged and the terminal is not reusable.
  • Page 1 1
  • Page 2 2
  • Page 3 3
  • Page 4 4

Aruba JW041A Installation guide

Type
Installation guide

Ask a question and I''ll find the answer in the document

Finding information in a document is now easier with AI