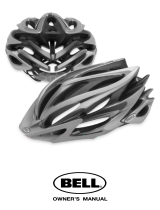
Crivit SP-06 Owner's manual

Type
Owner's manual

This manual is also suitable for

Crivit SP-06: Your safety companion for enhanced visibility while cycling. With three distinct lighting modes – continuous, flashing, and color chaser – you can customize your rear light to suit your preference and ensure you're seen on the road. Easily mount the light onto your helmet's size adjustment system for secure attachment. Stay visible, stay safe with Crivit SP-06.

Crivit SP-06: Your safety companion for enhanced visibility while cycling. With three distinct lighting modes – continuous, flashing, and color chaser – you can customize your rear light to suit your preference and ensure you're seen on the road. Easily mount the light onto your helmet's size adjustment system for secure attachment. Stay visible, stay safe with Crivit SP-06.

GB / IE / NI Owner´s Manual 04 - 09
DK Bruksanvisning 10 - 14
FR / BE Mode d‘emploi 15 - 20
NL / BE Gebruiksaanwijzing 21 - 26
DE / AT / CH Gebrauchsanleitung 27 - 32
BICYCLE HELMET SP-91/
LED REAR LIGHT SP-06
owner´s manual
CYKELHJELM SP-91/
LED-BAGLY GTE SP-06
Bruksanvisning
CASQUE DE VÉLO SP-91/
FEU ARRIÈRE LED SP-06
Mode d‘emploi
FIETSHELM SP-91/
LED-ACHTERLICHT SP-06
Gebruiksaanwijzing
FAHRRADHELM SP-91/
LED-RÜCKLICHT SP-06
Gebrauchsanleitung
BICYCLE HELMET SP-91/ LED REAR LIGHT SP-06
IAN 285909
GB / IE / NI Owner´s Manual 04 - 09
DK Bruksanvisning 10 - 14
FR / BE Mode d‘emploi 15 - 20
NL / BE Gebruiksaanwijzing 21 - 26
DE / AT / CH Gebrauchsanleitung 27 - 32
A B
E
K
L
J
H I
C
F
Press
Press
G
1
2
3
1x 2x 3x
D
4
BICYCLE HELMET SP-91
Dear Customer!
We are pleased that you have decided to purchase one of our high-quality products, which
are manufactured and certied in strict adherence to the currently valid safety standards.
Bicycle helmet SP-91
Bicycle helmet SP-91 04
Safety information 05
User information 05
1. The correct helmet position 05
2. Adjusting the single-hand twisting fastener 05
3. Adjusting the strap divider 06
4. Adjusting the chin strap 06
5. Visor 06
6. Cleaning and care 06
7. Disposal 07
LED - Rear light SP-06 07
Safety information 07
User information 08
1. Before the rst use 08
2. Removal and attachment of the tail light 08
3. Functions 08
4. Changing the batteries 08
5. Cleaning and care 08
6. Disposal 09
5
Familiarize yourself with this product before rst use. Carefully read the operating instructions
and the safety information. Use the product only as described and for the indicated
purposes. Keep these instructions. If you give the product to a third party, be sure to include
all the documents with it.
Safety information
Warning! This helmet should not be used by children while climbing or doing other
activities when there is a risk of strangulation/hanging if the child gets trapped with
the helmet.
Your helmet was specially designed for protection during cycling
1,
skateboarding
3, roller-skating 2 and riding a scooter 4. It must not be used for
other types of sport or for motorcycling
5.
Please note that the helmet can only provide protection if it ts correctly. Please
ensure you try out a range of different sizes before buying.
Please be aware that despite correct adjustment your helmet cannot always protect
you from all injuries.
The helmet should be checked for visible deciencies at regular intervals.
The helmet needs to be replaced after any hard impact, blow or deep scratch, as it
thereby loses its protective function.
The helmet should also be replaced if it does not properly t any longer or, at the
latest, 5 years after the date of manufacture, even if no damage can be observed.
Any adjustment to or removal of the original parts of the helmet can extremely impair
its protective function. The helmet may not be altered in order to make additions in a
way not recommended by the manufacturer.
Clean the inner padding with lukewarm water and mild soap and then let it air dry.
High temperatures, from as low as 60° C, can seriously damage the helmet. Uneven
helmet surfaces and the formation of small blisters are signs of such damage. Do not
store behind panes of glass, e.g. in the car or close to sources of heat or warmth.
User information
1. The correct helmet position
The helmet must always be levelly horizontal on your head (Fig. A).
If the helmet is too far forward, it can impair your vision.
If the helmet is too far back, your forehead is not sufciently protected (Fig. B).
Bicycle helmet SP-91
6
2. Adjusting the single-hand twisting fastener
The integrated size-adjusting system can be adjusted using a turning knob at the back of
one’s head (Fig. C):
smaller = twist clockwise
bigger = twist anti-clockwise
3. Adjusting the strap divider
Open the strap divider (Fig. D).
The strap divider must be positioned in such a way, that the straps are taut but
comfortable. The strap divider must be below the ear, and the straps must not cover the
ears.
Close the strap divider (Fig. E).
An open strap divider can lead to slipping of the helmet in the event
of an accident and thus to a loss of protection!!!
4. Adjusting the chin strap
The chin strap (Fig. G.3) has been adjusted correctly if you feel slight pressure when
you open your mouth.
If the chin strap (Fig. G.3) is too loose it must be pulled tight using the winding (Fig.
G.2) on the fastener (Fig. G.1).
If the chin strap (Fig. G.3) is too tight it must be loosened also using the winding (Fig.
G.2) on the fastener (Fig. G.1).
Please note that you must always make sure that the fastener is
closed before you ride !!! (Fig. F)
Please be aware that the helmet can only protect if it ts properly.
Please try out different sizes and choose the one in which the helmet
ts comfortably and sits rmly upon your head.
5. Visor
Carefully pull out the pins on the visor from the pin holes on the helmet shell to
remove the visor (Fig. H).
Attention: The pin holes on the helmet can expand through excessive
use. In this case, the visor may no longer be used.
Bicycle helmet SP-91
7
6. Cleaning and care
All chemicals, paints and stickers can seriously impair the protective effect of the
helmet.
Only clean your helmet with lukewarm water, mild soap and a soft cloth.
After every use, leave your helmet exposed to the air in order for it to dry.
7. Disposal
Please contact your local waste disposal company for the disposal of the helmet.
LED-REAR LIGHT SP-06
Safety information
The LED rear light is not a substitute for the light equipment stipulated by the German
standard StVZO (§ 67).
When used correctly, the LED rear light gives better visibility. The LED backlight
should not be used during rainy weather. It cannot be guaranteed to work if it gets
wet.
Please only use the LED rear light together with this cycle helmet and always put it
onto the rotating wheel of the size-adjustment system.
The LED rear light is only intended for personal use.
Please make sure that, during use, the LED cannot be covered or obscured by collars,
rucksacks or movements of the head.
The LED light can under certain circumstances come loose without this being noticed,
if it becomes caught on jackets, rucksacks or other objects.
Please be aware that the battery of the LED light can fall out or become at.
Therefore, check the light regularly for proper functioning.
The batteries must not be exposed to excessive heat such as sunshine, re or the
like. In the event that the batteries are incorrectly changed there exists the risk of
explosion. Only replace the batteries with the same or an equivalent battery type.
Parents should ensure that their child also checks to make sure that the LED backlight
is working on a regular basis.
The LED rear light is not suitable for use by children under 4 years of age.
The LED rear light is not a toy and its use by children is only permitted if they are
LED-rear light SP-06
8
under the supervision of adults.
The changing of batteries must only be carried out by adults.
If the battery leaks, avoid any contact with the skin as this can lead to skin irritation.
Leaking batteries must be disposed of immediately.
User information
1. Before the rst use
Take the tail light off the helmet (Fig. J). Before the rst use, remove the safety strips from the
reverse of the LED tail light (Fig. I).
2. Removal and attachment of the tail light
To remove the rear light, pull the rear light out of the holder (Fig. J).
To attach it, the LED rear light must be re-plugged on the holder provided for this
purpose.
3. Functions
The LED rear light has three different functions, each of which can be used as desired (Fig.
K).
Press x1: continuous light,
press x2: ashing light,
press x3: colour chaser,
press x4: light off.
4. Changing the batteries
The LED tail light comes equipped with a CR 1620 (3V) battery.
To replace the battery, unlock the screws at the back of the light using a small Phillips
type head screwdriver.
Subsequently, lift off the lid and the circuit board, exchange the battery and remount
the circuit board and the lid. In doing so, please make sure that the polarity is correct
when installing the new battery (Fig. L).
Now, attach the lid again using the four screws (Fig. L).
Battery type:
LED-rear light SP-06
9
5. Cleaning and care
The housing of the LED rear light can be cleaned with a damp cloth.
6. Disposal
Please do not dispose of at batteries via the household waste, but instead use the collecting
container intended for this purpose.
LED-rear light SP-06
10
CYKELHJELM SP-91
Kære kunde!
Det glæder os at du har valgt et af vore kvalitetsprodukter, der er fremstillet og certiceret
efter de aktuelt gyldige.
Cykelhjelm SP-91 10
Sikkerhedsinstruktioner 11
Brugervejledning 11
1. Den rigtige hjelmposition 11
2. Indstilling af system til enhåndsjustering af størrelse 11
3. Indstilling af remfordelser 12
4. Indstilling af kindrem 12
5. Visir 12
6. Rengøring 12
7. Bortskaffelse 13
LED-Bagly gte SP-06 13
Sikkerhedsinstruktioner 13
Brugervejledning 13
1. Før første brug 13
2. Montering og afmontering af baglygten 14
3. Funktioner 14
4. Udskiftning af batteri 14
5. Rengøring 14
6. Bortskaffelse 14
Cykelhjelm SP-91
11
Cykelhjelm SP-91
Gør dig bekendt med produktet før første brug. Læs omhyggeligt brugermanualen og
sikkerhedsoplysningerne. Brug kun produktet som beskrevet og til de angivne formål.
Opbevar disse instruktioner på et sikkert sted. Sørg for at al dokumentation medfølger, hvis
produktet videregives til tredjepart.
Sikkerhedsinstruktioner
Advarsel! Børn bør ikke bære denne hjelm under klatring eller andre aktiviteter, hvis
der er risiko for at barnet bliver stranguleret, hvis hjelmen kommer til at sidde fast et
sted.
Din hjelm er specielt designet til at beskytte dig, når du kører på cykel
1, skateboard
3, rulleskøjter 2 eller på scooter 4. Den må ikke anvendes for andre sportsgrene
eller til motorcykelkørsel
5.
Venligst bemærk at hjelmen, trods korrekt indstilling, ikke kan beskytte mod alle
skader.
Med jævne mellemrum skal hjelmen kontrolleres for synlige mangler.
Hver gang hjelmen har været udsat for et hårdt sammenstød, slag eller en dyb ridse,
skal den udskiftes, da den derved mister sin beskyttende virkning.
Hjelmen bør også udskiftes, når den ikke rigtigt passer mere eller senest 5 år efter
produktionsdatoen, også når skader ikke har kunnet konstateres.
En ændring eller afmontering af hjelmens originale dele kan påvirke
beskyttelseseffekten ekstremt. Hjelmen må ikke ændres for at kunne anbringe tilbehør
på en måde, der ikke anbefales af producenten.
Rengør inderhynden med lunket vand og mild sæbe og lad den siden lufttørre.
Høje temperaturer, allerede fra 60°C, kan skade hjelmen alvorligt. Ujævn
hjelmoverade eller bobledannelser er tegn på sådan skade. Må ikke opbevares bag
glasruder, f.eks. i bil, eller i nærheden af varmekilder.
Brugervejledning
1. Den rigtige hjelmposition
Hjelmen skal altid sidde vandret på hovedet (billede. A).
Sidder hjelmen for langt fremme kan udsynet reduceres.
Sidder hjelmen for langt bagude er panden ikke sikret tilstrækkeligt (billede B).
2. Indstilling af system til enhåndsjustering af størrelse
Det integrerede størrelsesindstillingssystem kan justeres trinløst på en drejeknap i nakken
(billede C):
12
mindre = drej mod højre
større = drej mod venstre
3. Indstilling af remfordelser
Åben remfordeler (billede D).
Remfordeler skal være placeret så remmen sidder stramt og bekvemt. Remfordeler
skal sidde øver øret og remmen må ikke dække ørene.
Luk remfordeler (billede E).
En åben remfordeler kan ved en ulykke få hjelmen til at glide og
herved mistye beskyttelsesvirkningen !!!
4. Indstilling af kindrem
Kindrem (billede G.3) er korrekt indstillet når der mærkes et let tryk ved åbning af
munden.
Er kindrem (billede G.3) for løs skal den efterspændes (billede G.2) med viklingen
(billede G.1) på låsen.
Er kindrem (billede G.3) for stram skal den løsnes med viklingen (billede G.1) på
låsen.
Venligst check at låsen er lukket inden hver kørsel!!! (billede F)
Venligst bemærk at hjelmen kun yder beskyttelse når den sidder
rigtigt. Prøv venligst forskellige størrelser og vælg den hvor hjelmen
sidder komfortabelt og fast på hovedet.
5. Visir
For at fjerne visiret skal du forsigtigt trække stifterne på visiret ud af
monteringshullerne i hjelmen (billede H).
Bemærk: Monteringshullerne i hjelmen kan udvides ved overdreven
brug. I dette tilfælde må visiret ikke længere anvendes.
6. Rengøring
Samtlige kemikalier, lakker eller mærkater kan påvirke hjelmens beskyttende funktion
betydeligt.
Rengør kun din hjelm med lunkent vand, mild sæbe og en blød klud.
Lad hjelmen lufttørre efter hver brug.
Cykelhjelm SP-91
13
LED - bagly gte SP-06
7. Bortskaffelse
Bortskaffelsen af din hjelm skal ske gennem et godkendt bortskaffelsesanlæg eller
gennem en kommunal bortskaffelsesordning.
LED-BAGLY GTE SP-06
Sikkerhedsinstruktioner
LED baglygten erstatter ikke det af myndighederne krævede lystekniske udstyr på
cykler.
LED baglygten giver større synlighed ved hensigtsmæssig brug. LED-baglygten må
ikke anvendes i regnvejr, da funktionaliteten ikke er garanteret i vådt vejr.
Brug kun LED baglygten sammen med denne cykelhjelm, og placer den altid på hjulet
til justering af størrelsen.
LED-baglygten er kun til privat brug.
Vær opmærksom på, at LED baglygten ved brug kan dækkes af krave, rygsæk eller
være usynlig pga. hovedbevægelser.
LED lyset kan ubemærket løsnes ved at det hænger fast i jakker, rygsække eller
lignende.
Vær opmærksom på, at LED baglygtens batteri kan svigte eller være opbrugt.
Kontroller derfor batteriets funktion regelmæssigt.
Batterierne må ikke udsættes for voldsom varme såsom solskin, ild eller lignende.
Ved forkert batteriskift kan der opstå eksplosionsfare. Batteriet må kun udskiftes med
samme eller tilsvarende batteritype.
Forældre skal være opmærksomme på, at deres barn regelmæssigt kontrollerer
funktionaliteten af LED-baglygten.
LED baglygten er ikke egnet til børn under 4 år.
LED baglygten er ikke legetøj og må kun bruges af børn under opsyn af voksne.
Batteriet må kun skiftes af voksne.
Brugervejledning
1. Før første brug
Tag baglygten af hjelmen (billede J). Før første benyttelse fjernes sikkerhedsstriben på
14
bagsiden af LED-baglygten (billede I).
2. Montering og afmontering af baglygten
Baglygten demonteres ved at trække det ud af holderen (billede J).
LED-baglygten monteres igen ved at sætte den i den dertil beregnede holder.
3. Funktioner
LED baglygten råder over tre forskellige valgfrie funktioner (billede K).
1 x tryk: konstant lys,
2 x tryk: blinklys,
3 x tryk: løbende lys,
4 x tryk: slukket lys.
4. Udskiftning af batteri
LED-baglygten er ved købet udstyret med et batteri af typen CR 1620 (3V).
For at skifte dette batteri skrues skruerne på bagsiden af lygten ud med en lille
stjerneskruetrækker.
Derefter tages dækslet og printpladen af, batteriet udskiftes, og printpladen og
dækslet sættes på igen. Vær i den forbindelse på at polerne på batteriet vender
korrekt (billede L).
Dækslet fastgøres nu igen med de re skruer (billede L).
Batteritype:
5. Rengøring
LED baglygtens hus kan rengøres med en fugtig klud.
6. Bortskaffelse
Bortskaf ikke tomme batterier sammen med husholdningsaffaldet, men kast dem i de dertil
indrettede opsamlingsbeholdere.
LED - bagly gte SP-06
15
CASQUE DE VÉLO SP-91
Chère cliente, cher client!
Nous nous réjouissons que vous ayez fait le choix d’acheter un de nos produits de grande
qualité, lesquels ont été strictement fabriqués et certiés selon les normes de sécurité
Casque de vélo SP-91 15
Consignes de sécurité 16
Conformément aux disposition 16
1. La bonne position du casque 16
2. Ajustement du système de réglage à une main de la taille 17
3. Reglage des lanieres 17
4. Reglage de la mentonniere 17
5. Visière 17
6. Nettoyage 18
7. Élimination 18
Feu arrière LED SP-06 18
Consignes de sécurité 18
Conformément aux disposition 19
1. Avant la première utilisation 19
2. Retrait et mise en place du feu arrière 19
3. Fonctions 19
4. Changement de la pile 19
5. Nettoyage 20
6. Élimination 20
Casque de vélo SP-91
16
actuellement en vigueur.
Familiarisez-vous au produit avant la première utilisation. Lisez attentivement le mode
d’emploi et les consignes de sécurité. Utilisez le produit uniquement comme décrit et dans les
domaines d’application indiqués. Conservez bien ce mode d’emploi. Remettez également
tous les documents à un tiers lors d’un transfert.
Consignes de sécurité
Avertissement! Ce casque ne peut pas être utilisé pour les grimpages ou autres
activités, qui présentent un risque d‘étranglement/de pendaison, si l‘enfant
s‘accroche.
Votre casque a été spécialement conçu pour vous protéger lors de la pratique du
vélo
1, du skateboard 3, des rollers 2 et de la trottinette 4. Il ne doit pas être
utilisé pour d’autres sortes de sport ou pour conduire une moto
5.
Veuillez noter que le casque ne protège que lorsqu‘il est bien ajusté. Lors de l‘achat,
vous devez impérativement essayer plusieurs tailles.
Veuillez tenir compte du fait que même si le casque est bien réglé, il ne peut pas
toujours offrir une protection contre toutes les blessures.
Le casque devrait être contrôlé au niveau des défauts visuels à intervalles réguliers.
Après chaque impact, choc violent ou chaque griffe profonde, le casque doit être
remplacé car il perd ainsi son pouvoir de protection.
Le casque doit être remplacé lorsqu’il n’est plus adapté ou au plus tard 5 ans après la
date de fabrication, même s’il ne présente aucun dommage.
La modication ou le retrait de pièces d‘origine du casque risque de diminuer
considérablement son effet de protection.Le casque ne doit pas subir de modications
telles que l‘ajout de composants d‘une manière qui n‘est pas recommandée par le
fabricant.
Nettoyer le rembourrage intérieur à l‘eau tiède et au savon doux puis laisser sécher à
l‘air libre.
De hautes températures, dès 60° C, peuvent endommager sérieusement le casque.
Une surface inégale du casque et la formation de petites bulles sont les signes d’un
tel endommagement. Ne pas placer le casque derrière une vitre, par ex. dans la
voiture ou à proximité d’un foyer ou d’une source de chaleur.
Conformément aux disposition
1. La bonne position du casque
Le casque doit toujours être placé à l’horizontal sur votre tête (g. A).
Casque de vélo SP-91
17
Casque de vélo SP-91
Si le casque est placé trop en avant, alors cela peut gêner votre vue.
Si le casque est placé trop en arrière, alors votre front n’est pas assez protégé (g. B).
2. Ajustement du système de réglage à une main de la taille
Le système de réglage de grandeur intégré se règle à l’aide d’un bouton rotatif à réglage
continu au niveau de l’occiput (g. C) :
rétrécir = tourner vers la droite
agrandir = tourner vers la gauche
3. Reglage des lanieres
Ouvrez l‘attache lanières (g. E).
Lattache lanières doit être positionnée de telle façon que les lanières sont tendues
mais placées de manières confortable. Lattache lanières doit passée sous l’oreille,
les lanières ne doivent pas recouvrir les oreilles.
Refermez l’attache lanières (g. D).
Une attache lanières ouverte peut, lors d‘un accident,entraîner le
glissement du casque et ainsi lui enlever tout son effet protecteur !!!
4. Reglage de la mentonniere
La mentonnière (g. G.3) est correctement réglée si, lorsque vous ouvrez la bouche,
vous sentez une légère pression.
Si la mentonnière (g. G.3) est trop lâche, elle doit être resserrée à l’aide de la
spire (g. G.2) de la boucle (g. G.1).
Si la mentonnière (g. G.3) est trop courte, elle doit également être desserrée
à l’aide de la spire(g. G.2) de la boucle (g. G.1).
Veillez à ce que la boucle soit bien fermée avant chaque trajet !!! (g. F)
Veuillez tenir compte du fait que le casque n‘offre une protection que
lorsqu’il est bien adapté à la tête. C’est pourquoi vous devez essayer
plusieurs grandeurs et choisir celle avec laquelle le casque tient le
mieux en place sur la tête et ceci de manière confortable.
5. Visière
Pour enlever la visière, retirez doucement les chevilles sur la visière, situées dans les
trous de xation prévus à cet effet sur le casque (g. H).
18
Attention: les trous de xation dans le casque peuvent s’élargir dans
le cas d’une utilisation excessive. Dans ce cas, ne plus utiliser la
visière.
6. Nettoyage
Leffet protecteur du casque peut être endommagé de manière sérieuse par tous les
produits chimiques, peintures ou autocollants.
Nettoyer votre casque uniquement à l’eau tiède, avec du savon doux et un chiffon
doux.
Laissez votre casque sécher à l’air libre après chaque utilisation.
7. Élimination
Veuillez contacter votre entreprise locale de traitement des déchets pour la mise au rebut
de votre casque.
Indépendamment de la garantie commerciale souscrite, le vendeur reste tenu des
défauts de conformité du bien et des vices rédhibitoires dans les conditions prévues aux
articles L211-4 et suivants du Code de la consommation et aux articles 1641 et suivants
du Code Civil.
FEU ARRIÈRE LED SP-06
Consignes de sécurité
Le feu arrière ne remplace pas l’éclairage des vélos prévu par le Code de la route
allemand (§67 du StVZO).
Dans le cas d’une utilisation appropriée, le feu arrière LED permet une meilleure
visibilité. La lumière arrière à LED ne doit pas être utilisée en cas de pluie car son
fonctionnement n‘est pas garanti dans des conditions d‘humidité.
Le feu arrière LED justement utilisable pour l´emploi privé.
Veuillez utiliser le feu arrière LED uniquement avec ce casque et placez toujours le feu
arrière sur la molette permettant de régler la taille du casque.
Assurez-vous qu’aucun col, sac à dos ou mouvement de la tête n’empêche le feu
arrière LED d’être visible.
Notez que la pile du feu arrière peut tomber en panne ou se vider. Par conséquent,
vériez régulièrement la batterie.
N’exposez pas les piles à une source de chaleur importante telle que le soleil, le feu
ou autres. Un remplacement inapproprié de la batterie peut provoquer une explosion.
feu arrière LED SP-06
19
feu arrière LED SP-06
Remplacez la batterie uniquement par une batterie du même type ou d’un type
équivalent.
Veuillez ne pas jeter la batterie dans la poubelle, mais dans les conteneurs prévus à cet effet.
Les parents doivent veiller à ce que leur enfant aussi contrôle régulièrement le
fonctionnement de la lumière arrière à LED.
L’utilisation du feu arrière LED n’est pas adaptée aux enfants de moins de 4 ans.
Le feu arrière LED n’est pas un jouet. Les enfants peuvent l’utiliser uniquement en
présence des parents.
Seul un adulte doit remplacer les piles.
En cas de fuite de la pile, évitez tout contact avec la peau. Risque d‘irritation cutanée.
Les piles qui fuient doivent être jetées immédiatement.
Conformément aux disposition
1. Avant la première utilisation
Retirez le feu arrière du casque (g. J). Avant la première utilisation, enlevez la bande de
sécurité au dos du feu arrière à LED (g. I).
2. Retrait et mise en place du feu arrière
Pour démonter la lumière arrière, la tirer pour la sortir du support (Illus. J).
Pour monter la lumière LED arrière, placez-la dans le support prévu à cet effet.
3. Fonctions
Le feu arrière LED dispose de trois fonctions différentes que vous pouvez utiliser
librement (g.K).
Appuyer 1 fois: éclairage permanent
Appuyer 2 fois: clignotement
Appuyer 3 fois: délement
Appuyer 4 fois: éclairage éteint.
4. Changement de la pile
Le feu arrière à LED est fourni avec une pile de type CR 1620 (3V).
Pour changer cette pile, ôtez les vis à l’arrière de la lumière à l’aide d’un petit tournevis
cruciforme.
Ensuite, retirez le couvercle et la platine, changez la pile et remettez le couvercle et la
20
feu arrière LED SP-06
platine. Prenez garde à respecter la polarité de la plie (g. L).
Fixez à présent le couvercle avec les quatre vis (g. L).
Type de pile:
5. Nettoyage
Vous pouvez nettoyer l’extérieur du feu arrière LED en utilisant un chiffon humide.
6. Élimination
Dans certaines conditions, le feu arrière LED peut subrepticement se détacher du casque en
s’accrochant à une veste, un sac à dos ou à d’autres objets.
  • Page 1 1
  • Page 2 2
  • Page 3 3
  • Page 4 4
  • Page 5 5
  • Page 6 6
  • Page 7 7
  • Page 8 8
  • Page 9 9
  • Page 10 10
  • Page 11 11
  • Page 12 12
  • Page 13 13
  • Page 14 14
  • Page 15 15
  • Page 16 16
  • Page 17 17
  • Page 18 18
  • Page 19 19
  • Page 20 20
  • Page 21 21
  • Page 22 22
  • Page 23 23
  • Page 24 24
  • Page 25 25
  • Page 26 26
  • Page 27 27
  • Page 28 28
  • Page 29 29
  • Page 30 30
  • Page 31 31
  • Page 32 32
  • Page 33 33

Crivit SP-06 Owner's manual

Type
Owner's manual
This manual is also suitable for

Crivit SP-06: Your safety companion for enhanced visibility while cycling. With three distinct lighting modes – continuous, flashing, and color chaser – you can customize your rear light to suit your preference and ensure you're seen on the road. Easily mount the light onto your helmet's size adjustment system for secure attachment. Stay visible, stay safe with Crivit SP-06.

Ask a question and I''ll find the answer in the document

Finding information in a document is now easier with AI