Page is loading ...

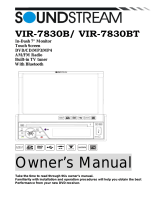
VRN-65HB
2 DIN 6.2' Monitor
DVD/CD/MP3/MP4 Player
AM/FMRadio
Support
Bluetooth
Support
Mobile Phone link
Build in
GPS
...
MO<
•
(:-
r-
+
~
==~)
-
~
'--
~
~
~
VRN-65HB
GPS
SeUNDSTREAM
3oow
4CH
0
Bluetooth
Owner's
Manual
Take
the
time
to
read
through
this
owner's
manual.
Familiarity
with
installation and
operation
procedures
will
help
you
obtain
the
best
Performance
from
your
new
DVD-receiver.

To
promote safety, certain functions are disabled unless the parking brake is
on.
The Unit is
designed
to
detect parked status and must
be
connected
to
the power supply side of the
parking brake switch.
Improper
connection or use of his connection mayviolate applicable law
and may result
in
serious injury or damage. To avoid the risk of damage
and
-.injury
and the
potential violation of applicable laws, this unit is not for use with a video screen that is visible to
the driver.
·
..
:
;~
•
To avoid the risk of accident and the potential violation of applicable laws,
theftont
Video
image feature should never be used while the vehicle
is
being driven. Also, other video
displays should not
be
in
a location where it is a visible distraction to the driver.
In
some
countries or states the viewing of images
on
a display inside a
vehicle
even by persons
other than the driver may
be
illegal. Where such regulations apply, they must
be
obeye~
and this unit's DVD features should not
be
used.
•
Please remember
to
wear your seat belt at
all
times while operating your
vehicle. If
you are
ever
in
an
accident, your injuries
can
be
considerably more severe if your seat belt is not
properly buckled.
•
The supplier waves any and
all
liability when these warnings are not followed.
OPERATION PRECAUTIONS
• Only
connect
to
a 12Vdc battery and negative grounding.
•
Avoid placing the product
in
direct sunlight,
in
areas with high levels of dust, high
temperatures (over
40°C)
or high humidity (over
90%).
In
case of high temperatures, cool
down the car interior by means of ventilation or air-conditioning.
• Operate
in
well
ventilated areas.
•
Do
not turn
on
or off the product
in
short intervals. When turning the unit off, wait for at least
10
seconds prior
to
turning the unit
on
again.
Do
not operate the player with scratched,
bended or broken discs and when a disc is not loaded properly, do not force it into the
player.
•
Do
not watch video playback while driving which
will
cause serious danger and risks of
traffic accident.
It
may violate the laws and regulations.
(There may
be
exceptional case, i.e., using rear view camera and navigation system)
•
Do
not install the unit where the operation for safety driving
is
restrained.
•
Do
not disassembly the unit by yourself, if need repairing, please take the unit to the after
service center.
•
Do
not open and
close the monitor manually, it may damage the monitor tilt system.
•
Do
not touch the LCD screen
by
hard objects,
it
may damage or give scratch
to
the LCD
screen.
• If the back of monitor touches dashboard or air-conditioner inlet etc after open the monitor,
then setup
TILT
level
in
monitor
TILT
menu
to
prevent damage from repeat touching.
• Car parking under direct sunlight may increase the temperature inside the car and the unit
may not
be
in
proper operation, please try it again after the temperature returns
to
normal.
•
Do
not replace the fuse
on
the power cable without professional guidance, using improper
fuse may cause damage
to
the unit or even cause burn the unit.
•
Do
not use irregular shaped Disk.
•
IR
remote control operation may
be
hindered
by
monitor when the monitor
is
opened, thus
please use the remote control at the similar level of remote control receiver.
•
Do
not install the unit where the cooling fan is blocked.
2

WARNING! ................................................................................................................. 2
OPERATION PRECAUTIONS .................................................................................... 2
CONTENTS ................................................................................................................ 3
ACCESSORIES .......................................................................................................... 3
UNIT INSTALLATION AND REMOVAL.
...........................................................
5
WIRING CONNECTIONS ........................................................................................... 6
PANEL ........................................................................................................................ 8
REMOTE CONTROL .................................................................................................. 9
REMOVE BATTERY .................................................................................................
11
MAIN MENU ............................................................................................................. 12
+
RADI0
..........
~
....................................................................................................... 12
+ DVD PLAYER ...................................................................................................... 13
+ USB/SDMMC INTERFEACE OPERATION .......................................................... 13
+SETTING
CONTROL ............................................................................................ 14
+GENERAL
SETTING ............................................................................................. 14
+DATE
TIME SETTING ........................................................................................... 15
+NAVIGATION SETTING ........................................................................................ 15
+VIDEO
SETTING .................................................................................................. 15
+STEERING
WHEEL CONTROL. ........................................................................... 13
+BLUETOOTH
SETTING ........................................................................................ 15
+EO
SETTING ........................................................................................................ 15
+RADIO
SETTING .................................................................................................. 16
+GPS
SETTING ...................................................................................................... 16
GPS SECTION ......................................................................................................... 16
MOBILE PHONE LINK SCETION ............................................................................. 17
BLUETOOTH SCETION ........................................................................................... 17
AV-IN MODE ............................................................................................................ 19
OTHER FUNCTIONS ............................................................................................... 19
NOTES ON DISC .....................................................................................................
20
TROUBLESHOOTING ................................................. : ............................................
21
TROUBLESHOOTING .............................................................................................. 22
TECHNICAL SPECIFICATIONS ............................................................................... 23
BLUETOOTH CONNECTION ATTENTION INSTRUCTIONS .................................. 24
VIDEO FILE CONVERSION ..................................................................................... 25
3

~
.................
~~~
~
Packa e contains the
followin
accessories for
installation
and o eration of the unit.
(1) Washer, Spring
Washer, M5 Nut
(2) Mounting Strap
(3) Bolt
(4) Screw
1 each
1
1
4
(5) Mounting Collar
1
(6) Release Key 2
(7) Screw 1
(8) Rubber Cushion 1
warranty
eard
Remote
Control
Warranty card
~
0 0
C)OOO)
User
Manual
User Manual
ISO cable
Trim ring
Note:
Product image may vary from the actual delivery.
4
GPS cable
SO
card

Note
Before starting
installation
of
the unit, make sure the wiring is connected
properly.
Use only the parts provided with
the unit to ensure proper installation.
The use
of
unauthorized parts
may
cause malfunction.
Install
the unit where it does not get in the driver's
way
and will
not injure the passenger in case
there is a sudden stop,
like
an emergency stop.
+
INSTALLATION
(figure
1)
+
Insert
the unit into dash-board
hole
and fix it
+
If
necessary,
place
the mount strap
at
the rear
of
the unit and fix it with provided washer as
figure 2.
+
Place
Trim Ring over the unit and
installation
is
completed
as figure 1.
Reteuekey
Flgu,..
3
+
UN-INSTALLATION
Insert
the
supplied
extraction keys into the unit and
pull the unit
out
with keeping the extraction
keys. (as Figure.
4)
~----------------------------~-------------.
y.
r&.~-
'-.&..
'\:
-
~?Y
Figure
4
5

Make sure you have good chassis ground. A good ground connection
will eliminate
most
electrical
noise
problems.
A good chassis ground requires a tight connection to the
vehicle's
metal
chassis. The area around the ground connection
should
be
clean,
bare metal
without rus
t,
paint, plastic, dust, or dirt for a good
electrical connection.
Caution:
Do
not interchange
the connection
of
the wiring!!!
For some car models
you
may need to modify wiring
of
the
supplied
power cord.
Contact your authorized car
dealer
before
installing
this
unit.
Using the
ISO Connector
1.
If
your car is equipped with
the
ISO
connector, then
connect the
ISO
connectors
as
illustrated.
2. For connections without
the
ISO
connectors, check
the wiring
in
the vehicle
carefully
before connecting,
incorrect connection may
cause serious damage to this
unit.
3.
Cut the connector; connect
the
colored leads
of
the
power cord to the car battery
as shown
in
the color
code
DVD/CD,USB,
MP3/MP4,Biuetooth
,
GPS
,
AM/FM
STEREO
SeUNDSTREAM
A1
A2
Rear
Camera [Pink)
A3
Parking
[Brown)
A4
Bettery+1
2VOC[Yallow]
AS
Antenne/Amp+1
2VOC[Biue]
AS
A7
ACC+12VOC[Red)
AB
GNO[Biack)
table below for speaker and power
cable
connections
Frequency
range:
FM
:
87
.5-1
07
.
9MHz
AM
:
530-1710KHz
MODEL:VRN-65HB
Front
speaker
83
Right+
84
Right
-
85
Left+
86
Left-
y
.....
·
!
_j
Vi
deo
Output2
y
.....
:
I
~
Vi
deo
Outputl
Blue
Blue
White
Wtllte
...
Rod
.,_j
Subwoolof0ut2
]
~Su-Outl
J
"""1
Uno
Out
(R
l)
: I
=:J
Uno
Out
(Fl)
J...j:
Une
Out
(RR)
.:fl:
Une
Out
(
FR)
Rear
speaker
81
A1
ght
+
82
Ri
ght-
87
Left+
88
Left-
NOTE: Never connect
cable to the system while
it is connected to the battery power. Whenever
the unit is disconnected from the battery, the preset memory
will
be erased and the unit
will
go
back to its factory defaults.
When the brown
cable for steering
wheel control
connected to the steeri
ng wheel,
we can use
the steering
wheel to control
some unit
SWC Interface
Connections
To use the
built-in SWC function, connect
SWC-1
(white) and SWC-2 (black/white) to the
corresponding
SWC
wires
of
the
vehicle. Follow
the
SWC
settings described
in
the SWC
Settings section, pg. 15.
To use an external universal SWC module,
connect
only SWC-2
(black/white) to the output
of
the
module.
Note: To watch video the parking wire should
be connected to break
signal. 2
cables
are
connected to a Hands-Free device (not
included).
Parking
wire
Note: The parking wire is connected with brake
signal;
for safety, the programs can be seen on
the monitor after braking the car.
6

Parking
Brake
switch
(Activated
by
parking
brake)
Parking
Brake
wire
from
car
DVD
player
(Pink/B
l
ack)
tr=========t~
~================t,~
To
metal
body
part
or
chassis
ground
of
your
car
Connecting
the reversing
line
to taillight
on the car
To
reversing
line
Totaillight~
To
Car
Battery
Tail
i
ght
After connecting, when you start up the reverse gear, the unit
will
receive the picture from car
·
rear view camera.
Note:
Only
use groundless loudspeakers.
Use
only loudspeakers
of
minimal 40Watt, using fewer watts may result
in
damaging
your
loudspeakers
at higher
volumes.
Use
4-8
0
(Ohm
impedance)
loudspeakers only; using higher or
lesser
impedance may
damage the unit.
Do not use
3-cable loudspeakers
and do not connect
the
loudspeakers
minus to the car
body (GND). The unit is using a BTL circuit and each
loudspeaker
must be connected
with
insulated cables
according
the diagram.
Loudspeaker
cables
and/or
optional external
power amplifiers
must
always
be about
30cm
away from the antenna and/or antenna extension parts.
Connect the speakers according
the
following
diagram, incorrect connections
will
damage the
unit
or
your
loudspeakers
Correct connection
Left front - Right front
I
Left rear - Right rear
Incorrect connections
7

-
7
8
9
10
I
l
I
1-
~
·.
I
I
I
-
...
-
n~
•
2-
~
r-
3-
r-
+
d
4-
r--
•••
=)
~
5-
--
~
6-
-
l!_
VRN
-
65Hii
S.UN
DSTREAM
300W4CH
fa
Blue
1
ooltl
1. IR Sensor
IR Remote control signal receiving window. Max distance is 6-8 meters, 45 angels.
2. EJECT Button
~
Press to eject a· disc. If the disc is not removed for about 10 seconds after eject, the disc is
reinserted automatically.
3. VOL Increase (
+)
Button
Press VOL increase button to increase the volume.
4. Main Menu
Press menu button enter to GPS mode.
5. VOL Decrease
(-)
Button
Press VOL decrease button to decrease the volume.
6.
POWER/MUTE Button
Press it to turn on the unit. Press and hold for 2 seconds to turn the unit off .Press the button
briefly to Mute .Please note that the volume will be muted on all audio output connector.
7. MIC
8.
DISC Slot
9. Info Display
Information Display LCD when operation the unit.
10. GPS Slot
8

000
00
1. POWER
Power on
or
off.
2.
MODE button
1
Power
ON/OFF
2
MODE
5
BAND/ADM
Cleer(Dnly
for
BT)
8
UPArrow
9
LeftArrow
10
Enter
13
Eject
14
Down
Arrow
17
P.SCAN/APT
I(Only
for
an
18
ST/MO
PTY(Only
for
ADS)
*(Only
for
an
21
LOUD
TA[Only
for
ADS)
22SEEK
·
/I+II
25STOP/PBC
28050
29
Number
Key
Note
:
1 AF j
ust
for
ADS model
3
Play/Pause
4
Mute/Biuetooth
7
MENU
8
Sub-t
11
Right
Arrow
12
Setup
15
Angle
..,..(Only
for
an
161NT
"'!'~>(Only
for
an
19VOl+
20ZOOM
/
A~
23SEL
AF(Only
for
ADS)
24SEEK+/II+I
27
VOL·
28
AUDIO/GO
TO
2
TA/PTY
for
ABDS/ADS
model
3 *
#
..,...
""!'~>
Bluetooth
These Functions
for
Blue
tooth
Models
4 EJECT
Optional
function
Press
it to select the mode: Radio,
DISC
(if there
is
a disc
in
unit),
USB
(if there is a
USB
device in the unit), CARD (if there
is
a
SD/MMC
card in the unit) and AV
IN.
3.
PLAY/PAUSE button
In DVD mode, press it to pause playback, press again to resume.
4. Mute/Root button
~:
Short
press this button to mute the volume output, press it again to resume volume.
5.
BAND/
ROM
(Only
for
Bluetooth)
In
Radio mode, press to change radio band
in
sequence
of
FM1
- FM2 -
FM3-
AM1
-
AM2
In
DVD mode, press it to play randomly.
In
Bluetooth mode, press it to clear number.
6.
Cursor
•
buttons
Use the • buttons
to
select the menu item, the title track
or
to show next frame.
7.
MENU/ROOT button
Short
press it to show main menu,.
In
DVD mode, long press it to enter
TITLE
MENU (Enable only
if
the DVD disc with title menu).
8.
SUBTITLE
button
Press
it to select the subtitle language (Available only
if
the disc with subtitle function).
9.
Cursor•
buttons
Use
the•
buttons to select the menu item. the title, track
or
to show next frame.
10.
ENTER button
Press
it to confirm selection or setting.
9

11.
Cursor
•buttons
Use the • buttons to select the menu item, the title track
or
to show next frame.
12. SETUP
button
In
DVD mode press it to enter the setup menu.
13. EJECT
button
Press it to eject the disc.
14.
Cursor
t
buttons
Use the t buttons to select the menu item. the title, track
or
to show next frame.
15. ANGLE/ACCEPT button (Only
for
Bluetooth)
In
DVD mode, press it repeatedly to change the viewing angle (Available only with a recorded
DVD file or DVD disc that has this function).
In
BLUETOOTH mode, press to make a call after inputted a phone number
or
accept an
incoming call.
16.
INTI
REJECT button (Only
for
Bluetooth)
Press it to activate the intro function. You can play the beginning
of
every track for 10 seconds
in
sequence.
In
BLUETOOTH mode, press to reject a coming call or hang up while calling.
17. P.SCN/ RPT
In
SD CARD/ USB mode, press to repeat REP 1 => REP DIR => REP ALL
In
DVD mode, press to start repeat REP OFF=>REP Chapter=>REP Title=>REP Off.
In
Radio mode: PS (Preset Scan): Press to scan all preset stations
in
the memory
of
the current
band and stay on each memory stations for about 5 seconds.
AS
(Auto Save): Long press to save the stations with good reception automatically.
18. STEREO/MONO (PTY
only
for
RDS/ Bluetooth)
Press STEREO button to select STEREO or MONO.
19. VOL+ button
Press to increase volume level.
20.
A-B/ZOOM
button
During playback, press it at the starting point
of
section you want to repeat(A), press this button
again at the ending point
of
the section you want to repeat (B), section A-B repeating starts.
Press it again to cancel the A-B repeat function.
Press it and hold for two seconds
in
DVD mode to zoom the image
in
or out
in
the sequence
of
ZOOM 2-> ZOOM 3-> ZOOM 4-> ZOOM 1/2-> ZOOM 1/3-> ZOOM 1/4.
21.
LOUD
(only
for
RDS)
Press to set LOUD on
or
OFF.
22.~~/seek-button
In
DVD mode, Press
~~~
button to skip to the previous track. Press and hold
~~
button for two
seconds to activate fast reverse (REW) search
in
a track.
In
RADIO mode,
press~~
button to start searching automatic, press and hold for two seconds to
start manual searching.
~~~
button Frequency down.
23.
SEL
button
(only
for
RDS)
Press it to enter the SOUND SETTING menu, and press Cursor UP/DN
l;>uttons
to choose an
item and press cursor left/right buttons to set the item. Press SEL button again to exit the menu.
24.
~~~
I seek +
button
In
DVD mode, Press
~~>~
button to skip to the next track, press and hold
~~>~
button for two
seconds to activate fast forward (FF) search in a track.
In
RADIO mode, press
~IJll
button to start searching automatic, press and hold for two seconds to
start manual searching
~~~
button Frequency up.
25.
STOP/PBC
button
Press it to Stop playback from the current position, press it again to final stop to the very
beginning. Press PLAY/PAUSE button to play.
Press and hold for two seconds to set PBC on/ off in VCD mode.
10

26.
OSD button
In
DVD mode press it to enter the
OSD
menu, press and
hold
for 2 seconds to set video setup.
(RED /GREEN /BLUE
/BRIGHT
I
CONTRAST
/SHARP /COLOR
RESET /BACK)
27.
VOL-
button
Press to decrease volume level.
28.
AUDIO/GOTO
button
In
DVD mode press it to select
the audio
language.
In
VCD mode, press it to
select the sound track
in
the sequence
of
MONO
L
=>MONO
R
=>STEREO.
Go to:
in
DVD mode, press and
hold
for 2 seconds to show
TIME
SEARCH menu,
select
number and confirm to go to certain position
directly.
When press
•
button to enter
TITLE/CHAPTER selection
mode,
select
number and confirm to go to certain
TITLE
or
CHAPTER position
directly.
29.
Digit
0-9
buttons
In
radio mode, select
1-6 the desired band;
In
DVD mode, select
track.
Noted:
The
RC
is the universal
and full-featured.
Some options are
available
with the
corresponding
model.
REMOVE BATTERY
Note:
•
The distance may vary according to the
brightness
of
ambient
light.
• If
the remote is not used for an extended period
of
time, remove the battery to prevent
possible
damage from battery
leakage
and corrosion.
•
Do not
place any objects between the remote
control
unit and the sensor on the unit.
•
Do not drop the remote
control
onto the floor; it
will
damage it beyond repair.
•
Do not use the remote
control
unit,
while simultaneously
operating the remote
control unit
of
any other equipment; they may interfere
resulting
in improper operation.
•
The battery
normally last
for about one year
although
depending how often the remote
control is used.
If
the remote
control
unit isn't working even when it is operated near the unit,
replace the battery with a new battery of the same make and use
only
a
lithium cell battery
type:
CR2025
(3V).
•
Dispose empty batteries in accordance with your
local governmental regulations.
•
Do not short-circuit,
disassemble,
heat
or
dispose
of
fire
or
flames the battery.
•
Keep the battery out
of
reach
of
children, should
the battery be
swallowed, immediately
consult
a doctor.
11

The best way to discover the program is to
explore
each screen
in
detail,
and to find out how to
move from one to another. Read this chapter for a guided tour.
Unit starts by
displaying
the Main menu. This is the root
of
the screen hierarchy, and you can
simply
access
all
features by tapping on the touch screen buttons.
Tap the icons to enter a desired mode.
+RADIO
PLAYER
•
.
•••
. '
• • I
•
•
• •
0
RADIO
I
:J.
n
I
IL
•U
I
~
-
~
8
7
C"
, .
_)u
o
..
1411
;\\
..
I
C.R
..
ftl
Touch this button to go into home page.
E
Return button.
B Touch this button to
select
program type.
~
Touch this button to search backward stations.
m
Touch this button can choose FM1=>FM2=>FM3=>AM1=>AM2.
I:JJ
Touch this button to search forward stations.
m
Touch this button can scan the stations from 1-6, Long touch it to save the stations with
Good reception
automatically
and scan each station for about 5 seconds.
1!!1
Touch this button adjust the EQ, it can choose User =>Rock =>Pop=> Jazz=>Eiectric
=>Flat
=> User.
Note: When a radio
signal
is not received, the
default
forST
I
MO
function, once received radio
function
automatically
converted to
ST.
12

............................
~~~
~
~
+DVD
PLAYER
To
start DVD Player, tap
DVD
icon from main menu screen.
TOUCH SCREEN MENU
llfl!l
In
DVD
mode touch it return to
DVD menu.
Ill
In
VCD
mode touch it can choose PBC
ON
or
OFF.
C
Touch it to skip to the previous track.
m Touch it to pause/play.
CJ
Touch it to skip to the next track.
(!!]
Press it to repeat REP CH => REP
TT
=> REP ALL.
I I
Touch it to select Subtitle 1/2=> Subtitle 2/2=> Subtitle off.
'*'
Touch it repeatedly to change the viewing angle.
I
T•!
Touch it to select title
D
In
DVD
mode, touch it to select Audio 1/2=> Audio 2/2.
In
VCD
mode, touch it to select sound track in the sequence
of
left=>right=>mixed=>stereo.
m Touch this button adjust the screen backlight and color.
Touch this button adjust the EQ, it can choose User =>Rock =>Pop=> Jazz=>Eiectric
=>Flat
=> User.
Note:
1:
DVD Player
will
automatically start playing when you insert any
DVD disc,
MEMORY
card
or
USB device.
2.
Warning displays if the
vehicle
is moving for driver's safety.
3.
DVD
Player will
not
only play
video, but
also picture and music files as
well.
+USB
INTERFACE
OPERATION
USB
Disk
When a USB is played, the screen will show
following interface:
To
play
MP3/ MP4 files from a USB flash memory, insert a USB flash memory into the USB
port on the back
of
the unit. The unit
will play automatically MP3/MP4//JPEG
files.
13

Press it to select songs.
~~~~
Press it to select move
or
video file.
~
Press it to select pictures.
- Press it to search USB files.
lfll Press it to search song, move, and video
or
=.efiles.
~
Press it to turn on I turn
off
track randomly
=ck.
.
~
Touch it to skip to the previous track.
ID
Play/pause button.
I:JI Touch it to skip to the next track.
[!'!] Press it to repeat REP CH => REP
TT
=> REP
ALL.
Ill
Touch this button adjust the EQ, it can choose
User =>Rock =>Pop=> Jazz=>Eiectric =>Flat => User.
iii1
Touch it to enter TITLE MENU (you can choose music, move, picture and Video to play).
+SETTING CONTROL
To start SETTING, tap SETUP icon on main menu. Your device has default system settings.
You can customize the settings to suit your personal needs. Once you change settings, your
new
setting~
will remain until you change it again.
0
Setup
u
Gt'nrr.Jl
tJ
J atc-&Time-
i__;:
..
• ' !
~
~
,
:1·
;,
..
..
y
'NJ!Ipapo:or
A
N:JV•Cption
,....
--
·.:,deo
@
swc
Setup 1
General
~
0
Setup
~
@
)
-i:
t .
..i
~:e;::.
:
>
A
;;.
~·~
:.·•!
::.•;:
, .. ,
~
~
1.
~
;-,
t.rr.1
':,:;)',:r-·:-
Setup 2
Language: Press it choose English, Portuguese,
n ... and act.
Lighting Detect: Turn on
or
off.
Screensaver: Choose screen savers and wait time.
Reset : Press it can reset all settings.
About:
Press it can see the software version.
14

24-Hour Time :Turn on
or
of
the 24 hour time.
Set Automatically
:Turn on or off
automaticlly set
dateand time.
Time Zone: Press it can choose time zone.
Navi Gain: Adjust Navi
volume.
Dissble
media
play
when navigating: Turn on or
off
dissble
media
play
when navigating.
Auto run: Turn on or off the auto run map.
Navi path: Press it can
select
the Navi path.
Rear Camera Mirror: Turn on
or
off the rear camera
mirror.
Brightness/ Contrast/ Hue/ Saturation: Through the
digital level
can adjust what you want the brightness,
contrast, hue and saturation.
Colorfui/SoWReset:
Press it to choose
backlight
effect
colorful,
soft or reset.
Please
make sure unit connect
SWC1
wire fist, and
then press the
wheel
button, then press the
corresponding button on screen.
Auto connect: Turn on or off auto connect with head
unit
Bluetooth.
Auto answer: Turn
on
or
off auto answer
calling
when phone
successfully connected
Bluetooth.
Paring code: Setting the paring code
Sound
Effect: Adjust EQ and balance
surround and
field.
Touch EQ button choose Rock, Pop, Live, Dance,
Classic, Soft,
Custom and
close.
Touch
balance button adjust
balance
surround and
filed.
15

............................
~
..
~
~
Radio Area
GPS SCETION
Radio Area: Can choose radio area Asia,
Japanese, Russian, North America and
Middle
East.
Radio Area: Can choose radio area Asia,
Japanese, Russian, North America and
Middle
East.
To
start
GPS
mode,
please insert
SO
card
in
GPS slot
on
the front panel. Firstly
tap
SETUP
icon
on
main menu and enter to Navigation setting;
secondly
choose Navigation path and
return main menu;
thirdly
touch
GPS
icon
on
main menu or tap main button
on
the panel
enter
to
GPS.
You can choose road and
run
GPS.
Navigation setup
Enter to
GPS
16

..............
~~~
~
Note:
Mobile
phone link
function can only be
available:
*Used for Android system phone. Do not support iphone till now.
*Set
your phone to debug mode.
When start to operate phone
link
function,
firstly
set the phone to
USB
debug mode; connect
the
USB cable
with
mobile
phone; then confirm your phone has
already
connected with unit via
Bluetooth,
and then tap Phone
link
icon on the main menu enter to Phone
link
mode.
BULETOOTH SCETION
Warning: Driving and having a
Telephone
conversation at the same time is dangerous,
please
park your car before having a
telephone
conversation. The
supplier waves any and
all liability
when this warning is not
followed.
To enter
Bluetooth mode, you can tap
Bluetooth icon on Main menu
or
long
press
the mute/Biuetooth button on the Remote
Control
or press mode button on remote or on front
panel.
Disconnect
Bluetooth
A user can make own choice by tap
the buttons.
Tap
Dial
button to enter
call mode.
~
Tap this button can see missed, received and
dialed calls.
Iii
Tap this button can see phonebook.
tim]
Tap this button can see previous
successfully
connected
mobile
phone and unit
Bluetooth
information.
~
Tap Music button to start
Bluetooth
Music
player.
Tap this button Making and accept
calling.
ap this icon to
clear
number.
17

.............................
~~
~
Pairing Mode
At
the 1st time when using BLUETOOTH,
you need to pair the mobile phone first. When a
phone have not been paired with the unit, the
BT
icon and Pairing mark
will blink continually
on
the panel.
When the unit have connect with phone, the
BT
icon
will turn on and the Mobile phone name (if
available) will be display on the
panel.
According to mobile pairing device manual,after searching new device(SoundStream), select it,
input password
"0000"
and confirm ok, device paring is finished.
The text 'Enter Number'
will shows on the panel after the pairing is completed.
It
means device
is connected and ready for BLUETOOTH
communication.
Auto-connect - Disconnect
When power on the unit, the
last
paired phone
will be connected to the device via Bluetooth
automatically, after searching about one minute,
if
the device cannot find the paired phone, it
will
stop searching. When in standby mode (unconnected), long
press Bluetooth button on
remote control to active auto-connect function and the device
will
search the
last
paired phone.
If
you want to disconnect the Bluetooth connection, turn off the Bluetooth on the phone.
1. Dial
BUTTON
Tap on Dial
button to enter
call
mode.
In Call
mode, the unit can be used as your phone. Making and receiving
calls
are possible with
BLUETOOTH. Simply
tap phone number and tap utton to make
a
call,
and
tap.
button
to;;nf
up.
1.) Tap button shortly to delete a wrong digit,
or
press Reject/INT button on remote to
delete all
the numbers at once.
2) Tap
..
button the device automatically makes a
call
to the latest
call in its
call log.
Voice Transfer
During a
call,
you can change a
call
from Bluetooth
mode to phone by tapping Transfer button.
To have a call
in
Bllletooth mode again, tap Transfer button.
NOTE:
the phonebook
only
supports Western Characters. Any difference
in
character will be
shown such
as"+,*
or#"
2. (A2DP) Music Mode
Tap Music button to listen music in Bluetooth mode.
You
can select the function with the key for previous,
play
or
pause,stop and next.
A2DP (Advanced Audio Distribution Profile) Music
Player
A2DP is a function which can receive the audio
frequency
signal from the mobile phone, amplified by the car
audio
and played
out
by the car speakers.
Notice: your mobile phone need to support A2DP.
Tap the buttons on the screen as shown,
or
press corresponding buttons (PAUSE/PLAY, STOP,
PREVIOUS/NEXT) on remote control to play, pause,
play
previous,
or
next music file.
18

--
To start AV-IN
Mode, tap on
AV-IN
button from main menu screen.Connect the
external
audio/video
signal
source to this unit.
Select AV-IN
mode
in
the main menu.
Note:
If
there
is
no
external
video input, the TFT
displays "Warning".
OTHER
FUNCTIONS
Subwoofer
Connect the subwoofer to the unit using sub output (see
electrical
diagram).~~
Tap it
on
screen enter into main menu setting choose EQ, or touch
• this icon
directly
enter to EQ
mode set subwoofer
ON
to
enable
subwoofer.
Parking
When the car is stopped and the parking brake is working, the screen can
display
the video
image, otherwise the screen can't
display
the video image
Back View Camera
This unit is equipped with back view camera output. The camera is used to observe the
situation behind the
vehicle
when you are backing the car.
Please
connect your back view camera with the back car video input. And connect the reverse
wire for back a car with the rear gear
light.
Rear view camera picture
will
be
enabled
when you
are backing the car.
19

............................
~~~
~
~
~
-¢-
Only
use
groundless loudspeakers.
-¢-
Use
only loudspeakers
of
minimal 40Watt,
using fewer watts may
result
in
damaging your
loud
speakers at higher
volumes.
-¢-
Use
4-8
0
(Ohm
impedance)
loudspeakers only;
using higher or
lesser
impedance may
damage the unit.
-¢-
Do not use
3-cable loudspeakers and do not connect the loudspeakers
minus to the car
body.
-¢-
(GND). using a BTL circuit and each loudspeaker
must be connected with
insulated cables
according the diagram.
-¢-
Loudspeaker
cables and/or
optional external
power
amplifiers
must
always
be about 30cm.
away
from the antenna and/or antenna extension parts.
-¢-
If want to display
for
7" TFT, parking wire must be connected to ground.
Handing
discs
Handing
When
holding
With
both
hands
When
holding
with
one
hand
•
Do
not
use
damaged
(cracked
or
warped)
discs.
•
Do
not
scratch
the
signal
surface
or
let
it
get
dirty
.
•
Do
not
attach
paper
or
seals
to
discs
.
The
player
may
be
damaged
if
there
is
any
exposed
glue,
etc
.,
On
discs
.
For
rental
discs
in
particular
,
extra
labels
are
often
attached
to
the
discs.
Check
carefully
for
any
exposed
glue
before
using
such
discs
.
Storing
discs
•
Always
place
discs
in
their
case
and
store
them
vertically
.
Avoid
storing
discs
in
hot
or
humid
places,
places
exposed
to
direct
sunlight
and
places
in
which
the
temperature
is
extremely
low
.
•
Read
any
cautions
in
c
luded
with
the
dis
c s
carefully
.
Cleaning
discs
•
Fingerprints
or
dust
on
discs
may
reduce
sound
or
picture
quality.
Remove
them
by
gently
wiping
the
disc
from
the
center
toward
the
edges
using
a
soft
cloth
.
,.
'
~
I
c(
+-
'2-'
~
-
'
",~
\
,....)
'
I
•
Do
not
use
benzene
,
thinner
or
other
volatile
chemicals.
Do
not
use
record
spray
or
antistatic
spray
either
.
•
We
recommend
using
the
separately
sold
cleaning
set
to
clean
discs.
•
For
tough
dirt,
apply
some
water
to
a
soft
cloth,
wring
out
thoroughlyYiipe
off
the
dirt,
then
wipe
the
disc
with
a
dry
cloth
.
Irr
e
gular
shaped
discs
Irregular
shaped
discs(heart
-
shaped
dis
cs,
hexagonal
discs
,
etc.}::annot
be
pl
·
ayed
on
this
playeDoing
so
c
ould
damage
the
player
.
Neve r
use
such
discs.
I
I
\
;
I
··~
(~
)
~
·-·
~-
-
Jl
~
20
/