CC-01CD012-2

Waterpik CC-01CD012-2, CC-01CD010-1, CC-02CD010-1, CC-02CD012-2, Complete Care 9.0, Complete Care 9.5 Owner's manual

  • Hello! I am an AI chatbot trained to assist you with the Waterpik CC-01CD012-2 Owner's manual. I’ve already reviewed the document and can help you find the information you need or explain it in simple terms. Just ask your questions, and providing more details will help me assist you more effectively!
Waterpik
®
Complete Care
Models CC-01 | CC-02
Soin complet Waterpik
®
Modèles CC-01 | CC-02
8
6
4
2
ON
OFF
Mode
Clean
Whiten
Massage
CHARGE
8
6
4
2
ON
OFF
Mode
Charge
Low
High
Massage
2
IMPORTANT SAFEGUARDS
IMPORTANT
SAFEGUARDS
When using electrical products, especially when
children are present, basic safety precautions
should always be followed, including the following:
READ ALL INSTRUCTIONS
BEFORE USING.
DANGER:
To reduce the risk of electrocution:
• Do not handle plug with
wet hands.
• Do not place in or drop into
water or other liquid.
• Do not use while bathing.
• Do not place or store product where it can fall or
be pulled into a tub or sink.
• Do not reach for a product that has fallen into
water. Unplug immediately.
• Check the power supply cord for damage before
the first use and during the life of the product.
WARNING:
To reduce the risk of burns,
electrocution, fire, or injury to
persons:
• Do not plug this device into a voltage system that is
different from the voltage system specified on the
device or charger. Use with improper voltage will
damage product and VOID warranty.
• If product is opened/disassembled for ANY reason
warranty is VOID.
• Do not use this product if it has a damaged cord
or plug, if it is not working properly, if it has been
dropped or damaged, or dropped into water.
Contact Water Pik, Inc. or your local distributor
which can be found at www.waterpik.com.
• Do not direct water from the Water Flosser under
the tongue, into the ear, nose or other delicate
areas. This product is capable of producing
pressures that may cause serious damage in these
areas.
• Do not direct water into the nose or ear. The
potentially deadly amoeba, Naegleria fowleri, may
be present in some tap water or unchlorinated well
water and may be fatal if directed into these areas.
• Use this product only as indicated in these
instructions or as recommended by your dental
professional.
• Only use tips and accessories recommended by
Water Pik, Inc.
• Do not drop or insert any foreign object into any
opening or hose.
ON
OFF
8
6
4
2
ENGLISH
3
• Keep electrical cord away from heated surfaces.
• Do not use Water Flosser or Toothbrush outdoors
or operate where aerosol (spray) products are
being used or where oxygen is being administered.
• Do not use iodine, or water insoluble concentrated
essential oils in the Water Flosser. Use of these can
reduce product performance and will shorten the
life of the product.
• Remove any oral jewelry prior to use of the Water
Flosser or Toothbrush.
• Do not use either the Water Flosser or Toothbrush
if you have an open wound on your tongue or in
your mouth.
If your physician or cardiologist has advised you
to receive antibiotic premedication before dental
procedures, you should consult your dentist and/
or medical professional before using the Water
Flosser or Toothbrush or any other oral hygiene aid.
• This product complies with the safety standards for
electromagnetic devices. If you have a pacemaker
or other implanted device containing magnets or
electronics, contact your physician or the device
manufacturer prior to using the Toothbrush.
• If the Pik Pocket
®
tip (not included in all models)
separates from the shaft for any reason, discard tip
and shaft and replace with new Pik Pocket
®
tip.
• Do not use the Water Flosser for more than 5
minutes in each two-hour period.
• This product does not contain any user serviceable
parts in the toothbrush handle or Water Flosser
unit. Do not attempt to open either component
except for battery disposal. See Battery Removal
Section.
• Using toothpastes containing peroxide may
damage the plastic housing of this product.
• Using abrasive or chemical cleaners may damage
the plastic housing of this product.
• Close supervision is necessary when this product
is used by, on or near children or invalids.
• Children should be supervised to ensure that they
do not play with the appliance.
• Fill Water Flosser reservoir with warm water or
other dental professional recommended
solutions only.
SAVE THESE INSTRUCTIONS.
4
ENGLISH
5
TABLE OF CONTENTS
Product Description
6
Getting Started With Your Water Flosser
8
Cleaning and Troubleshooting Your Waterpik
®
Water Flosser 10
Getting Started With Your Sonic
Toothbrush
11
Getting Started With Your Oscillating
Toothbrush
12
Care of Your Waterpik
®
Toothbrush
13
Disposal and Battery Removal
14
Limited Two Year Warranty
15
6
8
6
4
2
ON
OFF
PRODUCT DESCRIPTION
Water Flosser
1. Hinged Reservoir Lid
2. Reservoir
3. Hose
4. Water Flosser Pressure
Control Dial
5. Power Button
(Push to turn unit on/off)
6. Power Cord
7. Magnetic Handle Cradle
8. Tip
9. Tip Eject Switch
10. Water On/Off Switch
11. Toothbrush Charger post
12. Base
NOT ALL TIPS INCLUDED IN ALL MODELS
Water Flosser Tips
A. Orthodontic Tip*
- Braces
- General Use
B. Pik Pocket
®
Tip*
- Periodontal Pockets
- Furcations
C. Plaque Seeker
®
Tip*
- Implants
- Crowns
- Bridges
- Retainers
- General Use
D. Classic Jet Tip**
- General Use
E. Tongue Cleaner**
- Fresher Breath
A
E
B C
D
2
1
3
4
5
7
6
8
9
10
12
11
*Replace Every 3 months
**Replace Every 6 months
ENGLISH
7
NOTE: BRUSH HEADS ARE
NOT INTERCHANGEABLE.
EACH UNIT ONLY CONTAINS
ONE TYPE OF TOOTHBRUSH.
Brush Heads
F. Triple Sonic Brush Head*
-Plaque Removal
-Whitening
G. Triple Clean (Oscillating)
Brush Head*
- Plaque Removal
G
Mode
Clean
Whiten
Massage
CHARGE
Mode
Charge
Low
High
Massage
F
Sonic/Oscillating Toothbrush
13. Sonic Brush Head
14. Oscillating Brush Head
15. Toothbrush Power Button
16. Toothbrush Mode Button
17. Toothbrush Mode Indicator Lights
18. Toothbrush Recharge Indicator
13
(F)
14
(G)
15
16
17
18
*Replace Every 3 months
Sonic Oscillating
8
ON ON
8
6
4
2
ON
OFF
4
2
ON
OFF
ON
OFF
8
ON
Fill
High
Low
Power
ON
Push
Power
ON
Water
ON
Water
ON
Insert
Slide
to
Eject
Powering the Unit
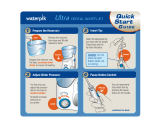
Plug the cord into an electrical outlet. If the outlet is controlled by a wall
switch, be sure it is turned on.
Preparing the Reservoir
Lift the reservoir lid, remove the reservoir, and fill with lukewarm water.
Replace the reservoir over the base and press down firmly and close the lid.
Inserting and Removing Tips
Insert tip into the center of the Water Flosser handle, pressing down firmly
until tip clicks into place. The colored ring will be flush with the top of the
handle if the tip is correctly locked into place.
To remove tip from the handle, slide the tip eject button on the handle.
Caution: Do not use tip eject slide while unit is running.
Prime Unit (First Time Use Only)
Set pressure control dial on base to high (pressure setting No. 10), point
the handle and tip into sink. Turn unit ON (l) and water ON until water flows
from the tip. Turn Power Off (O).
Adjusting the Pressure Setting
Turn the pressure control dial on the base of the unit to the lowest setting
(pressure setting No. 1) for first-time use. Gradually increase pressure over
time to the setting you prefer – or as instructed by your dental professional.
Using the Water Flosser
Always place the tip in your mouth before turning the water ON. With water
switch in OFF position, turn power on. Lean over sink and slightly close lips
enough to prevent splashing while still allowing water to flow from mouth
into the sink. Turn water switch ON. When finished, turn water switch and
power OFF. During use you can stop the flow of water by sliding the water
switch on handle to the OFF position.
NOTE: Motor will continue to run.
Recommended Technique
For best results, start with the back teeth and work toward the front teeth.
Glide tip along gumline and pause briey between teeth. Continue until you
have cleaned the inside and outside of both the upper and lower teeth.
GETTING STARTED WITH YOUR WATER FLOSSER
9
ENGLISH
When Finished
Turn the unit OFF (O). Empty any liquid left in the reservoir. Unplug the unit.
NOTE: If you used mouthwash or other solution besides water, see “Using
Mouthwash and Other Solutions” section.
NOTE: NOT ALL TIPS INCLUDED WITH ALL MODELS.
TIP USAGE
Plaque Seeker
®
Tip
To use the Plaque Seeker
®
tip, place the tip close to the teeth so that the
bristles are gently touching the teeth. Gently glide tip along gumline,
pausing briefly between teeth to gently brush and allow the water to flow
between the teeth.
Orthodontic Tip
To use the orthodontic tip, gently glide tip along gumline, pausing briefly to
lightly brush area between teeth and all around orthodontic bracket, before
proceeding to the next tooth.
Pik Pocket
®
Tip
The Pik Pocket
®
tip is specifically designed to deliver water or anti-
bacterial solutions deep into periodontal pockets.
To use the Pik Pocket
®
tip, set the unit to the lowest pressure setting.
Place the soft tip against a tooth at a 45-degree angle and gently place the
tip under the gumline, into the pocket.
Tongue Cleaner Tip
Set to lowest pressure setting, place tip in the center/middle of your tongue
about half way back. Pull forward with light pressure. Increase pressure as
you prefer.
10
8
ON
Using Mouthwash and Other Solutions
Your Waterpik
®
Water Flosser can be used to deliver mouthwash and
antibacterial solutions. After using any special solution, rinse unit to prevent
clogging by partially filling reservoir with warm water and running unit with
tip pointed into sink until unit is empty.
Cleaning
Before cleaning, unplug from the electrical outlet. Clean the product
when necessary by using a soft cloth and mild non-abrasive cleanser.
The water reservoir is removable for easy cleaning and is top rack
dishwasher safe.
Removing Hard Water Deposits / General Cleaning
Hard water deposits may build up in your unit, depending on the mineral
content of your water. If left unattended, it can hinder performance. Cleaning
internal parts: add 2 tablespoons of white vinegar to a full reservoir of warm
water. Point the handle and tip into sink. Turn unit ON and run until reservoir
is empty. Rinse by repeating with a full reservoir of clean warm water.
This process should be done every 1 to 3 months to ensure optimal
performance.
Leakage
If leaking due to a damaged hose, replacement hoses and handles can be
purchased at www.waterpik.com or contact Water Pik Inc. customer service
for a self service repair kit.
Service Maintenance
Waterpik
®
Water Flossers have no consumer serviceable electrical items and
do not require routine service maintenance. For all accessories go to
www.waterpik.com. You may also call our toll-free customer service number at
1-800-525-2774 (USA) or 1-888-226-3042 (Canada). Refer to the serial and
model numbers in all correspondence. These numbers are located on the
bottom of your unit.
Still have questions? Go to www.waterpik.com.
CLEANING AND TROUBLESHOOTING YOUR WATERPIK
®
WATER FLOSSER
11
ENGLISH
Mode
Clean
Whiten
Massage
CHARGE
Mode
Clean
Whiten
Massage
CHARGE
Mode
Clean
Whiten
Massage
CHARGE
30 sec.
30 sec.
30 sec.
30 sec.
Charging the Triple Sonic Toothbrush
Charge for 24 hours before rst use. All 3 charge indicator lights will
stay on continuously when the unit is fully charged. A full charge will last for
approximately 1 week of typical use (2 minutes of brushing twice a day).
If the toothbrush is to be stored for an extended period of time (six months or
more), be sure to fully charge it prior to storage.
Recharge Indicator Lights
Charge indicator lights will indicate level of battery charge for approximately 10
seconds after use and after removal from the charging base, and will then turn off.
Fully Charged
2/3 Charged
1/3 Charge Life (Recharging is Recommended)
Unit will not operate if the bottom LED begins to blink rapidly.
In order for the toothbrush to begin to work again, it must be placed on the
charger for approximately 1 hour.
Modes
Clean: Standard mode for superior teeth cleaning.
Whiten: Teeth cleaning with polishing and whitening.
Massage: Pulsates for gentle gum stimulation.
Sonic brushing
Slide the brush head onto handle and push it down firmly.
Select mode by pressing mode button until light is by desired mode then
press power button.
• Place the brush head into your mouth before turning the unit on.
• For best results, position brush along gumline at a 45-degree angle.
• Use light pressure with a small, slow back and forth motion covering one or
two teeth at a time.
Quad Timer: The Toothbrush will create a short pause every 30 seconds,
to remind you to move to the next quadrant of your mouth.
2-Minute Timer: The brush will automatically shut off after 2 minutes
of run time.
GETTING STARTED WITH YOUR SONIC TOOTHBRUSH
FULLY
CHARGED
2/3
CHARGED
1/3
CHARGED
CHARGE
12
Mode
Charge
Low
High
Massage
CHARGE
MASSAGE
LOW
MASSAGE
CHARGE
Mode
Clean
Whiten
Massage
CHARGE
Mode
Charge
Low
High
Massage
Mode
Charge
Low
High
Massage
30 sec.
30 sec.
30 sec.
30 sec.
Charging the Triple Clean Toothbrush
Charge for 24 hours before rst use. When the toothbrush is fully charged,
the charge indicator will be green while sitting on the base. A full charge will last
for approximately 1 week of typical use (2 minutes of brushing twice a day).
If the toothbrush is to be stored for an extended period of time (six months or
more), be sure to fully charge it prior to storage.
Recharge Indicator Lights
Charge indicator lights will indicate level of battery charge for approximately 10
seconds after use and after removal from the charging base, and will then turn off.
Fully Charged – CHARGE light is green
2/3 Charged Both MASSAGE and LOW lights are flashing green.
1/3 Charge life – MASSAGE light is green. Recharging is recommended.
NOTE: If the charger light blinks red and green when off the charger base, the
unit has a low battery level and may not operate.
In order for the toothbrush to begin to work again, it must be placed on the
charger for approximately 1 hour.
Modes
High: Everyday cleaning performance
Low: Gentle movements for effective cleaning of sensitive teeth
Massage: Micro-pulse pattern for enhanced gum stimulation
Brushing
Slide the brush head onto handle and push it down firmly.
Select mode by pressing mode button until light is by desired mode then
press power button.
Place the brush head into your mouth before turning the unit on.
Use light pressure with a small, slow back and forth motion covering
one or two teeth at a time.
Quad Timer: The Toothbrush will create a short pause every 30 seconds, to
remind you to move to the next quadrant of your mouth.
2-Minute Timer: The brush will automatically shut off after 2 minutes
of run time.
GETTING STARTED WITH YOUR OSCILLATING TOOTHBRUSH
13
ENGLISH
GETTING STARTED WITH YOUR OSCILLATING TOOTHBRUSH
Mode
Clean
Whiten
Massage
CHARGE
2.
Cleaning
1. After each use, turn off unit, remove the brush head from the handle
and rinse brush head under running water.
2. Wipe the handle dry after each use.
Service Maintenance
Waterpik
®
Water Flossers have no consumer serviceable electrical items
and do not require routine service maintenance. For all accessories go
to www.waterpik.com. You may also call our toll-free customer service
number at 1-800-525-2774 (USA) or 1-888-226-3042 (Canada). Refer to
the serial and model numbers in all correspondence. These numbers are
located on the bottom of your unit.
Still have questions? Go to www.waterpik.com.
CARE OF YOUR WATERPIK
®
TOOTHBRUSH
1.
14
DISPOSAL AND BATTERY REMOVAL
Disposal
This product contains rechargeable Nickel Metal Hydride batteries. The
batteries are not replaceable.
Please do not dispose of the unit in the household waste. Remove the
batteries per the instructions below and recycle at your local recycling
center.
Battery Removal
Note: This process is not reversible
Remove the battery only at the end of the product’s life for recycling. Doing
so earlier will destroy the product. Deplete the battery charge until the
brush no longer operates. Observe basic safety precautions.
Remove the batteries as shown and recycle them and the rest of the product
according to local regulations.
1. Use a screwdriver to remove the screw and battery door.
2. Hold the handle upside down, press the toothbrush shaft, and release
the two tabs inside the handle using a flathead screwdriver to release
the internal components of the handle.
3. Insert screwdriver next to the battery connections, and push out of
plastic covering. Twist and break the battery connections. Remove the
circuit board and pry the battery from the circuit carrier.
4. Recycle or dispose of the battery properly.
1.
2.
3.
4.
15
ENGLISH
LIMITED TWO YEAR WARRANTY
Water Pik, Inc. warrants to the original consumer of this product that it is free
from defects in materials and workmanship for 2 years from the date of purchase.
Consumer will be required to submit the original purchase receipt as proof of
purchase date and if requested, the entire product, to support a warranty claim.
Water Pik, Inc. will replace at its discretion any part of the product, which in its
opinion is defective, provided the product has not been abused, misused, altered
or damaged after purchase, was used according to instructions, and was used only
with accessories or consumable parts approved by Water Pik, Inc. Installation is
the responsibility of the consumer and is not covered by the warranty. This limited
warranty excludes accessories or consumable parts such as tips and brush heads.
Use with improper voltage will damage product and VOID warranty.
This warranty gives you specific legal rights. You may also have other rights that
vary, depending on the law in your place of residence.
Arbitration
BINDING ARBITRATION AND WAIVER OF RIGHT TO ASSERT MATTERS IN COURT
AND RIGHT TO JURY TRIAL
By purchasing, installing, or using this product you agree that any controversy or
claim arising out of or relating to your purchase, use, modification, installation,
or removal of this product shall be settled by binding arbitration. The arbitrator’s
decision will be final and binding. Judgment on the award rendered by the arbitrator
may be entered in any court having jurisdiction over the matter. Further, you agree
that you will not have the right to litigate any claim arising out of or in relation to your
purchase, use, modication, installation, or removal of this product in any court or
to have a jury trial onthat claim.
Arbitration of any matters shall be administered by the American Arbitration
Association and conducted by one arbitrator in accordance with the consumer
arbitration rules of the American Arbitration Association in effect at the time of filing
of the demand. The venue for all such arbitrations shall be Colorado and any such
arbitration shall be subject to the Federal Arbitration Act and Colorado law.
WAIVER OF RIGHT TO PARTICIPATE IN CLASS ACTIONS OR PURSUE CLAIMS IN
A REPRESENTATIVE CAPACITY.
Further, by purchasing, installing, or using this product you agree that arbitration
must be on an individual basis. This means neither you, nor we, may join or
consolidate claims in arbitration by or against other purchasers or users of water pik
products or the general public. Additionally, you may not litigate in court or arbitrate
any claims as a representative or member of a class or in a purported representative
capacity on behalf of the general public, other purchasers or users of this product,
other persons or entities similarly situated, or in a private attorney general capacity.
16
PRÉCAUTIONS D’EMPLOI
PRÉCAUTIONS
IMPORTANTES
Lors de l’utilisation de tout produit électrique,
particulièrement en présence d’enfants, on doit
toujours observer certaines précautions élémentaires
pour garantir la sécuri, dont les suivantes :
LISEZ TOUTES LES INSTRUCTIONS
AVANT L’UTILISATION.
DANGER :
Pour réduire le risque
d’électrocution :
Ne touchez pas la prise
avec les mains mouillées.
Ne placez pas ou ne
laissez pas tomber
l’appareil dans de l’eau
ou un autre liquide.
Ne vous servez pas de l’appareil dans votre
bain.
Ne posez pas l’appareil, et ne le rangez pas là
où il pourrait tomber ou être accidentellement
entraîné dans une baignoire ou un lavabo.
Ne touchez pas l’appareil s’il est tombé dans
l’eau. Débranchez-le immédiatement.
Vérifiez que le cordon d ‘alimentation n’est pas
endommagé avant la premre utilisation, puis
régulièrement pendant la durée de vie
de l’appareil.
AVERTISSEMENT :
Pour minimiser le risque
d’électrocution, incendie, blure
ou blessures :
• N’alimentez pas cet appareil à partir d’une source
d’électricité dont la tension est différente de la
tension spécifiée sur l’appareil ou le chargeur.
Une utilisation avec une tension inaquate
endommagera le produit et ANNULERA la garantie.
• If product is opened/disassembled for ANY reason
warranty is VOID.
Nutilisez pas cet appareil si sa prise ou son
cordon d’alimentation est endommagé, s’il ne
fonctionne pas correctement, s’il est tombé ou
a été abîmé, ou s’il est tombé dans un liquide
quelconque. Contactez Water Pik, Inc. ou votre
distributeur local dont les coordones se
trouvent à www.waterpik.com.
Ne dirigez pas le jet d’eau de l’hydropropulseur
sous la langue, dans une oreille, dans le nez
ou vers une autre zone délicate du corps. Cet
appareil est capable de produire des pressions
qui pourraient provoquer des lésions graves
dans ces zones.
Ne projetez pas le jet d’eau dans le nez ou dans
une oreille; l’amibe potentiellement mortelle
Naegleria fowleri peut être présente dans certaines
sources d’eau (puisage au robinet, ou eau de
puits non chlorée), et elle peut être mortelle après
introduction dans l’organisme par ces voies.
Utilisez l’appareil de la manière indiquée
dans le mode d’emploi ou suivez les
recommandations de votre dentiste.
ON
OFF
8
6
4
2
17
FRANÇAIS
Utilisez uniquement des embouts, brosses à dents
et accessoires recommandés par Water Pik, Inc.
Ninsérez pas ou ne faites pas tomber d’objet
étranger dans les tuyaux et ouvertures.
Gardez le fil éloigné des surfaces chaudes.
• N’utilisez pas l’hydropropulseur ou la brosse
à dent Sonic à l’exrieur ou dans un lieu
où l’on utilise des produits en aérosols (en
vaporisateur) ou encore où l’on administre de
l’oxygène.
• N’utilisez pas d’iode ou d’huiles essentielles
hydro-insolubles concentrées dans l’hydropulseur.
Cela pourrait dégrader la performance du produit
et réduire sa durée de vie.
• Retirez tout article de joaillerie buccale avant
d’utiliser l’hydropropulseur ou la brosse à
dent Sonic.
• N’utilisez pas l’hydropulseur ou la brosse à dents
en cas de blessure ouverte sur la langue ou dans la
bouche.
• Si votre médecin ou votre cardiologue vous a
conseillé de prendre une prédication à base
d’antibiotiques avant de subir un traitement
dentaire, vous devez consulter votre dentiste et/
ou un professionnel de la santé avant d’utiliser
l’hydropulseur ou la brosse à dents ou tout autre
dispositif d’hygiène buccale
• Ce produit est conforme aux normes de sécuri
concernant les appareils électromagnétiques.
Si vous portez un pacemaker ou tout dispositif
implanté comportant des aimants ou des
composants électroniques, contactez votre
decin ou le fabricant du dispositif avant
d’utiliser la brosse à dents.
Si pour une quelconque raison l’embout Pik
Pocket
®
(pas inclus avec tous les modèles) se
pare de la partie tubulaire de l’embout, jetez
les deux composants et installez un nouvel
embout Pik Pocket.
®
N’utilisez pas l’hydropropulseur pendant plus
de 5 minutes par période de deux heures.
• Ce produit ne contient aucune pièce réparable par
l’utilisateur dans le manche de la brosse à dents ou
l’hydropulseur. Ne tentez pas d’ouvrir l’un de ces
éléments, sauf en cas de mise au rebut de la pile.
Voir la section « Retrait de la pile ».
• L’utilisation de dentifrices contenant du peroxyde
peut endommager le logement en plastique de ce
produit.
• Lutilisation de nettoyants chimiques ou abrasifs
peut endommager le logement en plastique de ce
produit.
• Close supervision is necessary when this product
is used by, on or near children or invalids.
Les enfants doivent être surveillés afin de
s’assurer qu’ils ne jouent pas avec l’appareil.
Remplissez le réservoir de l’hydropropulseur
– uniquement avec de l’eau ou une solution
d’hygiène dentaire recommandée par un
dentiste.
CONSERVEZ CES INSTRUCTIONS.
18
19
FRANÇAIS
TABLE DES MATIÈRES
Description du produit
20
Familiarisation avec l’hydropropulseur
22
Nettoyage et dépannage de l’hydropropulseur Waterpik
®
24
Première utilisation de la brosse à dents sonique
25
Première utilisation de la brosse à dents oscillante
26
Entretien de la brosse à dents Waterpik
®
27
Mise au rebut et retrait de la pile
28
Garantie limitée de deux ans
29
20
8
6
4
2
ON
OFF
DESCRIPTION DU PRODUIT
Hydropulseur
1. Couvercle du réservoir
(sur charnière)
2. Réservoir
3. Tuyau flexible
4. Sélecteur de pression
(hydropropulseur)
5. Bouton d’alimentation
(pousser pour mettre
l’appareil sous/hors tension)
6. Cordon d’alimentation
7. Support de manche magnétique
8. Embout
9. Commutateur d’éjection de l’embout
10. Interrupteur On/Off (marche/
arrêt) d’alimentation en eau
11. Socle de charge de la brosse à dents
12. Base
REMARQUE : TOUS LES EMBOUTS ET TÊTES DE BROSSE NE
SONT PAS COMPRIS AVEC TOUS LES MOLES.
Embouts d’hydropulseur
A. Embout orthodontique
- Appareils orthodontiques
- Utilisation classique
B. Embout Pik Pocket
®
*
- Poches parodontales
- Furcations
C. Embout Plaque Seeker
®
*
- Implants
- Couronnes
- Bridges
- Appareils de rétention
- Utilisation classique
D. Embout de pulrisation
classique**
- Utilisation classique
E. Embout gratte-langue**
- Haleine fraîche
A
E
B C
D
2
1
3
4
5
7
6
8
9
10
12
11
*Remplacer tous les 3 mois
**Remplacer tous les 6 mois
/