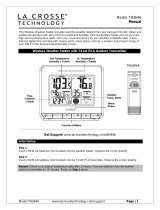
La Crosse Technology 308-1425B-INT FAQ
- Category
- Alarm clocks
- Type
- FAQ

La Crosse Technology, Ltd. www.lacrossetechnology.com/support Page 1
308- 1425B F AQS
The links below will work in most PDF viewers and link to the topic area by clicking the link.
We recommend Adobe Reader version 10 or greater available at:
http://get.adobe.com/reader
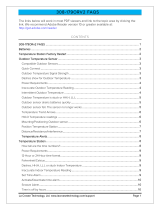
CONT ENTS
308-1425B FAQS ................................................................................................................. 1
AC Power ............................................................................................................................... 2
Batteries ................................................................................................................................ 2
Weather Station Factory Restart .................................................................................. 2
Outdoor Temperature Sensor ......................................................................................... 3
Compatible Outdoor sensors ............................................................................................. 3
Quick Connect ..................................................................................................................... 3
Outdoor Temperature Signal Strength ............................................................................ 3
Dashes show for Outdoor Temperature .......................................................................... 3
Power Requirements .......................................................................................................... 3
Inaccurate Outdoor Temperature Reading ..................................................................... 3
Intermittent Outdoor Temperature .................................................................................. 4
Outdoor Temperature is stuck or HH.H, LL.L ................................................................. 4
Outdoor sensor drains batteries quickly ......................................................................... 4
Outdoor Humidity goes to dashes when temperature is cold. .................................... 5
Outdoor sensor fell. The sensor no longer works .......................................................... 5
Temperature/Humidity Trend Arrows .............................................................................. 5
MIN/MAX Temperature readings ...................................................................................... 6
Heat Index/Dew Point ........................................................................................................ 6
Mounting/Positioning Outdoor sensor ............................................................................. 6
Position Weather Station ................................................................................................... 7
Distance/Resistance/Interference .................................................................................... 7
Temperature Alerts ........................................................................................................ 8
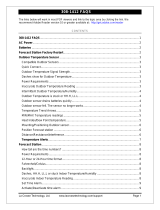
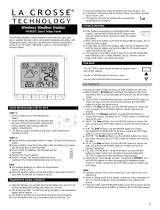
Weather Station .................................................................................................................. 9
Power Requirements .......................................................................................................... 9
12-Hour or 24-Hour time format ..................................................................................... 9
Fahrenheit/Celsius .............................................................................................................. 9
Backlight ............................................................................................................................... 9
Dashes, HH.H, LL.L or stuck Indoor Temperature/Humidity ....................................... 9
Inaccurate Indoor Temperature Reading ........................................................................ 9
Set Time Alarm.................................................................................................................... 9
Activate/Deactivate time alarm .......................................................................................10
Snooze Alarm .....................................................................................................................10
No WWVB Tower Icon ...........................................................................................................10
Time is off by hours ...............................................................................................................10

La Crosse Technology, Ltd. www.lacrossetechnology.com/support Page 2
Manually Set Time/Date: Program Menu .....................................................................10
Forecast Icons Inaccurate ................................................................................................11
Pressure graph is missing segments ..............................................................................11
Moon phase .........................................................................................................................11
Weather station is dim ......................................................................................................12
Weather station has distorted or frozen display ...........................................................12
Weather station is blank: No letters, numbers or dashed lines ................................12
Weather station drains batteries quickly .......................................................................12
Weather station has missing segments .........................................................................13
AC Power
The design of this weather station is to use AC power (5-volt) as primary power source.
When operating with the AC power cord, the backlight can be on continually.
When operating on AC power, batteries are optional and are not required in the weather
station.
The backlight will turn off or operate at high or low intensity at your discretion.
Batteries
Explanation: Many problems are resolved with fresh batteries of the appropriate voltage.
Many items sent in under warranty work when tested with fresh batteries. Batteries
manufactured this year will have an expiration date 10 years (or more) in the future.
Battery technology has improved and batteries will maintain voltage longer in storage.
However, the environment the batteries reside in for the 10 years can deplete the power.
Use Alkaline or Lithium batteries in the outdoor sensor.
A minimum voltage of 1.48V for each battery is necessary for proper performance.
Use batteries dated at least six years in advance of the current year. Batteries dated
earlier than six years from now may still work, but may be unstable in performance.
Good name brand batteries make less noise, which reduces the chance of RF (radio
frequency) interference from the battery compartment.
Weather Station Factory Restart
Explanation: The factory restart returns the weather station and outdoor sensor to an
“out-of-the-box” default state and often resolves an issue.
Factory Restart:
1. Remove all power (batteries and AC) from outdoor sensor and weather station.
2. Press one of the buttons on the weather station at least 20 times to clear all memory.
3. Verify that the weather station is blank before proceeding (there may be lines painted on
the screen that will show when there is no power).
4. Leave both units without power for 15 minutes (very important).
5. Insert the AC power cord into the wall outlet then into the weather station.
6. Insert fresh batteries into the outdoor sensor.
7. Press the TX button on the outdoor sensor to transmit RF signal.
8. Keep the outdoor sensor 5-10 feet from the weather station.
9. When RF connection is established, the temperature will appear on the station. Allow the
outdoor sensor and weather station to sit together for 15 minutes to establish a strong
connection.
10. Do not press buttons for 15 minutes.
For optimum 433MHz transmission, place the outdoor sensor no more than 300 feet (91
meters, open air) from the weather station.

La Crosse Technology, Ltd. www.lacrossetechnology.com/support Page 3
See the section on mounting and distance/resistance/interference for details on
mounting the outdoor sensor.
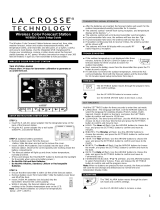
Outdoor Temperature Sensor
Compatible Outdoor sensors
The TX141TH-Bv2 outdoor sensor comes packaged with this weather station.
The TX141TH-A, TX141TH-Av2 and TX141TH-B (433MHz) outdoor sensors are
compatible with this weather station.
Quick Connect
Explanation: Use the quick connect for a weather station and outdoor sensor that have
been working but lost connection due to interference or low batteries. This is not the same
as a thorough factory reset.
1. Bring the outdoor sensor and weather station together inside, and place the units 5-10
feet apart with nothing between them.
2. Hold the HEAT/DEW button for 5 seconds. The outdoor temperature area will flash.
3. Remove battery cover from the outdoor sensor and press and release the TX button to
send the signal.
4. Wait for 2 minutes for the outdoor temperature to appear on the weather station.
Factory Restart: If the above procedure does not work, please try the factory reset.
Outdoor Temperature Signal Strength
Explanation: The weather station will search for the outdoor temperature/humidity sensor
for 3 minutes after installing batteries or after holding the HEAT/DEW button for 3 seconds.
The antenna symbol will flash during reception.
The temperature display will be dashes “---“.
If synchronization fails once, the antenna will lose one bar.
If synchronization fails twice, the antenna will lose two bars.
If RF (radio frequency) reception fails five times, the antenna symbol will show without
bars.
The antenna will show full display with successful RF (radio frequency) reception.
Dashes show for Outdoor Temperature
Explanation: Dashes mean the connection is lost between the weather station and the
outdoor sensor.
Batteries often resolve the connection.
Distance/Resistance can cause loss of connection between the outdoor sensor and the
weather station.
Turn the weather station 90 degrees towards the outdoor sensor to provide better
reception. This allows more antenna surface to face the outdoor sensor signal.
Try the quick connect or factory restart.
Power Requirements
2-AA batteries power the outdoor sensor.
We recommend Alkaline batteries for the outdoor sensor.
You may choose to use Lithium batteries for temperatures below -20°F/-28.8°C.
Inaccurate Outdoor Temperature Reading
Explanation: High outdoor temperature readings are generally a location issue. Low
outdoor temperature readings are power related or a sensors going bad.

La Crosse Technology, Ltd. www.lacrossetechnology.com/support Page 4
The outdoor sensor reads the environment where it is mounted. When mounted inside
the home, it will read inside temperature/humidity.
When the outdoor sensor reads high during the day, but not at night, it is a positioning
problem.
Look for heat sources such as sunlight, door or window frames or reflected heat.
Side-by-side test: Place the outdoor sensor right next to the weather station for 2 hours.
Compare indoor and outdoor temperature. The temperatures should be within 4 degrees
to be within tolerance.
If the outdoor sensor reads correctly when next to the weather station, try a different
location outside.
Intermittent Outdoor Temperature
Explanation: Intermittent problems are the hardest to resolve. RF (radio frequency)
communication may come and go occasionally. This can be normal in some environments
(e.g. moister climates). If outdoor sensor signal is lost, please wait 2-4 hours for the signal
to reconnect on its own.
Move the outdoor sensor to a closer location.
Distance/Resistance can cause loss of outdoor sensor signal.
Check Batteries.
Freezer test: Confirm the weather station is reading the correct outdoor sensor (not a
neighbor’s sensor). Place the outdoor sensor in the freezer for an hour and watch the
temperature drop on the weather station.
Indoor distance test: Please complete the Restart with outdoor sensor and weather
station 5-10 feet apart and inside to establish a strong connection.
After 15 minutes, if there is a reading in the outdoor temperature area, move the
outdoor sensor to another room with one wall between the outdoor sensor and the
weather station.
Observe to see if the temperature remains on consistently for 1 hour.
If the temperature remains on while in the house, then it is likely a distance/resistance
issue.
Move the outdoor sensor to different locations outside to find a location where the
temperature reading will hold.
Outdoor Temperature is stuck or HH.H, LL.L
Explanation: These symbols are error messages indicating the outdoor sensor is outside of
its readable range.
Check Batteries. Overpowered or underpowered batteries can cause this reading.
Replace outdoor sensor.
Note: The last outdoor reading may remain (not change) for several hours when connection
is lost. The outdoor temperature reading will flash when the connection is first lost or
intermittent.
Outdoor sensor drains batteries quickly
Test a new set of alkaline batteries. Write down the date of installation and the voltage
of the batteries.
When the batteries fail, please note the date and voltage again.
Check the distance and resistance between the outdoor sensor and weather station.
Outdoor sensors at the end of the range may work while batteries are fresh but not after
they drain a bit.

La Crosse Technology, Ltd. www.lacrossetechnology.com/support Page 5
Check for leaking batteries, which may damage the outdoor sensor.
Battery life is over 24 months when using reputable battery brands for both Alkaline and
Lithium batteries.
Outdoor Humidity goes to dashes when temperature is cold.
The outdoor temperature/humidity sensor designed to work with this weather station
may drop the outdoor humidity and dew point reading in cold temperatures.
The humidity and dew point will return when the temperature rises. This is how the
sensor came from the factory. The temperature itself will continue to read.
Outdoor sensor fell. The sensor no longer works
Explanation: If there is no physical damage to the outdoor sensor, the fall may not have
caused internal damage. A fall can shock the outdoor sensor or the batteries in the outdoor
sensor. Batteries that have fallen on a hard surface may be damaged and unable to function
properly.
Complete a Restart with fresh batteries.
Use Batteries dated at least six years in advance of the current year. Batteries dated
earlier than six years from now may still work, but may be unstable in performance.
Note: An outdoor sensor that has fallen into puddle, snow, or other standing water, will
likely have water damage and need replacement. Outdoor sensors are water resistant, not
waterproof.
Replacement Outdoor sensors
Visit your local Retailer or La Crosse Technology® Store
http://store.lacrossetechnology.com/
Note: Be sure to order the correct model and frequency to avoid receiving the incorrect
item.
Call La Crosse Technology® Store at 608-785-7939 or e-mail from the store website if
you are unsure about the correct item to order. Each item carries the original new
product warranty and includes access to La Crosse Technology® technical support.
Temperature/Humidity Trend Arrows
Explanation: The indoor and outdoor temperature (2°F / 1°C) and humidity (3% RH) trend
indicators update every 30 minutes or less. These trends represent temperature changes
over the past three hours.
Example: At 11:00, the trend arrows will reflect changes in temperature or humidity since
8:00. At 11:30, the trend arrows will reflect changes in temperature or humidity since
8:30, etc.
Up Arrow:
Temperature has risen in the past 3 hours.
Humidity has risen in the past 3 hours.
Right Arrow:
Temperature has not changed in the past 3 hours.
Humidity has not changed in the past 3 hours.
Down Arrow:
Temperature has fallen in the past 3 hours.
Humidity has fallen in the past 3 hours.

La Crosse Technology, Ltd. www.lacrossetechnology.com/support Page 6
MIN/MAX Temperature readings
Explanation: The weather station shows the daily minimum and maximum temperatures
each day starting at midnight (12:00 AM). The weather station automatically resets the
MIN/MAX temperatures at midnight (12:00 AM).
View MAX data: Press the ▲ button once to view maximum temperature and humidity
values for indoor and outdoor data.
Reset MAX data: Hold the ▲ button for five seconds to reset maximum temperature
and humidity values for indoor and outdoor data.
View MIN data: Press the ▼ button once to view minimum temperature and humidity
values for indoor or outdoor data.
Reset MIN data: Hold the ▼ button for five seconds to reset minimum temperature
and humidity values for indoor and outdoor data.
Heat Index/Dew Point
Heat Index:
Heat Index combines the effects of heat and humidity.
Heat Index is what the temperature feels to a human being.
As humidity increases, the body is unable to cool effectively.
The temperature will feel warmer.
View Heat Index: From the default time display, press the HEAT/DEW button once and
Heat Index will show instead of the outdoor ambient temperature.
Note: Heat index will be the same number as the temperature until the outdoor
temperature is above 26.7°C (80°F).
Dew Point Temperature:
Dew Point Temperature is the saturation point of the air, or the temperature to which
the air has to cool in order to create condensation.
The higher the dew points, the higher the moisture content of the air at a given
temperature.
View Dew Point Temperature: From the default time display, press the HEAT/DEW
button twice and Dew Point will show instead of the outdoor ambient temperature. The
words “Dew Point” will show near outdoor temperatures.
Note: Dew Point is lower than the actual temperature.
Mounting/Positioning Outdoor sensor
First: Place the outdoor sensor in the desired shaded location and the weather station in
the home. Wait approximately 1 hour before permanently mounting the outdoor sensor to
ensure that there is proper reception.
POSITION
Outdoor:
Protect the outdoor sensor from standing rain or snow and from the overhead sun,
which can cause it to read incorrectly.
Mounting under an eave or deck rail works well.
If you choose, you can construct a small roof or box for the outdoor sensor. Be sure a
box has vents.
Mount the outdoor sensor on the North side where to prevent sun from causing incorrect
readings.
Mount at least 6 feet in the air for a strong RF (radio frequency) signal.
Do not mount the outdoor sensor on a metal fence. This significantly reduces the
effective range.

La Crosse Technology, Ltd. www.lacrossetechnology.com/support Page 7
Outdoor sensors are water resistant, not waterproof.
Indoor:
Mount the Outdoor Sensor indoors to monitor high mold risk areas like in a crawl space
or a basement.
Indoor or Outdoor:
Mount outdoor temperature sensor vertically.
Avoid more than one wall between the outdoor sensor and the weather station.
The maximum transmitting range in open air is over 300 feet (91 meters).
Obstacles such as walls, windows, stucco, concrete and large metal objects can reduce
the range.
Do not mount near electrical wires, transmitting antennas or other items that will
interfere with the signal.
RF (radio frequency) signals do not travel well through moisture or dirt.
MOUNT
Option 1:
Install one mounting screw (not included) into a wall.
Place the outdoor sensor onto the screw (hanging hole on the backside).
Gently pull down to lock the screw in place.
Option 2:
Insert the mounting screw through the front of the outdoor sensor and into the wall.
Tighten the screw to snug (do not over tighten).
Position Weather Station
The weather station has a pull out stand to sit on a desk or table or can be wall
mounted.
Place within range of the outdoor sensor.
The maximum transmitting range in open air is 300 feet (91 meters).
Obstacles such as walls, windows, stucco, concrete and large metal objects can reduce
the range.
Choose a location 6 feet or more from electronics such as cordless phones, wireless
gaming systems, televisions, microwaves, routers, baby monitors, etc., which can
prevent signal reception.
Be aware of electrical wires and plumbing within a wall. This will interfere with RF (radio
frequency) signal reception.
Distance/Resistance/Interference
Distance:
The maximum transmitting range in open air is over 300 feet (91 meters) between the
outdoor sensor and the weather station. This range is in open air with ideal conditions.
Consider what is in the signal path between the weather station and the outdoor sensor.
Avoid placing electronics in the signal path between the weather station and the outdoor
sensor.
Resistance:
Obstacles such as walls, floors, windows, stucco, concrete and large metal objects can
reduce the range.
When considering the distance between the outdoor sensor and the weather station (200
feet open air), cut that distance in half for each wall, window, tree, bush or other
obstruction in the signal path.
Closer is better.

La Crosse Technology, Ltd. www.lacrossetechnology.com/support Page 8
Windows reflect the RF (radio frequency) signal.
Metal absorbs the signal and reduces the range.
Stucco has a metal mesh that absorbs the signal.
Do not mount the outdoor sensor on a metal fence. This significantly reduces the
effective range.
Interference:
Consider items in the signal path between the outdoor sensor and the weather station.
Sometimes a simple relocation of the outdoor sensor or the weather station will correct
the interference.
Windows can reflect the radio signal.
Metal will absorb the RF (radio frequency) signal.
Stucco has a metal mesh that absorbs signal.
Avoid transmitting antennas: (ham radios, emergency dispatch centers, airports,
military bases, etc.)
Electrical wires (utilities, cable, etc.)
Vegetation is full of moisture and reduces signal.
It is difficult for RF (radio frequency) signal to travel through a hill.
Temperature Alerts
Explanation: The outdoor and indoor temperature alerts are set in two separate steps.
Set the alert value.
Arm/Disarm the alert.
Select Temperature Alert Values:
Hold the ALERT button for five seconds to select and set temperature alert values.
1. OUTDOOR HI alert will flash. Press the ▲ or ▼ buttons to set the alert value, and press
the ALERT button to confirm. Then press the ALERT button again switch to OUTDOOR LO
setting.
2. OUTDOOR LO alert will flash. Press the ▲ or ▼ buttons to set the alert value, and press
the ALERT button to confirm. Then press the ALERT button again switch to INDOOR HI
setting.
3. INDOOR HI alert will flash. Press the ▲ or ▼ buttons to set the value, and press the
ALERT button to confirm and switch to INDOOR LO.
4. INDOOR LO alert will flash. Press the ▲ or ▼ buttons to set the alert value, and press
the ALERT button to confirm. Then press the ALERT button again confirm and exit.
Note: After selecting temperature alert values, use the next step to arm or disarm
individual alerts.
Temperature Alerts ON/OFF
In normal mode, hold then release the ALERT button to toggle between:
Outdoor HI
Outdoor LO
Indoor HI
Indoor LO
Press the ▲ button to arm the selected alert.
The alert icon (bell) appears next to the alert, when the alert is active.
Press the ▼ button to disarm the selected alert.
Note: When no temperature alerts are set, the Temperature Alert area will show OFF.
Temperature Alert Sounds
When temperature alert sounds, the corresponding alert icon (bell) will flash.
The alert beeps once every minute, until the temperature is out of alert range.
Press any button to stop alert. The alert symbol will still show.

La Crosse Technology, Ltd. www.lacrossetechnology.com/support Page 9
Turn alert OFF: In normal mode, hold and release the ALERT button to select the alert.
With HI or LO alert selected, press the ▼ button to disarm that alert.
Weather Station
Power Requirements
This weather station is powered by a 5 volt AC power adapter
Alternatively, optional 3-AAA Alkaline batteries may be used.
12-Hour or 24-Hour time format
Time can display in 12-hour (am, pm) or 24-hour format.
Default is 12-hour time.
Use the Program Menu to switch time formats.
Fahrenheit/Celsius
Use the program menu to switch between Fahrenheit and Celsius.
Backlight
AC adapter: The backlight is on continuously when operating the weather station with the
5-volt AC adapter.
Note: When the AC adapter is NOT in use, the HI-LOW-OFF light feature is not available.
HIGH: The backlight is defaulted to HI at setup when the AC adapter is in use.
LOW: Press the HI-LOW-OFF button to dim the backlight.
OFF: Press the HI-LOW-OFF button again to turn the backlight off.
Press the HI-LOW-OFF button to return to full strength.
Note: When the backlight is off, press any button to activate the backlight for 10 seconds.
Battery power: When operating on battery power only, press and release the any button
and the backlight will show for 10 seconds.
Dashes, HH.H, LL.L or stuck Indoor Temperature/Humidity
Explanation: These symbols are error messages indication the indoor sensor is outside of
its readable range. For indoor readings, this is generally a power related issue.
Check that the AC power cord is inserted into a working outlet.
Batteries may be overpowered or underpowered. Remove batteries from the weather
station.
Press any button 20 times. Leave the weather station unpowered for 1-2 hours.
Install fresh Alkaline batteries with correct polarity.
If the indoor temperature is still shows dashes, HH.H or LL.L, the weather station may
need replacement.
Inaccurate Indoor Temperature Reading
Explanation: When the indoor temperature is inaccurate, it is often due to the location of
the display or overpowered/under powered batteries. You can test the accuracy at you
home.
Side-by-side test: Bring the outdoor sensor in the house and place it next to the weather
station for 2 hours.
Compare indoor and outdoor temperature. The temperature should be within 4 degrees
to be within tolerance.
Look for heat sources such as sunlight, door or window frames or reflected heat or cold
near the weather station.
Check batteries and AC power cord.
Set Time Alarm

La Crosse Technology, Ltd. www.lacrossetechnology.com/support Page 10
In normal mode, hold the ALARM button for three seconds to enter alarm set mode.
1. HOUR: The Hour will flash, use the ▲ or ▼ buttons to set the hour, and press ALARM
button to confirm and switch to minutes.
2. MINUTES: The Minutes will flash, use the ▲ or ▼ buttons to set the minutes, and press
ALARM button to confirm and exit.
Note: When no buttons are pressed for ten seconds, the weather station will save the last
change and default back to normal mode
Activate/Deactivate time alarm
In normal mode, press and release the ALARM button once to show alarm time.
Press and release the ALARM button repeatedly to turn ON/OFF alarm.
The alarm icon appears when alarm is active.
Note: The alarm will ring for 2 minutes then turn off if no buttons are pressed.
Snooze Alarm
When the alarm sounds, press the HI/LOW/OFF button to snooze the alarm for 10
minutes.
The snooze option can repeat three times.
The alarm icon will flash while the snooze feature is active.
Note: while the alarm sounds press any button except the ALARM button to turn the
alarm off.
No WWVB Tower Icon
The forecast station has not received a WWVB time signal in the past 24-hours.
Position the forecast station for better reception.
Be sure you have good batteries in the forecast station.
Hold the + and – buttons together to send the forecast station on a signal search at night.
Allow up to 5 nights to receive the time signal.
Time is off by hours
Check to see if the WWVB Tower icon appears on the forecast station. If not, the forecast station has
not received a WWVB time signal in the past 24-hours.
Reposition the forecast station with the front or back facing Colorado.
Check that the Time Zone selected correctly reflects your location. Adjust the time zone in the
Program Menu.
Check that the DST indicator is correct for your location (most areas observe DST so this should be
ON). Adjust the DST indicator in the Program Menu.
Manually Set Time/Date: Program Menu
The TIME SET button will move through the program menu. To change a value use the
ARROW buttons.
1. WWVB ON/OFF: Hold the TIME SET button five seconds so WWVB and the word ON
will flash. Press and release either ARROW button to turn this to OFF if you do not wish
WWVB time reception. Confirm with the TIME SET button and move to time zone.
2. TIME ZONE: EST will flash. Press and release the ▲ or ▼ buttons to select a different
Time Zone: AST=Atlantic, EST= Eastern, CST= Central, MST= Mountain, PST= Pacific,
AKT= Alaska, HAT=Hawaiian time zone. Confirm with the TIME SET button and move to
DST.

La Crosse Technology, Ltd. www.lacrossetechnology.com/support Page 11
3. DAYLIGHT SAVING TIME: DST will flash and the word ON. Press and release the ▲ or
▼ buttons to turn this to OFF if you do not observe DST. Confirm with the TIME SET
button and move to 12/24 hour time.
4. 12/24 HOUR TIME: 12H will flash. Press and release the ▲ or ▼ buttons to select 24H.
Confirm with the TIME SET button and move to the hour.
5. HOUR: The hour will flash. Press and release the ▲ or ▼ buttons to select the correct
hour. Confirm with the TIME SET button and move to the minutes.
6. MINUTES: The minutes will flash. Press and release the ▲ or ▼ buttons to adjust the
minutes. Confirm with the TIME SET button and move to the year.
7. YEAR: The year will flash. Press and release the ▲ or ▼ buttons to select the correct
year. Confirm with the TIME SET button and move to the month.
8. MONTH: The month will flash. Press and release the ▲ or ▼ buttons to select the
correct month. Confirm with the TIME SET button and move to the date.
9. DATE: The date will flash. Press and release the ▲ or ▼ buttons to select the correct
date. Confirm with the TIME SET button and move to F/C.
10. Note: The Day of the Week will set automatically when the year, month and date are
set.
11. FAHRENHEIT/CELSIUS: °F will flash. Press and release the ▲ or ▼ buttons to select
Fahrenheit or Celsius. Confirm with the TIME SET button and exit.
Note: When no buttons are pressed for ten seconds, the weather station will save the
last change and default back to normal mode.
Forecast Icons Inaccurate
THIS WEATHER STATION LEARNS OVER TIME!
Please allow 3-4 weeks for barometer calibration to generate an accurate forecast.
IMPORTANT: As the Weather station builds memory, it will compare the current average
pressure to the past forty day average pressure for increased accuracy. The longer the
Weather station operates in one location, the more accurate the forecast icons will be.
Weather Forecast Icons: This Weather station has six forecast icons that predict the
weather condition of the next 12-hours based on the change of atmospheric pressure. The
weather forecast is about 70-75% correct. As weather conditions cannot be 100% correctly
forecasted we are not responsible for any loss caused by an incorrect forecast.
Sunny (clear)
Partly Cloudy
Cloudy
Stormy
Rainy
Snowy (temp below 32 ºF)
The icons forecast the weather in terms of getting better or worse and not necessarily sunny
or rainy, as each icon indicates.
Pressure graph is missing segments
The pressure graph has several bars over time. The far right set of bars is the current
pressure or the “zero mark”. Each set of bars to the left represent the change from the
zero mark for that period.
Occasionally a low front will come through that drops the pressure several bars in a
short time. When this occurs, the graph appear to lose all bars for a given time period.
This is due to the graph having a limited number of bars per time. The graph will correct
itself within 1-2 days.
The pressure graph will scroll to prevent LCD burnout.
Moon phase

La Crosse Technology, Ltd. www.lacrossetechnology.com/support Page 12
Explanation: The Moon Phase is based on the date manually set on the weather station.
The moon is divided into 6 sections, showing 12 phases of the moon.
Waxing indicates growing or expanding illumination and happens after a new moon.
Waning indicates decreasing illumination and occurs after a full moon.
Crescent refers to the moon being less than half-illuminated. Crescents can be waning
or waxing.
Gibbous describes a moon phase when more than half is illuminated. Gibbous can be
waxing or waning.
New Moon occurs when the moon is between the earth and sun, so the illuminated
portion of the moon is on the backside facing the sun and we cannot see it. After a new
moon, the illuminated portion will increase or wax until the full moon occurs.
Full Moon occurs when the earth, moon and sun are in approximate alignment, with the
moon and the sun on opposite sides of the earth. The illuminated portion of the moon
faces the earth, giving us complete visibility of one side of the entire moon. After a full
moon, the illuminated portion will decrease or wane until the new moon occurs.
First Quarter and Last Quarter moons occur when the moon is at a 90-degree angle
to the earth and sun. We see half of the moon illuminated and the other half is in
shadow.
Weather station is dim
Explanation: Most weather stations have a dark background. Place the weather station at
eye level, to determine if it is dim. Weather stations that sit in the sunlight can develop a
cloudy film over time.
This is generally a power related issue.
Batteries may be overpowered or underpowered. Remove batteries from weather
station.
Press any button 20 times. Leave the weather station unpowered for 1-2 hours.
Install fresh alkaline batteries with correct polarity.
Weather station has distorted or frozen display
Explanation: On a brand new weather station, check for thin plastic film of printed
scratch guard that may be on the screen of the weather station. This thin piece of plastic
has printed numbers for store displays. When the batteries are installed, the “real” numbers
show behind the printed scratch guard and create distortion.
With all power removed, the weather station should be blank.
If numbers still appear, please check for scratch guard.
Power:
Check that the batteries are installed correctly.
This is generally a power related issue.
Batteries may be overpowered or underpowered.
Remove batteries from weather station.
Press any button 20 times. Leave the batteries out of the display for 2 hours.
Insert batteries into the weather station.
Weather station is blank: No letters, numbers or dashed lines
Check that the batteries are installed correctly.
Batteries may be overpowered or underpowered.
Remove batteries from weather station.
Press any button 20 times. Leave the batteries out of the display for 2 hours.
Insert batteries into the weather station.
Weather station drains batteries quickly
Test a new set of alkaline batteries. Write down the date of installation and the voltage
of the batteries.

La Crosse Technology, Ltd. www.lacrossetechnology.com/support Page 13
When the batteries fail, please note the date and voltage again. This is helpful in
determining the problem.
Check for leaking batteries, which may damage the weather station.
Battery life is over 12 months when using reputable battery brands.
Weather station has missing segments
Explanation: When parts of numbers, letters, or pictures are missing on the display, it is
often power related.
Batteries may be overpowered or underpowered. Remove batteries from weather
station.
Press any button 20 times. Leave the weather station unpowered for 1-2 hours.
Install fresh alkaline batteries with correct polarity.
-
 1
1
-
 2
2
-
 3
3
-
 4
4
-
 5
5
-
 6
6
-
 7
7
-
 8
8
-
 9
9
-
 10
10
-
 11
11
-
 12
12
-
 13
13


La Crosse Technology 308-1425B-INT FAQ
- Category
- Alarm clocks
- Type
- FAQ
Ask a question and I''ll find the answer in the document
Finding information in a document is now easier with AI
Related papers
-
 La Crosse Technology S85814 Installation guide
-
 La Crosse Technology 308-179ORV2 Faqs
-
La Crosse Technology S88907 Installation guide
-
La Crosse Technology 308-179OR FAQ
-
 La Crosse Technology 308-1412 User manual
-
 La Crosse Technology T83646 User manual
-
La Crosse Technology 314-152B Operating instructions
-
 La Crosse Technology WS6818 Quick Setup Manual
-
La Crosse Technology WS-9077U-IT Faqs
-
 La Crosse Technology WS6826 Quick Setup Manual


Other documents
-
Technoline Model User manual
-
 Discovery Channel Weathertech FX5000 User manual
-
 Wittime Digital Wireless Weather Station User manual
-
Trotec T210 User guide
-
 Dr Prepare Projection Alarm Clock User manual
-
Sharper Image La Crosse Wireless Color Weather Station User manual
-
 Springfield 91066 User manual
-
 Aqua Comfort ACT Signature Series Calibrations And Settings
-
Extech Instruments CTH10A User manual


