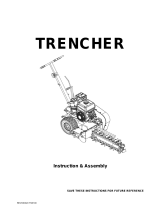
Toro TRX-250 Trencher User manual

Type
User manual

This manual is also suitable for

FormNo.3431-900RevB
TRX-250andTRX-300Trencher
ModelNo.22983—SerialNo.400000000andUp
ModelNo.22983G—SerialNo.400000000andUp
ModelNo.22983HD—SerialNo.400000000andUp
ModelNo.22984—SerialNo.400000000andUp
Registeratwww.Toro.com.
OriginalInstructions(EN)
*3431-900*B
ThisproductcomplieswithallrelevantEuropean
directives;fordetails,pleaseseetheseparateproduct
specicDeclarationofConformity(DOC)sheet.
ItisaviolationofCaliforniaPublicResourceCode
Section4442or4443touseoroperatetheengineon
anyforest-covered,brush-covered,orgrass-covered
landunlesstheengineisequippedwithaspark
arrester,asdenedinSection4442,maintainedin
effectiveworkingorderortheengineisconstructed,
equipped,andmaintainedforthepreventionofre.
Theenclosedengineowner'smanualissupplied
forinformationregardingtheUSEnvironmental
ProtectionAgency(EPA)andtheCaliforniaEmission
ControlRegulationofemissionsystems,maintenance,
andwarranty.Replacementsmaybeorderedthrough
theenginemanufacturer.
Important:IfyouareusingamachinewithaToro
engineabove1500m(5,000ft)foracontinuous
period,ensurethattheHighAltitudeKithasbeen
installedsothattheenginemeetsCARB/EPA
emissionregulations.TheHighAltitudeKit
increasesengineperformancewhilepreventing
spark-plugfouling,hardstarting,andincreased
emissions.Onceyouhaveinstalledthekit,attach
thehigh-altitudelabelnexttotheserialdecalon
themachine.ContactanyAuthorizedService
DealertoobtaintheproperHighAltitudeKitand
high-altitudelabelforyourmachine.Tolocate
adealerconvenienttoyou,accessourwebsite
atwww.Toro.comorcontactourToroCustomer
CareDepartmentatthenumber(s)listedinyour
EmissionControlWarrantyStatement.
Removethekitfromtheengineandrestorethe
enginetoitsoriginalfactorycongurationwhen
runningtheengineunder1500m(5,000ft).Do
notoperateanenginethathasbeenconverted
forhigh-altitudeuseatloweraltitudes;otherwise,
youcouldoverheatanddamagetheengine.
Ifyouareunsurewhetherornotyourmachine
hasbeenconvertedforhigh-altitudeuse,lookfor
thefollowinglabel.
decal127-9363
WARNING
CALIFORNIA
Proposition65Warning
Theengineexhaustfromthisproduct
containschemicalsknowntotheStateof
Californiatocausecancer,birthdefects,
orotherreproductiveharm.
Batteryposts,terminals,andrelated
accessoriescontainleadandlead
compounds,chemicalsknownto
theStateofCaliforniatocause
cancerandreproductiveharm.Wash
handsafterhandling.
Useofthisproductmaycauseexposure
tochemicalsknowntotheStateof
Californiatocausecancer,birthdefects,
orotherreproductiveharm.
Introduction
Thismachineisdesignedtodigtrenchesinsoilto
burycablingandpipingforvariousapplications.Itis
notintendedtocutrock,wood,oranymaterialother
thansoil.Usingthisproductforpurposesotherthan
itsintendedusecouldprovedangeroustoyouand
bystanders.
Readthisinformationcarefullytolearnhowtooperate
andmaintainyourproductproperlyandtoavoid
injuryandproductdamage.Youareresponsiblefor
operatingtheproductproperlyandsafely.
Visitwww.Toro.comforproductsafetyandoperation
trainingmaterials,accessoryinformation,helpnding
adealer,ortoregisteryourproduct.
Wheneveryouneedservice,genuineToroparts,or
additionalinformation,contactanAuthorizedService
DealerorToroCustomerServiceandhavethemodel
andserialnumbersofyourproductready.Figure
1illustratesthelocationofthemodelandserial
numbersontheproduct.Writethenumbersinthe
spaceprovided.
©2019—TheToro®Company
8111LyndaleAvenueSouth
Bloomington,MN55420
2
Contactusatwww.Toro.com.
PrintedintheUSA
AllRightsReserved
Important:Withyourmobiledevice,youcan
scantheQRcodeontheserialnumberdecal(if
equipped)toaccesswarranty,parts,andother
productinformation.
g272571
Figure1
1.Modelandserialnumberplate
ModelNo.
SerialNo.
Thismanualidentiespotentialhazardsandhas
safetymessagesidentiedbythesafety-alertsymbol
(Figure2),whichsignalsahazardthatmaycause
seriousinjuryordeathifyoudonotfollowthe
recommendedprecautions.
g000502
Figure2
1.Safety-alertsymbol
Thismanualuses2wordstohighlightinformation.
Importantcallsattentiontospecialmechanical
informationandNoteemphasizesgeneralinformation
worthyofspecialattention.
Contents
Safety.......................................................................4
GeneralSafety...................................................4
SafetyandInstructionalDecals..........................5
Setup......................................................................10
1InstallingtheBoomandChain........................10
2CheckingtheFluidLevels...............................11
3ChargingtheBattery.......................................11
ProductOverview...................................................12
Controls...........................................................12
Specications..................................................14
Attachments/Accessories.................................14
BeforeOperation.................................................15
BeforeOperationSafety...................................15
AddingFuel......................................................15
PerformingDailyMaintenance..........................16
DuringOperation.................................................16
DuringOperationSafety...................................16
StartingtheEngine...........................................18
DrivingtheMachine..........................................18
ShuttingofftheEngine......................................18
DiggingaTrench..............................................19
OperatingTips.................................................19
AfterOperation....................................................20
AfterOperationSafety......................................20
SecuringtheMachineforTransport..................20
LiftingtheMachine...........................................20
Maintenance...........................................................21
MaintenanceSafety..........................................21
RecommendedMaintenanceSchedule(s)...........21
Pre-MaintenanceProcedures..............................23
RemovingtheCoverPlate................................23
Lubrication..........................................................23
GreasingtheMachine.......................................23
GreasingtheTrencherHousing........................24
EngineMaintenance...........................................24
EngineSafety...................................................24
IdentifyingtheEngine.......................................24
ServicingaKohler
®
Engine...............................25
ServicingaT oroEngine....................................29
FuelSystemMaintenance...................................33
UsingtheFuel-ShutoffValve.............................33
DrainingtheFuelT ank......................................34
ReplacingtheFuelFilter...................................34
ElectricalSystemMaintenance...........................35
ElectricalSystemSafety...................................35
ServicingtheBattery.........................................35
ReplacingtheFuses.........................................37
DriveSystemMaintenance..................................38
ServicingtheTracks.........................................38
BrakeMaintenance.............................................41
TestingtheParkingBrake.................................41
HydraulicSystemMaintenance...........................41
HydraulicSystemSafety...................................41
HydraulicFluidSpecications...........................41
CheckingtheHydraulic-FluidLevel...................42
ReplacingtheHydraulicFilter...........................42
ChangingtheHydraulicFluid............................43
TrencherMaintenance.........................................44
ReplacingtheDiggingTeeth.............................44
CheckingandAdjustingtheDiggingChain
andBoom.....................................................44
ReplacingtheDriveSprocket...........................45
Cleaning..............................................................46
RemovingDebrisfromtheMachine..................46
Storage...................................................................46
Troubleshooting......................................................48
3
Safety
DANGER
Theremaybeburiedutilitylinesinthework
area.Diggingintothemmaycauseashock
oranexplosion.
Havethepropertyorworkareamarkedfor
buriedlinesanddonotdiginmarkedareas.
Contactyourlocalmarkingserviceorutility
companytohavethepropertymarked(for
example,intheUS,call811orinAustralia,
call1100forthenationwidemarkingservice).
GeneralSafety
Thisproductiscapableofamputatinghandsandfeet.
Alwaysfollowallsafetyinstructionstoavoidserious
injuryordeath.
Havethepropertyorworkareamarkedforburied
linesandotherobjects,anddonotdiginmarked
areas.
Keepyourhandsandfeetawayfrommoving
teeth,auger,orotherparts.
Keepbystandersandpetsawayfromthemachine.
ReadandunderstandthecontentofthisOperators
Manualbeforestartingtheengine.
Neverallowchildrenoruntrainedpeopleto
operatethemachine.
Donotoperatethemachinewithouttheguards
andothersafetyprotectivedevicesinplaceand
workingonthemachine.
Useyourfullattentionwhileoperatingthe
machine.Donotengageinanyactivitythat
causesdistractions;otherwise,injuryorproperty
damagemayoccur.
Stopthemachine,shutofftheengine,andremove
thekeybeforeservicing,fueling,orunclogging
themachine.
Improperlyusingormaintainingthismachinecan
resultininjury.Toreducethepotentialforinjury,
complywiththesesafetyinstructionsandalways
payattentiontothesafety-alertsymbol
,which
meansCaution,Warning,orDanger—personalsafety
instruction.Failuretocomplywiththeseinstructions
mayresultinpersonalinjuryordeath.
4
SafetyandInstructionalDecals
Safetydecalsandinstructionsareeasilyvisibletotheoperatorandarelocatednearanyarea
ofpotentialdanger.Replaceanydecalthatisdamagedormissing.
decalbatterysymbols
BatterySymbols
Someorallofthesesymbolsareonyourbattery.
1.Explosionhazard6.Keepbystandersaway
fromthebattery.
2.Nore,opename,or
smoking
7.Weareyeprotection;
explosivegasescan
causeblindnessandother
injuries.
3.Causticliquid/chemical
burnhazard
8.Batteryacidcancause
blindnessorsevereburns.
4.Weareyeprotection.9.Flusheyesimmediately
withwaterandgetmedical
helpfast.
5.ReadtheOperator's
Manual.
10.Containslead;donot
discard
decal93-6686
93-6686
1.Hydraulicuid2.ReadtheOperator's
Manual.
decal93-7814
93-7814
1.Entanglementhazard,belt—stayawayfrommovingparts;
keepallguardsandshieldsinplace.
decal93-9084
93-9084
1.Liftpoint/Tie-downpoint
decal100-4650
100-4650
1.Crushinghazardofhand—keepbystandersaway.
2.Crushinghazardoffoot—keepbystandersaway.
decal107-8495
107-8495
1.Parkingbrake
5
Decal131-1097isformachineswithaT oroengine
only.
decal131-1097
131-1097
1.Oildrain
decal133-8062
133-8062
decal139-1271
139-1271
1.Parkingbrake—Engage2.Parking
brake—Disengage
decal138-7107
138-7107
1.Forward3.Right
2.Left
4.Reverse
decal138-7154
138-7154
1.ReadtheOperator’s
Manualforfuse
information.
4.Magnetorelay
2.Fan5.Fanrelay
3.Electric6.Ignitionrelay
6
Decal137-3882isformodel22983only.
decal137-3882
137-3882
1.ReadtheOperatorsManual.
Decal138-7155isformodel22984only.
decal138-7155
138-7155
1.ReadtheOperatorsManual.
decal99-9952
99-9952
1.Cutting/dismembermenthazard,augerandchain—keepbystandersaway;stayawayfrommovingparts.
2.Warning—removethekeybeforeperformingmaintenance.
3.Explosionhazard;electricalshockhazard—donotoperateifpowerlinesmaybepresent.
decal138-7104
138-7104
1.Warning—readtheOperatorsManual;donotoperatethis
machineunlessyouaretrained.
5.Electricalshockhazard;explosionhazard—donotoperateif
powerlinesmaybepresent;callyourlocalutilitycompany.
2.Cutting/dismembermenthazardoftheleg,trencher—keep
bystandersaway;donotoperatethetrencherchainwhile
transportingthemachine.
6.Warning—stayawayfrommovingparts;waitforallmoving
partstostop.
3.Explosionhazard,fueling—shutofftheengineandextinguish
allameswhenfueling.
7.Warning—lowertheboom,engagetheparkingbrake,shutoff
theengine,andremovethekeybeforeleavingthemachine.
4.Tipping/crushinghazard—lowertheboomwhenoperating
onslopes.
7
Decal138-7105isformodel22983only.
decal138-7105
138-7105
1.Engine—Shutoff
9.Trencherchain—Forward
2.Engine—Run
10.Off
3.Engine—Start11.ReadtheOperator’sManualforinformationonoperatingthe
machine—movethetrencher-controllevertothereference
bar;lowerthetrencherboom;pullthetractioncontrol
rearward.
4.Enginespeed12.Unlock
5.Choke—On
13.Lowertheboom.
6.Choke—Off
14.Lock
7.ReadtheOperator’sManualforinformationonstartingthe
engine—movethetrencher-controllevertotheOFFposition;
placethetractioncontrolintheNeutralposition;movethe
throttlelevertotheFastpositionandengagethechoke;turn
thekeytotheRunposition;disengagetheparkingbrake.
15.Raisetheboom.
8.Trencherchain—Reverse
8
Decal138-7106isformodel22984only
decal138-7106
138-7106
1.Engine—Shutoff
8.Trencherchain—Forward
2.Engine—Run
9.Off
3.Engine—Start10.ReadtheOperator’sManualforinformationonoperatingthe
machine—movethetrencher-controllevertothereference
bar;lowerthetrencherboom;pullthetractioncontrol
rearward.
4.Enginespeed11.Unlock
5.Attention—readtheOperator’sManualbeforeperforming
maintenance.
12.Lowertheboom.
6.ReadtheOperator’sManualforinformationonstartingthe
engine—movethetrencher-controllevertotheOFFposition;
placethetractioncontrolintheNeutralposition;movethe
throttlelevertotheFastposition;turnthekeytotheRun
position;disengagetheparkingbrake.
13.Lock
7.Trencherchain—Reverse14.Raisetheboom.
9
Setup
LooseParts
Usethechartbelowtoverifythatallpartshavebeenshipped.
ProcedureDescription
Qty.
Use
Boom(soldseparately)
1
1
Chain(soldseparately)
1
Installtheboomandchain.
2
Nopartsrequired
Checktheuidlevels.
3
Nopartsrequired
Chargethebattery.
1
InstallingtheBoomand
Chain
Partsneededforthisprocedure:
1
Boom(soldseparately)
1
Chain(soldseparately)
Procedure
Important:Thereareseveralboomandchainsize
congurationsavailable.RefertoyourAuthorized
ServiceDealertoobtaintheappropriateboomand
chaintomeetyourrequirements.
1.Parkthemachineonalevelsurfaceandengage
theparkingbrake.
2.Shutofftheengineandremovethekey.
3.Removethebolt,2saddlewashers,andnut
securingthespoilsaugerandremovetheauger
(Figure4).
Note:Savethefastenersforfutureuse.
g011470
Figure4
1.Spoilsauger
6.Adjustingbolt
2.Boom7.Jamnut
3.Bolt(2)
8.Armonthedrivehead
4.Doublewasher9.Drivesprocket
5.Nut(2)
4.Removethe2bolts,nuts,anddoublewashers
fromthesidesoftheboom(Figure4).
5.Loosentheadjustingboltandjamnut(Figure4).
6.Slidetheboomoverthearmonthedrivehead.
7.Installthe2bolts,nuts,anddoublewashers
removedinstep4throughtheboomandarm,
butdonottightenthem.
8.Ifthechainisnotconnected,connectthelinks
bypressingorhammeringtheclevispinsupplied
withthechainthroughthelinks.
Important:Toavoidbendingthechainlinks,
placeblocksunderandbetweenthelinks
whenhammeringtheclevispinthrough.
9.Securetheclevispinwiththecotterpinsupplied
withthechain.
10
10.Loopthediggingchainovertheaugerdriveshaft
andontothedrivesprocket,ensuringthatthe
diggingteethpointforwardontheupperspan.
11.Settheupperspanofthechainintoplaceon
thetrencherboom,thenwrapthechainaround
therollerattheendoftheboom.
12.Threadtheadjustmentboltintotheboomand
turnitinuntilthereis3.8to6.3cm(1-1/2to2-1/2
inches)ofslackinthechainonthebottomspan.
13.Threadthejamnutdowntheadjustingboltand
tightenitsecurelyagainsttheboom.
14.Torquethe2boltsandnutssecuringtheboom
to183to223N·m(135to165ft-lb).
15.Installthespoilsaugerusingthebolt,2saddle
washer,andnutthatyouremovedpreviously.
16.Torquetheboltandnutto101N·m(75ft-lb).
2
CheckingtheFluidLevels
NoPartsRequired
Procedure
Beforestartingtheengineforthersttime,check
theengine-oilandhydraulic-uidlevels.Refertothe
followingsectionsformoreinformation:
CheckingtheEngine-OilLevel(page30)
CheckingtheHydraulic-FluidLevel(page42)
3
ChargingtheBattery
NoPartsRequired
Procedure
Chargethebattery;refertoChargingtheBattery
(page36)formoreinformation.
11
ProductOverview
g251307
Figure5
1.Controlpanel
6.Boom
2.Engine7.Trencherhead
3.Chainguard8.Spoilsauger
4.Chain
9.Track
5.Diggingteeth
10.Reversesafetyplate
Controls
Becomefamiliarwithallthecontrols(Figure6)before
youstarttheengineandoperatethemachine.
ControlPanel
g251305
Figure6
1.Tractioncontrol6.Hourmeter
2.Boom-elevationlever
7.Chokelever—T oro
enginesonly
3.Boom-elevation-leverlock8.Throttlelever
4.Referencebar
9.Keyswitch
5.Trenchercontrollever
10.Malfunction-indicatorlight
(MIL)—Kohlerengines
only
Electronic-ControlUnit
Malfunction-IndicatorLight
KohlerMachinesOnly
Theelectronic-controlunit(ECU)continuously
monitorstheoperationoftheEFIsystem.
Ifaproblemorfaultwithinthesystemisdetected,the
malfunction-indicatorlight(MIL)isilluminated(Figure
6).
TheMIListheredlightlocatedintheconsolepanel.
WhentheMILilluminates,makeinitialtroubleshooting
checks.
Ifthesechecksdonotcorrecttheproblem,further
diagnosisandservicingbyanAuthorizedService
Dealerisnecessary.
KeySwitch
Thekeyswitch,usedtostartandshutofftheengine,
has3positions:OFF,RUN,andSTART.Referto
StartingtheEngine(page18).
ThrottleLever
Movethecontrolforwardtoincreasetheenginespeed
andrearwardtodecreasetheenginespeed.
ChokeLever
ToroEnginesOnly
Beforestartingacoldengine,movethechokelever
forward.Aftertheenginestarts,regulatethechoke
tokeeptheenginerunningsmoothly.Assoonas
possible,movethechokeleverallthewayrearward.
Note:Awarmenginerequireslittleornochoking.
HourMeter
Thehourmeterdisplaysthenumberofhoursof
operationthathavebeenloggedonthemachine.
ReferenceBar
Whendrivingthemachine,usethereferencebar
asahandleandaleveragepointforcontrollingthe
machine.Toensuresmooth,controlledoperation,
donottakebothhandsoffthereferencebarwhile
operatingthemachine.
12
TractionControls
Tomoveforward,movebothtractioncontrols
forward(Figure7).
g258529
Figure7
Tomoverearward,movebothtractioncontrols
rearward(Figure8).
Important:Whenreversing,lookbehindyou
forobstructionsandkeepyourhandsonthe
referencebar.
g258530
Figure8
Toturnright,movethelefttractioncontrolforward
(Figure9).
g258532
Figure9
Toturnleft,movetherighttractioncontrolforward
(Figure10).
g258531
Figure10
Tostopthemachine,releasethetractioncontrols.
Note:Thefartheryoumovethetractioncontrolin
anydirection,thefasterthemachinemovesinthat
direction.
Boom-ElevationLever
Tolowertheboom,slowlymovetheleverforward
(Figure11).
Toraisetheboom,slowlymovetheleverrearward
(Figure11).
g258811
Figure11
1.Raisetheboom2.Lowertheboom
13
Boom-ElevationLock
Theboom-elevationlocksecurestheboom-elevation
leversothatyoucannotpushitforward.Thishelps
toensurethatnooneaccidentallylowerstheboom
duringmaintenance.Securetheboomwiththelock
anytimeyouneedtostopthemachinewiththeboom
raised.
Tosetthelock,liftuponitsoitclearstheholeinthe
controlpanelandswingittotherightinfrontofthe
boomelevationlever,pushingitdownintothelocked
position(Figure12).
g251304
Figure12
1.Boom-elevationlever2.Boom-elevationlock
TrencherControlLever
Todigwiththetrencher,rotatetheleverrearwardand
pullitdowntothereferencebar(Figure13,number1).
Toreversethetrencherhead,rotatethelever
rearward,thenmoveitleftintotheupperslot(Figure
13,number2).
Ifyoureleasethelever,itwillautomaticallyreturnto
theneutralposition(Figure13,number3),stopping
thechain.
g261593
Figure13
1.Forward3.Neutral
2.Reverse
Parking-BrakeLever
Toengagetheparkingbrake,pullthebrakelever
rearwardandup(Figure14).
Todisengagetheparkingbrake,pullthelever
rearwardandthendown(Figure14).
g251303
Figure14
1.Parkingbrakeengaged
2.Parkingbrakedisengaged
Specications
Note:Specicationsanddesignaresubjectto
changewithoutnotice.
Width
86cm(33.8inches)
Lengthwith70cm(24
inch)boom
210cm(83inches)
Lengthwith91.4cm(36
inch)boom
235cm(93inches)
Lengthwith122cm(48
inch)boom
283cm(111inches)
Height
117cm(46inches)
Weightfor22983501kg(1,104lb)
Weightfor22984505kg(1,114lb)
*A91.4cm(36inch)boomandchainaddsabout27kg(60lb)tothelisted
weight.
Attachments/Accessories
AselectionofT oroapprovedattachmentsand
accessoriesisavailableforusewiththemachine
toenhanceandexpanditscapabilities.Contact
yourAuthorizedServiceDealerorauthorizedT oro
distributororgotowww.T oro.comforalistofall
approvedattachmentsandaccessories.
Toensureoptimumperformanceandcontinuedsafety
certicationofthemachine,useonlygenuineToro
replacementpartsandaccessories.Replacement
partsandaccessoriesmadebyothermanufacturers
couldbedangerous,andsuchusecouldvoidthe
productwarranty.
14
Operation
Note:Determinetheleftandrightsidesofthe
machinefromthenormaloperatingposition.
Important:Beforeoperatingthemachine,check
theuidlevels,andremovedebrisfromthe
machine.Ensurethattheareaisclearofpeople
anddebris.Youshouldalsoknowandhave
markedthelocationsofallutilitylines.
BeforeOperation
BeforeOperationSafety
GeneralSafety
Havethepropertyorworkareamarkedforburied
linesandotherobjects,anddonotdiginmarked
areas;notethelocationofunmarkedobjectsand
structures,suchasundergroundstoragetanks,
wells,andsepticsystems.
Inspecttheareawhereyouwillusetheequipment.
Evaluatetheterraintodeterminewhat
accessoriesandattachmentsyouneedto
properlyandsafelyperformthejob.
Removealldebris.
Ensurethattheareaisclearofbystanders
beforeoperatingthemachine.
Stopthemachineifanyoneentersthearea.
Becomefamiliarwiththesafeoperationofthe
equipment,operatorcontrols,andsafetydecals.
Theownerisresponsiblefortrainingall
operatorsandmechanics.
Neverallowchildrenoruntrainedpeople
tooperateorservicethemachine.Local
regulationsmayrestricttheageorrequire
certiedtrainingoftheoperator.
Knowhowtostopthemachineandshutoffthe
enginequickly.
Checkthattheoperator'spresencecontrols,
safetyswitches,andshieldsareattached
andfunctioningproperly.Donotoperatethe
machineunlesstheyarefunctioningproperly.
Locatethepinch-pointareasmarkedonthe
machineandattachments;keepyourhands
andfeetawayfromtheseareas.
Stopthemachine,shutofftheengine,and
removethekeybeforeleavingtheoperating
position.
FuelSafety
Useextremecarewhenhandlingfuel.Itis
ammableanditsvaporsareexplosive.
Extinguishallcigarettes,cigars,pipes,andother
sourcesofignition.
Useonlyanapprovedfuelcontainer.
Donotremovethefuelcaporllthefueltank
whiletheengineisrunningorhot.
Donotaddordrainfuelinanenclosedspace.
Donotstorethemachineorfuelcontainerwhere
thereisanopename,spark,orpilotlight,such
asonawaterheaterorotherappliance.
Ifyouspillfuel,donotattempttostarttheengine;
avoidcreatinganysourceofignitionuntilthefuel
vaporshavedissipated.
Donotllcontainersinsideavehicleoronatruck
ortrailerbedwithaplasticliner.Alwaysplace
containersontheground,awayfromyourvehicle
beforelling.
Removetheequipmentfromthetruckortrailer
andrefuelitwhileitisontheground.Ifthisisnot
possible,thenrefuelfromaportablecontainer
ratherthanafuel-dispensernozzle.
Keepthefuel-dispensernozzleincontactwith
therimofthefueltankorcontaineropeningat
alltimesuntilfuelingiscomplete.Donotusea
nozzlelock-opendevice.
AddingFuel
RecommendedFuel
Forbestresults,useonlyclean,fresh(lessthan
30daysold),unleadedgasolinewithanoctane
ratingof87orhigher((R+M)/2ratingmethod).
Ethanol:Gasolinewithupto10%ethanol
(gasohol)or15%MTBE(methyltertiarybutyl
ether)byvolumeisacceptable.Ethanoland
MTBEarenotthesame.Gasolinewith15%
ethanol(E15)byvolumeisnotapprovedforuse.
Neverusegasolinethatcontainsmorethan
10%ethanolbyvolume,suchasE15(contains
15%ethanol),E20(contains20%ethanol),orE85
(containsupto85%ethanol).Usingunapproved
gasolinemaycauseperformanceproblemsand/or
enginedamagewhichmaynotbecoveredunder
warranty.
Donotusegasolinecontainingmethanol.
Donotstorefueleitherinthefueltankorfuel
containersoverthewinterunlessyouuseafuel
stabilizer.
Donotaddoiltogasoline.
15
UsingStabilizer/Conditioner
Usefuelstabilizer/conditionerinthemachinetokeep
thefuelfreshlongerwhenusedasdirectedbythe
fuel-stabilizermanufacturer.
Important:Donotusefueladditivescontaining
methanolorethanol.
Addtheamountoffuelstabilizer/conditionertofresh
fuelasdirectedbythefuel-stabilizermanufacturer.
FillingtheFuelTank
1.Parkthemachineonalevelsurface,engagethe
parkingbrake(ifequipped),andlowertheboom.
2.Shutofftheengine,removethekey,andallow
theenginetocool.
3.Cleanaroundthefuel-tankcapandremoveit
(Figure15).
g251914
Figure15
1.Fuel-tankcap
4.Addfueltothetankuntilthelevelis6to13mm
(1/4to1/2inch)belowthebottomoftheller
neck.
Important:Thisspaceinthetankallows
fueltoexpand.Donotllthefueltank
completelyfull.
5.Installthefuel-tankcapsecurely,turningituntil
itclicks.
6.Wipeupanyspilledfuel.
PerformingDaily
Maintenance
Beforestartingthemachineeachday,performthe
EachUse/DailyprocedureslistedinMaintenance
(page21).
DuringOperation
DuringOperationSafety
GeneralSafety
Keepyourhandsandfeetawayfrommoving
teeth,chain,auger,orotherparts.
Keepbystandersandpetsawayfromthe
machineandnevercarrypassengers.
Wearappropriateclothingincludingeye
protection,longpants,substantialslip-resistant
footwear,andhearingprotection.
Tiebacklonghairanddonotwearloose
clothingorloosejewelry.
Stopdiggingifanyoneentersthearea.
Themachinemovesinreverseduring
operation—beawareofyoursurroundingswhile
usingthemachine.
Operatethemachineonlyinareaswhere
thereissufcientclearanceforyoutosafely
maneuver.
Beawareofobstaclesincloseproximityto
you.Failuretomaintainadequatedistance
fromtrees,walls,andotherbarriersmay
resultininjuryasthemachinebacksup
duringoperationifyouarenotattentivetothe
surroundings.
Lookbehindanddownbeforebackingupto
ensurethatthepathisclear.
Useyourfullattentionwhileoperatingthe
machine.Donotengageinanyactivitythat
causesdistractions;otherwise,injuryorproperty
damagemayoccur.
Neverjerkthecontrols;useasteadymotion.
Theowner/usercanpreventandisresponsible
foraccidentsthatmaycausepersonalinjuryor
propertydamage.
Donotoperatethemachinewhenyouaretired,ill,
orundertheinuenceofalcoholordrugs.
Operatethemachineonlyingoodlight.
Ensurethatallthedrivesareinneutralandengage
theparkingbrakebeforestartingtheengine.Start
theengineonlyfromtheoperator'sposition.
Usecarewhenapproachingblindcorners,shrubs,
trees,orotherobjectsthatmayobscurevision.
Stopthediggingchainwhenyouarenotdigging.
Stopthemachine,shutofftheengine,remove
thekey,andinspectthemachineifyoustrike
anobject.Makeanynecessaryrepairsbefore
resumingoperation.
Neverrunanengineinanenclosedarea.
16
Neverleavearunningmachineunattended.
Beforeleavingtheoperatingposition,dothe
following:
Parkthemachineonalevelsurface.
Lowertheboomtotheground
Engagetheparkingbrake.
Shutofftheengineandremovethekey.
Checkforoverheadclearance(i.e.,electrical
wires,branches,anddoorways)beforedriving
underanyobjectsanddonotcontactthem.
Donotoperatethemachinewhenthereistherisk
oflightning.
UseonlyToro-approvedattachmentsand
accessories.
SlopeOperation
Operateupanddownslopeswiththefrontofthe
machineuphill.
Raisingtheboomonaslopeaffectsthestability
ofthemachine.Keeptheboominthelowered
positionwhenonslopes.
Slopesareamajorfactorrelatedtoloss-of-control
andtip-overaccidents,whichcanresultinsevere
injuryordeath.operatingthemachineonany
sloperequiresextracaution.
Establishyourownproceduresandrulesfor
operatingonslopes.Theseproceduresmust
includesurveyingthesitetodeterminewhich
slopesaresafeformachineoperation.Always
usecommonsenseandgoodjudgmentwhen
performingthissurvey.
Slowdownanduseextracareonhillsides.Ground
conditionscanaffectthestabilityofthemachine.
Avoidstartingorstoppingthemachineonaslope.
Avoidturningonslopes.Ifyoumustturn,turn
slowlyandkeeptheheavyendofthemachine
uphill.
Keepallmovementsonslopesslowandgradual.
Donotmakesuddenchangesinspeedor
direction.
Ifyoufeeluneasyoperatingthemachineona
slope,donotdoit.
Watchforholes,ruts,orbumps,asuneventerrain
couldoverturnthemachine.T allgrasscanhide
obstacles.
Usecautionwhenoperatingonwetsurfaces.
Reducedtractioncouldcausesliding.
Evaluatetheareatoensurethatthegroundis
stableenoughtosupportthemachine.
Usecautionwhenoperatingthemachinenearthe
following:
Drop-offs
Ditches
Embankments
Bodiesofwater
Themachinecouldsuddenlyrolloverifatrack
goesovertheedgeortheedgecavesin.Maintain
asafedistancebetweenthemachineandany
hazard.
Ifthemachinestartstotip,letgoofthecontrols
andstepawayfromthemachine.
Donotremoveoraddattachmentsonaslope.
Donotparkthemachineonahillsideorslope.
17
StartingtheEngine
1.Movethethrottlelevermidwaybetweenthe
SLOWandFASTpositions(Figure16).
g251917
Figure16
1.Chokelever(Toroengines
only)
3.Key
2.Throttlelever
2.ForT oroengines,dothefollowing:
A.MovethechokelevertotheONposition
(Figure16).
Note:Awarmorhotenginemaynot
requirechoking.
B.TurnthekeytotheONposition(Figure16).
Whentheenginestarts,releasethekey.
C.GraduallymovethechokelevertotheOFF
position(Figure16).Iftheenginestallsor
hesitates,engagethechokeagainuntilthe
enginewarmsup.
3.ForKohlerengines,turnthekeytotheON
position(Figure16).Whentheenginestarts,
releasethekey.
4.Movethethrottlelevertothedesiredsetting
(Figure16).
Important:Runningtheengineathigh
speedswhenthehydraulicsystemiscold
(i.e.,whentheairtemperatureisator
belowfreezing)coulddamagethehydraulic
system.Whenstartingtheengineincold
conditions,allowittoruninthemiddle
throttlepositionfor2to5minutesbefore
movingthethrottletotheFASTposition.
Note:Iftheoutdoortemperatureisbelow
freezing,storethemachineinagaragetokeep
itwarmerandaidinstarting.
DrivingtheMachine
Usethetractioncontrolstomovethemachine.The
fartheryoumovethetractioncontrolsinanydirection,
thefasterthemachinemovesinthatdirection.
Releasethetractioncontrolstostopthemachine.
CAUTION
Whenreversing,youmaybackintostationary
objectsoroverbystandersandcauseserious
personalinjuryordeath.
Lookbehindyouforobstructionsor
bystandersandkeepyourhandsonthe
referencebar.
Thethrottlecontrolregulatestheenginespeedas
measuredinrpm(revolutionsperminute).Placethe
throttleleverintheFASTpositionforbestperformance.
Youcan,however,usethethrottlepositiontooperate
atslowerspeeds.
ShuttingofftheEngine
1.Parkthemachineonalevelsurface,engage
theparkingbrake(ifapplicable),andlowerthe
boom.
2.MovethethrottlelevertotheSLOWposition
(Figure16).
3.Iftheenginehasbeenworkinghardorishot,let
itidleforaminutebeforeturningthekeyswitch
totheOFFposition.
Note:Thishelpstocooltheenginebeforeyou
shutitoff.Inanemergency,youcanshutoff
theengineimmediately.
4.TurnthekeyswitchtotheOFFpositionand
removethekey.
CAUTION
Achildoruntrainedbystandercould
attempttooperatethemachineandbe
injured.
Removethekeyfromtheswitchwhen
leavingthemachine,evenifjustforafew
seconds.
18
DiggingaTrench
1.Starttheengine,raisetheboom,movethe
throttlelevertotheFASTposition,andmovethe
machineovertheareatobetrenched.
Important:Allowthemachinetowarmup
forseveralminutesbeforedigging.
2.Pullthetrenchercontrollevertothereference
bartoengagethetrencher.
3.Slowlylowertheboomandchainintothe
ground.
Note:Toachievethemaximumdepth,youmay
needtolowertheboomasfarintotheground
asitcangowiththechainrunning.Then,stop
thechainandloweritfully.Startthechainagain
andresumeoperation.
4.Oncethetrencherboomisinthegroundata45°
to60°angle,slowlymovethemachinerearward
toextendthetrench.
Note:Ifyoumovetoofast,thetrencherwillstall.
Ifitstalls,raiseitslightly,slowlydriveforward,or
reversethechaindirectionmomentarily.
5.Whennished,raisetheboomoutofthetrench,
thenstopthetrencher.
OperatingTips
Cleantheareaoftrash,branches,androcks
beforetrenchingtopreventdamagingthemachine.
Alwaysbegintrenchingwiththeslowestground
speedpossible.Increasespeedifconditions
permit.Ifthechainspeedslowsdown,reduce
thegroundspeedtokeepthechainmovingatits
fastestrate.Donotspinthetrackswhiletrenching.
Alwaysusefullthrottle(maximumenginespeed)
whentrenching.
Alwaystrenchbackward(i.e.,inreverse).
Trenchwiththechainata45°to60°angleforbest
results.
Youwillbeabletodigatrenchfasterbycontrolling
thedepthwithperiodicadjustmentsoftheboom.
Ifthetrencherbindsinthesoil,reversethechain
direction.Oncethechainisloose,changechain
directionsandcontinuetrenching.
Ifyouneedthenishedtrenchtobecleaner
thanwhatispossiblewiththetrencher,you
canpurchaseacrumberfromyourdealer.The
crumbermountsontothetrencherheadand
scrapesthetrenchcleanasyoudig.
Toimprovethequalityoftrencheslessthan61cm
(24inches)deep,usea61cm(24inch)boom.
Usethecorrectchainforthegroundconditions,as
listedinthefollowingtable:
SoilTypeRecommendedChainType
SandySoilchain(congurewith
extrateethforafasterdigging
speed;refertoyourAuthorized
ServiceDealer)
SandyLoam/Loam/Loamy
Clay
Soilchain
Wet,stickyclay
Soilchain
Hardsoils:dryclayand
compactedsoils
Combinationchain
Rockysoil/gravel
Rockchain
19
AfterOperation
AfterOperationSafety
Parkthemachineonalevelsurface,disengage
thetrencherhydraulics,lowertheboom,engage
theparkingbrake,shutofftheengine,andremove
thekey.Waitforallmovementtostopandallow
themachinetocoolbeforeadjusting,servicing,
cleaning,orstoringit.
Cleandebrisfromtheattachments,drives,
mufers,andenginetohelppreventres.Clean
upoilorfuelspills.
Keepallpartsingoodworkingconditionandall
hardwaretightened.
Usecarewhenloadingorunloadingthemachine
intoatrailerortruck.
SecuringtheMachinefor
Transport
Important:Donotoperateordrivethemachine
onroadways.Usecarewhenloadingorunloading
themachineintoatrailerortruck.
1.Parkthemachineonalevelsurface,engage
theparkingbrake(ifapplicable),andlowerthe
boom.
2.Shutofftheengineandremovethekey.
3.Securethemachinetoatrailerwithchainsor
strapsusingthetie-down/liftloopsatthefront
andrearofthemachine(Figure17andFigure
18).Refertoyourlocalordinancesfortrailerand
tie-downrequirements.
g251915
Figure17
1.Fronttie-downloop
g251916
Figure18
1.Reartie-downloops
LiftingtheMachine
Youcanliftthemachineusingthetie-down/liftloops
asliftpoints(Figure17andFigure18).
20
  • Page 1 1
  • Page 2 2
  • Page 3 3
  • Page 4 4
  • Page 5 5
  • Page 6 6
  • Page 7 7
  • Page 8 8
  • Page 9 9
  • Page 10 10
  • Page 11 11
  • Page 12 12
  • Page 13 13
  • Page 14 14
  • Page 15 15
  • Page 16 16
  • Page 17 17
  • Page 18 18
  • Page 19 19
  • Page 20 20
  • Page 21 21
  • Page 22 22
  • Page 23 23
  • Page 24 24
  • Page 25 25
  • Page 26 26
  • Page 27 27
  • Page 28 28
  • Page 29 29
  • Page 30 30
  • Page 31 31
  • Page 32 32
  • Page 33 33
  • Page 34 34
  • Page 35 35
  • Page 36 36
  • Page 37 37
  • Page 38 38
  • Page 39 39
  • Page 40 40
  • Page 41 41
  • Page 42 42
  • Page 43 43
  • Page 44 44
  • Page 45 45
  • Page 46 46
  • Page 47 47
  • Page 48 48
  • Page 49 49
  • Page 50 50
  • Page 51 51
  • Page 52 52

Toro TRX-250 Trencher User manual

Type
User manual
This manual is also suitable for

Ask a question and I''ll find the answer in the document

Finding information in a document is now easier with AI