Page is loading ...

305-018110 12/17
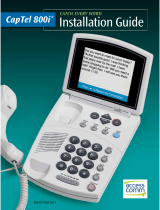
CapTel
®
840i
How-to Guide

Physical Dimensions
Size: 9" × 6.5" × 7.5"
Weight: 2 lb. 10 oz.
Power
AC Adapter: 5.9-6.0V, 2Amps
(barrel is negative)
Adapter is UL listed.
Dial Pad
Large Keys: 0.75" × 0.70"
Display
7" Backlit, graphical LCD
color display
840 × 480 pixels
Function Buttons
3 Programmable Speed Dial
1 Customer Service Speed Dial
Redial
Flash
Mute
Tone
Caption
Volume
Up/Down/Yes/No
Controls
Conversation: Amplification
when Captions on: 0-40 dB gain
when Captions off: 0-18 dB gain
Tone
Ringer: off, low, medium, high
(0-87 dB at 1 meter)
Indicator Lights
Mute
Volume Levels (1 through 12)
Captions On/Off
Handset
Type: HAC (Hearing Aid
Compatible)
Dialing
Phone Book (97 entries)
Speed Dial (3 entries)
Redial (Last 10 dialed numbers)
Captions
4 Caption font sizes
• Small 0.15"
(14 lines of text)
• Medium 0.20"
(10 lines of text)
• Large 0.25"
(8 lines of text)
• Extra Large 0.33"
(6 lines of text)
Adjustable colors for
background and captions font
Connections
Telephone line: requires RJ11
connection (can be standard
analog line, VOIP, DSL with
filter, Fiber Optic. Does not
support digital PBX system
unless analog port available).
3.5 mm Neckloop/Headset
2.5 mm Headset with microphone
Ethernet or WiFi wireless network
AC power
Approvals
FCC approved
ACTA Product-Labeling Number:
US:D8KTE00BCAPTEL840
REN: 0.0B
Conversation Memory
Up to 50 conversations (or
62,000 characters) saved in
memory
Caller ID History
Up to 50 entries
Answering Machine
63 Recordable messages
(2 minute max per message)
Recordable greeting
Selectable number of rings
before answer
Ability to caption messages left on
an external answering machine
Remote access to Answering
Machine messages from another
phone
CapTel 840i Specifications
Action Needed – Registration
The Federal Communications Commission (FCC) requires that all CapTel 840i
users register. As you set up your new phone, please follow the registration
directions on the screen. The Captions feature cannot be activated until
registration is complete. For directions, please see Registering Your CapTel
phone on page 22.
Need help registering? Call 1-888-269-7477
NOTE: Your CapTel phone will periodically connect to the Captioning Service through the Internet
and/or phone line connection to report its status and check for software updates.

Customer Service: 888-269-7477 CONGRATULATIONS • 1
Congratulations on
Choosing CapTel!
Welcome to the Captioned Telephone – CapTel! With CapTel, you can see
captions of everything people say over the phone, letting you enjoy calls
with confi dence.
Please take a moment to read this guide and learn:
• How to start using your CapTel phone
• How your CapTel phone works
• How to get help when you have questions
We want the CapTel phone to be enjoyable and convenient for you.
As you use your new phone, we welcome your questions and comments.
If we can help, please call!
Thanks again for choosing CapTel.
Sincerely,
CapTel Customer Service
1-888-269-7477
www.CapTel.com

Overview – How CapTel Works ................................. 4
Section 1: Getting Started ........................................ 5
What is in the box ............................................................. 5
Overview of CapTel 840i phone ......................................... 6
Using a headset or neckloop (optional) ........................... 11
Setting up your CapTel 840i ............................................. 12
Registering your CapTel phone ........................................ 22
Getting help .................................................................... 24
Section 2: Making and Answering Calls ................. 25
Dialing a phone number directly .................................... 26
Calling using the Speed Dial buttons ............................... 27
Calling a number in the Phone Book .............................. 28
Answering an incoming call ............................................ 29
Adjusting the volume ...................................................... 30
Adjusting the sound – TONE ............................................ 31
Knowing what sounds are on the line ............................. 32
Section 3: Viewing Captions .................................. 33
Turning captions on/off during a call .............................. 34
Viewing corrections ......................................................... 34
Reviewing captions during a call ..................................... 35
Reviewing captions after hanging up .............................. 36
Saving conversations ....................................................... 38
Erasing all conversations ................................................. 40
Changing the caption font size ........................................ 41
Setting the color of the captions ..................................... 43
Setting how captions scroll across the Display Screen ..... 45
Adjusting the brightness of the Display Screen ............... 47
Section 4: Call History ........................................... 49
About Caller ID ................................................................ 49
Using Call History to see recent calls ............................... 50
Adding a Call History entry to the Phone Book ............... 52
Clearing all Caller ID entries ............................................ 54
2 • TABLE OF CONTENTS Customer Service: 888-269-7477
TABLE OF CONTENTS

Customer Service: 888-269-7477 TABLE OF CONTENTS • 3
Section 5: Using the Answering Machine ............... 55
Turning Answering Machine on/off ................................. 56
Playing your Answering Machine messages ..................... 57
Clearing all messages ...................................................... 60
Recording a personal greeting message .......................... 61
Setting the number of rings before answering ................ 63
Making incoming messages audible/silent ...................... 65
Remote access to Answering Machine messages ............. 67
To access your Answering Machine messages remotely
.... 69
Captioning external Answering Machine messages ......... 70
Section 6: Using the Phone Book ........................... 72
Adding a new contact to your Phone Book ..................... 73
Dialing a phone number from the Phone Book .............. 75
Editing an existing contact in the Phone Book ................ 76
Removing a contact from your Phone Book .................... 78
Section 7: Using Speed Dial Buttons ...................... 79
About the Speed Dial buttons ......................................... 79
Saving phone numbers in the Speed Dial buttons .......... 80
Editing phone numbers in the Speed Dial buttons ......... 81
Dialing with the Speed Dial buttons ............................... 82
Section 8: Settings ................................................. 83
Setting the Captions button to on/off.............................. 84
Turning Spanish captions on/off ..................................... 86
Adjusting the volume of the Ringer................................. 88
Setting the pitch of the Ringer ........................................ 89
Turning keypad lights on/off ........................................... 90
Saving the captions volume ............................................ 92
Setting your CapTel phone for Tone/Pulse dialing ........... 94
Knowing when the phone line is already in use ............. 95
Changing the network settings ........................................ 97
Removing saved networks ............................................... 99
Setting the Time and Date ............................................ 100
Using Call Waiting ......................................................... 102
Dialing 911 with your CapTel 840i ................................. 103
Updating your CapTel phone ......................................... 104
Problem Solving................................................... 105
Index .................................................................... 108

The CapTel 840i connects to both your telephone service and to
your Internet service. Every time you make a telephone call, the
phone uses the Internet connection to access a free Captioning
Service. An operator at the Captioning Service uses speech
recognition technology to generate captions of everything your
caller says, and sends the captions back to your CapTel 840i phone.
You can enjoy conversations over the phone with the added help
of written captions in case you miss anything.
NOTE: The CapTel 840i phone does not generate captions of the
phone call on its own. The phone works with the Captioning Service
(over the Internet) to display captions during your calls.
4 • HOW CAPTEL WORKS Customer Service: 888-269-7477
Captioning Service
Captions
show you
everything
the caller
says!
You
Caller
(captions)
(voice)
Telephone
Connection
Internet
Connection
Captions are provided by a free Captioning Service that connects
automatically (over the Internet) to every telephone call.
(CapTel CA#1234) (F) Hi mom
how are you I am fine the
weather is so nice outside and I
amgetting the garden ready
what have you been up to oh
that is nice did you have fun
P
ress NO to exit
OVERVIEW
How CapTel Works

Customer Service: 888-269-7477 GETTING STARTED • 5
This section explains how to start using your
new CapTel 840i phone.
TOPICS:
What is in the Box
Overview of CapTel 840i Phone
Using a Headset or Neckloop (Optional)
Setting up your CapTel 840i
Registering your CapTel 840i Phone
What is in the Box?
Your CapTel 840i includes the following parts:
• CapTel 840i Phone
• Telephone Cord
• Power Adapter –
to plug into a
wall outlet
Important! Use only the power adapter that
came in the box with your CapTel 840i
• Ethernet Cable – to connect
to Internet service
(not necessary for
WiFi installations)
• CapTel Setup
Guide and CapTel
How-to Guide
SECTION 1
Getting Started

Overview of CapTel 840i Phone
1
2
3
4
5
6
7
8
9
10
11
12
13
14
6 • GETTING STARTED Customer Service: 888-269-7477

Customer Service: 888-269-7477 GETTING STARTED • 7
1. Display Screen
Shows captions, Caller ID, Answering Machine messages, Phone
Book entries and more.
2. Information Bar
Gives you instructions and helpful tips.
3. YES Button
Allows you to select items that are highlighted in the Options list,
and respond “Yes” to questions or commands on the display screen.
4. UP Arrow Button
Allows you to move up through items in the Options list and move
through entries in your Phone Book, Answering Machine messages,
or Call History. Also lets you go back during a call to review
captions that have already scrolled off the display screen.
5. NO (Exit) Button
Allows you to respond “No” to questions or commands on the
display screen and to Exit out of the Options list.
6. DOWN Arrow Button
Allows you to move down through items in the Options list and
move through entries in your Phone Book, Answering Machine
messages, or Call History. Also lets you scroll down through
captions when reviewing calls.
TIP: If you hold down the UP arrow button, it will continue scrolling up
automatically until you release the button.
TIP: If you hold down the DOWN arrow button, it will continue scrolling down
automatically until you release the button.

8 • GETTING STARTED Customer Service: 888-269-7477
7. CUSTOMER SERVICE Button
Our helpful customer service team is happy to help you set up and
use your CapTel 840i telephone – we’re only a button push away.
Pressing the CUST SERV button will automatically dial the CapTel
help line. In an office, you may need to dial 9 first.
NOTE: Help is available 24 hours a day, 7 days a week (closed on major
holidays).
Help materials are also available online at www.CapTel.com
8. SPEED DIAL Buttons
You can quickly dial up to three frequently-called phone numbers,
just by pressing a speed dial button.
9. REDIAL Button
Lets you dial up to 10 most-recently called phone numbers. Lift the
handset and press REDIAL button to dial the last phone number
called. Leave the handset down and press the REDIAL button to
review/dial up to the last 10 numbers called.
10. FLASH Button
Some telephone service features like Call Waiting require a “hook
flash.” The hook flash is a very brief interruption of the connection
like hanging up the phone for one second. There is a brief click or
silence on the line.
11. MUTE Button
Silences the sound from your end of the conversation. When the
MUTE button is pressed (red light around the button is ON), the
person on the other end of your call will not be able to hear you.
You will still be able to hear the caller and get captions of
everything they say. To turn the Mute feature off, press the MUTE
button again (red light around the button is OFF).

Customer Service: 888-269-7477 GETTING STARTED • 9
12. TONE Button
Allows you to adjust the sound settings of the call, letting you
enhance LOW, MED, or HIGH frequency tones to find the range that
you hear best.
13. CAPTIONS Button
Whenever the red light is on around the CAPTIONS button, your
calls will automatically be connected over the Internet to the free
Captioning Service, and you will get captions during the call.
Captions can be turned on or off at any time. To turn the captions
off, just press the CAPTIONS button to turn the red light off.
14. VOLUME Bar
Lets you adjust the volume to a comfortable level, up to a 40 dB
gain from min/max for captioned calls. To increase the volume,
press the
right side of the VOLUME bar. To decrease the volume,
press the
left side of the VOLUME bar. There are 12 volume
levels. Watch the light panel above the VOLUME bar to know what
the current volume setting is.
To prevent your CapTel phone from returning to a mid-range volume setting
whenever
the phone is hung up, see “Saving the Captions Volume” on page 92.
WARNING: The maximum volume setting on captioned calls is very loud.
People who do not need amplification should not use the phone at the highest
volume setting. The volume level automatically returns to a mid-range setting
whenever the phone is hung up.
NOTE: Per FCC requirements, your CapTel handset includes a reminder that no
one other than the registered CapTel user should use your phone with the
Captions feature turned ON. As long as the CAPTIONS button is turned OFF,
others are welcome to use your CapTel phone.

10 • GETTING STARTED Customer Service: 888-269-7477
Back (top) edge view of CapTel 840i
1 2 3 4
Features
1. Telephone Line
Plug the telephone cord here (RJ11 jack). Phone cord can be
for analog, VOIP, fiber optic, Digital Cable service, or analog
with DSL service. CapTel 840i should not be used with a PBX
system unless an analog port is available, otherwise it will
cause damage to the phone or PBX system.
2. Ethernet Jack
Plug the Ethernet cable (provided) here to connect to your
Internet Service.
NOTE: If you are connecting to the Internet using a WiFi
network, you do not need to connect the Ethernet cable.
3. Ethernet Status Light
Lets you know if your Ethernet cable is connected to the
Internet and whether activity is on the line.
NOTE: The LNK/ACT indicator does not light up when using a
WiFi connection.
4. Power Jack
Plug the AC power adapter here. Use only the AC power
adapter that came with your CapTel phone.

Customer Service: 888-269-7477 GETTING STARTED • 11
Using a Headset or Neckloop (Optional)
Audio Jacks (2.5 mm/3.5 mm)
You can use earphones, a headset, neckloop, or other type of listening device
with the CapTel 840i to maximize the audio quality or to enjoy your new phone
hands-free. Simply plug the headset/assistive device into the appropriate
2.5 mm or 3.5 mm audio jack located on the right edge of the CapTel 840i
phone. Open the protective cover to reach the jacks.
2.5 mm jack –
incoming/outgoing audio
3.5 mm jack –
incoming audio only

12 • GETTING STARTED Customer Service: 888-269-7477
Setting up Your CapTel 840i
For complete instructions, please see the Setup Guide.
Requirements
1. High-speed Internet access using a DSL or Digital Cable modem (the CapTel
840i connects either via a WiFi network or with an Ethernet cable).
Depending on your Internet setup, a router may also be required to allow
you to connect more than one device to your Internet service.
2. Telephone service (can be analog line, DSL with filter, VOIP, fiber optic, or
Digital Cable phone service). CapTel does not work with digital Private Branch
Exchange (PBX) systems found in some office environments, residential facilities,
and hotels, unless an analog port is available. Using CapTel with a PBX system
without an analog port may damage the phone and the PBX system.
3. Standard electrical power (AC adapter plugs into standard wall outlet).
Select a location
Set up the CapTel 840i in a place where:
• There is a high-speed Internet (Ethernet) jack or your wireless
router is located nearby.
• There is a telephone jack nearby (can be analog line, DSL with
filter, VOIP, fiber optic, or Digital Cable phone service).
• There is an electrical outlet nearby.
• The surface it will be set on, or mounted to, is stable and secure.
• The area is protected from excessive heat or humidity.
NOTE: The outlets for power, the phone line, and the Ethernet connection
should all be located nearby, as each cord needs to plug into your CapTel 840i.
If your Internet access is located in a different room than where you plan to use
the CapTel 840i, a WiFi setup is recommended. Please see the Setup Guide or
contact CapTel Customer Service for help setting everything up.

Customer Service: 888-269-7477 GETTING STARTED • 13
Connect to a power outlet
1. Plug the power adapter cord into the socket labeled “Power”
located on the back (top) edge of the CapTel 840i.
2. Plug the power adapter into a wall outlet or power strip.
The CapTel display screen will light up to let you know power
is connected.
TIP:
Plug your power adapter into an electrical power surge protector to protect
your CapTel 840i from damage caused by unspecified electrical voltage or
damage caused by lightning.
Connect to your telephone service
1. Plug one end of the telephone cord into the telephone jack
labeled “Line 1” located on the back (top) edge of the CapTel 840i.
Use the telephone cord included with your new CapTel 840i phone.
2. Plug the other end of the telephone cord into a telephone
wall outlet.
NOTE: If you need to connect more than one device to the same telephone line,
please see “Sharing a Telephone Line Jack” on page 107.
WARNING: Be sure to use only
the power adapter that came
with your CapTel 840i. Using
any other power adapter may
damage your phone.
Once you plug in the power, your CapTel phone will automatically check
that everything is connected and working properly. You can follow along
on the CapTel display screen, which will tell you what is happening during
the setup process.

14 • GETTING STARTED Customer Service: 888-269-7477
Select a Language
You can set the CapTel 840i for either English or Spanish language. The
CapTel menu options and conversation captions will appear in whichever
language you select.
1. When the CapTel screen lights
up, select which language you
would like. Press the UP arrow
or DOWN arrow until the
language you want is
highlighted.
2. Press the
YES
button to accept.
NOTE: You can change the Language setting at a later time. Please see
“Turning Spanish Captions On/Off” on page 86.
Please Select Language
English
Español
Press YES to Accept
English
English

Customer Service: 888-269-7477 GETTING STARTED • 15
Connect to your Internet service
There are two ways to connect to your Internet service:
Option 1: Wired – use an Ethernet cable to connect to the Internet.
Please follow instructions for “Wired Installations” below.
Option 2: Wireless – use your home/office WiFi network to reach the
Internet. Please follow instructions for “Wireless/WiFi Installations”
on page 17.
For Wired Installations
1. Plug one end of the Ethernet cable into the jack labeled “Ethernet”.
Located on the back (top) edge of the CapTel 840i. Be sure to use the
Ethernet cable that came with your new CapTel 840i phone.
2. Connect the other end of the Ethernet cable into the jack you use to access
your Internet service.
Depending on how your Internet service is set up for your home/office,
you could be plugging into any of the following:
• An available Ethernet jack on a digital cable modem
• An available Ethernet jack on a DSL modem
• An available Ethernet jack on a router in your home
• An available Ethernet jack in a wall outlet
NOTE: When connected properly, LNK/ACT
indicator light will glow. The LNK/ACT indicator
light is located next to the Ethernet jack on
the back (top) edge of the CapTel 840i.
Use the examples on the following pages to match your setting with the
correct installation method.

16 • GETTING STARTED Customer Service: 888-269-7477
Example 2: If there is not an available Ethernet jack in your DSL or Cable
Modem, you will need a router or switch that lets you connect more than
one device to the Internet. Contact your Internet Service Provider to learn
what
router or switch will work with your modem. The router should support
DHCP.
Connect the router to your DSL/Cable Modem. Then connect the
CapTel 840i to the router or switch using the Ethernet cable as shown below.
If your Internet outlet is in a different room from where you plan to use
CapTel, see the Setup Guide for instructions.
All Outlets Located Together (Wired Setup)
Example 1: All of the connection outlets (telephone, Internet, and power) are
available in the same room that you are planning to use the CapTel 840i.

Customer Service: 888-269-7477 GETTING STARTED • 17
For Wireless/WiFi Installations
If you have a wireless (“WiFi”) network in your home or office, your CapTel
phone can connect to the Internet using the WiFi network. You do not need
to plug in an Ethernet cable.
To set up your CapTel for WiFi use, you will need to know the name of your
wireless network (also called the SSID) as well as any passwords that may be
necessary to access the network. The way you access your WiFi network with
CapTel will be very similar to how you access the network from a computer
or mobile device.

18 • GETTING STARTED Customer Service: 888-269-7477
NOTE: If someone helped install the wireless network in your home or offi ce,
it may be helpful to consult with them as you set up your CapTel phone.
To set up your WiFi connection:
1. The display asks, Press
YES for WiFi Setup.
Press the YES button.
2. Your CapTel checks if any
wireless networks have been
used previously and are already
saved in memory. If no previous
networks are detected, CapTel
scans for available networks in
your location.
3. CapTel lists any WiFi networks
detected, in order of the
strongest signal strength to the
weakest signal strength.
Use the UP/DOWN arrows to
highlight the wireless network
you want to use. Press the YES
button to select.
NOTE:
CapTel may detect wireless networks
in your location that you do not recognize –
such as a wireless network from a neighbor
or nearby offi ce. Be sure to select the SSID
that matches your WiFi network.
If you do not see the network you want listed, try moving your CapTel
phone to an area closer to your wireless router and selecting “Refresh
Network List”. CapTel will re-scan for available networks. See the Setup
Guide for additional directions.
SETUP - CONNECT TO INTERNET
Please plug in Ethernet Cable.
Or
Press YES for WiFi Setup
Press YES for WiFi Setup
SETUP - WIFI
Scanning for WiFi Networks
Press YES to accept or NO to exit
SSID Security Ch. Signal
2WIRE269 WPA 08
Offi ceNet WPA 06
ACBRDBAND WPA 06
NETWORK1 WPA 04
Refresh Network List
Enter Network Manually
Press YES to Select a Wireless Network
Press NO to exit WiFi Setup
2WIRE269 WPA 08
/