10
10
Set your Station ID
You should store your name and fax number to be
printed on all fax pages that you send.
a Press Menu.
b Press 0.
c Press 3.
d Enter your fax number (up to 20 digits) on the
dial pad, and then press OK.
03.Station ID
Fax:_
Enter & OK Key
e Enter your telephone number (up to 20 digits)
on the dial pad, and then press OK. (If your
telephone number and fax number are the
same, enter the same number again.)
03.Station ID
Fax:XXXXXXXXXXX
Tel:_
Enter & OK Key
f Use the dial pad to enter your name (up to 20
characters), and then press OK.
03.Station ID
Fax:XXXXXXXXXXX
Tel:XXXXXXXXXXX
Name:_
Enter & OK Key
g Press Stop/Exit.
Note
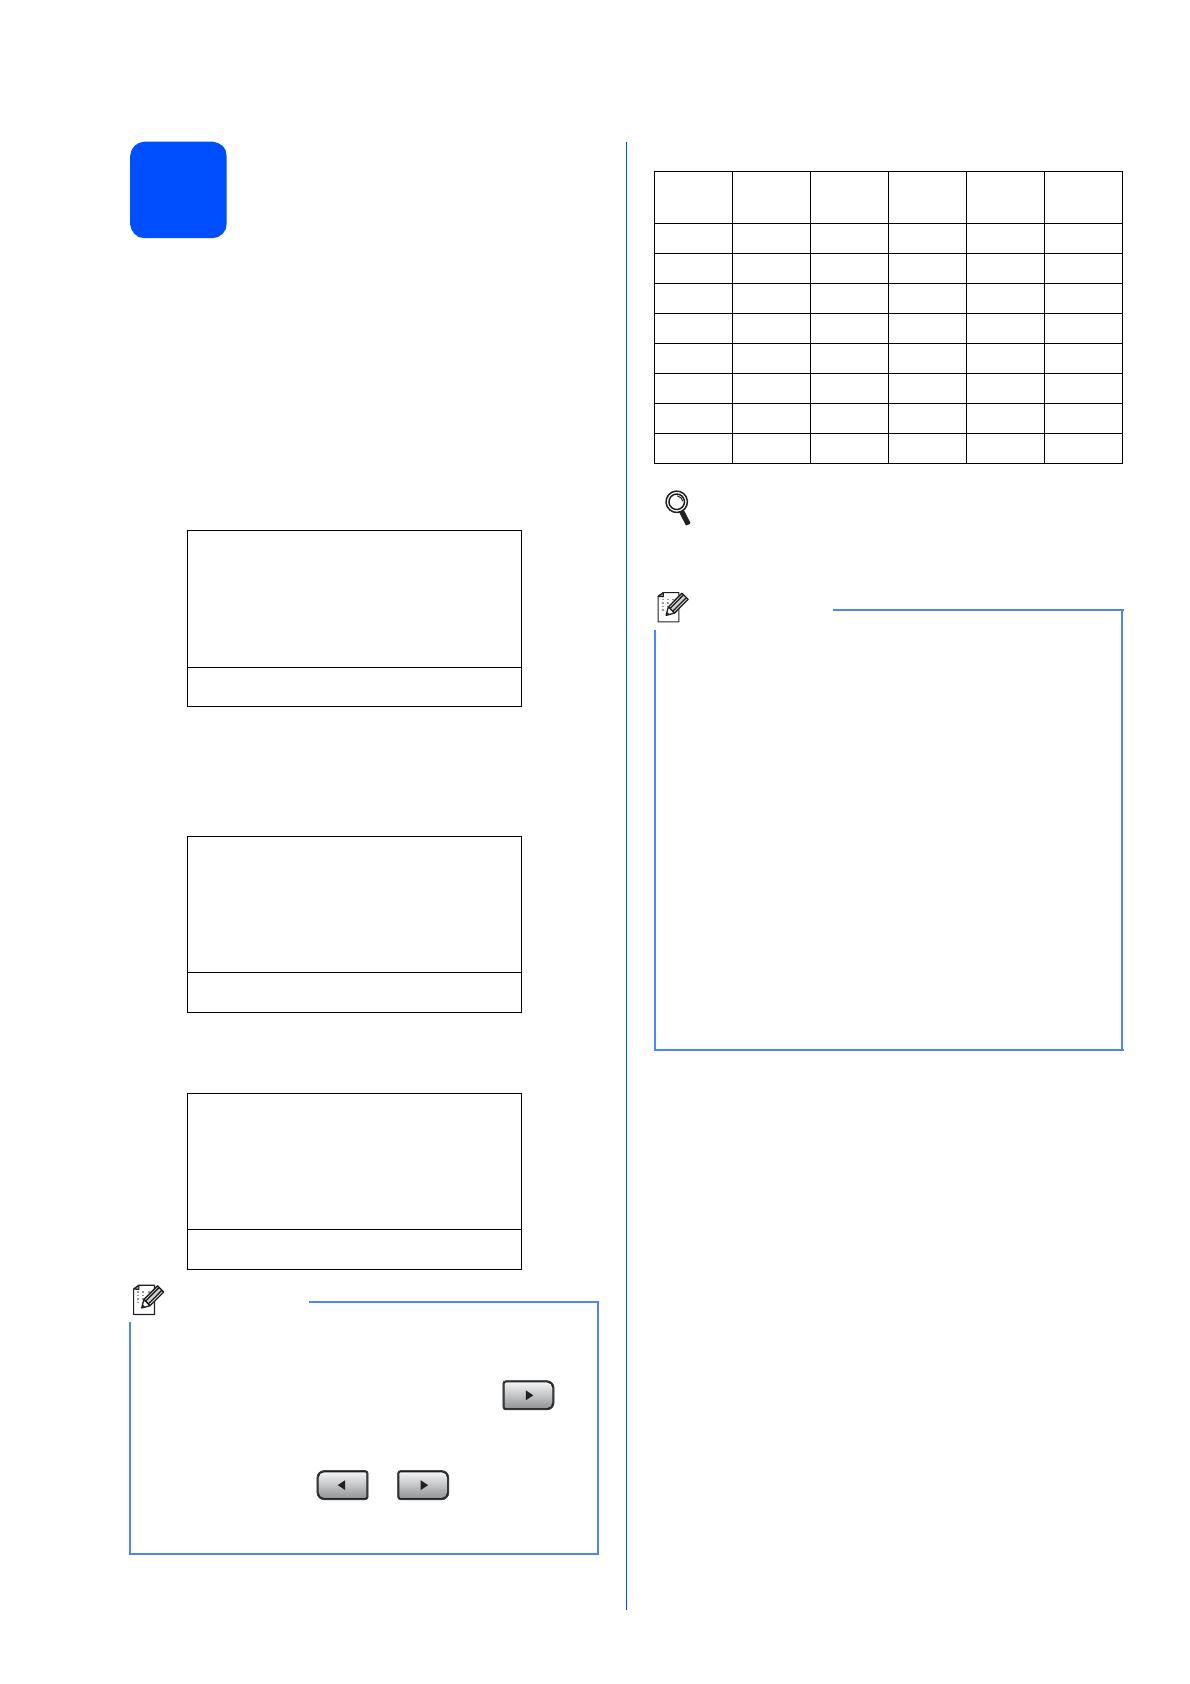
• See the following chart for entering your name.
• If you need to enter a character that is on the
same key as the last character, press to
move the cursor to the right.
• If you entered a letter incorrectly and want to
change it, press or to move the
cursor to the incorrect character, press
Clear/Back.
Press
key
One
time
Two
times
Three
times
Four
times
Five
times
2 ABC2A
3 DEF3D
4 GH I 4G
5 JKL5J
6 MNO6M
7 PQRS 7
8 TUV8T
9 WXY Z 9
For more details, see Entering Text in the
User’s Guide.
Note
If you make a mistake and want to start again,
press Stop/Exit and go back to step a.
(USA only) The Telephone Consumer Protection
Act of 1991 makes it unlawful for any person to
use a computer or electronic device to send any
message via a telephone fax machine unless
such messages clearly contain, in a margin at the
top or bottom of each transmitted page, or on the
first page of the transmission, the date and time it
is sent and an identification of the business or
other entity or other individual sending the
message and the telephone number of the
sending machines or such business, other entity
or individual. To program this information into
your machine, see Set the date and
time on page 9 and Set your Station
ID on page 10.


