Page is loading ...

Information
If in doubt of any aspect regarding the assembly, use or safety of your garden arbour please contact us:
Help Line: (Normal Office Hours) 01829 261 121
Email: support@rowgar.co.uk
ROWLINSON GARDEN PRODUCTS LIMITED
Green Lane
Wardle Nr. Nantwich
Cheshire
CW5 6BN
www.rowgar.co.uk
We constantly improve the quality of our products,
occasionally the components may differ from the
components shown and are only correct at time
of printing. We reserve the right to change the
specification of our products without prior notice.
2018 © Rowlinson Garden Products Ltd
7. Removable front board
Turn the catch horizontal to allow the removable board to be positioned. Once the board is in place, turn the catch
back vertical.
6. Lid to base
Place the lid centrally on top of the assembly. Secure the hinges to the lid and back wall using 6 x 20mm screws per
hinge.
Assembly Instructions
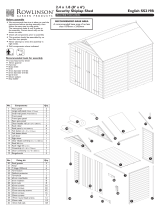
Beehive Composter English SS096C
Before assembly
• We recommend that time is taken to read
the instructions before starting assembly,
then follow the easy step by step guide.
The instruction sheet is only a guide to
the assembly. Certain items may not be
shown to scale.
• Check all components prior to assembly
• This product should be assembled by no
less than two people
• Drill all components where indicated
x 2
Recommended tools for assembly
• Crosshead screwdriver bit
No. Fixing Kit Qty.
12 Hinge 2
13 70mm screws 8
14 40mm screws 4
15 20mm screws 12
16 40mm nails 28
No. Components Qty.
1 Right-hand lid frame 1
2Left-hand lid frame with lid stay 1
3 Lid front/rear triangular panel 2
4 Lid slat panel 2
5 Lid coverstrip 1
6 Half base board 1
7Full board 22
8 Square board 2
9 Full board with catch 1
10 Half top board 2
11 Removable base board 1
1
5
2
3
4
6
7
8
9
10
11
2v0mm

2. Lid slat panels
Place a lid slat panel onto one side of the lid frame assembly. Ensure the correct orientation of the slats to allow for
water off. With the slats centred front to back and the top board aligned at the apex of the triangular panel, Nail
through the slats into the top edge of the triangular panels using 7 x 40mm nails at each end of the panel. Attach the
second slat panel to the other side of the roof in the same way.
3. Lid coverstrip
Position the lid coverstrip over the join of the two lid slat panels and secure in place using 4 x 40mm screws. Screw
through the coverstrip, lid slats and into the top edge of the triangular panels.
1. Lid frame
Attach the triangular front and rear lid panels to the two lid side frames as shown using 2 x 70mm screws at
each corner.
4. Base
Start at the back of the composter with the half base board, interlock two full boards with the base board to create
the sides. At the front on the composter interlock the two square boards with the full boards. Continue by adding a
full board at the back and two more for the sides.
5. Full board with catch
Fit the Full board with catch at the front of the composter and continue to build up the rest of the walls using the
remaining full boards. Once all the full boards are used. Finish off the side walls with the top half boards.
70mm
70mm
Important Note:
Ensure correct orientation
of slat overlap to allow
water run off.
40mm
40mm
70mm
/


