Page is loading ...

INSTALLATION INSTRUCTIONS
For Model # P8027-084 (Rev. 09/20/2012)
WARNING! SHUT POWER OFF AT FUSE OR CIRCUI T BRE AKER.
AVERTISSEMENT! COUPER LE COURANT AU NIVEAU DES FUSIBLES OU DU DISJONCTEUR.
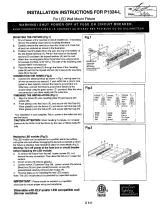
Fig. 1
Fig. 2
HANGING THE FIXTURE (Fig. 1)
1. Shut off power at the circuit breaker and remove old
fixture including the mounting hardware.
2. Carefully remove the fixture from the carton and
check that all parts are included as shown in the
illustration.
3. Position Reinforcement Plate (B) on ceiling, and
mark location of two mounting holes. Drill the holes
on the ceiling and insert the Drywall Anchor (C) into
the holes.
4. Attach the Reinforcement Plate (B) to the Outlet box
in the ceiling with two screws (E). The side of the
Circular Strap marked “GND” must face out.
5. Place the Wood Screw (D) through the keyhole into
the Plastic Anchor (C) secure the Reinforcement
Plate (B).
6. Determine desired distance from ceiling to hang the
Fixture. (Do not mount less than 4 inches from
ceiling). Loosen the Caps screw (K), Run the Wire
Cord through Metal Sleeve (J) and cut redundant
wire, and then Place the wire end into the Metal (L)
using the one small Hex Nut to tighten it. And
secure the other big Hex Nut on Metal Sleeve (J).
Put the Caps screw (K) to wrap it.
CONNECTING THE WIRES (Fig. 2)
7. At this point, connect the electrical wire as shown in
figure 2, making sure that all wire connectors are
secured. If your outlet has a ground wire (green or
bare copper), connect the fixtures Ground Wire to it.
Otherwise, connect the fixture Ground Wire directly
to the crossbar using the Green Screw provided.
8. Place Canopy (F) over the Reinforcement Plate (B).
Turn the Canopy (F) and let the Screw (A) slide into
the slot of Canopy (F). Tighten the Screw (A).
9. Install Xenon bulb into socket in accordance with
the fixture’s specifications. (DO NOT EXCEED THE
MAXIMUM WATTAGE RATING!) (NE PAS
DEPASSER LA PUISSANCE NOMINALE
MAXIMALE!)
10. Loosen the metal ring (M) from socket (G), align
the holes on the metal ring (M) and Glass shade
(H) and secure them by three screws (I). Place
glass shade (H) onto the socket.
Your installation is now complete. Return power to the
junction box and test the fixture.
FIXTURE
WIRES
Black or
Smooth
HOUSE
WIRES
Black
(Hot)
FIXTURE
WIRES
White or
Ribbed
HOUSE
WIRES
White
(Neutral)
FIXTURE
WIRES
Bare
Copper
(Ground)
HOUSE
WIRES
Green
(Ground)
Fig. 3
WRONG
RIGHT
WARNING!
1. The wire has positive and negative power
cords. To avoid short circuit, please don’t
intercross wire. (See Fig. 3)
2. Avoid swing for children!
LA-1212E
OUTLET BOX
(CEILING)
E
A
B
C
F
D
J
L
G
I
H
K
M
IMPORTANT: FIXTURE SHOULD BE INSTALLED
BY A QUALIFIED ELECTRICIAN TO ENSURE
PROPER WIRING AND INSTALLATION.
/


