iv Rev D
10/18/2007
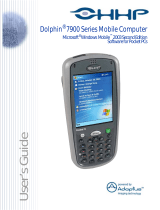
Dolphin® 7600 User’s Guide
29-Key Numeric Keyboard .................................................................................................................4-4
Navigation Keys............................................................................................................................4-4
Hardware Application Buttons......................................................................................................4-5
Toggling Between Alpha and Numeric Modes.............................................................................4-6
29-Key Blue Key Combinations (Alpha Mode) ...........................................................................4-7
29-Key Shift Functionality in Numeric Mode..............................................................................4-7
29-Key Red Key Combinations....................................................................................................4-8
38-Key Alpha Keyboard......................................................................................................................4-9
Toggling Between Alpha and Numeric Modes.............................................................................4-9
38-Key Red Key Combinations..................................................................................................4-10
38-Key NUM Lock Mode ..........................................................................................................4-11
Chapter 5 - Using the Image Engine
Overview .............................................................................................................................................5-1
Available Image Engines.....................................................................................................................5-1
Depth of Field ...............................................................................................................................5-1
Supported Bar Code Symbologies.......................................................................................................5-2
Activating the Engine..........................................................................................................................5-3
Decoding..............................................................................................................................................5-3
Capturing Images.................................................................................................................................5-5
Chapter 6 - Communication
Communication Options......................................................................................................................6-1
Installing Additional Software.............................................................................................................6-1
Connecting the USB Cable..................................................................................................................6-2
ActiveSync Communication................................................................................................................6-3
Wireless Radios...................................................................................................................................6-6
Connecting the Terminal to a Wireless Network..........................................................................6-6
WLAN (802.11b/g Radio)...................................................................................................................6-6
Adding Programs From the Internet....................................................................................................6-7
Infrared Communication......................................................................................................................6-8
Chapter 7 - Bluetooth Manager
Overview .............................................................................................................................................7-1
Enabling the Bluetooth Radio..............................................................................................................7-1
Setting Tab...........................................................................................................................................7-2
BT Service Tab....................................................................................................................................7-2
Serial Port Tab.....................................................................................................................................7-3
Connecting to Bluetooth Printers ........................................................................................................7-4
Connecting to Other Bluetooth Devices..............................................................................................7-7
Bluetooth ActiveSync........................................................................................................................7-10
Chapter 8 - Dolphin HomeBase
Overview .............................................................................................................................................8-1
Front Panel ..........................................................................................................................................8-2
Back Panel ..........................................................................................................................................8-3
Powering the Dolphin HomeBase .......................................................................................................8-3
Charging the Main Battery ..................................................................................................................8-4