Page is loading ...

www.dell.com/supplies | support.dell.com
Dell™ Workgroup Laser Printer W5300
Owner’s Manual
Look Inside For:
• Network Printing
• Installing Printer Drivers
• Installing Memory Cards
• Loading Paper
• Using Your Printer

Order toner cartridges
Dell™ toner cartridges are available only through Dell. You can order toner cartridges online at
www.dell.com/supplies or by phone.
USA 877-465-2968
(877-Ink2You)
Canada 877-501-4803
Mexico 001-800-210-7607
Puerto Rico 800-805-7545
UK 0870 907 4574
Ireland 1850 707 407
France 0825387247
Italy 800602705
Spain 902120385
Germany 0800 2873355
Austria 08 20 - 24 05 30 35
Netherlands 020 - 674 4881
Belgium 02.713 1590
Sweden 08 587 705 81
Norway 231622 64
Denmark 3287 5215
Finland 09 2533 1411
Switzerland 0848 801 888

www.dell.com/supplies | support.dell.com
Dell™ Workgroup Laser Printer W5300
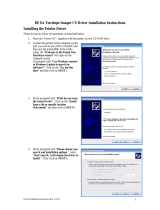
If you purchased additional options, for example, paper trays, a duplex unit,
or an envelope feeder, refer to the User’s Guide (Start → Programs or All
Programs → Dell Printers → Dell Laser Printer W5300 →User’s Guide)
for installation instructions.
1
2
3
4
5
8
7
6
1 Standard output bin 5 On/Off switch
2 Operator panel 6 Power cord connector
3 Multipurpose feeder 7 Ethernet port
4 Standard tray (500 sheets) 8 USB port

Notes, Notices, and Cautions
NOTE: A NOTE indicates important information that helps you make better
use of your computer.
NOTICE: A NOTICE indicates either potential damage to hardware or loss of
data and tells you how to avoid the problem.
CAUTION: A CAUTION indicates a potential for property damage,
personal injury, or death.
____________________
Information in this document is subject to change without notice.
© 2003 Dell Computer Corporation. All rights reserved.
Reproduction in any manner whatsoever without the written permission of Dell Computer
Corporation is strictly forbidden.
Trademarks used in this text: Dell and DELL logo are trademarks of Dell Computer Corporation;
Microsoft and Windows are registered trademarks of Microsoft Corporation; Novell and NetWare
are registered trademarks of Novell, Inc.; UNIX is a registered trademark of The Open Group in the
United States and other countries.
Other trademarks and trade names may be used in this document to refer to either the entities claiming
the marks and names of their products. Dell Computer Corporation disclaims any proprietary interest
in trademarks and trade names other than its own.
UNITED STATES GOVERNMENT RESTRICTED RIGHTS
This software and documentation are provided with RESTRICTED RIGHTS. Use, duplication or
disclosure by the Government is subject to restrictions as set forth in subparagraph (c)(1)(ii) of the
Rights in Technical Data and Computer Software clause at DFARS 252.227-7013 and in applicable
FAR provisions: Dell Computer Corporation, One Dell Way, Round Rock, Texas, 78682, USA.
FCC emissions information
This equipment has been tested and found to comply with the limits for a Class B digital device, pursuant
to Part 15 of the FCC rules. Refer to the Drivers and Utilities
CD for details.

Contents 5
Contents
1 Set up for network printing
Selecting your printer network setup . . . . . . . . . . . . . . . 12
Attaching locally to a print server
. . . . . . . . . . . . . . . . . 13
Complete Microsoft Plug and Play Wizard
. . . . . . . . . . . 13
Installing drivers in a Linux environment
. . . . . . . . . . . . 18
Installing drivers in a Novell environment . . . . . . . . . . . . 19
Set up the queue on the print server . . . . . . . . . . . . . . . 19
Install printer drivers on one client computer
. . . . . . . . . . 20
Attaching directly to the network (print server)
. . . . . . . . . . 21
Locate the IP address
. . . . . . . . . . . . . . . . . . . . . . 21
Set up the queue on the print server
. . . . . . . . . . . . . . . 22
Install printer drivers on one or more remote client computers . . 23
Attaching directly to the network (no print server) . . . . . . . . 24
Locate the IP address
. . . . . . . . . . . . . . . . . . . . . . 24
Assign an IP Address . . . . . . . . . . . . . . . . . . . . . . 24
Install printer drivers . . . . . . . . . . . . . . . . . . . . . . 26
Install printer drivers on one client computer
. . . . . . . . . . 27
2 Install optional memory cards
Accessing the printer system board . . . . . . . . . . . . . . . . 30
Installing printer memory . . . . . . . . . . . . . . . . . . . . . 33
Replacing the shield
. . . . . . . . . . . . . . . . . . . . . . . . 36

6 Contents
3 Set up for local printing
Installing printer drivers . . . . . . . . . . . . . . . . . . . . . 38
4 Load paper
Loading paper and transparencies . . . . . . . . . . . . . . . . 46
In the standard tray
. . . . . . . . . . . . . . . . . . . . . . 46
In the multipurpose feeder
. . . . . . . . . . . . . . . . . . . 49
Loading envelopes
. . . . . . . . . . . . . . . . . . . . . . . . . 53
In the multipurpose feeder
. . . . . . . . . . . . . . . . . . . 53
5 Use your printer
Changing the language on the operator panel . . . . . . . . . . 56
Using the operator panel to change printer settings . . . . . . . 56
Restore factory default settings
. . . . . . . . . . . . . . . . 57
Disable menus . . . . . . . . . . . . . . . . . . . . . . . . . 58
Printing a job . . . . . . . . . . . . . . . . . . . . . . . . . . . 60
Canceling a job from the printer operator panel
. . . . . . . . . 60
Utilizing additional software tools . . . . . . . . . . . . . . . . 61
Status Monitor
. . . . . . . . . . . . . . . . . . . . . . . . . 61
Status Monitor Center . . . . . . . . . . . . . . . . . . . . . 61
Printing Status window
. . . . . . . . . . . . . . . . . . . . 62
Dell Toner Reorder Window . . . . . . . . . . . . . . . . . . 62
Dell Printer Software Uninstall . . . . . . . . . . . . . . . . 62
Driver Profiler
. . . . . . . . . . . . . . . . . . . . . . . . . 63
Replacing the toner cartridge
. . . . . . . . . . . . . . . . . . . 64
Removing the used toner cartridge
. . . . . . . . . . . . . . . 64
Cleaning the printer
. . . . . . . . . . . . . . . . . . . . . . 65
Installing the new toner cartridge
. . . . . . . . . . . . . . . 66


8 Contents

9
CAUTION: SAFETY INFORMATION
Use the following safety guidelines to help ensure your own personal safety and to help
protect your system and working environment from potential damage.
• Your product uses a laser.
CAUTION: Use of controls or adjustments or performance of procedures other
than those specified herein may result in hazardous radiation exposure.
• Your product uses a printing process that heats the print media, and heat can
cause certain media to release emissions. You must understand the section in your
operating instructions that discusses the guidelines for selecting appropriate print
media to avoid the possibility of harmful emissions.
CAUTION: If your product is
not
marked with this symbol , it
must
be
connected to an electrical outlet that is properly grounded.
• The power cord must be connected to an electrical outlet that is near the product
and easily accessible.
• Refer service or repairs, other than those described in the operating instructions,
to a professional service person.
• This product is designed to meet safety standards with the use of specific
Dell-authorized components. The safety features of some parts may not always be
obvious. Dell disclaims liability associated with use of non-Dell-authorized
components.

10
www.dell.com/supplies | support.dell.com


12 Set up for network printing
www.dell.com/supplies | support.dell.com
Selecting your printer network setup
Determine your network setup from the three options below.
1 Attach your printer to a print server (or other computer) with a USB cable. Go to
page 13 for instructions.
2 Attach your printer directly to the network with an Ethernet cable, with the print
server managing the print queue. Go to page 21 for instructions.
3 Attach your printer directly to the network with an Ethernet cable (no print server).
Go to page 24 for instructions.
Clients
Print Server Printer
Clients
Print Server
Printer
Clients
Printer

Set up for network printing 13
Attaching locally to a print server
If you are connecting the printer to a print server with a USB cable and want to share the
printer with multiple users on the network, use this method. In this section you will:
• Complete the Microsoft Plug and Play Wizard.
• Set up the queue on the print server.
• Install printer drivers for all clients connected to the print server.
Complete Microsoft Plug and Play Wizard
When you turned on the printer and print server, the Found New Hardware Wizard screen
appeared.
Use the table below to find instructions for the operating system on the print server.
NOTE: The Dell Laser Printer W5300 only supports Windows 95 with a network connection to
a computer.
Computer operating system Go to page...
Windows XP 14
Windows 2000 14
Windows Me 15
Windows NT 16
Windows 98 16
Linux 18
Novell 19

14 Set up for network printing
www.dell.com/supplies | support.dell.com
Using Windows XP
1 Insert the Drivers and Utilities CD into your computer.
The Wizard automatically searches for an appropriate driver.
2 Scroll through the list of drivers until you see D:\drivers\win_2000\dkaag1da.inf
selected in the Location column. Instead of D:\ you will see the letter of your
CD-ROM drive.
3 Click Next.
The wizard copies all of the necessary files and installs the printer drivers.
4 Click Finish when the software is installed.
5 Go to “Set up the queue on the print server” on page 19.
Using Windows 2000
1 Insert the Drivers and Utilities CD, and then click Next.
2 Select Search for a suitable driver, and then click Next.
3 Select Specify a location only, and then click Next.
4 Browse to the location of the printer driver on the Drivers and Utilities CD.
D:\Drivers\Win_2000\
Replace D:\ with the letter of your CD-ROM drive (for example, type D:\ where D is
the drive letter of your CD).
5 Click Open, and then click OK.
6 Click Next to install the driver that is displayed.
D:\Drivers\Win_2000\dkaag1da.inf
7 Click Finish when the software is installed.
8 Go to “Set up the queue on the print server” on page 19.

Set up for network printing 15
Using Windows Me
NOTE: Depending on the software and printers already installed on your computer, your screens
may vary from those in the instructions.
You must install both a USB port driver and a custom print driver.
1 Insert the Drivers and Utilities CD.
The Wizard automatically searches for the USB driver on the CD and installs it.
2 After the USB port driver is found, click Finish.
3 Select Automatic search for the best driver (recommended), and then click Next.
The wizard searches for a printer driver.
4 Select your printer and driver from the list on the screen, and then click OK. Use the
following table to identify the driver for your language.
5 Click Next to install the printer driver.
6 Click Next to complete installation.
7 Use the default printer name (for example, Dell Laser Printer W5300) or type a
unique name for your printer, and then click Next.
8 Click Yes (recommended), and then click Finish to print a test page.
9 After the test page prints, click Yes to close the window.
10 Click Finish to complete the installation and close the wizard.
11 Go to “Set up the queue on the print server” on page 19.
If your computer
uses this language
Select the driver from the list
(Replace the D:\ in the table with the letter of
your CD-ROM drive)
English D:\DRIVERS\WIN_9X\ENGLISH\LMPCL5C.INF
French D:\DRIVERS\WIN_9X\FRENCH\LMPCL5C.INF
German D:\DRIVERS\WIN_9X\GERMAN\LMPCL5C.INF
Italian D:\DRIVERS\WIN_9X\ITALIAN\LMPCL5C.INF
Spanish D:\DRIVERS\WIN_9X\SPANISH\LMPCL5C.INF

16 Set up for network printing
www.dell.com/supplies | support.dell.com
Using Windows NT
NOTE: USB support is not available for Windows NT operating systems.
NOTE: You need administrative access to install printer drivers on your computer.
1
Insert the Drivers and Utilities CD.
2 Click Install the printer for Use on this Computer only (Personal Installation).
When all the files are installed on your computer, the Congratulations screen appears.
3 Click Finish to complete the installation and close the wizard.
4 Go to "Set up the queue on the print server" on page 19.
Using Windows 98
NOTE: Depending on the software and printers already installed on your computer, your screens
may vary from those in the instructions.
You must install both a USB port driver and a custom print driver.
When you attached the cable and turned on the printer and computer, the Add New
Hardware Wizard screen appeared on your computer screen.
1 Insert the Drivers and Utilities CD, and then click Next.
2 Select Search for the best driver for your device (recommended), and then click Next.
3 Select CD-ROM drive only, and then click Next.
4 After the wizard finds the USB port driver, click Next.
5 When the USB port driver is installed, click Finish.
The wizard prompts you to search for new drivers.
6 Click Next to search for a printer driver.
7 Select Search for the best driver for your device (recommended), and then click Next.
8 Select Specify a location only and browse to the location of the printer driver on the
Drivers and Utilities CD.

Set up for network printing 17
Use the following table to identify the driver for your language.
9 Highlight the driver, and then select to install the updated driver (recommended).
10 Click Next.
11 Click Next to complete installation.
12 Use the default printer name (for example, Dell Laser Printer W5300) or type a
unique name for your printer, and then click Next.
13 Select Yes to print a test page, and then click Finish. All the necessary files are
installed on your computer.
14 After the test page prints, click Yes to close the message window.
15 Click Finish to complete the installation.
Using Windows 95
NOTE: The Dell Laser Printer W5300 only supports Windows 95 with a network connection to
a computer.
1
Insert the Drivers and Utilities CD, and then click Next.
If a system-compatible driver is found on your operating system, the Wizard installs it.
If no compatible system driver is found on your operating system, click Other
Locations.
2 Browse to the location of the printer driver on the Drivers and Utilities CD, and then
click
OK.
If your computer
uses this language
Select the driver from the list
(Replace the D:\ in the table with the letter of
your CD-ROM drive)
English D:\DRIVERS\WIN_9X\ENGLISH\LMPCL5C.INF
French D:\DRIVERS\WIN_9X\FRENCH\LMPCL5C.INF
German D:\DRIVERS\WIN_9X\GERMAN\LMPCL5C.INF
Italian D:\DRIVERS\WIN_9X\ITALIAN\LMPCL5C.INF
Spanish D:\DRIVERS\WIN_9X\SPANISH\LMPCL5C.INF

18 Set up for network printing
www.dell.com/supplies | support.dell.com
Use the following table to identify the driver for your language.
3 Highlight the appropriate driver, and then click Finish.
The Add Printer Wizard screen appears.
4 Use the default printer name (for example, Dell Laser Printer W5300), or type a
unique name for your printer.
5 Select whether or not to use this printer as the default printer.
6 Click Next.
7 You are prompted to insert the Drivers and Utilities CD. Click OK.
A dialog box asks for the file “lexdrvin.exe”.
8 Browse to the appropriate folder on the Drivers and Utilities CD (for example,
D:\Drivers\Win_9x\English).
9 Click OK.
10 Click OK again.
All the necessary files are installed on your computer.
11 Go to "Set up the queue on the print server" on page 19.
Installing drivers in a Linux environment
Your printer supports Red Hat Linux versions 7.1, 7.2, and 7.3, and SuSE Linux 7.2, 7.3, and
8.0. Refer to the Unix®/packages on the Drivers and Utilities CD for instructions on
installing your printer in a Linux environment.
If your computer
uses this language
Select the driver from the list
(Replace the D:\ in the table with the letter of
your CD-ROM drive)
English D:\DRIVERS\WIN_9X\ENGLISH\LMPCL5C.INF
French D:\DRIVERS\WIN_9X\FRENCH\LMPCL5C.INF
German D:\DRIVERS\WIN_9X\GERMAN\LMPCL5C.INF
Italian D:\DRIVERS\WIN_9X\ITALIAN\LMPCL5C.INF
Spanish D:\DRIVERS\WIN_9X\SPANISH\LMPCL5C.INF

Set up for network printing 19
Installing drivers in a Novell environment
Your printer supports Novell® NetWare® versions 3.x, 4.x, 5.x, and 6.x. For information on
using your printer in a Novell environment, refer to your Novell documentation.
Set up the queue on the print server
1 Click Install the printer on the Network (Network Installation) and then click Next.
2 Click On a print server, and then click Next.
3 Select both options to install the software and the User’s Guide on the print server, and
then click Next.
4 The box to share the printer is checked. Create a share name you want to use for the
PCL driver and/or the PostScript driver. Make it an obvious name for clients to easily
find when they are browsing for a shared printer.
NOTE: You do not need to create share names for both drivers if you are only using one driver.
5
Click Next.
6 Select TCP/IP, and then click Next.
If your network also uses NetWare, click NetWare Systems as well.
7 Choose the port that corresponds to the hardware port you used when you connected
the printer to the print server (or other computer). For example, USB001 represents
the USB port on the print server.
8 Click Finish.
The Congratulations screen appears.
9 Click Print a Test Page to verify the driver is installed correctly.
10 Click Finish.
If you are sitting at the print server and want to install printer drivers on one client
computer, you can go to that client computer, insert the Drivers and Utilities CD, and
follow the steps on the screen, or you can install the drivers remotely (see“Install printer
drivers on one or more remote client computers” on page 23).

20 Set up for network printing
www.dell.com/supplies | support.dell.com
Install printer drivers on one client computer
If you are connecting one client computer to the print server, go to that client computer and
insert the Drivers and Utilities CD.
1 Click Install the printer on the Network (Network installation), and then click Next.
2 Click On this client computer.
3 Click Next.
4 Select the software or documentation you want your users to have access to.
5 Select the printer protocols you want to install, and then click Next.
6 Select the Universal Network Connection (UNC) port.
7 Type the name of the print server the printer is connected to as well as the name of the
printer:
\\Server Name\PrinterShareName.
To find out the print server name, right-click your mouse and choose My Computer →
Properties →Network Identification.
8 Click Finish.
The Congratulations screen appears.
9 Click Print a Test Page to verify the driver is installed correctly.
10 Click Finish.
/