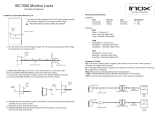
Installation Instructions
3. 4.
1. 2.
5. 6.
The door must be machined with a 3/8” wire raceway, mortise
lock pocket & prepped for a energy transfer hinge. Make sure
the mortise pocket is free of debris.
Connect the wires exiting the mortise pocket to the Bridge
Rectier (included).
Run the wires from the ETH hinge through the 3/8” raceway
starting at the ETH hinge & exiting into the mortise pocket.
Connect the Bridge Rectier to the plug exiting the mortise
chassis.
Screw the ETH hinge to the door. At this time DO NOT
connect the hinge wires on the jamb side to the wires coming
from the power supply.
Connect the wires from the power supply at the ETH hinge
on the jamb side. Connect the hinge to the jamb.
Carefully slip the connected mortise lock chassis into the
mortise pocket paying close attention not to pinch any wires.
Mount the chassis per manufacturer’s instructions.
12VAC/DC
24VAC/DC
or
Power
Supply
Bridge Rectifier Energy Transfer Hinge
Switch
EU (Fail Secure)
EU (Fail Secure)
12VAC/DC
24VAC/DC
or
Power
Supply
Bridge Rectifier Energy Transfer Hinge
Switch
EL (Fail Safe)
EL (Fail Safe)
Mortise
Lock
Pocket
3/8 Wire Raceway
ETH Hinge Pocket
Bridge
Rectifier
Wire Transfer Hinge
Bridge
Rectifier
Plug
3/8 Wire Raceway
Mortise
Lock
Pocket
Mortise
Lock
Pocket
Mortise
Lock
Pocket
12VAC/DC
24VAC/DC
or
Power
Supply
Bridge Rectifier Energy Transfer Hinge
Switch
EU (Fail Secure)
EU (Fail Secure)
12VAC/DC
24VAC/DC
or
Power
Supply
Bridge Rectifier Energy Transfer Hinge
Switch
EL (Fail Safe)
EL (Fail Safe)
Mortise
Lock
Pocket
3/8 Wire Raceway
ETH Hinge Pocket
Bridge
Rectifier
Wire Transfer Hinge
Bridge
Rectifier
Plug
3/8 Wire Raceway
Mortise
Lock
Pocket
Mortise
Lock
Pocket
Mortise
Lock
Pocket
US customer support 1-888-622-2377 | www.commandaccess.com | CANADA customer support 1-855-823-3002
7. 8.
12VAC/DC
24VAC/DC
or
Power
Supply
Bridge Rectifier Energy Transfer Hinge
Switch
EU (Fail Secure)
EU (Fail Secure)
12VAC/DC
24VAC/DC
or
Power
Supply
Bridge Rectifier Energy Transfer Hinge
Switch
EL (Fail Safe)
EL (Fail Safe)
Mortise
Lock
Pocket
3/8 Wire Raceway
ETH Hinge Pocket
Bridge
Rectifier
Wire Transfer Hinge
Bridge
Rectifier
Plug
3/8 Wire Raceway
Mortise
Lock
Pocket
Mortise
Lock
Pocket
Mortise
Lock
Pocket
1
2
3
4
12VAC/DC
24VAC/DC
or
Power
Supply
Bridge Rectifier Energy Transfer Hinge
Switch
EU (Fail Secure)
EU (Fail Secure)
12VAC/DC
24VAC/DC
or
Power
Supply
Bridge Rectifier Energy Transfer Hinge
Switch
EL (Fail Safe)
EL (Fail Safe)
Mortise
Lock
Pocket
3/8 Wire Raceway
ETH Hinge Pocket
Bridge
Rectifier
Wire Transfer Hinge
Bridge
Rectifier
Plug
3/8 Wire Raceway
Mortise
Lock
Pocket
Mortise
Lock
Pocket
Mortise
Lock
Pocket
12VAC/DC
24VAC/DC
or
Power
Supply
Bridge Rectifier Energy Transfer Hinge
Switch
EU (Fail Secure)
EU (Fail Secure)
12VAC/DC
24VAC/DC
or
Power
Supply
Bridge Rectifier Energy Transfer Hinge
Switch
EL (Fail Safe)
EL (Fail Safe)
Mortise
Lock
Pocket
3/8 Wire Raceway
ETH Hinge Pocket
Bridge
Rectifier
Wire Transfer Hinge
Bridge
Rectifier
Plug
3/8 Wire Raceway
Mortise
Lock
Pocket
Mortise
Lock
Pocket
Mortise
Lock
Pocket
US customer support 1-888-622-2377 | www.commandaccess.com | CANADA customer support 1-855-823-3002


