J&W TECHNOLOGY WMFNEOX5 User manual

Type
User manual

J&W TECHNOLOGY WMFNEOX5 is an Android-based media hub powered by a dual-core ARM Cortex-A9 processor with Mali-400 GPU. It can connect to the Internet via Ethernet, Wi-Fi, or a mobile hotspot. You can use it to access the Google Play Store to download apps, watch YouTube and Internet TV, play games, or browse the web. It also has ports for connecting external devices such as USB drives, keyboards, mice, and speakers.

J&W TECHNOLOGY WMFNEOX5 is an Android-based media hub powered by a dual-core ARM Cortex-A9 processor with Mali-400 GPU. It can connect to the Internet via Ethernet, Wi-Fi, or a mobile hotspot. You can use it to access the Google Play Store to download apps, watch YouTube and Internet TV, play games, or browse the web. It also has ports for connecting external devices such as USB drives, keyboards, mice, and speakers.

Android™ is a trademark of Google Inc.
Thank you for purchasing MINIX NEO X5.
Follow this guide to setup your device.
MINIX NEO X5 is a revolutionary smart media hub based on a dual-
core ARM Cortex-A9 processor with quad-core Mali-400 GPU and the
latest Android™ 4.0.4 OS. Sign into Google Play Store to download the
favorite applications and install them directly into NEO X5.
YouTube™, Internet radio and lots of other applications are all readily
available on Google Play Store. Alternatively, you could also download
the applications through other third-party stores or to install the .apk les
directly with the ApkInstaller.
MINIX NEO X5 comes with Ethernet, Bluetooth and Wi-Fi connection;
you could connect to many of your devices within the same network and
share the contents amongst them, such as videos, music and photos.
Content
Chapter 1: Connect .......................................................5
What's in the box ....................................................................................6
MINIX NEO X5 at a glance ....................................................................7
What you need ......................................................................................11
Setting up MINIX NEO X5 .....................................................................12
Chapter 2: Basic Setup ................................................13
Language setup ....................................................................................14
Time zone setup ...................................................................................14
Wi-Fi setup (basic) ...............................................................................14
Chapter 3: Google Play Store ......................................15
Chapter 4: Control .......................................................17
Different control methods ......................................................................18
Using your MINIX remote .....................................................................18
To use the GridShow launcher .............................................................18
Functions of the MINIX remote ............................................................19
- 5 -
Chapter 1
Connect.
- 6 -
What’s in the box
- MINIX NEO X5 x 1
- MINIX remote x 1
- 5V Power adapter x 1
- Micro-USB OTG cable x 1
- HDMI cable x 1
- Setup guide x 1
- 7 -
MINIX NEO X5 at a glance
1. IR receiver
2. Power LED
3. Power button
4. Earphone jack
5. Microphone jack
6. USB port 1
7. SD/MMC card slot
8. OTG port (serves as
USB port 2 also)
9. Recover button (for
service and upgrade)
10. HDMI port
11. Optical audio port
12. USB 2.0 port 3
13. USB 2.0 port 4
14. Ethernet jack
15. DC 5V Power-in jack
3
15
14
11
2
10
12
13
4 5 6 7 8
9
1
- 8 -
IR receiver
Use with the included MINIX remote to control MINIX NEO X5.
Power LED
The LED glows when the MINIX NEO X5 is on.
Power button
To power on MINIX NEO X5, press and hold the power button for 2-3
seconds until the power LED glows. To power off MINIX NEO X5,
press and hold the power button and the display will prompt out the
conrmation dialogue for power off, select OK to conrm; OR hold the
power button for 8 seconds to force power off, the LED will be off.
Earphone jack
Connect to an external audio output device such as earphone or speaker.
Microphone jack
Connect to a microphone for voice input.
SD/MMC card slot
Increase the storage size or read files directly from a SD/MMC card,
support up to 32GB max.
- 9 -
OTG port
Connect the micro end of the micro-USB cable to this port and the other
end to the computer for synchronization and upgrade purpose. This port
also serves as an extra USB port while used with the Micro-USB OTG
cable bundled in the package.
Recover button
This button is to be used together with the OTG port when connecting
to a computer for service/upgrade purpose. Simply press and hold this
button before connecting to the computers USB port and release it
once MINIX NEO X5 is powered on.
HDMI port
Connect MINIX NEO X5 to the HDMI port of a high-denition TV or PC
monitor using an HDMI cable.
Optical audio port
Connect to the optical audio input of an external sound processing unit,
such as an amplier.
USB 2.0 ports
Connect an external USB device to MINIX NEO X5 such as USB ash
drive, receiver of wireless keyboard and mouse, USB mouse, receiver
of wireless headset…etc.
- 10 -
Ethernet jack
Connect to the Ethernet cable for Internet access. If you need advanced
setting such as PPPoE dial-up, go into the setting page at: Settings ->More
While connected with the Ethernet cable, MINIX NEO X5 can be used
as a router and also a Wi-Fi hotspot; if you need to use the Wi-Fi
hotspot feature, please make sure that the Wi-Fi feature is OFF before
you enable the Wi-Fi hotspot service at: Settings ->More…
DC 5V Power-in jack
Connect the 5V power adapter supplied in the package to this port.
MINIX NEO X5 requires less than 1A to operate however we have
supplied a 5V 3A adapter with consideration that you need to connect to
other power-drawing external devices such as an external hard drive.
- 11 -
What you need
To start using MINIX NEO X5, you need the following:
High-denition TV/ PC monitor
A high-denition TV or PC monitor that can display 720p or 1080p video
with at least one HDMI input.
Cable
An HDMI cable to connect MINIX NEO X5 to your TV.
Wireless network
A wired network cable or an 802.11 a, b, g, or n Wi-Fi wireless network
(wireless video streaming requires 802.11g or n), your wireless network
name and password.
Software and accounts
To play content (videos, photos, music) from a smartphone or PC on
MINIX NEO X5, you need:
- A UPnP™/DLNA® software pre-loaded in your smartphone or
PC.
- A Google account to sign-in to Google Play Store to download
the corresponding applications (e.g. iMediaShare,
eHomeMediacenter) necessary for streaming the content from
a smartphone or PC.
- Other accounts may be required for full access to some
Internet contents.
- 12 -
Setting up MINIX NEO X5
MINIX NEO X5 connects to your TV or PC monitor through an HDMI
port that delivers both audio and video. Before you set up MINIX NEO
X5, look at the ports on the side/back of your TV or PC monitor to make
sure you have the right cable:
- An HDMI cable: You can connect MINIX NEO X5 to an HDTV
or home theater receiver that has an HDMI port, using an
HDMI cable for both video and audio.
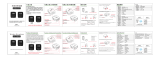
Step 1: Connecting the cable
1. Connect one end of the HDMI cable to the HDMI port of your TV/ PC
monitor.
2. Connect the other end of the cable to the HDMI port of MINIX NEO
X5.
Step 2: Connecting the power
Connect the 5V power adapter supplied in the package to this port.
Press and hold the power button for 2-3 seconds to power on MINIX
NEO X5 and the power LED glows when done.
Step 3: Turn on your TV/ PC monitor and select the input
Simply turn on your TV or PC monitor and select the corresponding
HDMI port connected to MINIX NEO X5.
- 13 -
Chapter 2
Basic Setup.
- 14 -
Language setup
You may choose the desired system language by the following steps:
Launcher Home Screen > Settings > Language & input > Language
The default language is English, you may choose your desired language
and conrm.
Time zone setup
You should adjust the time zone according to your current location by
the following steps:
Launcher Home Screen > Settings > Date & time > Select time zone
Choose your time zone and conrm.
Wi-Fi setup (basic)
Connect to your wireless network so that you could access to the
Internet by the following steps:
Launcher Home Screen > Settings > Wi-Fi > Check the option “To
see available networks turn Wi-Fi on”
Wi-Fi will turn on and automatically scan the wireless networks
available, then select the wireless network that you want to connect to
and conrm, key-in the password of the Wi-Fi network when the virtual
keyboard prompts, nally, hit the “Connect” button.
- 15 -
Chapter 3
Google Play Store.
- 16 -
Sign-in to your Google Account
Launch the Google Play Store by the following steps:
Launcher Home Screen -> Google Play Store, hit and conrm.
To use Google Play Store you need a Google Account. If you already
had a Google Account, select “Sign in” and login with your Google
Account. If you don’t have a Google Account yet, select “Get a Google
Account” and complete the rest of the process.
Upon completion of the sign-in process will bring you into the Google
Play Store which allows you to download and install the applications you
need.
Alternatively, if you cannot find the applications you need on Google
Play Store because of language restriction, location restriction or some
other reasons; you may look for and download the application les in the
form of “.apk” from the Internet and install them through the “ApkInstaller"
which is pre-loaded in the system.
- 17 -
Chapter 4
Control.
- 18 -
Different control methods
You may control your MINIX NEO X5 with the following input devices:
1.) Wired mouse;
2.) 2.4GHz USB wireless keyboard and mouse set;
3.) 2.4GHz USB wireless AirMouse remote control (MINIX NEO A1, to
be sold separately);
4.) MINIX infrared remote control (included)
Using your MINIX remote
Read on to learn about using your MINIX remote with MINIX NEO X5.
This remote will be 100% functional when working with our customized
user interface - the GridShow launcher
Note: The MINIX remote will still function if you are not using the
GridShow launcher, however, some keys might become useless, e.g the
STOP button.
To use the GridShow launcher:
Home -> Select “GridShow” launcher
Use the MINIX remote to control MINIX NEO X5 settings and navigate
your content. Make sure there are no obstructions between the MINIX
remote and MINIX NEO X5.
- 19 -
Functions of the MINIX remote
POWER - To wake up from or put the MINIX NEO X5 into sleep
mode
VOLUME DOWN - Adjust the system volume down
VOLUME UP - Adjust the system volume up
HOME - Bring you back to the Home Screen (choose of launcher
required)
MENU - Call out the options menu for your current screen or
application running
BACK - Bring you back to the previous screen running or cancelling
an activity
- 20 -
ZOOM IN - Allow you to zoom in when an application supports this
function
UP - Move upward
ZOOM OUT - Allow you to zoom out when an application supports
this function
LEFT - Move left
OK - To conrm a particular action, and as an “Enter” key
RIGHT - Move right
SEARCH - Pop up the search interface when an application
supports this function
DOWN - Move downward
MUTE - Mute the system volume
REWIND - Rewind the music or video playing
PLAY/PAUSE - Play or pause the music or video playing
FORWARD - forward the music or video playing
PREVIOUS - Jump to the previous music or video playing
STOP - Stop the music or video playing
NEXT - Jump to the next music or video playing
S
  • Page 1 1
  • Page 2 2
  • Page 3 3
  • Page 4 4
  • Page 5 5
  • Page 6 6
  • Page 7 7
  • Page 8 8
  • Page 9 9
  • Page 10 10
  • Page 11 11
  • Page 12 12
  • Page 13 13
  • Page 14 14
  • Page 15 15
  • Page 16 16
  • Page 17 17
  • Page 18 18
  • Page 19 19
  • Page 20 20
  • Page 21 21
  • Page 22 22

J&W TECHNOLOGY WMFNEOX5 User manual

Type
User manual

J&W TECHNOLOGY WMFNEOX5 is an Android-based media hub powered by a dual-core ARM Cortex-A9 processor with Mali-400 GPU. It can connect to the Internet via Ethernet, Wi-Fi, or a mobile hotspot. You can use it to access the Google Play Store to download apps, watch YouTube and Internet TV, play games, or browse the web. It also has ports for connecting external devices such as USB drives, keyboards, mice, and speakers.

Ask a question and I''ll find the answer in the document

Finding information in a document is now easier with AI