Raven RS1 Installation guide

Type
Installation guide

This manual is also suitable for

Raven RS1 is a device that enables automatic steering of agricultural vehicles, increasing efficiency and accuracy in farming operations. It utilizes satellite navigation and correction services to precisely guide the vehicle along predetermined paths, reducing overlap and optimizing coverage. The RS1 system includes a control unit, sensors, and a display that provides real-time data and guidance information to the operator. It can be integrated with various Raven displays and implement controllers for seamless operation.

Raven RS1 is a device that enables automatic steering of agricultural vehicles, increasing efficiency and accuracy in farming operations. It utilizes satellite navigation and correction services to precisely guide the vehicle along predetermined paths, reducing overlap and optimizing coverage. The RS1 system includes a control unit, sensors, and a display that provides real-time data and guidance information to the operator. It can be integrated with various Raven displays and implement controllers for seamless operation.

RBR Enterprise Vector 300
LS/Venturi LS RS1/HDU
Installation Manual
Manual No. 016-5035-002 Rev. A 10/18 E32227
Copyright 2018
016-0171-686 Rev. A 8/18 E31924
We Solve Great Challenges.
DISCLAIMER
While every effort has been made to ensure the accuracy of this document, Raven Industries assumes no
responsibility for omissions and errors. Nor is any liability assumed for damages resulting from the use of
information contained herein.
Raven Industries shall not be responsible or liable for incidental or consequential damages or a loss of anticipated
benefits or profits, work stoppage or loss, or impairment of data arising out of the use, or inability to use, this
system or any of its components. Raven Industries shall not be held responsible for any modifications or repairs
made outside our facilities, nor damages resulting from inadequate maintenance of this system.
As with all wireless and satellite signals, several factors may affect the availability and accuracy of wireless and
satellite navigation and correction services (e.g. GPS, GNSS, SBAS, etc.). Therefore, Raven Industries cannot
guarantee the accuracy, integrity, continuity, or availability of these services and cannot guarantee the ability to
use Raven systems, or products used as components of systems, which rely upon the reception of these signals or
availability of these services. Raven Industries accepts no responsibility for the use of any of these signals or
services for other than the stated purpose.
Table of Contents
Manual No. 016-5035-002 Rev. A i
Chapter 1 Important Safety Information............................................................................. 1
Instructions for Wire Routing .................................................................................................................................2
Chapter 2 Introduction............................................................................................................. 5
Preparing for Installation ..........................................................................................................................................5
Recommendations .................................................................................................................................................................6
Point of Reference .................................................................................................................................................................6
Kit Contents ...................................................................................................................................................................6
RS1/HDU Kits ................................................................................................................................................................6
Updates ...........................................................................................................................................................................6
Chapter 3 Hydraulic System Installation............................................................................ 11
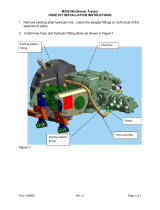
Install Fittings in the Steering Valve ..................................................................................................................12
Mount the Steering Valve .....................................................................................................................................13
Install the Left and Right Steering Hoses ........................................................................................................14
Install the Pressure and Tank Hoses .................................................................................................................17
Install the Load Sense Hoses ...............................................................................................................................19
Hydraulic Diagram ...................................................................................................................................................21
Chapter 4 Wheel Angle Sensor Installation ...................................................................... 23
Assemble the WAS ...................................................................................................................................................23
Install THE was ......................................................................................................................................................................23
Chapter 5 Cab Component Installation.............................................................................. 27
RS1 Installation ..........................................................................................................................................................27
Cab Component Installation ................................................................................................................................29
Install the Master Switch .......................................................................................................................................30
Install System Cables ...............................................................................................................................................31
HDU Cable ..............................................................................................................................................................................31
HDU Switch Cable ....................................................................................................................................................34
Valve Cable .................................................................................................................................................................35
RS1 Cable .....................................................................................................................................................................37
Routine Operation ...................................................................................................................................................39
System Diagrams ......................................................................................................................................................41
Appendix A Kits Lists ................................................................................................. 43
Kits ..................................................................................................................................................................................43
Table of Contents
ii RBR Enterprise Vector 300 LS/Venturi LS RS1/HDU Installation Manual
CHAPTER
1
Important Safety Information: 1
CHAPTER 1
IMPORTANT SAFETY
INFORMATION
Read this manual and the operation and safety instructions included with your implement and/or controller
carefully before installing the RS1/HDU™ system.
Follow all safety information presented within this manual.
If you require assistance with any portion of the installation or service of your Raven equipment, contact your
local Raven dealer for support.
Follow all safety labels affixed to the RS1/HDU system components. Be sure to keep safety labels in good
condition and replace any missing or damaged labels. To obtain replacements for missing or damaged safety
labels, contact your local Raven dealer.
When operating the machine after installing RS1/HDU, observe the following safety measures:
Be alert and aware of surroundings.
Do not operate RS1/HDU or any agricultural equipment while under the influence of alcohol or an illegal
substance.
Remain in the operators position in the machine at all times when RS1/HDU is engaged.
Disable RS1/HDU when exiting the operators seat and machine.
Do not drive the machine with RS1/HDU enabled on any public road.
Determine and remain a safe working distance from other individuals. The operator is responsible for disabling
RS1/HDU when the safe working distance has diminished.
Ensure RS1/HDU is disabled prior to starting any maintenance work on RS1/HDU or the machine.
When starting the machine for the first time after installing RS1/HDU, be sure that all persons stand clear in
case a hose has not been properly tightened.
The machine must remain stationary and switched off during RS1/HDU installation or maintenance.
NOTICE
WARNING
CHAPTER 1
2 RBR Enterprise Vector 300 LS/Venturi LS RS1/HDU Installation Manual
INSTRUCTIONS FOR WIRE ROUTING
The word “harness” is used to mean all electrical leads and cables, bundled and unbundled. When installing
harness, secure it at least every 30 cm (12in) to the frame. Follow existing harness as much as possible and use
these guidelines:
Harness should not contact or be attached to:
Lines and hoses with high vibration forces or pressure spikes
Lines and hoses carrying hot fluids beyond harness component specifications
Avoid contact with any sharp edge or abrading surfaces such as, but not limited to:
Sheared or flame cut edges
Edges of machined surfaces
Fastener threads or cap screw heads
Ends of adjustable hose clamps
Wire exiting conduit without protection, either ends or side of conduit
Hose and tube fittings
Routing should not allow harnesses to:
Hang below the unit
Have the potential to become damaged due to exposure to the exterior environment. (i.e. tree limbs, debris,
attachments)
Be placed in areas of or in contact with machine components which develop temperatures higher than the
temperature rating of harness components
Wiring should be protected or shielded if it needs to route near hot temperatures beyond harness component
specifications
Harnessing should not have sharp bends
Allow sufficient clearance from machine component operational zones such as:
Drive shafts, universal joints and hitches (i.e. 3-point hitch)
Pulleys, gears, sprockets
Deflection and backlash of belts and chains
Adjustment zones of adjustable brackets
Changes of position in steering and suspension systems
Moving linkages, cylinders, articulation joints, attachments
Ground engaging components
For harness sections that move during machine operation:
Allow sufficient length for free movement without interference to prevent: pulling, pinching, catching or
rubbing, especially in articulation and pivot points
Clamp harnesses securely to force controlled movement to occur in the desired harness section
Avoid sharp twisting or flexing of harnesses in short distances
Connectors and splices should not be located in harness sections that move
Important Safety Information: Instructions for Wire Routing 3
IMPORTANT SAFETY INFORMATION
Protect harnesses from:
Foreign objects such as rocks that may fall or be thrown by the unit
Buildup of dirt, mud, snow, ice, submersion in water and oil
Tree limbs, brush and debris
Damage where service personnel or operators might step or use as a grab bar
Damage when passing through metal structures
IMPORTANT: Avoid directly spraying electrical components and connections with high pressure water. High pressure
water sprays can penetrate seals and cause electrical components to corrode or otherwise become
damaged. When performing maintenance:
Inspect all electrical components and connections for damage or corrosion. Repair or replace
components, connections, or cable as necessary.
Ensure connections are clean, dry, and not damaged. Repair or replace components, connections,
or cable as necessary.
Clean components or connections using low pressure water, pressurized air, or an aerosol electrical
component cleaning agent.
Remove visible surface water from components, connections, or seals using pressurized air or an
aerosol electrical component cleaning agent. allow components to dry completely before
reconnecting cables.
CHAPTER 1
4 RBR Enterprise Vector 300 LS/Venturi LS RS1/HDU Installation Manual
CHAPTER
2
Introduction: Preparing for Installation 5
CHAPTER 2
INTRODUCTION
Congratulations on your purchase of the RS1/HDU system! This system is designed to provide cutting-edge,
hands-free steering of the machine via Global Positioning System (GPS) coordinates.
This manual applies to the following machines:
MAKE: RBR
MODEL: Vector 300 LS/Venturi LS
FIGURE 1. RBR Vector 300 LS
PREPARING FOR INSTALLATION
Before installing the RS1/HDU system, park the machine where the ground is level, clean, and dry. Turn off the
machine and leave it turned off for the duration of the installation process. Bleed pressure from the hydraulic
system by loosening the hydraulic fittings slowly, where applicable.
During the installation process, follow good safety practices. Be sure to carefully read the instructions in this
manual as you complete the installation process.
CHAPTER 2
6 RBR Enterprise Vector 300 LS/Venturi LS RS1/HDU Installation Manual
RECOMMENDATIONS
Raven Industries recommends the following best practices when installing or operating the RS1/HDU system for
the first time, at the start of the season, or when moving the RS1/HDU system to another machine:
Install the GPS antenna in the recommended location. Refer to the following table for the machine-specific
antenna mounting location.
Ensure the machine’s hydraulic filters have been recently changed and there are no issues with the machine’s
hydraulic system (e.g., pump issues, faulty hydraulic motors, fine metal deposits in the hydraulic hoses, etc.).
Ensure the machine’s hydraulic system is using fresh oil and debris is flushed from the hydraulic hoses, valves,
and filters.
Raven Industries recommends the following best practices when installing the RS1/HDU system:
Use part numbers to identify the parts.
Do not remove the plastic wrap from a part until it is necessary for installation.
Do not remove plastic caps from a part until it is necessary for installation.
POINT OF REFERENCE
The instructions in this manual assume that you are standing behind the machine, looking toward the cab.
KIT CONTENTS
This section contains a list of kits that may be included with the components. Before beginning the RS1 installation,
compare the items in the kit with the components specific to your installation on the list(s) in
“Kits Lists” on
page 43. If you have questions about the kit, contact your Raven dealer.
RS1/HDU Kits
UPDATES
Software and manual updates are available on the Raven Applied Technology website:
http://www.ravenhelp.com
Description Kit Number
Kit, WAS, RBR 117-0192-053
Kit, Hydraulic, PVG Dynamic Load Sense 117-0199-126
Kit, HDU, RBR Vector 117-5035-002
2
Introduction: Updates 7
INTRODUCTION
At Raven Industries, we strive to make your experience with our products as rewarding as
possible. One way to improve this experience is to provide us with feedback on this manual.
Your feedback will help shape the future of our product documentation and the overall service we
provide. We appreciate the opportunity to see ourselves as our customers see us and are eager
to gather ideas on how we have been helping or how we can do better.
To serve you best, please send an email with the following information to
techwriting@ravenind.com
-RBR Enterprise Vector 300 LS/Venturi LS RS1/HDU Installation Manual
-Manual No. 016-5035-002 Rev. A
-Any comments or feedback (include chapter or page numbers if applicable).
-Let us know how long have you been using this or other Raven products.
We will not share your email or any information you provide with anyone else. Your feedback is
valued and extremely important to us.
Thank you for your time.
CHAPTER 2
8 RBR Enterprise Vector 300 LS/Venturi LS RS1/HDU Installation Manual
2
Introduction: Updates 9
INTRODUCTION
CHAPTER 2
10 RBR Enterprise Vector 300 LS/Venturi LS RS1/HDU Installation Manual
CHAPTER
3
Hydraulic System Installation: 11
CHAPTER 3
HYDRAULIC SYSTEM
INSTALLATION
WARNING
Hydraulics are under pressure. Care should
always be taken with a system that has been
pressurized.
Before beginning the RS1/HDU hydraulic
installation, turn off the machine and relieve
pressure by turning the steering wheel left and
right.
Never work on a hot machine. Always allow it to
cool before performing diagnostics,
maintenance, or routine service.
When disconnecting or purging hydraulic hoses,
be aware that the hydraulic fluid within the
machine’s system may be extremely hot and
under high pressure.
Tampering with hydraulic valves may cause
serious injury or death, and will void the warranty.
CAUTION
When installing hydraulic components,
performing diagnostics, maintenance, or routine
service, ensure precautions are taken to prevent
any foreign material from being introduced into
the machine’s hydraulic system.
Objects or materials that are able to bypass the
machine’s hydraulic filtration system will reduce
performance and possibly damage the steering
hydraulic valve.
CHAPTER 3
12 RBR Enterprise Vector 300 LS/Venturi LS RS1/HDU Installation Manual
INSTALL FITTINGS IN THE STEERING VALVE
Before mounting the RS1/HDU valve (P/N 334-0003-088) on the machine, install the proper fittings in the valve.
This prepares the valve for installation and simplifies the hose connection process later in the procedure.
FIGURE 1. Fittings Installed in the Steering Valve
NOTICE
The appearance of the RS1/HDU hydraulic valve
may vary slightly from the images contained in
this manual. However, the fittings, hose
connections, and cable connections remain the
same.
Fitting Part Number Port
Fitting - -6 JIC (M) to -10 SAE O-Ring (M) Straight Adapter 333-0012-106 A, B
Fitting - -6 JIC M/F 90° Swivel Elbow 333-0012-042 A, B
Fitting - -4 JIC (M) to -6 SAE O-Ring (M) Straight Adapter 333-0012-044
LSPV,
LS STEER
Fitting - -4 JIC M/F 90° Swivel Elbow 333-0012-154 LSPV
Fitting - -10 JIC (M) to -8 SAE O-Ring (M) Straight Adapter 333-0012-110 P, T
Fitting - -10 JIC M/F 90° Swivel Elbow 333-0012-108 P, T
Transducer - 0-3000 PSI Pressure 422-0000-086 PS
Install -4 JIC M/F 90°
Swivel Elbow (P/N 333-
0012-154) on Fitting
Installed in Port LSPV
Install -6 JIC M/F 90°
Swivel Elbow (P/N 333-
0012-042) on Fittings
Installed in Ports A and B
Install -10 JIC M/F 90°
Swivel Elbow (P/N 333-
0012-108) on Fittings
Installed in Ports P and T
3
Hydraulic System Installation: Mount the Steering Valve 13
HYDRAULIC SYSTEM INSTALLATION
MOUNT THE STEERING VALVE
FIGURE 2. Steering Valve Mounting Location
1. Identify the steering valve (P/N 334-0003-088) mounting location on the inside of the machine’s frame, below
the walkway.
FIGURE 3. Steering Valve Installed
2. Secure the steering valve to the valve mounting bracket using four 5/16”-18 x 7/8” hex bolts (P/N 311-0052-104)
and four 5/16” lock washers (P/N 313-1000-019).
3. Remove the top bolt from the machine’s catwalk.
4. Align the lip of the valve mounting bracket with the hole in the catwalk and the adjacent hole in the machine’s
frame.
5. Install the valve mounting bracket on the machine using the machine’s bolt that was removed in step 2 and one
3/8”-16 UNC x 1-4” bolt (P/N 311-0054-106, one 3/8” flat washer (P/N 313-2300-013), and one 3/8”-16 UNC 3B
nylon insert lock washer (P/N 312-4000-061).
CHAPTER 3
14 RBR Enterprise Vector 300 LS/Venturi LS RS1/HDU Installation Manual
INSTALL THE LEFT AND RIGHT STEERING HOSES
FIGURE 4. Steering Orbital Location
1. Locate the machine’s steering orbital under the hood, just in front of the cab.
FIGURE 5. Left Steering Port on Steering Orbital
2. Remove the cap from the tee fitting installed in the left steering port (upper-right corner) of the steering
orbital.
Left Steering Port
3
Hydraulic System Installation: Install the Left and Right Steering Hoses 15
HYDRAULIC SYSTEM INSTALLATION
FIGURE 6. Left Steering Hose Installed on Steering Orbital
3. Install the straight end of the supplied hydraulic hose (P/N 214-1000-780) on the open port of the tee fitting.
FIGURE 7. Left Steering Hose Installed on Steering Valve
4. Connect the 90° end of the installed hydraulic hose to the fitting installed in Port A of the steering valve
(P/N 334-0003-088).
Machine’s
Left
Steering
Hose
Installed Left
Steering Hose
(P/N 214-1000-
780)
CHAPTER 3
16 RBR Enterprise Vector 300 LS/Venturi LS RS1/HDU Installation Manual
FIGURE 8. Right Steering Port on Steering Orbital
5. Remove the cap from the tee fitting installed in the right steering port (lower-right corner) of the steering
orbital.
FIGURE 9. Right Steering Hose Installed on Steering Orbital
6. Install the straight end of the supplied hydraulic hose (P/N 214-1000-780) in the open port if the tee fitting.
Right Steering Port
Machine’s
Right
Steering Hose
Installed Right
Steering Hose
(P/N 214-1000-
780)
  • Page 1 1
  • Page 2 2
  • Page 3 3
  • Page 4 4
  • Page 5 5
  • Page 6 6
  • Page 7 7
  • Page 8 8
  • Page 9 9
  • Page 10 10
  • Page 11 11
  • Page 12 12
  • Page 13 13
  • Page 14 14
  • Page 15 15
  • Page 16 16
  • Page 17 17
  • Page 18 18
  • Page 19 19
  • Page 20 20
  • Page 21 21
  • Page 22 22
  • Page 23 23
  • Page 24 24
  • Page 25 25
  • Page 26 26
  • Page 27 27
  • Page 28 28
  • Page 29 29
  • Page 30 30
  • Page 31 31
  • Page 32 32
  • Page 33 33
  • Page 34 34
  • Page 35 35
  • Page 36 36
  • Page 37 37
  • Page 38 38
  • Page 39 39
  • Page 40 40
  • Page 41 41
  • Page 42 42
  • Page 43 43
  • Page 44 44
  • Page 45 45
  • Page 46 46
  • Page 47 47
  • Page 48 48
  • Page 49 49
  • Page 50 50
  • Page 51 51
  • Page 52 52
  • Page 53 53
  • Page 54 54
  • Page 55 55

Raven RS1 Installation guide

Type
Installation guide
This manual is also suitable for

Raven RS1 is a device that enables automatic steering of agricultural vehicles, increasing efficiency and accuracy in farming operations. It utilizes satellite navigation and correction services to precisely guide the vehicle along predetermined paths, reducing overlap and optimizing coverage. The RS1 system includes a control unit, sensors, and a display that provides real-time data and guidance information to the operator. It can be integrated with various Raven displays and implement controllers for seamless operation.

Ask a question and I''ll find the answer in the document

Finding information in a document is now easier with AI