Page is loading ...

Series TAC-L Photo/Contact Digital Tachometer
Specications - Installation and Operating Instructions
Bulletin TE-TAC-L
MODEL TAC-L Portable Digital Tachometer measures rotational speed either by
contacting a rotatable head to the shaft of the object, or using photo sensor to detect
the reections from the laser. The laser target can record from a distance of up to 20
inches and gives a more accurate measurement than LED targeting. Model TAC-L
includes a large LCD with a backlight for use in dark areas. This tachometer is made
of a strong, lightweight ABS plastic housing, which is designed to comfortably t in the
hand of the user. Supplied with this model are 3 contact rotational heads, a contact
surface wheel, and a protective carrying case.
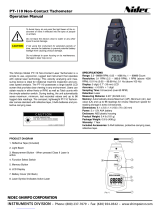
PRODUCT OVERVIEW
A. Surface speed wheel B. Contact test device
C. Contact measuring device D. Measuring button
E. Function switch F. Memory button
G. Display H. Battery cover
NON-CONTACT MEASURING (RPM)
1. Apply a reective mark to the object being measured.
2. Slide the function switch to “rpm photo” and remove the cap.
3. Depress the measuring button and align the visible light beam with the applied
target. Verify that the monitor indicator lights when the target aligns with the beam.
SPECIFICATIONS
Accuracy: ±(0.05% + 1 digit).
Display: Backlit LCD; 5 digits, 7 segments, 0.7˝ (1.8 cm) H.
Range: Non-contact (RPM): 2.5 to 99,999 RPM; Contact (RPM): 0.5 to 19,999
RPM; Surface Speed (m/min): 0.05 to 1999.9 m/min.
Resolution: Non-contact (RPM): 0.1 RPM (2.5 to 999.9 RPM), 1 RPM (1000 to
99,999 RPM); Contact (RPM): 0.1 RPM (0.5 to 999.9 RPM), 1 RPM (1000 to 19,999
RPM); Surface Speed (m/min): 0.01 m/min (0.05 to 99.99 m/min), 0.1 m/min (100.0
to 1999.9 m/min).
Non-contact Measuring Distance Range: 2 to 20˝ (5 to 50 cm).
Sampling Time: 0.8 s.
Temperature Limits: 32 to 122°F (0 to 50°C).
Power Requirements: (4) 1.5 V AA alkaline batteries.
Weight: 1.37 lb (.620 kg).
In the case of measuring low RPM values with the non-contact
laser, it is suggested that the user attach more reective marks
an average distance apart on the object, then measure as above, giving a more
accurate measurement. The user then must divide the reading shown by the number
of reective marks to nd the true RPM.
NOTICE
m/min
rpm
rpm
MEM
contact
contact
photo
DIGITAL TACHOMETER
TAC-L
A
B
C
D
E
F
G
H
DIGITAL TACHOMETER
7-3/8
[187.91]
2-7/8
[73.89]
6-1/4
[159.96]
1-3/8
[34.05]
RPM ADAPTER FITTING
(ATTACHED TO UNIT)
CYLINDRICAL CONTACT
ROTATIONAL FITTING
SMALL POINTED CONTAC
T
ROTATIONAL FITTING
LARGE POINTED CONTAC
T
ROTATIONAL FITTINGS
(ATTACHED TO UNIT)
SURFACE SPEED
RING ATTACHMENT
Figure 1
®
DWYER INSTRUMENTS, INC.
P.O. BOX 373 • MICHIGAN CITY, INDIANA 46360, U.S.A.
Phone: 219/879-8000
Fax: 219/872-9057
www.dwyer-inst.com
e-mail: [email protected]

Printed in U.S.A. 6/17 FR# 444140-00 Rev. 1©Copyright 2017 Dwyer Instruments, Inc.
DWYER INSTRUMENTS, INC.
P.O. BOX 373 • MICHIGAN CITY, INDIANA 46360, U.S.A.
Phone: 219/879-8000
Fax: 219/872-9057
www.dwyer-inst.com
e-mail: [email protected]
CONTACT MEASURING (RPM)
1. Install the contact device, with the head piece that works best for the object being
measured.
2. Slide the function switch to “rpm contact.”
3. Lightly press the rpm adapter against the center hole of the rotating shaft.
4. Depress the measuring button, being sure to keep the alignment straight.
5. Release the measuring button when the display reading stabilizes.
SURFACE SPEED MEASURING (M/MIN)
1. Install the surface speed ring attachment.
2. Slide the function switch “m/min contact.”
3. Lightly press the speed ring to the object being measured.
4. Depress the measuring button, being sure to keep the alignment straight.
5. Release the measuring button when the display reading stabilizes.
MEMORY
The memory button is able to recall the records from the last time the measuring button
was pressed. Press and hold the memory button each time. The rst time the button
is pressed, the maximum recorded value is shown, alternated with “UP.” See Figure 2.
The second time the button is pressed, the minimum recorded value is shown,
alternated with “DN.” See Figure 3.
The third time the button is pressed, the last recorded value is shown, alternated with
“LA.” See Figure 4.
The fourth time the button is pressed, there will be a countdown from 20 to 1. After this,
the display will show “An **.” The number that is displayed after “An” is the number of
seconds that the tachometer was recording for during the last session. In the case of
Figure 5, the tachometer recorded for 64 seconds.
Each time the button is pressed after that, it will show the recorded value for each
second it was recording. After having gone through all of the values, pressing the
button will start from the beginning with the maximum measurement.
REPLACING THE BATTERIES
When the batteries need to be replaced, the battery icon will appear in the bottom
left corner of the display. To replace the batteries, slide the battery cover off of the
tachometer and remove the 4 batteries. Install the new batteries in the same position
as the previous ones.
MAINTENANCE/REPAIR
Upon nal installation of the Model TAC-L, no routine maintenance is required
besides changing the batteries. The Model TAC-L is not eld serviceable and should
be returned if repair is needed. Field repair should not be attempted and may void
warranty.
WARRANTY/RETURN
Refer to “Terms and Conditions of Sale” in our catalog and on our website. Contact
customer service to receive a Return Goods Authorization number before shipping the
product back for repair. Be sure to include a brief description of the problem plus any
additional application notes.
The large tapered and pillar rubber pieces are more suitable for low
speed. The small tapered piece is more suitable for high speed.
NOTICE
Recorded data is reset every time the measuring button is pressed.
NOTICE
Figure 2
Figure 4
Figure 5
Figure 3
/