Page is loading ...

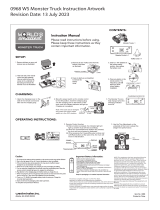
RC4WD XR2 Ultimate Micro Radio
and ESC/Receiver

i
Warranty
RC4WD non-electrical products are warranted to be free of defects in materials and workmanship
when new. Our limited warranty does not cover damages due to normal wear and tear, user error of
assembly or installation, user modifications, user's failure to perform routine maintenance, addition of
aftermarket parts or option parts. This warranty lasts 30 days after arrival for original purchaser.
In the event of a defect under this warranty, RC4WD will, at our discretion, replace the product,
provided our inspection indicates that an original defect exists. RC4WD reserves the right to replace
any product which is no longer available with a product of comparable value and function. If RC4WD
determines the repair is not covered under warranty guidelines, we will contact you to discuss your
options. If you have any questions, please contact us via email at [email protected].
RC4WD warranties its electronics for 30 days from date of arrival. This covers all electrical items
except items that are already noted on the individual product page.

BATTERY CHARGING
Model
Input
Output
RC4WD 2s Lipo Balance Charger
DC5V 1~2A
DC7.4V 800mA
SPECIFICATIONS
Rating Voltage
Battery Capacity
Discharge Rate
7.4V
850mAh
25C
SPECIFICATIONS
1. Only charge batteries that are cool to the touch and are not
damaged (swollen, bent, broken or punctured).
2. Connect the charger to USB 2.0 compatible charging block
(ie. cell phone charger)
3. Plug the battery's balance port (white plug) into the charger's
connector. The LED will be red when it is charging.
4. The charger will have a bright red LED when charging. When
charging is complete the LED light will dim and turn off.
5. Always unplug the battery from the charger immediately
upon completion of charging.
CAUTION: Overcharging a battery may cause a fire.
LiPO BATTERY
IMPORTANT: To prevent battery from leaking, overheating or exploding, carefully follow these instructions! Misuse
of battery may lead to leakage, heat generation or explosion. Battery may become hot during use. Battery
temperature may exceed 25C (77F) even under normal operation and may cause burns or alter the shape of some
materials.
Failure to follow instructions associated with this symbol risks injury or even death!
lf battery liquid enters the eye, immediately flush continuously with clean running water and seek medical
treatment. Serious and permanent eye damage may occur.
Do not leave battery and charger unattended
This charger is designed to charge only 7.4V 850mAh 2S LiPo Battery.
Do not use this charger with other batteries. RC4WD can not guarantee
compatibility with other batteries. Never let children operate unsupervised
while charger is in use. Adult supervision is recommended at all times.
The charger is for indoor use only. Do not use in case of high humidity
conditions or condensation.
Do not attempt to open or modify the charger’s case.
Do not let objects or liquids penetrate the charger’s cooling vents.
The charger may get hot during use. Use the charger in a well ventilated area, away from people and electrically
conductive or inflammable materials.
If the battery has suspicious reactions during the charge or discharge, such as overheating, venting or leaking,
immediately disconnect the battery and store it in a safe location, away from people and inflammable materials.
1

Failure to follow instructions associated with this symbol risks injury or even death!
Avoid battery liquid contact with skin and clothing.
If contact occurs, remove contaminated clothing and wash skin thoroughly with water.
NEVER place a battery into water.
IF you experience irregular noise,
temperature or any leaking from your
battery, stop using it immediately!
KEEP battery away from exposed flame,
high temperatures and humidity.
ONLY use genuine charger unit for
recharging brand LiPo batteries.
ENSURE polarity is correct when plugging
a battery into the charger unit.
NEVER plug a battery directly into
household outlets or cigarette lighters
in cars!
Before Use: Read and understand the battery and charger operating instructions before recharging.
NOTE: Before any use of this battery, ensure that it is fully charged.
During use: Always monitor a battery while it’s charging so you can react to any unexpected problems.
LiPo batteries are ONLY for use in
R/C (radio control) models! Do NOT
use them for any other purpose!
NEVER disassemble or modify a battery!
Do NOT remove or cut the outer tube
from battery!
DISCONTINUE charging immediately
if the charge time has been
exceeded, even if the battery is not
fully charged.
LiPo
Battery is recyclable. At the end of its useful life, under various national, state or local laws, it may be illegal to
dispose of a battery into the municipal waste stream. Check with your local solid waste officials for details in your
area for recycling options or proper disposal.
WARNING
Before using, customers must read information below:
Use caution when holding the battery. Do not drop or attempt to dismantle the battery or any parts of the battery.
Do not mix usage of old and new cells or cells of different sizes, different chemistry and/or types in the same battery
assembly.
Do not heat or dispose of battery into fire, water and/or other liquids.
Do not place the battery into microwave, washing machine and/or drying machine.
Do not use a damaged battery (such as swollen, deformed, voltage is lower than 0.9V, destroyed, etc.)
Do not place batteries near heating sources or expose to direct sunlight for long periods. Elevated temperatures may
result in reduced battery life cycle.
Do not short-circuit the battery’s positive and negative terminals.
Do not charge, discharge or store the battery above or below the battery specifications.
Do not disassemble the battery.
Before charging battery, ensure polarity is correct.
Keep battery far away from easily flammable objects and children while charging.
Do not charge when battery is hot to the touch. Allow battery to cool before recharging.
Never leave batteries unattended while charging.
Do not leave battery installed in your model while not in use. Do not charge the battery while installed in models.
2

Power
ON / OFF
ATV
Bind
Steering Trim Dial
LED indicator
Throttle Trim Dial
Throttle
Reverse Switch
Battery Compartment Tray
Throttle Trigger
Grip Handle
Steering Wheel
2.4 ANT
Steering
Reverse Switch
The following is an overview of the various functions and adjustments found on XR2 Ultimate Micro radio system for
RC4WD models. It is important to read and understand about all of these functions and adjustments before driving.
1. Transmitter Functions
2. Battery Installation
* User should practice the throttle and steering approach
for different cornering at different speeds or road surfaces.
Description
Specifications
Steering Wheel
ST. Trim Dial
TH. Trim Dial
ST Reverse Switch
TH Reverse Switch
Battery
Compartment Tray
ATV
Bind
Controls direction (Left / Right)
Throttle Trigger
Controls speed (Forward / Brake / Backward)
2.4 Antenna
Transmits signal to the model
Power ON / OFF the transmitter
Binding indicator and Low Battery indicator
Adjusts the maximum steering angle when
model turns Left / Right
Adjusts the model to run straight when
steering wheel is at center position
Contains batteries for powering
the transmitter
Power ON / OFF
LED indicator
Adjusts the model to stop when throttle
trigger is at stop position
Reverse direction when operating
steering wheel
Reverse direction when operating
throttle trigger
Allows TX to pair with RX
XR2 Ultimate Micro Radio and ESC/Receiver
(1) Use a Phillips screwdriver to remove the screw at
the handle and remove the battery compartment cover.
(2) Install the 4x 1.5V AA batteries with correct
polarity as marked on the battery compartment.
(3) Reinstall the battery compartment cover.
Warning: Never disassemble batteries or place the
batteries in a fire or chemical bath.
Battery Disposal: Observe your local regulations for
proper disposal of batteries.
Type
Binding
Lipo
NiMH
Normal Operation
Micro RX/ESC
LED Flashing Quickly
LED Flashing Slowly
LED Solid On
Repeating blink two times quickly
When no signal is received
at RX / ESC
Connect to Motor
Connect to Battery
Connect to Servo
Power ON / OFF
Setup Key
3. ESC/Receiver Connections
* The LED will remain solid during operation when the
battery type is LiPo and RF signal is received. If user wants
to select NiMH battery, hold the key for 5+ seconds, the
RX/ESC will change to the other battery type. For NiMH, the
LED will continually flash once RF signal is received.
Phillips Screw (M3 x 10)
3

XR2 Ultimate Micro ESC/Receiver
1. ESC/Receiver Features
Type 2.4GHz RX with Crawler ESC
Servo Port Standard 3 Pin Servo Port
BEC For Servo 5V,1A
Battery 7.2V NiMH or 2S LiPo, JST connector (Use setup key to select battery type)
2. ESC/Receiver
Status LED Remark
LED Off: If after 4 sec with no TX
detected, it will flash 2 times repeatedly
to indicate loss of signal.
TX Off
Normal Operation: LiPo Mode
Normal Operation: NiMH Mode LED Flashing Quickly
LED Solid On To select battery type, See section 3
To select battery type, See section 3
3. Selecting Battery Type
During normal operation, hold the key for 5+ seconds until LED change status. Now battery type is changed and
saved in the memory.
4. Electrical Specifications
Description Specifications
Low Voltage Cut-off (NiMH) 4V (Motor will stop once battery voltage below this value)
Low Voltage Cut-off (LiPo) 6.6V (Motor will stop once battery voltage below this value)
Max Battery Voltage 9V
Max Continuous Current
Max Peak Current
Thermal Protection
Stall Protection
3.5A
6A
110˚C
By current limit – 3A
BEC 5V, 1A with Thermal and Over Current Protection
XR2 Ultimate Micro Radio
1. Transmitter Features
Type 2.4GHz, Frequency Hopping, FHSS
2 Channel System
Programmable Steering End-points by Setup Key
Programmable Throttle End-points by Setup Key
Adjustable Steering Trim
Adjustable Throttle Trim
Dual Rate Steering
Low Battery Indicator LED
4

Press and hold the program button of the
RX/ESC and turn on RX/ESC, the LED will flash
slowly
Program
Button
LED
Power off the TX
12
Hold the Bind button of TX and then power on TX.
TX LED will flash when binding starts.
3When the RX LED Solid On, this means RX has
paired to TX successfully. If TX LED stops
flashing and RX is not bound, move closer and
start over at step 1.
4
2. Pairing to TX

1 2
3 4
If the truck turns the wrong direction when driving,
you can reverse the direction with the reverse
switch. The same principle can be applied to
forward and reverse.
Use the steering trim to make minor adjustments
to keep truck going in a straight line when not
steering.
Use throttle trim to adjust if truck does not stop
when not using the throttle.
Use the ATV Knob to adjust the steering
endpoints. This can be used to make the truck
steer more or less sharp.
a) Reverse Switches, Trim and ATV Knob
3. Setup Your Radio
6

Move the steering wheel until the front wheel is at
the right-most position. Then hold the steering
wheel at this position and press the setup key to
save this End-point.
12
3
b) Programming the End-points
To set the Right End-point of Steering
Hold the steering wheel at right-most position and
then hold the setup key for 10+ seconds until LED
flashes.
4The LED will blink 4 times and then return the TX
back to normal operation.
Turn on TX and RX.
7

Instructions for Disposal of WEEE by Users in the European Union
These products must never be thrown away with other waste. Thus, the users are responsible for disposing the used
batteries by submitting them to designated collection stations specific for recycling electronic and electric items.
Disposing of the used batteries in this way is helpful in conserving natural resources and promotes human health
while protecting the environment. For more information about used battery disposal and recycling, please contact
your local city office, your disposal service, or where you purchased the products.
ATTENTION
Do not use
damaged or
leaking batteries.
Z-S1718
RC4WD AA Batteries
4x
4. Low Battery Indicator
Once battery gets too low,
the LED will begin flashing
very slowly to indicate
battery is low. You should
replace with a new battery
as soon as possible.
12
Safety Precautions
THIS MODEL IS ONLY SUITABLE FOR PEOPLE 14 YEARS OLD AND UP.
THIS RADIO CONTROL MODEL IS NOT A TOY.
It is recommended that beginners seek advice from an experienced person in order to assemble the model or parts
correctly.
* During assembly: Keep out of reach of children. Parts are small and may be hazardous to small children.
Use precaution while operating this model. User is fully responsible for the model's assembly and safe operation.
Similar to above, only difference ishold the steering
at left-most position and then hold the setup key for
10+ seconds.
Similar to steering end-point programming, hold
the throttle at forward-most position to set forward
end-point, (Reverse-most position to set reverse
end-point) hold the setup key for 10+ seconds.
During normal operation,
the LED should be
solid ON. Program
Button
Program
Button
1 1
To set the Left End-point of Steering Throttle End-points Programming
8

FCC ID: 2AOMDCTX01
FCC Statement:
Manufacturer name: RC4WD Inc.
Company address: 720 N. Gateway St. Visalia, CA 93291
Contact information: [email protected]
Applicable environment: Toy
Frequency range: 2.4GHz
Transmit power: Below 100mW
This equipment has been tested and found to comply with the limits for a Class B digital device, pursuant to part 15
of the FCC Rules. These limits are designed to provide reasonable protection against harmful interference in a
residential installation. This equipment generates, uses and can radiate radio frequency energy and, if not installed
and used in accordance with the instructions, may cause harmful interference to radio communications.
However, there is no guarantee that interference will not occur in a particular installation. If this equipment does
cause harmful interference to radio or television reception, which can be determined by turning the equipment off and
on, the user is encouraged to try to correct the interference by one or more of the following measures:
• Reorient or relocate the receiving antenna.
• Increase the separation between the equipment and receiver.
• Connect the equipment to an outlet on a circuit different from that to which the receiver is connected.
This device complies with part 15 of the FCC rules. Operation is subject to the following two conditions: (1) This
device may not cause harmful interference, and (2) this device must accept any interference received, including
interference that may cause undesired operation.
NOTE: Modifications to this product will void the user’s authority to operate this equipment.
RF Exposure Warning:
This equipment complies with FCC radiation exposure limits set forth for an uncontrolled environment.
And should be operated with minimum distance of 20 cm between the antenna & your body.
The associated regulatory agencies of the following countries recognize the noted certifications for this product as
authorized for sale and use.
This is an advanced hobby grade product. It must be operated with caution and common sense. Basic mechanical
aptitude is required to operate this model: Failure to operate this product in a safe and responsible manner could
result in injury, damage the product or other properties. This product is not intended for use by children without direct
adult supervision. The product manual contains instructions for safe operation and maintenance. It is essential to
read and follow all the instructions and warnings in the manual prior to assembly, setup and use, in order to operate
correctly and avoid damage or injury.
As the user of this product, you are solely responsible for operating it in a manner that does not endanger yourself
and others or result in damage to the product or the property of others.
This model is controlled by a radio signal that is subject to interference from many sources outside your control. This
interference can cause momentary loss of control so it is necessary to always keep a safe distance in all directions
around your model, as this will help to avoid collisions or injury.
• Always operate your model in an open area away from cars, traffic or people.
• Avoid operating your model on the street where injury or damage can occur.
• Never operate the model on a busy street or populated areas for any reason.
• Never operate your model with low transmitter batteries.
• Carefully follow the directions, warnings for this product and any optional support equipments (chargers, recharge-
able battery packs, etc.) that you use.
• Keep all chemicals, small parts and anything electrical out of the reach of children.
• Moisture causes damage to electronics. Avoid water exposure to all equipment not specifically designed and
protected for this purpose.
Introduction
Safety, Precautions and Warnings
CE Compliance Information for The European Union
UK DE DK BG SE CZ ES NL SK HU RO FR PT
FI EE LV LT PL AT CY SI GR MT IT IE LU
9
/