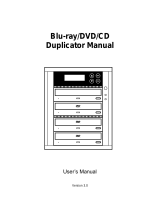
StarTech.com SATDUP11IMG User manual

Category
Media duplicators
Type
User manual

StarTech.com SATDUP11IMG is a versatile HDD/SSD duplicator and image library backup and restore system. It allows you to quickly and easily create exact duplicates of entire drives, add drive images from hard drives to your image drive, or use your image drive to copy a specific drive image to another drive. With its user-friendly interface and a variety of features, the SATDUP11IMG is perfect for IT professionals, system administrators, and anyone who needs to manage and duplicate large amounts of data.

StarTech.com SATDUP11IMG is a versatile HDD/SSD duplicator and image library backup and restore system. It allows you to quickly and easily create exact duplicates of entire drives, add drive images from hard drives to your image drive, or use your image drive to copy a specific drive image to another drive. With its user-friendly interface and a variety of features, the SATDUP11IMG is perfect for IT professionals, system administrators, and anyone who needs to manage and duplicate large amounts of data.

Manual Revision: 08/25/2014
For the most up-to-date information, please visit: www.startech.com
DE: Bedienungsanleitung - de.startech.com
FR: Guide de l'utilisateur - fr.startech.com
ES: Guía del usuario - es.startech.com
IT: Guida per l'uso - it.startech.com
NL: Gebruiksaanwijzing - nl.startech.com
PT: Guia do usuário - pt.startech.com
SATDUP11IMG
1:1 HDD/SSD Duplicator with Image
Library Backup & Restore
*actual product may vary from photos
Instruction Manual
FCC Compliance Statement
This equipment has been tested and found to comply with the limits for a Class B digital
device, pursuant to part 15 of the FCC Rules. These limits are designed to provide reasonable
protection against harmful interference in a residential installation. This equipment generates,
uses and can radiate radio frequency energy and, if not installed and used in accordance with
the instructions, may cause harmful interference to radio communications. However, there
is no guarantee that interference will not occur in a particular installation. If this equipment
does cause harmful interference to radio or television reception, which can be determined by
turning the equipment o and on, the user is encouraged to try to correct the interference by
one or more of the following measures:
Reorient or relocate the receiving antenna.
Increase the separation between the equipment and receiver.
Connect the equipment into an outlet on a circuit dierent from that to which the receiver
is connected.
Consult the dealer or an experienced radio/TV technician for help.
Use of Trademarks, Registered Trademarks, and other Protected Names and Symbols
This manual may make reference to trademarks, registered trademarks, and other
protected names and/or symbols of third-party companies not related in any way to
StarTech.com. Where they occur these references are for illustrative purposes only and do not
represent an endorsement of a product or service by StarTech.com, or an endorsement of the
product(s) to which this manual applies by the third-party company in question. Regardless
of any direct acknowledgement elsewhere in the body of this document, StarTech.com hereby
acknowledges that all trademarks, registered trademarks, service marks, and other protected
names and/or symbols contained in this manual and related documents are the property of
their respective holders.
Instruction Manual
i
Table of Contents
Product Diagram ....................................................................................1
Front View .................................................................................................................................................... 1
Rear View ...................................................................................................................................................... 1
Introduction ............................................................................................ 2
Packaging Contents ................................................................................................................................. 2
Hardware Installation ............................................................................2
User Menu Table of Contents ...............................................................5
User Menu Table of Contents ...............................................................6
Hardware Operation .............................................................................. 6
1. Copy ..........................................................................................................................................................6
2. Compare ..................................................................................................................................................11
3. Copy & Compare ................................................................................................................................... 11
4. Image Manager ..................................................................................................................................... 12
5. Utility ......................................................................................................................................................... 13
6. Setup ......................................................................................................................................................... 17
Technical Support ..................................................................................20
Warranty Information ............................................................................ 20
Instruction Manual
1
Power Switch
Power Adapter
Port
Product Diagram
Front View
Rear View
SATA HDD
Target Port
SATA HDD
Source Port
Ok Button
Esc Button
Navigation
Buttons
Display Screen
Instruction Manual
2
Introduction
Packaging Contents
1 x HDD Duplicator/Eraser
2 x 10cm SATA Cables
2 x 50cm SATA Cables
1 x eSATA + 5V DC Type F Power Cable
1 x eSATA + 12V DC Type M Power Cable
1 x Power Adapter
3 x Power Cords (NA, UK, EU)
2 x HDD Pads
1 x Instruction Manual
WARNING! Hard drives and storage enclosures require careful handling, especially
when being transported. If you are not careful with your hard disk, lost data may
result. Always handle your hard drive and storage device with caution. Be sure that
you are properly grounded by wearing an anti-static strap when handling computer
components or discharge yourself of any static electricity build-up by touching a large
grounded metal surface (such as the computer case) for several seconds.
Hardware Installation
WARNING! Hard drives and drive duplicators require careful handling, especially
when being transported. If you are not careful with your hard disk, lost data may
result. Always handle your hard drive and duplicator device with caution. Be sure that
you are properly grounded by wearing an anti-static strap when handling computer
components or discharge yourself of any static electricity build-up by touching a large
grounded metal surface (such as the computer case) for several seconds.
1. Ensure the power switch is set in the o position. Using the included Universal
Power Adapter, connect the Power Adapter Port on the back of the
SATDUP11IMG to an available power outlet.
Instruction Manual
3
2. Connect your Source drive to the SATA SSD/HDD Source Port on the SATDUP11IMG.
Note: The Source Drive can be a drive you intend to make an exact copy of, or an
Image drive containing several hard drive images.
a) If the source drive is a SATA HDD/SSD, use the included Short SATA cable or
the included Long SATA cable if the drive is installed into a PC chassis.
b) If your source drive is an eSATA HDD/SSD Enclosure or Dock, use the
included eSATA + 12V Power Cable or eSATA+5V Power Cable depending
on your drive requirements.
3. Connect your Target drive to the SATA SSD/HDD Target Port on the SATDUP11IMG.
Note: The Target Drive can be a drive you intend to overwrite with another drive
image, or an Image drive you intend to add an additional drive image to.
a) If the target drive is a SATA HDD/SSD, use the included Short SATA cable or
the included Long SATA cable if the drive installed into a PC Chassis.
b) If your target drive is an eSATA HDD/SSD Enclosure or Dock, use the included
eSATA + 12V Power Cable or eSATA+5V Power Cable depending on your
drive requirements.
Instruction Manual
4
4. For added drive protection and heat insolation, place the source drive and target
drive on top of each, of the included SSD/HDD Pads.
5. Set the Power Switch to the on position. The SATDUP11IMG is now ready to use.
Instruction Manual
5
1. Copy
1.1 HDD > Image
1.2 Image > HDD
1.3 HDD > HDD
2. Compare
2.1 HDD > Image
2.2 Image > HDD
2.3 HDD > HDD
3. Copy+Compare
3.1 HDD > Image
3.2 Image > HDD
3.3 HDD > HDD
4. Image Manager
4.1 Show HDD Info
4.2 Show Image Info
4.3 Rename Image
4.4 Delete Image
4.5 Format HDD #2 (Setup Image Drive)
5. Utility
5.1 Show HDD Info
(Select Device 1 or Device 2 depending
on your preference)
5.1.1 Model Number
5.1.2 Version of Firmware
5.1.3 Serial Number
5.1.4 Device Power Cycle
5.1.5 Power-on Hours
5.1.6 Reallocation Event Count
5.1.7 O-Line Scan Uncorrectable
5.1.8 Seek Error Rate
5.1.9 Temperature
User Menu Table of Contents
Instruction Manual
6
6. Setup
6.1 Copy Area
6.1.1 System and Files
6.1.2 ALL Partitions
6.1.3 Whole HDD
6.1.4 Percentage
6.2 Skip Error
6.3 Language
6.4 Advanced Setup
6.4.1 Unknown Format
6.4.2 Stop Motor Time
6.5 Restore Defaults
User Menu Table of Contents
Hardware Operation
1. Copy
The copy section of the menu enables you to create exact duplicates of entire drives,
our use your Image drive to copy a specic drive image from your image drive. As well
as add drive images from hard drives to your image drive. Refer to functions [1.1 / 1.2 /
1.3] for details.
Note: By Default quick copy mode “System and Files” is selected.
1.1 HDD -> Image
The HDD to image enables you to create an Image Library Drive/Add an Image to your
HDD Image Library Drive.
1. Using the UP/DOWN Navigation buttons and the Display Screen, locate 1.Copy
from the on screen menu, and press the OK button, to access the [Copy] sub menu.
Instruction Manual
7
2. Using the UP/DOWN Navigation buttons and the Display Screen, locate 1.HDD ->
Image, on the [Copy] sub menu, and press the OK button.
3. The SATDUP11IMG will analyze the source drive and ensure the target drive is
ready, by verifying size and format.
4. Press the OK button again to format your target drive as an Image drive.
Note: If the target drive has not been formatted as an Image drive, the
SATDUP11IMG will alert you on the display screen, Press the OK button.
WARNING! Formatting your HDD/SSD will delete all data stored on the target
drive.
Instruction Manual
8
5. Once the drives have been analyzed (and if necessary, formatted the SATDUP11IMG
will begin to copy your SSD/HDD image to the Image Drive.
6. The image will be completely copied when the % indicator on the Display Screen
reaches 100%. The image drive now contains the drive image (and if working with a
non-formatted drive, an image drive has also been created.)
1.2 Image -> HDD
The Image to HDD enables you to restore an HDD Image from an Image Library Drive.
WARNING! The drive attached to the Target port will be overwritten, deleting
all data currently stored on the drive.
Note: The target drive must be equal to or larger than the source drive Image.
If the target drive is larger than the source drive image, any additional space
will remain unformatted.
1. Using the UP/DOWN Navigation buttons and the Display Screen, locate
1.Copy from the on screen menu, and press the OK button, to access the [Copy]
sub menu.
2. Using the UP/DOWN Navigation buttons and the Display Screen, locate
2.Image-> HDD, on the [Copy] sub menu, and press the OK button.
Instruction Manual
9
1. The SATDUP11IMG will analyze the source Image Library Drive and ensure the
target drive is ready, by verifying size and format. Using the UP/DOWN Navigation
buttons and the Display Screen, select the drive image you would like to copy over
to the target drive and press the OK button.
2. Once the drives have been analyzed (and if necessary, formatted), you will receive
an indicator stating the SATDUP11IMG is ready and begin the duplication process.
3. The drive image duplication will be complete when the % indicator on the Display
Screen reaches 100%. The image drive now contains the drive image (and if
working with a non-formatted drive, an image drive has also been created.)
4. 1.3 HDD -> HDD
The HDD to HDD enables you to copy one hard drive exactly to another.
WARNING! The drive attached to the Target port will be overwritten, deleting all
data currently stored on the drive.
Note: The target drive must be equal to or larger than the source drive. If the
target drive is larger than the source drive, any additional space will remain
unformatted.
Instruction Manual
10
1. Using the UP/DOWN Navigation buttons and the Display Screen, locate 1.Copy
from the on screen menu, and press the OK button, to access the [Copy] sub menu.
WARNING! Proceeding will overwrite your target drive with the data on your
source drive, deleting all data currently stored on the target drive.
2. Using the UP/DOWN Navigation buttons and the Display Screen, locate 3. HDD->
HDD, on the [Copy] sub menu, and press the OK button.
3. The SATDUP11IMG will analyze the source drive and ensure the target drive is
ready, by verifying drive size, and begin the duplication process.
Instruction Manual
11
4. The drive duplication will be complete when the % indicator on the Display Screen
indicates the duplication has reached 100%. The target drive is now a duplicate of
the source drive.
2. Compare
The Compare function can be used after your duplication is nished, to conrm the
data on the target HDD is identical to the source HDD.
Run The Compare feature after your Copy task is completed.
Note: Please be sure to select the sub menu option that corresponds with your Copy
Selection (i.e. IMG->HDD / HDD -> IMG / HDD -> HDD).
3. Copy & Compare
The Copy & Compare function executes a duplication based on your selection and
then automatically executes the compare function immediately afterwards.
Note: For step by step instructions and denition of sub menu options (i.e. IMG->HDD /
HDD -> IMG / HDD -> HDD) please see Copy functions [1.1 / 1.2 / 1.3].
Instruction Manual
12
4. Image Manager
The Image Manager enables you to create an Image Library Drive and review details,
delete, and rename drive images saved on your image drive. Refer to functions [4.1 /
4.2 / 4.3 / 4.4 / 4.5] for details.
Note: Ensure your Image drive is connected to the target port on the
SATDUP11IMG for the below operations.
4.1 Show HDD Info
Displays Disk information from the physical hard drive being used as your image drive.
4.2 Show Image Info
Displays each drive image le stored on your image drive.
4.3 Rename Image
Enables you to rename images on your image drive, follow the below steps to rename
a specic image on your drive.
1. From the function table, select 4.Image Manager >> 3.Rename Image.
2. Using the up and down arrow keys, select the le you wish to rename.
3. Using the up and down arrow keys, select words up to 8 characters, then press
the okay button to complete your update.
4.4 Delete Image
Enables you to delete drive images saved on your image drive. follow the below steps
to rename a specic image on your drive.
WARNING! All data stored in that specic drive image will be lost.
1. From the function table, select 4.Image Manager >> 3.Delete Image.
2. Using the up and down arrow keys, select the Image you wish to Delete.
3. Press the okay button to delete your specied Drive Image.
Instruction Manual
13
4.4 Format HDD #2
Enables you to delete the data on the target drive and prepare it to be a new Image
Library Drive. Follow the below steps to format and create your Image Library Drive.
WARNING! All data stored on the drive connected to the target port will be
deleted.
1. From the function table, select 4.Image Manager >> 4.Format HDD #2.
2. Press the okay button to conrm your format.
5. Utility
From the Utility options you can access dierent administrative congurations and
information. See the list below outlining the details of each option. Refer to functions
[5.1 / 5.2 / 5.3 / 5.4 / 5.5] for details.
5.1 Show Disc Info.
The Show Disc Info. function displays information about the HDD attached to the
source port (Device 1) or the target port (Device 2) select your desired disc then refer
to functions [5.1.1 - 5.1.9] for details.
5.1.1 Model Number
The Model Number function shows basic information about the connected HDD.
[Disc Info.]
1. Model Number
Model: WDC WD
5000BPVT-00HXZT3
5.1.2 Version of Firmware
The Version of Firmware function displays the HDD rmware version of the connected
HDD.
[Disc Info.]
1. Version of Firmware
Version
01.01A01
Instruction Manual
14
5.1.3 Serial Number
The Serial Number function displays the serial number of the connected HDD
5.1.4 Device Power Cycle
The Device Power Cycle function displays the number of times the HDD has been
turned on and o.
5.1.5 Power-on Hours
The power-on Hours function displays the total number of hours the HDD has been
powered-on.
5.1.6 Reallocation Event Count
The Reallocation Event Count function displays the number of reallocating events. A
reallocation event occurs when the HDD fails to save data. Once this occurs the HDD
will need to redene the location to store the data causing a higher amount of drive
read/write errors.
[Disc Info.]
1. Serial Number
[Disc Info.]
5. Device Power Cycle
[Disc Info.]
6. Power-on Hours
[Disc Info.]
7. Reallocaon Event Count
Serial N0.:
WD-WXB1A91M3998
[Device Power Cycle]
99
[Power-on Hours]
18
[Reallocaon Event Count]
0
Instruction Manual
15
5.1.7 O-Line Scan Uncorrectable
The O-Line Scan Uncorrectable Sector Count function displays the volume of sectors
that are uncorrectable when scanned o-line. The higher the uncorrectable sector
volume is, the more seriously the HDD is damaged.
5.1.8 Seek Error Rate
The Seek Error Rate function displays the rate of error that occurs while searching for
data. This represents the rate of damaged data that is stored on your HDD.
5.1.9 Temperature
The Temperature function displays the current HDD temperature.
[Disc Info.]
8. O-Line Scan uncorrecta
Uncorrectable Sector Count
[Disc Info.]
8. Seek Error Rate
[Disc Info.]
9. Temperature
[O-Line Scan uncorrecta]
0
[Seek Error Rate]
0
[Temperature]
220C
Instruction Manual
16
5.2 System Info.
The System info function displays duplicator information such as model name and
rmware version.
5.3 Update System
From The Update System menu you can perform a BIOS update or create an update
hard drive to perform a BIOS update. Follow the steps below for details.
5.3.1 Update Bios
If an update to the device rmware is available on the StarTech.com product page,
this option can be used to update the device. The steps below outline the steps for
executing a system update.
Note: A rmware update should only be done if recommend by StarTech.com.
The below steps should only be performed by advanced users. Please contact
StarTech.com Technical Support for assistance.
a) Format a blank hard drive with a 10GB FAT32 partition. (To do this you can run
The Create Update HDD task in the menu (See 5.2.2
b) Download the rmware le from the StarTech.com Website, and place the le on
the main directory of the new partition.
c) Connect the hard drive to the source port of the SATDUP11IMG.
d) Using the Navigation Buttons locate “5.2.1 Update BIOS” and press ok.
The update will take place, and the on screen display will alert you upon completion.
5.3.2 Create Update HDD
Automatically formats the source hard drive to the proper format for a BIOS update
(10GB FAT32 partition).
Instruction Manual
17
6. Setup
From the Setup function you can access dierent advanced congurations. See the list
below outlining the details of each option. Refer to functions [6.1 – 6.5] for details.
6.1 Copy Area
The Copy Area function enables you to adjust the mode in which the hard drives are
copied. Refer to functions [6.1.1 / 6.1.2 / 6.1.3] for details.
1. Select “6.1 Copy Area” using the navigation buttons.
2. From the “Copy Area” menu you can select your desired method of hard drive
duplication. See the list below outlining the details of each option.
6.1.1 System and Files
It will copy source HDD’s System and Files instead of the whole HDD. The system will
analyze the source HDD and identify the data area to copy. The copy will be completed
as long as the source HDD data is within the size of the target HDD.
Note: System and Files only supports FAT, NTFS, and LINUX(ext2/ext3/ext4).
  • Page 1 1
  • Page 2 2
  • Page 3 3
  • Page 4 4
  • Page 5 5
  • Page 6 6
  • Page 7 7
  • Page 8 8
  • Page 9 9
  • Page 10 10
  • Page 11 11
  • Page 12 12
  • Page 13 13
  • Page 14 14
  • Page 15 15
  • Page 16 16
  • Page 17 17
  • Page 18 18
  • Page 19 19
  • Page 20 20
  • Page 21 21
  • Page 22 22
  • Page 23 23
  • Page 24 24

StarTech.com SATDUP11IMG User manual

Category
Media duplicators
Type
User manual

StarTech.com SATDUP11IMG is a versatile HDD/SSD duplicator and image library backup and restore system. It allows you to quickly and easily create exact duplicates of entire drives, add drive images from hard drives to your image drive, or use your image drive to copy a specific drive image to another drive. With its user-friendly interface and a variety of features, the SATDUP11IMG is perfect for IT professionals, system administrators, and anyone who needs to manage and duplicate large amounts of data.

Ask a question and I''ll find the answer in the document

Finding information in a document is now easier with AI