HP J6424 Quick start guide
- Category
- Networking
- Type
- Quick start guide
This manual is also suitable for
Page is loading ...

Copyright Information
© 2008 Copyright Hewlett-Packard Development Company, L.P.
Edition 2, 2/2008
Reproduction, adaptation or translation without prior written permission
is prohibited, except as allowed under the copyright laws.
The information contained herein is subject to change without notice.
The only warranties for HP products and services are set forth in the express
warranty statements accompanying such products and services. Nothing
herein should be construed as constituting an additional warranty. HP shall
not be liable for technical or editorial errors or omissions contained herein.
Trademark credits
Microsoft
®
and Windows
®
are U.S. registered trademarks of
Microsoft Corporation.
Informations sur le copyright
© 2008 Copyright Hewlett-Packard Development Company, L.P.
Édition 2, 2/2008
Toute reproduction, adaptation ou traduction sans autorisation écrite
préalable est interdite, à l’exception de ce qui est autorisé en vertu des
lois sur le copyright.
Les informations contenues dans ce document sont sujettes à des
modifications sans préavis.
Les seules garanties couvrant les produits et les services HP sont
celles stipulées de façon explicite dans les déclarations de garantie
accompagnant ces produits et services. Rien dans le présent document
ne peut être considéré comme constituant une garantie supplémentaire.
HP n’est en aucun cas responsable des éventuelles omissions ou erreurs
d’ordre technique ou éditorial contenues dans le présent document.
Crédits
Microsoft
®
et Windows
®
sont des marques commerciales de
Microsoft Corporation aux Etats-Unis.

English
Contents 2
Set up Wireless (802.11) communication...........................................................................3
Step 1: Obtain required information and equipment ........................................................3
Step 2: Install software for your HP Officejet/Officejet Pro device ......................................4
Step 3: Test the connection ...........................................................................................4
Solving wireless (802.11) problems...................................................................................5
Basic troubleshooting...................................................................................................5
Advanced troubleshooting ............................................................................................6
Change the connection method ........................................................................................9
Change from a USB connection ....................................................................................9
Change from an Ethernet connection .............................................................................9
Connect the HP Officejet/Officejet Pro device using an ad hoc wireless network connection.....9
Method 1...................................................................................................................9
Method 2 (Windows only)..........................................................................................10
Configure your firewall to work with HP devices................................................................10
Advanced firewall information.....................................................................................11
Add hardware addresses to a wireless router ...................................................................11
About wireless communication........................................................................................12
Communication mode................................................................................................12
Network name (SSID).................................................................................................12
Security....................................................................................................................12
Hewlett-Packard limited warranty statement ......................................................................13
Contents

Set up Wireless (802.11) communication3
Set up Wireless (802.11) communication
Your HP Officejet/Officejet Pro device can
connect wirelessly to an existing wireless
network.
For more information, including the version of
communication supported by the HP device, see the
electronic User Guide available on your computer after
you install the software-either from the HP Solution
Center Software (Windows) or the Help Viewer
(Mac OS). (The user guide is also available online
at (www.hp.com/support.)
NOTE: Other methods of establishing a wireless connection might be available for your HP device, such as using
the device’s control panel or embedded Web server. For more information, see the electronic User Guide available
on your computer after you install the software.
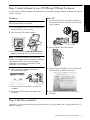
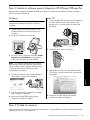
Step 1: Obtain required information and equipment
IMPORTANT: Do not connect the USB wireless setup cable until prompted by the software.
Before you can set up the HP Officejet/Officejet Pro
device to use wireless communication, you must have the
following:
• A USB wireless setup cable, included
in the box.
• The Starter CD that came with the
HP device
• A wireless-enabled computer connected to your
network. You will also need to know the following
information about your wireless network:
• Your Network Name (SSID)
• Your Wi-Fi Protected Access (WPA) key or Wired
Equivalent Privacy (WEP) passphrase (if needed)
NOTE: Contact your network administrator, or person
who set up the wireless network, for the Network Name
(SSID) and WPA key or WEP passphrase.
For more information about the network connections
types, the SSID, and the WEP key/WPA Passphrase, see
“About wireless communication” on page 12.
If your wireless network does not
use a wireless router, you can
connect the HP Officejet/
Officejet Pro device directly to
your computer using a wireless connection (known as
an “ad hoc“ wireless connection). For information about
connecting the HP device using an ad hoc wireless
network connection, see “Connect the HP Officejet/
Officejet Pro device using an ad hoc wireless network
connection” on page 9.
IMPORTANT: You must have the network information
available to continue with your wireless setup.
For computers running Windows, HP provides a web-
based tool called the Wireless Network Assistant
[URL: www.hp.com/go/networksetup (English only)]
that can help retrieve this information for some systems.
If the Wireless Network Assistant is unable to retrieve
your network information, you must consult the
documentation for your wireless router, the router
manufacturer, or the person who originally setup your
wireless network.

Set up Wireless (802.11) communication 4
English
Step 2: Install software for your HP Officejet/Officejet Pro device
You must run the installation program from the Starter CD. The installation program installs the software and creates a
wireless connection.
Windows
IMPORTANT: Do not connect the USB wireless setup
cable until prompted by the software.
1. Save any open documents. Close any applications
that are running on your computer.
2. Place the Starter CD into the computer.
3. On the CD menu, click Install Network/Wireless
Device, and then follow the onscreen instructions.
NOTE: If the firewall software on your computer
displays any messages during the installation, select the
“always permit/allow“ option in the messages.
Selecting this option allows the software to install
successfully on your computer.
4. When prompted, temporarily connect the
USB wireless setup cable.
5. Follow the onscreen instructions to complete the
installation.
6. Disconnect the USB wireless setup cable when
prompted.
Mac OS
1. Connect a USB wireless setup cable to the port on
the back of the HP device and then to any USB port
on the computer.
2. Place the Starter CD into the computer.
3. Double-click the HP Installer icon on the Starter CD,
and then follow the onscreen instructions.
4. Disconnect the USB wireless setup cable when
prompted.
Step 3: Test the connection
Open a file on your computer and try printing the document. If you have problems, see “Solving wireless (802.11)
problems” on page 5.

Solving wireless (802.11) problems5
Solving wireless (802.11) problems
The following sections provide assistance if you are encountering problems connecting the HP Officejet/Officejet Pro
device to your wireless network. First, follow the suggestions provided in the Basic troubleshooting section. If you are
still encountering problems, follow the suggestions provided in the Advanced troubleshooting section.
After you resolve any problems and have connected the HP device to your wireless network, complete the following
steps:
Windows
Place the Starter CD into the computer and run the software installation program again. If you are using a computer
running Windows, select either Install Network/Wireless Device or Add a Device when prompted.
Mac OS
Open the HP Device Manager, located in the Dock. (HP Device Manager is also located in the Hewlett-Packard
folder in the Applications folder on your computer.) Select Setup Assistant or Network Setup Assistant from the
Information and Settings list, and then follow the onscreen instructions.
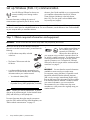
Basic troubleshooting
If you are encountering problems using your
HP Officejet/Officejet Pro device over a network, try the
following suggestions in the order listed:
1. Make sure the wireless (802.11) light is turned on
If the blue light near the HP device’s control panel is not
lit, wireless capabilities might not have been turned on.
To turn on wireless, press the wireless button (located
near the wireless light) once to turn on wireless
capabilities. Or press the Setup ( ) button on the
HP device’s control panel, select Network, select
Wireless Radio, and then select On.
NOTE: If your HP device supports Ethernet networking,
make sure that an Ethernet cable has not been
connected to the device. Connecting an Ethernet cable
turns off the HP device’s wireless capabilities.
2. Restart components of the wireless network
Turn off the router and the HP device, and then turn
them back on in this order: router first, and then the
HP device. If you still are unable to connect, turn off
the router, HP device, and your computer, and then
turn them back on in this order: router first, then the
HP device, and finally the computer. Sometimes, turning
off the power and then turning it back on will recover a
network communication issue.
3. Run the Wireless Network Test
For wireless networking issues, run the Wireless
Network Test from the HP device control panel:
If a problem is detected, the printed test report will
include recommendations that might help solve the
problem.
HP Officejet J4680
All-in-One series
a. On the HP device’s control
panel, press the Setup
() button.
b. Select Network Setup,
select Print Network
Settings, select Wireless
Test Report, and then
press OK.
HP Officejet J6400
All-in-One series
a. On the HP device’s control
panel, press the Setup
() button.
b. Select Print Report, and
then select Wireless Test.

Solving wireless (802.11) problems 6
English
Advanced troubleshooting
If you have tried the suggestions provided in the Basic
troubleshooting section and are still unable to connect
your HP Officejet/Officejet Pro device to the wireless
network, try the following suggestions in the order listed:
1. Make sure that the computer is connected to your
network (page 6)
2. Make sure that the HP Officejet/Officejet Pro device
is connected to your network (page 6)
3. Check to see if the firewall software is blocking
communication (page 7)
4. Make sure the HP Officejet/Officejet Pro device is
online and ready (page 8)
5. Make sure the wireless version of the HP Officejet/
Officejet Pro device is set as the default printer driver
(Windows only) (page 8)
6. Make sure the HP Network Devices Support service
is running (Windows only) (page 8)
1. Make sure that the computer is
connected to your network
To check a wired (Ethernet) connection
Many computers have indicator lights beside the port
where the Ethernet cable from the router connects to
your computer. Usually there are two indicator lights,
one that is on and another that blinks. If your computer
has indicator lights, check to see if the indicator lights
are on. If the lights are not on, try reconnecting the
Ethernet cable to the computer and the router. If you still
do not see lights, there might be a problem with the
router, the Ethernet cable, or your computer.
NOTE: Macintosh computers do not have indicator
lights. To check the Ethernet connection on a Macintosh
computer, click System Preferences in the Dock, and
then click Network. If the Ethernet connection is working
correctly, Built-In Ethernet appears in the list of
connections, along with the IP address and other status
information. If Built-in Ethernet does not appear in the
list, there might be a problem with the router, the
Ethernet cable, or your computer. For more information,
click the Help button in the window.
To check a wireless connection
1. Make sure that your computer’s wireless has been
turned on. (For more information, see the
documentation available with your computer.)
2. If you are not using a unique network name (SSID),
then it is possible that your wireless computer could
be connected to a nearby network that is not yours.
The following steps can help you determine if your
computer is connected to your network.
Windows
a. Click Start, point to Settings, click Control Panel,
double-click Network Connections, click the View
menu, and then select Details.
-Or-
Click Start, click Control Panel, point to Network
Connections, and then click View Network Status
and Tasks.
Leave the network dialog box open while you
continue to the next step.
b. Disconnect the power cord from the wireless router.
The connection status of your computer should
change to Not Connected.
c. Reconnect the power cord to the wireless router. The
connection status should change to Connected.
Mac OS
a. Click the AirPort icon in the menu bar at the top of
the screen. From the menu that appears, you can
determine if the AirPort is turned on and which
wireless network your computer is connected to.
NOTE: For more detailed information about your
AirPort connection, click System Preferences in the Dock,
and then click Network. If the wireless connection is
working correctly, a green dot appears next to AirPort in
the list of connections. For more information, click the
Help button in the window.
If you are unable to get your computer connected to
your network, contact the person who set up your
network or the router manufacturer as there might be a
hardware issue with either your router or computer.
If you are able to access the Internet and are using a
computer running Windows, you can also access the
HP Network Assistant at http://www.hp.com/sbso/
wireless/tools-setup.html?jumpid=reg_R1002_USEN for
help in setting up a network. (This Web site is only
available in English.)
2. Make sure that the HP Officejet/
Officejet Pro device is connected to
your network
If your device is not connected to the same network as
your computer, you will not be able to use the HP device
over the network. Follow the steps described in this
section to find out if your device is actively connected to
the correct network.

Solving wireless (802.11) problems7
A. Make sure the HP Officejet/Officejet Pro device is on
the network
• If the HP Officejet/Officejet Pro device supports
Ethernet networking and is connected to an Ethernet
network, check the two Ethernet indicator lights on
the top and bottom of the Ethernet port on the back
of the HP device. The lights indicate the following:
• Top light: If the light is lit solid green, the
HP device is connected to the network, and
communications have been established. If the
light is off, there is no network connection.
• Bottom light: If the yellow light flashes, data is
being sent or received by the HP device over the
network.
• If the HP device is connected to a wireless network,
print the device’s Network Configuration Page:
After the page has been printed, check the Network
Status and URL:
B. Check to see if you can access the embedded Web
server (EWS)
After you establish that the computer and the HP device
both have active connections to a network, you can
verify if they are on the same network by accessing the
device’s embedded Web server (EWS). For more
information on the EWS, see the electronic User Guide
available on your computer after you install the
software.
To access the EWS
On your computer, open the Web browser you normally
use to access the Internet (for example, Internet Explorer or
Safari). In the address box, type the URL of the HP device
as it was shown on the Network Configuration Page (for
example,http://192.168.1.101).
NOTE: If you are using a proxy server in your browser,
you might need to disable it to access the EWS.
If you can access the EWS, try using the HP device over
the network (such as to scan or print) to see if your
network setup was successful.
If you cannot access the EWS or are still having
problems using the HP device over the network,
continue to the next section regarding firewalls.
3. Check to see if the firewall software
is blocking communication
If you cannot access the EWS and are sure both the
computer and HP device have active connections to the
same network, the firewall security software might be
blocking communication. Temporarily turn off any
firewall security software running on your computer and
then try to access the EWS again. If you can access the
EWS, try using the HP device (for printing or scanning).
If you are able to access the EWS and use your
HP device with the firewall turned off, you will need to
reconfigure your firewall settings to allow the computer
and HP Officejet/Officejet Pro device to communicate
with each other over the network. For more information,
see “Configure your firewall to work with HP devices” on
page 10.
If you are able to access the EWS but are still unable to
use the HP device even with the firewall turned off, try
enabling the firewall software to recognize the
HP device. For more information, see “Configure your
firewall to work with HP devices” on page 10.
If you still encounter problems after configuring the
firewall, go to sections 4 and 5.
HP Officejet J4680
All-in-One series
a. On the HP device’s control
panel, press the Setup ( )
button.
b. Select Network Setup, select
Print Network Settings, select
Configuration Page, and then
press OK.
HP Officejet J6400
All-in-One series
a. On the HP device’s control
panel, press the Setup ( )
button.
b. Select Print Report, and then
select Wireless Test.
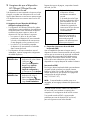
Network Status • If the Network Status is Ready,
the HP device is actively
connected to a network.
• If the Network Status is
Offline, the HP device is not
connected to a network. Run
the Wireless Network Test
(using the instructions at the
beginning of this section) and
follow any recommendations.
URL The URL shown here is the
network address assigned to the
HP device by your router. You will
need this address for step B.

Solving wireless (802.11) problems 8
English
4. Make sure the HP Officejet/Officejet
Pro device is online and ready
If you have the HP software installed, you can check the
HP device’s status from your computer to see if the
device is paused or offline, preventing you from using it.
To check the HP device’s status, complete the following
steps:
Windows
1. Click Start, point to Settings, and then click Printers
or Printers and Faxes.
- Or -
Click Start, click Control Panel, and then double-click
Printers.
2. If the printers on your computer are not being
displayed in Details view, click the View menu, and
then click Details.
3. Do one of the following, depending on the printer
status:
•If the HP device is Offline, right-click the device
and click Use Printer Online.
•If the HP device is Paused, right-click the device
and click Resume Printing.
4. Try using the HP device over the network.
Mac OS
1. Click System Preferences in the Dock, and then click
Print & Fax.
2. Select the HP device, and the click Print Queue.
3. If Jobs Stopped appears in the window that
appears, click Start Jobs.
If you can use the HP device after performing the steps
above but find that the symptoms persist as you continue
to use the device, your firewall might be interfering. For
more information see “Configure your firewall to work
with HP devices” on page 10. If you still cannot use the
HP device over the network, continue to the next section
for additional troubleshooting help.
5. Make sure the wireless version of the
HP Officejet/Officejet Pro device is
set as the default printer driver
(Windows only)
If you install the software again, the installer might
create a second version of the printer driver in your
Printers or Printers and Faxes folder. If you have
difficulties printing or connecting to the HP device, make
sure the correct version of the printer driver is set as the
default.
1. Click Start, point to Settings, and then click Printers
or Printers and Faxes.
- Or -
Click Start, click Control Panel, and then double-click
Printers.
2. Determine if the version of the printer driver in the
Printers or Printers and Faxes folder is connected
wirelessly:
a. Right-click the printer icon, and then click
Properties, Document Defaults, or Printing
Preferences.
b. On the Ports tab, look for a port in the list with a
checkmark. The version of the printer driver that
is connected wirelessly has Standard TCP/IP Port
as the Port description, next to the checkmark.
3. Right-click the printer icon for the version of the
printer driver that is connected wirelessly and select
Set as Default Printer.
NOTE: If there is more than one icon in the folder for
the HP device, right-click the printer icon for the version
of the printer driver that is connected wirelessly and
select Set as Default Printer.
6. Make sure the HP Network Devices
Support service is running (Windows
only)
To restart the HP Network Device Support service
1. Delete any print jobs currently in the print queue.
2. On the desktop, right-click My Computer or
Computer, and then click Manage.
3. Double-click Services and Applications, and then
click Services.
4. Scroll down the list of services, right click
HP Network Devices Support, and then click Restart.
5. After the service restarts, try using the HP device over
the network again.
If you are able to use the HP device over the network,
your network setup was successful.
If you still cannot use the HP device over the network or
if you have to periodically perform this step in order to
use your device over the network, your firewall might be
interfering. For more information see “Configure your
firewall to work with HP devices” on page 10.
If this still does not work, there might be a problem with
your network configuration or router. Contact the person
who set up your network or the router manufacturer for
help.

Change the connection method9
Change the connection method
If you have installed the software and connected your HP Officejet/Officejet Pro device using a USB or Ethernet
cable, you can change to a wireless connection any time you want.
Change from a USB connection
Use the following instructions to change from a USB to a
wireless connection.
Windows
1. Place the Starter CD into the computer.
2. Press Add a Device.
3. Follow the onscreen instructions and remove the USB
wireless setup cable when prompted.
Mac OS
1. Click the HP Device Manager icon on the Dock or in
the Hewlett Packard folder in the Applications folder.
2. From the Information and Settings list, select
Network Printer Setup Utility.
3. Follow the onscreen instructions to configure the
network settings.
Change from an Ethernet
connection
Use the following instructions to change from an
Ethernet connection to a wireless connection.
NOTE: For Ethernet-enabled HP devices only
1. Open the embedded Web server (EWS). For more
information on the EWS, see the electronic User
Guide available on your computer after you install
the software.
2. Click the Networking tab, and then click Wireless
(802.11) in the left pane.
3. On the Wireless Setup tab, press Start Wizard.
4. Follow the onscreen instructions to change from an
Ethernet connection to a wireless connection.
5. After you finish changing the settings, disconnect the
Ethernet cable.
Connect the HP Officejet/Officejet Pro device using an ad
hoc wireless network connection
Method 1
1. Turn on wireless in your computer and in the
HP device.
2. On your computer, connect to the network name
(SSID) “hpsetup“. (This network name is the default,
ad hoc network created by the HP device.)
If your HP device was previously configured for a
different network, you can restore the network defaults
to enable the device to use “hpsetup“. To restore the
network defaults complete the following steps:
HP Officejet J4680
All-in-One series
a. On the HP device’s control
panel, press the Setup ( )
button.
b. Select Tools, select Wireless
Menu, and then select Reset
Wireless.
HP Officejet
J6400 All-in-One
series
a. On the HP device’s control
panel, press the Setup ( )
button.
b. Select Tools, select Network
Setup, and then select Restore
Network Defaults.

Configure your firewall to work with HP devices 10
English
Method 2 (Windows only)
1. Make sure your computer has an ad hoc network
profile. For more information, see the documentation
available with your operating system.
2. Follow the instructions in “Install software for your
HP Officejet/Officejet Pro device” on page 4 and
select the network that corresponds to the ad hoc
network profile for your computer.
Configure your firewall to work with HP devices
A personal firewall, which is security software running
on your computer, can block network communication
between your HP device and your computer.
If you are having problems such as:
• Printer not found when installing HP software
• Unable to print, print job stuck in queue or printer
goes offline
• Scan communication errors or scanner busy
messages
• Unable to see printer status on your computer
The firewall might be preventing your HP device from
notifying computers on your network where it can be
found. If the HP software cannot find the HP device
during installation (and you know the HP device is on
the network), or you have already successfully installed
HP software and experience problems, try the following:
1. If you are using a computer running Windows, in the
firewall configuration utility, look for an option to
trust computers on the local subnet (sometimes called
the “scope“ or “zone“). By trusting all computers on
the local subnet, computers and devices in your
home can communicate with each other while still
being protected from the internet. This is the easiest
approach to use.
2. If you do not have the option to trust computers on
the local subnet, add incoming UDP port 427 to
your firewall’s list of allowed ports.
NOTE: Not all firewalls require you to differentiate
between incoming and outgoing ports, but some do.
Another common problem is that HP software is not
trusted by your firewall to access the network. This can
happen if you answered “block“ to any firewall dialog
boxes that appeared when you installed the
HP software.
If this occurs, and if you are using a computer running
Windows, check that the following programs are in your
firewall’s list of trusted applications; add any that are
missing.
• hpqkygrp.exe, located in C:\program
files\HP\digital imaging\bin
• hpqscnvw.exe, located in C:\program
files\HP\digital imaging\bin
• hpqste08.exe, located in C:\program
files\HP\digital imaging\bin
• hpqtra08.exe, located in C:\program
files\HP\digital imaging\bin
• hpqthb08.exe, located in C:\program
files\HP\digital imaging\bin
NOTE: Refer to your firewall documentation on how to
configure the firewall port settings and how to add
HP files to the “trusted“ list.
NOTE: Some firewalls continue to cause interference
even after you disable them. If you continue to have
problems after configuring the firewall as described
above and if you are using a computer running
Windows, you might need to uninstall the firewall
software in order to use the HP device over the network.

Add hardware addresses to a wireless router11
Advanced firewall information
The following ports are also used by your HP device and might need to be opened on your firewall configuration.
Incoming ports (UDP) are destination ports on the computer while outgoing ports (TCP) are destination ports on the
HP device.
• Incoming (UDP) ports: 137, 138, 161, 427
• Outgoing (TCP) ports: 137, 139, 427, 9100,
9220, 9500
The ports are used for the following functions:
Printing
• UDP ports: 427, 137, 161
• TCP port: 9100
Photo card upload
• UDP ports: 137, 138, 427
• TCP port: 139
Scanning
• UDP port: 427
• TCP ports: 9220, 9500
HP device status
UDP port: 161
Faxing
• UDP port: 427
• TCP port: 9220
HP device installation
UDP port: 427
Add hardware addresses to a wireless router
MAC filtering is a security feature in which a wireless
router is configured with a list of MAC addresses (also
called “hardware addresses“) of devices that are
allowed to gain access to the network.
If the router does not have the hardware address of a
device attempting to access the network, the router
denies the device access to the network:
1. Locate the MAC address for the HP Officejet/
Officejet Pro device. This address is printed on the
serial number label (typically located on the back of
the HP device), and this address is also printed on
the Network Configuration Page. For more
information about printing the Network
Configuration Page, see “Make sure the HP
Officejet/Officejet Pro device is on the network” on
page 7.
2. Open the router’s configuration utility, and add the
device’s wireless hardware address to the list of
accepted MAC addresses.

About wireless communication 12
English
About wireless communication
802.11 wireless technology allows you to wirelessly
connect to your HP Officejet/Officejet Pro device and a
computer without requiring a direct line of sight between
the devices.
Communication mode
There are two communication mode options:
Infrastructure: On an
infrastructure network,
computers and printers
communicate with each other
through an access point, such
as a Linksys wireless router or
Apple AirPort Base Station. The
computer sends information to
the HP device and other devices
on the network through this
router.
Once the HP device is successfully connected to the
network, all the computers on the network that have the
HP software installed can send information to the
HP device through the wireless router.
Ad hoc: On an ad hoc
network, the computer
sends information directly
to the HP device without the
use of a wireless router. Ad hoc networks are typically
small and simple (for example, two wireless computers
or a wireless computer and a wireless printer).
Though ad hoc networks may be secured with a WEP
passphrase, they cannot be secured with a WAP key.
Also, the performance of the network might not be as
good as an infrastructure network.
The HP device is pre-configured by the factory to
connect to an ad-hoc network with the SSID “hpsetup“.
NOTE: If you reset the network settings from the control
panel at any point, the SSID will be reset to “hpsetup”.
Network name (SSID)
The network name provides a basic connection to a
wireless network. All devices trying to communicate with
each other must have the same SSID and security
settings.
CAUTION: To prevent other users from accessing your
wireless network, HP strongly recommends using a
password or passphrase (WPA or WEP security) and a
unique network name (Service set identifier (SSID)) for
your wireless router. Your wireless router might have
been shipped with a default network name, which is
typically the manufacturer name. If you use the default
network name, your network can be easily accessed by
other users using the same default network name (SSID).
It also means that the HP device might accidentally
connect to a different wireless network in your area
which uses the same network name. If this happens you
will not be able to access the HP device. For more
information on how to change the network name, see
the documentation that came with your wireless router.
Security
The HP Officejet/Officejet Pro supports WEP, WPA, and
WPA2 security methods. For more information, see the
“Understand 802.11 wireless network settings“ section
in the electronic User Guide available on your computer
after you install the software.

Hewlett-Packard limited warranty statement13
Hewlett-Packard limited warranty statement
A. Extent of limited warranty
1. Hewlett-Packard (HP) warrants to the end-user customer that the HP products specified above will be free from defects
in materials and workmanship for the duration specified above, which duration begins on the date of purchase by the
customer.
2. For software products, HP’s limited warranty applies only to a failure to execute programming instructions. HP does not
warrant that the operation of any product will be interrupted or error free.
3. HP's limited warranty covers only those defects that arise as a result of normal use of the product, and does not cover
any other problems, including those that arise as a result of:
a. Improper maintenance or modification;
b. Software, media, parts, or supplies not provided or supported by HP;
c. Operation outside the product's specifications;
d. Unauthorized modification or misuse.
4. For HP printer products, the use of a non-HP cartridge or a refilled cartridge does not affect either the warranty to the
customer or any HP support contract with the customer. However, if printer failure or damage is attributable to the use of
a non-HP or refilled cartridge or an expired ink cartridge, HP will charge its standard time and materials charges to
service the printer for the particular failure or damage.
5. If HP receives, during the applicable warranty period, notice of a defect in any product which is covered by HP's
warranty, HP shall either repair or replace the product, at HP's option.
6. If HP is unable to repair or replace, as applicable, a defective product which is covered by HP's warranty, HP shall,
within a reasonable time after being notified of the defect, refund the purchase price for the product.
7. HP shall have no obligation to repair, replace, or refund until the customer returns the defective product to HP.
8. Any replacement product may be either new or like-new, provided that it has functionality at least equal to that of the
product being replaced.
9. HP products may contain remanufactured parts, components, or materials equivalent to new in performance.
10. HP's Limited Warranty Statement is valid in any country where the covered HP product is distributed by HP. Contracts
for additional warranty services, such as on-site service, may be available from any authorized HP service facility in
countries where the product is distributed by HP or by an authorized importer.
B. Limitations of warranty
TO THE EXTENT ALLOWED BY LOCAL LAW, NEITHER HP NOR ITS THIRD PARTY SUPPLIERS MAKES ANY
OTHER WARRANTY OR CONDITION OF ANY KIND, WHETHER EXPRESS OR IMPLIED WARRANTIES OR
CONDITIONS OF MERCHANTABILITY, SATISFACTORY QUALITY, AND FITNESS FOR A PARTICULAR
PURPOSE.
C. Limitations of liability
1. To the extent allowed by local law, the remedies provided in this Warranty Statement are the customer's sole and
exclusive remedies.
2. TO THE EXTENT ALLOWED BY LOCAL LAW, EXCEPT FOR THE OBLIGATIONS SPECIFICALLY SET FORTH IN
THIS WARRANTY STATEMENT, IN NO EVENT SHALL HP OR ITS THIRD PARTY SUPPLIERS BE LIABLE FOR
DIRECT, INDIRECT, SPECIAL, INCIDENTAL, OR CONSEQUENTIAL DAMAGES, WHETHER BASED ON
CONTRACT, TORT, OR ANY OTHER LEGAL THEORY AND WHETHER ADVISED OF THE POSSIBILITY OF
SUCH DAMAGES.
D. Local law
1. This Warranty Statement gives the customer specific legal rights. The customer may also have other rights which vary
from state to state in the United States, from province to province in Canada, and from country to country elsewhere in
the world.
2. To the extent that this Warranty Statement is inconsistent with local law, this Warranty Statement shall be deemed
modified to be consistent with such local law. Under such local law, certain disclaimers and limitations of this Warranty
Statement may not apply to the customer. For example, some states in the United States, as well as some governments
outside the United States (including provinces in Canada), may:
a. Preclude the disclaimers and limitations in this Warranty Statement from limiting the statutory rights of a consumer
(e.g., the United Kingdom);
b. Otherwise restrict the ability of a manufacturer to enforce such disclaimers or limitations; or
c. Grant the customer additional warranty rights, specify the duration of implied warranties which the manufacturer
cannot disclaim, or allow limitations on the duration of implied warranties.
3. THE TERMS IN THIS WARRANTY STATEMENT, EXCEPT TO THE EXTENT LAWFULLY PERMITTED, DO NOT
EXCLUDE, RESTRICT, OR MODIFY, AND ARE IN ADDITION TO, THE MANDATORY STATUTORY RIGHTS
APPLICABLE TO THE SALE OF THE HP PRODUCTS TO SUCH CUSTOMERS.
HP Limited Warranty
Dear Customer,
You will find below the name and address of the HP entity responsible for the performance of the HP Limited Warranty in your
country.
You may have additional statutory rights against the seller based on your purchase agreement. Those rights are not
in any way affected by this HP Limited Warranty.
Ireland: Hewlett-Packard Ireland Ltd. 30 Herbert Street IRL-Dublin 2
United Kingdom: Hewlett-Packard Ltd, Cain Road, Bracknell, GB-Berks RG12 1HN
HP product Duration of limited warranty
Software Media 90 days
Printer 1 year
Print or Ink cartridges Until the HP ink is depleted or the “end of warranty” date printed
on the cartridge has been reached, whichever occurs first. This
warranty does not cover HP ink products that have been refilled,
remanufactured, refurbished, misused, or tampered with.
Accessories 1 year unless otherwise stated
Page is loading ...
Page is loading ...
Page is loading ...
Page is loading ...
Page is loading ...
Page is loading ...
Page is loading ...
Page is loading ...
Page is loading ...
Page is loading ...
Page is loading ...
Page is loading ...
Page is loading ...
Page is loading ...
Page is loading ...
Page is loading ...
Page is loading ...
Page is loading ...
Page is loading ...
Page is loading ...
Page is loading ...
Page is loading ...
Page is loading ...
Page is loading ...
Page is loading ...
Page is loading ...
Page is loading ...
Page is loading ...
Page is loading ...
Page is loading ...
Page is loading ...
Page is loading ...
Page is loading ...
Page is loading ...
Page is loading ...
Page is loading ...

Safety Information
Always follow basic safety precautions when using this product to
reduce risk of injury from fire or electric shock.
1. Read and understand all instructions in the documentation that comes
with the device.
2. Use only a grounded electrical outlet when connecting this product to a
power source. If you do not know whether the outlet is grounded, check
with a qualified electrician.
3. When connecting the device to the electrical outlet, use only the power
cord provided with the device.
4. Use only the external power adaptor or battery provided with the
device.
5. If your device supports fax, use the phone cable included with the
device.
6. Observe all warnings and instructions marked on the device.
7. Unplug this device from wall outlets before cleaning.
8. Do not install or use this device near water, or when you are wet.
9. Install the product securely on a stable surface.
10. Install the device in a protected location where no one can step on or
trip over the line cord, and the line cord cannot be damaged.
11. If the device does not operate normally, see “Maintaining and
troubleshooting” in the onscreen user guide on the Starter CD.
12. There are no user-serviceable parts inside. Refer servicing to qualified
service personnel.
Note: Ink from the cartridges is used in the printing process in a number of
different ways, including in the initialization process, which prepares the
device and cartridges for printing, and in printhead servicing, which keeps
print nozzles clear and ink flowing smoothly. In addition, some residual ink
is left in the cartridge after it is used. For more information see
www.hp.com/go/inkusage.
Consignes de sécurité
Respectez toujours les précautions de sécurité élémentaires quand
vous utilisez ce produit afin de réduire les risques de blessures dues
au feu ou à un choc électrique.
1. Lisez attentivement toutes les instructions contenues dans la
documentation livrée avec l’appareil.
2. Utilisez toujours une prise de courant avec mise à la terre lors du
branchement de ce produit à une source d’alimentation. Si vous ne
savez pas si la prise de courant est mise à la terre, consultez un
électricien qualifié.
3. Lorsque vous connectez le périphérique à la prise électrrique, utilisez
uniquement le cordon d’alimentation fourni avec le périphérique.
4. N’utilisez que le module d’alimentation externe ou la batterie fourni(e)
avec l’imprimante.
5. Si votre périphérique prend en charge la télécopie, utilisez le câble
téléphonique fourni avec le périphérique.
6. Suivez tous les avertissements et toutes les instructions indiqués sur le
périphérique.
7. Débranchez cet appareil des prises murales avant de procéder à un
nettoyage.
8. N’installez jamais cet appareil près d’une source d’eau, ni si vous êtes
mouillé.
9. Installez l’appareil en toute sécurité sur une surface stable.
10. Installez l’appareil en un lieu protégé où personne ne puisse marcher
sur le cordon ou trébucher sur celui-ci, et où le cordon ne puisse pas
être endommagé.
11. Si l’appareil ne fonctionne pas normalement, reportez-vous à la section
« Entretien et dépannage » du guide utilisateur disponible à l’écran
proposé sur le CD de démarrage.
12. L’appareil ne contient aucune pièce dont l’entretien doit être réalisé par
l’utilisateur. Confiez l’entretien à du personnel qualifié.
Remarque : l’encre des cartouches est utilisée dans le processus
d’impression de différentes manières, notamment lors de la phase
d’initialisation, qui prépare l’appareil et les cartouches pour l’impression, et
de l’entretien de la tête d’impression, qui maintient les buses dégagées et
garantit une libre circulation de l’encre. Notez également qu’il reste de
l’encre dans la cartouche après son utilisation. Pour plus d’informations,
reportez-vous à la page Web www.hp.com/go/inkusage.
EN
FR
Información de seguridad
Siga siempre las precauciones básicas de seguridad al utilizar este
producto para reducir el riesgo de lesiones por incendio o
descargas eléctricas.
1. Lea y comprenda todas las instrucciones de la documentación que
viene con el dispositivo.
2. Al conectar este producto a una fuente de poder, utilice solamente una
toma de corriente con conexión a tierra. Si no sabe si la toma tiene
conexión a tierra, verifíquelo con un electricista calificado.
3. Use sólo el cable eléctrico que incluye el dispositivo para conectar el
dispositivo a una toma de corriente.
4. Use sólo el adaptador externo o la batería proporcionados junto con el
dispositivo.
5. Si el dispositivo admite fax, use el cable de teléfono incluido.
6. Tenga en cuenta todas las advertencias e instrucciones indicadas en el
producto.
7. Antes de limpiarlo, desenchufe el dispositivo de la toma de corriente de
pared.
8. No instale ni utilice este dispositivo si está cerca de agua o mojado.
9. Instale el producto de manera segura sobre una superficie estable.
10. Instale el dispositivo en un lugar protegido donde nadie pueda pisar el
cable de alimentación eléctrica ni tropezar con él, y donde dicho cable
no sufra daños.
11. En caso de que el dispositivo no funcione con normalidad, consulte
“Mantenimiento y solución de problemas” en la guía del usuario en
pantalla del Starter CD.
12. No hay piezas que el usuario pueda reparar dentro de la impresora.
Confíe las tareas de servicio a personal de servicio calificado.
Nota: La tinta de los cartuchos se usa en el proceso de impresión de
diversas formas, que incluyen el proceso de inicialización, donde se
prepara el dispositivo y los cartuchos para la impresión y el servicio de los
cabezales de impresión, que mantiene los inyectores de tinta despejados y
permite que la tinta fluya sin problemas. Además, se deja un poco de tinta
residual en el cartucho después de su uso. Para obtener más información,
consulte la página Web www.hp.com/go/inkusage.
Informações sobre segurança
Ao usar este produto, sempre devem ser tomadas medidas básicas
de segurança, para reduzir o risco de lesões físicas que possam
decorrer de incêndio ou choque elétrico.
1. Leia e certifique-se de que entende todas as instruções na
documentação que acompanha a dispositivo.
2. Ao conectar este produto a uma fonte de alimentação, use apenas
tomadas elétricas com ligação à terra. Se não souber se a tomada
é aterrada, consulte um eletricista competente.
3. Ao conectar o dispositivo à tomada elétrica, use apenas o cabo de
alimentação fornecido com o dispositivo.
4. Use apenas o adaptador de energia ou bateria externo fornecido com
o dispositivo.
5. Se seu dispositivo suportar fax, use o cabo do telefone incluído com
o dispositivo.
6. Observe todas as advertências e instruções indicadas no dispositivo.
7. Desligue o dispositivo da tomada elétrica antes de limpá-lo.
8. Não instale nem use o dispositivo próximo a água, nem o use quando
você estiver molhado.
9. Instale o produto de forma segura, em superfície estável.
10. Instale o dispositivo em local protegido onde ninguém possa pisar ou
tropeçar no fio de alimentação e onde o fio possa ser danificado.
11. Se o dispositivo não funcionar corretamente, consulte “Manutenção e
solução de problemas” no guia do usuário exibido na tela do
Starter CD.
12. Não há nenhuma peça interna que possa ser reposta ou consertada
pelo próprio usuário. Os consertos devem ser feitos por técnicos
qualificados.
Observação: a tinta dos cartuchos é usada no processo de impressão de
várias maneiras, incluindo o processo de inicialização que prepara o
dispositivo e os cartuchos para impressão, e o serviço de manutenção do
cabeçote de impressão, que mantém os bicos de impressão limpos e a tinta
fluindo normalmente. Além disso, sempre fica um pouco de tinta no
cartucho após seu uso. Para obter mais informações, consulte
www.hp.com/go/inkusage.
ES
PT

© 2008 Hewlett-Packard Development Company, L.P.
Printed in US
Imprimé aux Etats-Unis
Impreso en EE.UU.
Impresso nos E.U.A.
www.hp.com/support
*CB783-90023*
*CB783-90023*
CB783-90023
EN
PT
FR
ES
-
 1
1
-
 2
2
-
 3
3
-
 4
4
-
 5
5
-
 6
6
-
 7
7
-
 8
8
-
 9
9
-
 10
10
-
 11
11
-
 12
12
-
 13
13
-
 14
14
-
 15
15
-
 16
16
-
 17
17
-
 18
18
-
 19
19
-
 20
20
-
 21
21
-
 22
22
-
 23
23
-
 24
24
-
 25
25
-
 26
26
-
 27
27
-
 28
28
-
 29
29
-
 30
30
-
 31
31
-
 32
32
-
 33
33
-
 34
34
-
 35
35
-
 36
36
-
 37
37
-
 38
38
-
 39
39
-
 40
40
-
 41
41
-
 42
42
-
 43
43
-
 44
44
-
 45
45
-
 46
46
-
 47
47
-
 48
48
-
 49
49
-
 50
50
-
 51
51
-
 52
52


HP J6424 Quick start guide
- Category
- Networking
- Type
- Quick start guide
- This manual is also suitable for
Ask a question and I''ll find the answer in the document
Finding information in a document is now easier with AI
in other languages
- français: HP J6424 Guide de démarrage rapide
- español: HP J6424 Guía de inicio rápido
- português: HP J6424 Guia rápido
Related papers
-
HP OFFICEJET Owner's manual
-
HP Photosmart C4500 All-in-One Printer series User guide
-
HP OFFICEJET PRO 8600 Owner's manual
-
-
-
-
HP Officejet Pro L7500 All-in-One Printer series User manual
-
HP LaserJet M5035 Multifunction Printer series Quick start guide
-
-
Other documents
-
Canon imagePROGRAF TX-4000 MFP T36 User guide
-
Canon imagePROGRAF PRO-2000 User guide
-
Canon imagePROGRAF PRO-4100S User guide
-
Canon imagePROGRAF TA-20 MFP L24ei User guide
-
Zonet ZPW4000 Quick Installation Manual
-
Canon imagePROGRAF TM-200 MFP L24ei User guide
-
Canon Cartridge 045 Black, High Capacity User manual
-
GREENFOX Office GMW5000 Wireless Mouse User manual
-
Linksys AC900 User manual
-
3com 3CRWER101E-75 Installation guide