Page is loading ...

Advanced Contact Technology
www.multi-contact.com 1 / 4
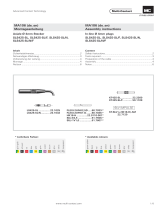
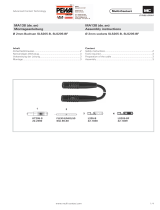
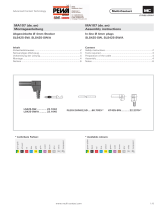
AB6AR-S/9,4 14.0023
AB6AR-S/12,4 14.0029
AS6AR-S/9,4 14.0030
AS6AR-S/12,4 14.0033
MA039 (de_en)
Montageanleitung
MA039 (de_en)
Assembly instructions
Sicherheits-Aufbaubuchsen
AB6AR-S/9,4
AB6AR-S/12,4
Sicherheits-Aufbaustecker
AS6AR-S/9,4
AS6AR-S/12,4
Safety surface mounting sockets
AB6AR-S/9,4
AB6AR-S/12,4
Safety surface mounting plugs
AS6AR-S/9,4
AS6AR-S/12,4
Inhalt
Sicherheitshinweise....................................................................2
Notwendiges Werkzeug ............................................................3
Montage ....................................................................................3
Content
Safety Instructions ......................................................................2
Tools required ............................................................................3
Assembly ................................................................................... 3

Advanced Contact Technology
2 / 4 www.multi-contact.com
Erklärung der Symbole Explanation of the symbols
Warnung vor gefährlicher elektrischer Spannung Warning of dangerous voltages
Warnung vor einer Gefahrenstelle Warning of a hazard area
Nützlicher Hinweis oder Tipp Useful hint or tip
Sicherheitshinweise Safety instructions
Die Montage und Installation der Produkte darf ausschliess-
lich durch qualifi ziertes und erfahrenes Fachpersonal unter
Berücksichtigung aller anwendbaren gesetzlichen Sicher-
heitsbestimmungen und Regelungen erfolgen.
Multi-Contact (MC) lehnt jegliche Haftung infolge Nichteinhal-
tung dieser Warnhinweise ab.
The products may be assembled and installed exclusively by
suitably qualifi ed and trained specialists duly observing all ap-
plicable safety regulations.
Multi-Contact (MC) does not accept any liability in the event of
failure to observe these warnings.
Benutzen Sie nur die von MC angegebenen Einzelteile und
Werkzeuge. Weichen Sie nicht von den hier beschriebenen
Vorgängen zur Vorbereitung und Montage ab, da sonst bei der
Selbstkonfektionierung weder die Sicherheit noch die Einhal-
tung der technischen Daten gewährleistet ist. Ändern Sie das
Produkt nicht in irgend einer Weise ab.
Use only the components and tools specifi ed by MC. In case
of self-assembly, do not deviate from the preparation and as-
sembly instructions as stated herein, otherwise MC cannot
give any guarantee as to safety or conformity with the techni-
cal data. Do not modify the product in any way.
Nicht von MC hergestellte Steckverbindungen, die mit MC-
Elementen steckbar sind und von einigen Herstellern manch-
mal auch als „MC-kompatibel“ bezeichnet werden, entspre-
chen nicht den Anforderungen für eine sichere, langzeitstabile
elektrische Verbindung und dürfen aus Sicherheitsgründen
nicht mit MC-Elementen gesteckt werden. MC übernimmt
daher keine Haftung, falls diese von MC nicht freigegebenen
Steckverbindungen mit MC-Elementen gesteckt werden und
deshalb Schäden entstehen.
Connectors not originally manufactured by MC which can
be mated with MC elements and in some cases are even
described as ”MC-compatible” by certain manufacturers do
not conform to the requirements for safe electrical connec-
tion with long-term stability, and for safety reasons must not
be plugged together with MC elements. MC therefore does
not accept any liability for any damages resulting from mating
such connectors (i.e. lacking MC approval) with MC elements.
Die hier beschriebenen Arbeiten dürfen nicht an
stromführenden oder unter Spannung stehenden
Teilen durchgeführt werden.
The work described here must not be carried out
on live or load-carrying parts.
Der Schutz vor einem elektrischen Schlag muss
durch das Endprodukt (d.h. dem korrekt konfi gu-
rierten Steckverbinder) gegeben sein und vom An-
wender selbst sichergestellt werden.
Protection from electric shock must be assured by
the end product (i.e. by the correctly assembled
plug connector) and by its user.
Die Steckverbindungen dürfen nicht unter Last
getrennt werden. Das Stecken und Trennen unter
Spannung ist zulässig.
The plug connections must not be disconnected
under load. Plugging and unplugging when live is
permitted.
Vor jedem Gebrauch ist durch Besichtigen (im be-
sonderen die Isolation) zu prüfen, ob keine äusseren
Mängel vorhanden sind. Wenn Zweifel bezüglich der
Sicherheit bestehen, muss ein Fachmann hinzuge-
zogen werden oder der Steckverbinder muss ausge-
tauscht werden.
Each time the connector is used, it should previously
be inspected for external defects (particularly in the
insulation). If there are any doubts as to its safety, a
specialist must be consulted or the connector must
be replaced.
Die Steckverbinder im Gehäuse sind vor Wasser
geschützt gemäss der für das jeweilige Produkt an-
gegebenen IP-Schutzart.
The plug connectors in the housing are protected
from water in accordance with the IP protection
class stated for the relevant product.
Nicht gesteckte Steckverbinder sind vor Feuchtig-
keit und Schmutz zu schützen. Die Steckverbinder
dürfen nicht im verschmutzten Zustand miteinander
gesteckt werden.
Unmated plug connectors must be protected from
moisture and dirt. The male and female parts must
not be plugged together when soiled.
Weitere technische Daten entnehmen Sie bitte dem
Produktkatalog.
For further technical data please see the product
catalogue.

Advanced Contact Technology
www.multi-contact.com 3 / 4
1
2
3
4
5
10
6
7
Notwendiges Werkzeug Tools required
(ill. 1)
Sechskantsteckschlüssel SW8 für
AS6AR-S/...
(ill. 1)
Hex. key wrench A/F 8 for
AS6AR-S/....
(ill. 2)
Drehmomentschlüssel SW10, 3Nm
für Mutter M6
Gabelschlüssel SW10 für Mutter M6.
(ill. 2)
Torque spanner A/F10, 3 Nm, for nut M6
Open-end spanner A/F10 for nut M6.
Montage Assembly
(ill. 3)
Fronttafel bohren gemäss Bohrplan
für:
AB6AR-S/9,4
AS6AR-S/9,4
(ill. 3)
Drill front panel according to drilling
plan for:
AB6AR-S/9,4
AS6AR-S/9,4
(ill. 4)
Fronttafel bohren gemäss Bohrplan
für:
AB6AR-S/12,4
AS6AR-S/12,4
(ill. 4)
Drill front panel according to drilling
plan for:
AB6AR-S/12,4
AS6AR-S/12,4
(ill. 5)
Den Gewindebolzen des Buchsen-
oder Steckerkörpers von vorne in die
Frontafel stecken. Bei AB6AR-S/12,4
und AS6AR-S/12,4 muss zusätzlich
ein Ring 2 auf das Gewinde gescho-
ben werden. Distanzring 3 und Schei-
be 4 auf das Gewinde schieben und
mit Mutter 5 festschrauben.
Anzugs-drehmoment: 2,5Nm.
(ill. 5)
Insert threaded bolt of the socket or
plug into front panel. With AB6AR-
S/12,4 and AS6AR-S/12,4 slip the
additional ring 2 onto the thread. Slip
spacer 3 and washer 4 onto the thread
and screw-on the nut 5.
Tightening torque 2,5Nm.
(ill. 6)
Bei den AS6AR-S/... muss zusätzlich
mit der Mutter (M) und dem Steck-
schlüssel gekontert werden.
Anzugsdrehmoment: 2,5Nm.
(ill. 6)
The AS6AR-S/... nut (M) must be
secured with the hex.key wrench.
Tightening torque 2,5Nm
(ill. 7)
Kabelschuh D mit angeschlossener
Leitung auf das Gewinde schieben. U-
Scheiben 6, Federscheibe 7 und Mut-
ter 8 montieren. Mutter 8 mit Dreh-
momentschlüssel SW10 anziehen und
mit Gabelschlüssel SW10 und Mutter
5 kontern. Anzugsdrehmoment: 3Nm.
(ill. 7)
Slip cable lug D with pre-assembled
cable onto the thread. Reinstall wash-
ers 6 lock washer 7 and nut 8. Tighten
nut 8 with the torque spanner 10mm
A/F and secure it with nut 5 and the
open-end spanner 10mm A/F.
Tightening torque 3Nm.

Advanced Contact Technology
© by Multi-Contact AG, Switzerland – MA039 – 05.2013, Index b, Global Communications – Änderungen vorbehalten / Subject to alterations
Hersteller/Producer:
Multi-Contact AG
Stockbrunnenrain 8
CH – 4123 Allschwil
Tel. +41/61/306 55 55
Fax +41/61/306 55 56
mail [email protected]
www.multi-contact.com
Notizen/Notes:
/


