Page is loading ...

Instruction
Manual
Direct Measuring
Mold Cavity Pressure
Sensors with ø4 mm
Sensor Front
with Machinable Front
Type 6157BA...,
6157BB...,
6177AA...
with Chrome-Plated
Front or Diaphragm
Type 6157BC...,
6157BD...,
6177AC...,
6167A...
6157B
_
002-391e-03.10

Instruction
Manual
Direct Measuring
Mold Cavity Pressure
Sensors with ø4 mm
Sensor Front
Type 6157BA...,
6157BB...,
6177AA...,
6157BC...,
6157BD...,
6177AC..., 6167A...
6157B_002-391e-03.10
Direct Measuring
Mold Cavity Pressure
Sensors with ø4 mm
Sensor Front
with Machinable Front
Type 6157BA...,
6157BB...,
6177AA...
with Chrome-Plated Front
or Diaphragm
Type 6157BC...,
6157BD...,
6177AC...,
6167A...


Foreword
6157B_002-391e-03.10 Page 1
Foreword
We thank you for choosing a Kistler quality product
distinguished by technical innovation, precision and long
life. Please take the time to thoroughly read this instruction
manual. It will help you with the installation, maintenance,
and use of this product.
Information in this document is subject to change without
notice. Kistler reserves the right to change or improve its
products and make changes in the content without obliga-
tion to notify any person or organization of such changes
or improvements.
To the extent permitted by law Kistler does not accept any
liability if this instruction manual is not followed or
products other than those listed under Accessories are
used.
© 2010 Kistler Group. All rights reserved. Except as
expressly provided herein, no part of this manual may be
reproduced for any purpose without the express prior
written consent of Kistler Group.
Kistler Group
Eulachstrasse 22
8408 Winterthur
Switzerland
Tel. +41 52 224 11 11
Fax +41 52 224 14 14
www.kistler.com

Direct Measuring Cavity Pressure Sensors, Types 6157Bx..., 6177Ax..., 6167A…
Page 2 6157B_002-391e-03.10
Content
1. General Information....................................................................................................................... 4
2. Important Hole Conditions ............................................................................................................ 5
3. Holes for Sensors ........................................................................................................................... 6
3.1 Hole for Unmachined Sensors............................................................................................ 6
3.1.1 Hole for Sensor with Mounting Nut Type 6457................................................................. 7
3.1.2 Hole for Sensor with Spacer Sleeve Type 6459 .................................................................. 7
3.2 Hole for Contour-Adapted Sensors.................................................................................... 7
3.2.1 Hole Seat with Rotation Protection.................................................................................... 8
3.2.2 Machining the sensor shoulder .......................................................................................... 8
3.2.3 Adapting the Sensor Front to Cavity Contour.................................................................... 9
3.3 Sensors with Chrome-Plated Front .................................................................................. 10
4. Cable Installation and Connectors ...............................................................................................11
4.1 Single-Wire Cables .......................................................................................................... 11
4.1.1 Single-Wire Clamping Connector Type 1839 and Mounting Plate................................... 12
4.1.2 Multichannel Single-Wire Connector Types 1708A... and 1710A... ................................. 12
4.1.2.1 Recess for 4-Channel Connector Type 1708A... .............................................................. 12
4.1.2.2 Recess for 8-Channel Connector Type 1710A... .............................................................. 13
4.2 Coaxial Cable...................................................................................................................13
5. Sensor Installation ....................................................................................................................... 14
5.1 Sensor Installation with Mounting Nut Type 6457........................................................... 14
5.2 Sensor Installation with Spacer Sleeve Type 6459 ............................................................ 15
5.2.1 Machining the Spacer Sleeve ........................................................................................... 15
5.2.2 Mounting Spacer Sleeve and Support Plate ..................................................................... 15
6. Cable and Connector ................................................................................................................... 16
6.1 Single-Wire Technique..................................................................................................... 16
6.1.1 Cut and Grip Technique................................................................................................... 17
6.1.2 Connector Installation...................................................................................................... 17
6.1.2.1 Installing Connector Type 1839....................................................................................... 17
6.1.2.2 Installation for Multichannel Connector Types 1708A0 and 1710A0............................... 18
6.2 Coaxial Technique ........................................................................................................... 19
6.2.1 Installing Coaxial Cable.................................................................................................... 19
7. Identification Plate....................................................................................................................... 20
8. Function Test ............................................................................................................................... 21
8.1 Insulation Testing ............................................................................................................ 21
8.2 Testing the Sensor Function............................................................................................. 22
9. Servicing and Repairs................................................................................................................... 23
9.1 Insulation Testing ............................................................................................................ 23
9.2 Testing the Sensor Function............................................................................................. 24
9.3 Sensor Removal ............................................................................................................... 24

Content
6157B_002-391e-03.10 Page 3
9.4 Single-Wire Repairs ..........................................................................................................25
9.5 Repairs at Kistler...............................................................................................................25
9.6 Disposal Instructions for Electrical and Electronic Equipment ............................................25
10. Measuring Chains.........................................................................................................................26
10.1 Machine-Integrated Mold-Cavity Pressure Monitoring.....................................................26
10.2 Mold Cavity Pressure Monitoring with External Kistler Instruments..................................27
Total Pages 27

Direct Measuring Cavity Pressure Sensors, Types 6157Bx..., 6177Ax..., 6167A…
Page 4 6157B_002-391e-03.10
1. General Information
Sensor diameter ø4 mm must not be machined
Sensor front must be clean and without notches
Use only recommended mounting tool
Do not pull the sensor out of the hole by pulling on the
cable.
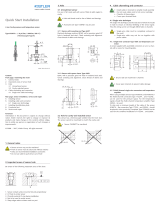
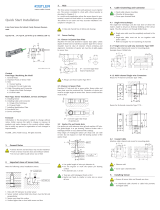
Fig. 1: Cavity pressure sensor Type 6157BA...
Fig. 2: Dimensions Type 6157BA...

Important Hole Conditions
6157B_002-391e-03.10 Page 5
2. Important Hole Conditions
The measuring hole can influence the function and life of
the sensor. Inaccurate holes can lead to measuring errors
due to the inclusion of transverse forces acting on the
sensor.
Thus attention must be given to the following criteria:
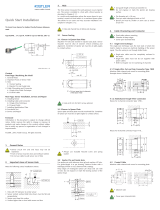
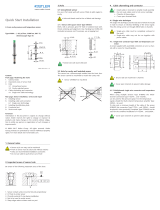
Fig. 3: Important characteristics of the measuring hole
1. Contact surface right-angled and flat
2. Sensor center-aligned by the H7 hole
3. Chamfer prevents damage to the O-ring during moun-
ting
4. No centering hole; the sensor shoulder must not touch
the wall
5. Sharp edge reduces impressions on the molding

Direct Measuring Cavity Pressure Sensors, Types 6157Bx..., 6177Ax..., 6167A…
Page 6 6157B_002-391e-03.10
3. Holes for Sensors
The sensor is mounted front flush in the measuring hole in
the cavity wall. The pressure in the cavity is transferred via
the sensor front directly onto the piezoelectric measuring
element, which produces a proportional charge. The measu-
ring signals are converted to a voltage in the amplifier and
amplified to a standardized voltage signal, which is used to
record the pressure curve.
The sensor front can be machined on sensors which are not
chrome plated, so that the front will fit flush in the cavity
wall.
The sensor front of chrome-plated or diaphragm sen-
sors must not be machined (see section 3.3).
Clean hole and thread of metal particles and debris.
Accessory set Type 1300A81 is provided for machining
the sensor front.
3.1 Hole for Unmachined Sensors
For pressure measurements in flat parts and in those parts
with a flat cavity wall, the sensor is mounted without
machining in a hole at right-angles to the cavity wall. After
mounting, the sensor front must come flush with the cavity
wall and, for this purpose, the hole is adapted to the sensor
dimension of the front measuring body.

Holes for Sensors
6157B_002-391e-03.10 Page 7
3.1.1 Hole for Sensor with Mounting Nut Type 6457
Use EDM (Electrical discharge machining), mill or grind H7
hole in hardened tool steel. Check centering and positional
alignment. Clean thread free of metal particles and debris.
Fig. 4: Sensor hole for fitting mounting nut; mounting nut
3.1.2 Hole for Sensor with Spacer Sleeve Type 6459
Use EDM, mill or grind H7 hole in hardened tool steel.
Check centering and positional alignment.
Fig. 5: Sensor hole for mounting with spacer sleeve; spacer
sleeve
3.2 Hole for Contour-Adapted Sensors
This concerns sensor Types 6157BA..., 6157BB... and
6177AA... .
With an oblique cavity wall or one with a oblique structure
or in free-form surfaces, the sensor can be adapted to the
contour.
The sensor front can be machined within certain limits. For
this purpose and in every case, the sensor must be secured

Direct Measuring Cavity Pressure Sensors, Types 6157Bx..., 6177Ax..., 6167A…
Page 8 6157B_002-391e-03.10
against rotation before machining by machining the sensor
shoulder on one side. The sensor hole is then adapted and
the sensor front machined either directly or in the mounted
position.
The sensor front of Types 6157BC..., 6157BD...,
6177AC and 6167A... must not be machined.
3.2.1 Hole Seat with Rotation Protection
Use EDM or mill the hole with rotation protection in the
hole seat using the hole dimensions as above
Section 3.1.1: Hole for sensor with mounting nut Type
6457 or
Section 3.1.2: Hole for sensor with spacer sleeve Type
6459
The hole dimensions indicated above are adapted accor-
ding to the following drawing in the area of the hole seat.
Fig. 6: Hole seat for rotation protection
Take care with the radius at the transition to the
"land". If necessary, a chamfer will need to be machi-
ned on the sensor shoulder.
The thread in the hole for the mounting nut must be
clean and free of metal particles and debris.
3.2.2 Machining the sensor shoulder
To prevent the sensor from rotating, the ø7 mm sensor
shoulder is machined on one side. The dimension for the
machined part is shown in Fig. 7. A face grinder is suitable
for the machining. If necessary, a free-hand grinder can also
be used to produce this surface. With manual grinding of
the sensor shoulder, no more than 0,6 mm must be

Holes for Sensors
6157B_002-391e-03.10 Page 9
removed from one side, so that the shoulder dimension at
the machined diameter is about 6,4 mm.
During machining the sensor should be clamped at the
ø5 mm connector end.
Fig. 7: Machine sensor shoulder on one side
The sensor must not be clamped or held at the front
end with the ø4 mm diameter.
The centering diameter ø4 mm and the sensor contact
shoulder must under no circumstances be machined.
Do not machine off the serial and type numbers.
3.2.3 Adapting the Sensor Front to Cavity Contour
This applies to sensor Types 6157BA..., 6157BB... and
6177AA... .
The front of the sensor can be machined with a radius or
slanted surface, also when mounted in the mold. When
eroding a cavity contour that has an installed sensor,
ensure that no liquid enters the connector. Seal the rear
sensor body with silicone sealant. The end of the cable
should always be secured outside the erosion bath.
After machining the sensor front, remove the sensor and
dry it. Tool Type 1315A can be used for the removal.
Clean and dry the hole.
Fig. 8: Sensor front dimension for radii; sensor front di-
mensions for surfaces
Use extraction tool Type 1315A.

Direct Measuring Cavity Pressure Sensors, Types 6157Bx..., 6177Ax..., 6167A…
Page 10 6157B_002-391e-03.10
3.3 Sensors with Chrome-Plated Front
This applies to sensor Types 6157BC..., 6157BD...,
6177AC... and 6167A... .
Chrome-plated sensors must not be machined.
Machining the sensor front will damage the chrome
layer and ruin the sensor. All liability and claims under
warranty become void in the case of a sensor whose
front has been machined.
Fig. 9: Chrome-plated sensors and sensors with a dia-
phragm cannot be machined
The chrome-plated front triples the life of the sensor in the
injection molding of glass-reinforced or fiber-reinforced
plastics. The front region of the sensor tip is chrome plated
for this purpose up to the O-ring and has the same dimen-
sions as the unplated sensor.
The sensor hole is thus the same as in Section 3.1 "Hole
for unmachined sensors". When installing the chrome
plated sensor, the hole depth L = 8 mm must be adapted
accurately to the length of the sensor adapter sleeve. The
sensor front must come flush with the cavity wall and must
not protrude. Here compliance is required with the dimen-
sional tolerance in the dimensional drawing on Page 4.

Cable Installation and Connectors
6157B_002-391e-03.10 Page 11
4. Cable Installation and Connectors
The cables for piezoelectric sensors must be well insulated.
Cables and connectors must be installed with good
protection to prevent cable damage during installation and
in operation. Moisture and dirt in the area of the connector
must be prevented in order to ensure optimum function.
Recommendations for cable installation:
Install cables with sufficient slack to ensure they are not
under strain.
Secure cables in the channel with putty/mastic to simplify
mold mounting.
Do not install cables around hot runner cartridges or in
hot runner holes.
Radii at transitions and corners in the cable channel and
holes prevent cable damage.
Cover open channels.
4.1 Single-Wire Cables
With the single-wire method, electrical shielding is pro-
vided by the injection mold. Thus the cable must be
integrated in the mold body and never be installed outside
the mold. In the case of an open channel, a cover plate
must be provided. All contact surfaces and threads for the
connectors must in addition be uncoated, clean and free of
grease.
The single-wire cable must on no account be installed toge-
ther with other electrical cables such as the power supply for
hot runner systems in the cable hole.
Electrical shielding is mandatory: install single-wire ca-
ble completely in the mold and cover open channels.
To prevent interference signals, never install single-
wire cables together with power cables.
To ensure effective insulation, contact surfaces and
threads must be clean and dry.

Direct Measuring Cavity Pressure Sensors, Types 6157Bx..., 6177Ax..., 6167A…
Page 12 6157B_002-391e-03.10
4.1.1 Single-Wire Clamping Connector Type 1839 and Mounting Plate
Mill a recess for the mounting plate. Contact surfaces and
threads must be clean and free of grease. Provide radii at
transitions and corners in the cable channel or hole, so as
to prevent cable damage during assembly and in
operation.
Example showing installation in a hole.
Fig. 10: Hole and recess for connector Type 1839
4.1.2 Multichannel Single-Wire Connector Types 1708A... and 1710A...
Mill a recess for the multichannel connector. Contact
surfaces and threads must be clean and free from grease.
Provide radii at transitions and corners in the cable channel or
hole, so as to prevent cable damage during assembly and
in operation.
4.1.2.1 Recess for 4-Channel Connector Type 1708A...
Wherever possible, position the cable channel or cable hole
in the middle of the recess to simplify connection of the
sensors. When space is limited, the cable entry can be
located as required, in which a side entry at the level of the
base may be used.
Fig. 11: Recess for multichannel connector Type 1708A0

Cable Installation and Connectors
6157B_002-391e-03.10 Page 13
4.1.2.2 Recess for 8-Channel Connector Type 1710A...
Wherever possible, position the cable channel or cable hole in the
middle of the recess to simplify connection of the sensors. When
space is limited, the cable entry can be located as required, in
which a side entry at the level of the base may be used.
Fig. 12: Recess for multichannel connector Type 1710A0
4.2 Coaxial Cable
Coaxial cable must be installed in holes and channels well
protected against mechanical damage.
Mill a recess for the mounting plate. Provide channels for
radii at transitions and corners in the cable channel or hole, so
as to prevent cable damage during assembly and in ope-
ration.
Attention should be given to larger radii at the transitions
when using high-temperature sensor Types 6157BB... and
6157BD....
Fig. 13: Channel and recess for coaxial connector
Note radii.
If possible, cover open channels.

Direct Measuring Cavity Pressure Sensors, Types 6157Bx..., 6177Ax..., 6167A…
Page 14 6157B_002-391e-03.10
5. Sensor Installation
First install the sensor, then the cable and finally the
connector. This sequence is particularly important when
installing single-wire sensors, in which the cable in the
mold is cut to the required length.
All sensor holes and threads must be clean.
Radii in the channel and at transitions prevent cable
damage.
5.1 Sensor Installation with Mounting Nut Type 6457
Insert the sensor into the hole with a slight rotary move-
ment. Tool Type 1315A is suitable for deep holes and is
screwed onto the M5 thread at the back of the sensor.
Install the mounting nut with the tubular socket wrench
Type 1383, taking care not to twist the single-wire cable.
Carefully tighten the mounting nut but do not overtighten
it. Allow a clearance of 0,01 ... 0,03 mm so that the sensor
is not pressed against the seat.
Fig. 14: Installation with mounting nut
With single-wire cables, ensure that the cable is
neither twisted nor pulls on the sensor.
Do not preload the sensor; allow a clearance of 0,01
... 0,03 mm.
Install the sensor with extraction tool Type 1315A.
Secure mounting nut with tubular socket wrench Type
1383.

Sensor Installation
6157B_002-391e-03.10 Page 15
5.2 Sensor Installation with Spacer Sleeve Type 6459
Insert the sensor into the hole with a slight rotary
movement. Tool Type 1315A is suitable for deep holes and
is screwed onto the M5 thread at the back of the sensor.
Allow a clearance of 0,01 ... 0,03 mm so that the sensor is
not pressed against the seat.
5.2.1 Machining the Spacer Sleeve
Cut the spacer sleeve to a length which is approx. 2 ... 3
mm longer than the mounting dimension. Then insert the
sensor with the spacer sleeve into the hole and measure
the protruding dimension. Now grind the sleeve to size so
as to ensure 0,01 ... 0,03 mm clearance.
The machined end must be flat and right-angled.
Do not preload the sensor; allow a clearance of 0,01
... 0,03 mm
With multi-cavity applications, the spacer sleeves
should be numbered and assigned to the individual
sensors.
5.2.2 Mounting Spacer Sleeve and Support Plate
Insert the machined spacer sleeve and check before
assembly that it is not protruding. Allow a clearance of
0,01 ... 0,03 mm so that the sensor is not pressed against
the seat.
Fig. 15: Installing the spacer sleeve
Before assembly check that the spacer sleeve is not
protruding.

Direct Measuring Cavity Pressure Sensors, Types 6157Bx..., 6177Ax..., 6167A…
Page 16 6157B_002-391e-03.10
6. Cable and Connector
The most frequent sensor failures are caused by damage to
the cable during installation. It is essential to allow suffi-
cient slack when installing the cable and the connector.
Edges and transitions should thereby be provided with radii
and a sufficient length of cable installed to ensure that it is
not under strain.
To prevent any possible damage to the cable during instal-
lation in the mold, it is advisable to cover open channels or
to secure the cable with mastic.
Good insulation is important for low-noise signal trans-
mission. Caps must be placed over open connectors.
Remove sharp edges in the cable hole and the chan-
nel; provide radii
Secure the cap on the mold and cover the connector
Provide open channels with a cover plate
6.1 Single-Wire Technique
The patented single-wire technique simplifies installation of
the pressure sensors, which affects both the installation of
the cable and the cable length as well as the connector
connection. With the single-wire sensor, the charge is fed
from the sensor through a single wire. Shielding, which
normally in a coaxial cable is provided by metallic braiding
in the cable sheath, is provided in the single-wire technique
by the mold steel. Thus the single-wire cable must always
be installed in the mold and covered in open channels.
Connection to the connector is made via cut-and-grip
contact, which is connected after sensor and cable
installation. Tightening the knurled nut clamps the cable, in
which the cable insulation is pierced and an electrical
contact made.

Cable and Connector
6157B_002-391e-03.10 Page 17
6.1.1 Cut and Grip Technique
Cut the sensor cable to the required length but do not strip
off the insulation. To simplify mold servicing, cut the cable
to an adequate length. Slacken the connector at the
knurled nut but do not separate it. Ensure that the
insulation is not stripped from the cable and the first 10
mm are not kinked. Insert the cable as far as it will go and
tighten it by hand. Check the connection by pulling on it
gently.
Fig. 16: Connection to connector Type 1839; connection to
multichannel connector
Do not cut the cable too short.
Do not strip insulation from the cable.
6.1.2 Connector Installation
When installing the single-wire connector, good contact
must be ensured between the mold and the mounting
plate or connector plate of the multichannel connector.
This contact is important for electrical shielding of the
sensor. Without shielding, the cable will also carry electrical
interference signals.
When installation is in an open channel, this must be
closed off with a plate to ensure effective shielding.
Tapped holes provide good electrical contact and must be
clean and free of grease. Secure the cable loop of the cap
when installing the mounting plate. The cap must also
remain inserted when sensors are not connected. The
short-circuit pin in the cap prevents crosstalk on sensors
making measurements.
6.1.2.1 Installing Connector Type 1839
Attach the connector to the mounting plate and insert in
the hole. Secure the mounting plate with three screws,
while in the same process also installing the cap cable and
fitting the cap.
/


