Page is loading ...

1
PCATX-R9 User’s Guide
Introduction
Chapter 1
Introduction
Welcome to your BSI (Broadax Systems, Inc.) FieldGo PCATX-R9 portable
workstation. Your FieldGo PCATX-R9 workstation is one member of an entire
family of portable computers and workstations designed by BSI.
Founded in 1986, BSI is one of the pioneers in the portable computer indus-
try. BSI started by producing a transportable PC with an integrated mono-
chrome CRT display. In 1987, BSI introduced its first flat panel portable PC-AT
system with a backlit supertwist nematic monochrome LCD. It represented
BSI's successful effort in reducing the overall size and weight of a portable
PC, while retaining all the expansion capacities of a desktop computer. Since
then, BSI has continued to expand to the current lines we now have.
Your FieldGo PCATX-R9 workstation is designed to provide the full power of a
desktop computer, and the ability to use standard add-on cards in a rugged
portable package suitable for use in harsh environments. It features five drive
bays, a large, bright flat panel LCD, detachable keyboard with integrated
pointing device, 300W power supply, and a carrying case.
Combining cutting-edge processors and peripherals, your new FieldGo
PCATX-R9 sets a new standard for portable computational power by deliver-
ing performance, versatile system configuration, high level of expandability,
and reliability that can ultimately increase your productivity.

2
PCATX-R9 User’s Guide
About This User’s Guide
This is your guide to setting up your workstation and adding new components
in it. You’ll also find contact information here.
This guide tells you how to:
w Setup and start your workstation.
w Use the LCD on-screen display (OSD).
w Add new expansion cards and drives.
w Care for your workstation.
This guide, however, contains no information regarding configuration of your
add-on cards or additional drives. Refer to the setup information for those
devices to complete your installation.
Your FieldGo PCATX-R9 workstation can be configured with a dual processor
capable main board. If you initially purchased a single processor in a dual-
processor capable system, BSI recommends that when you decide to add a
second processor, you do so with professional assistance from BSI.
Any updates to this user’s guide as well as additional technical information
can be found on our web site: http://www.bsicomputer.com. Updates are
referenced by their version numbers. Your current version number can be
found on the inside cover of this guide.
Introduction

3
PCATX-R9 User’s Guide
Chapter 2
Getting Started
Before You Start
Before you unpack and start using your FieldGo PCATX-R9 workstation,
please take a few minutes to read these first few pages to prevent problems
from arising due to shipping damages, missing items, or possible misuse of
your workstation.
Important Safety Instructions
Read the following safety instructions to make sure you use the workstation
safely and effectively:
w Use your workstation on a stable surface.
w Before making any hardware installation, make sure both the system
and the external devices are turned OFF. Disconnect the power cord
from the workstation. Sudden surges of power could damage sensitive
components.
w Before installing internal add-on cards or components, always ground
yourself first to prevent static electricity from damaging the components.
You can touch the metal housing of the power supply to discharge any
Important:
Always verify that your portable
power supply voltage matches
your local AC supply voltage. Most
systems are shipped with an auto-
sensing power supply that switches
automatically to your AC supply
voltage. A non-autosensing power
supply comes with a two position
switch that sets the power supply
for 115V or 230V AC input
voltage. Be sure to select the
correct AC input voltage if you
have a non-autosensing type
power supply.
Getting Started

4
PCATX-R9 User’s Guide
electrostatic charge on your body, or use a grounding wrist strap at-
tached to the chassis. Leave all electronic components in their antistatic
containers until you’re ready to install them.
w Do not block or cover the ventilation openings on the left and right-hand
sides of the workstation chassis.
w Do not drop the chassis! Prevent any sharp or hard objects from hitting
the LCD panel! The LCD panel is made of glass that can easily crack if
dropped.
w Occasionally you may want to clean or dust off the external chassis and
the LCD panel. Turn OFF the system power and disconnect the power
cord before cleaning. Clean the chassis using a cloth only. Do not spray
any liquid cleaner directly onto the screen.
w Do not open the system’s back cover except for adding or removing
expansion cards or drives. Except as specifically explained in this User’s
Guide, do not attempt to service the workstation yourself, this may void
your warranty.
w Before transporting your workstation, securely lock the keyboard in
place.
Getting Started

5
PCATX-R9 User’s Guide
Where To Get Help
BSI provides technical assistance through on-line support and telephone
services during regular work hours.
The following lists contact information:
Corporate Headquarters Contact Information:
Broadax Systems, Inc.
17539 E. Rowland St.
City Of Industry, CA 91748
(626)964-2600
(626)964-2665 (fax)
1-800-872-4547
E-mail: info@bsicomputer.com
On the web: www.bsicomputer.com
Technical Support Contact Information:
(626)964-2750
(626)964-2661 (fax)
E-mail: support@bsicomputer.com
Getting Started

6
PCATX-R9 User’s Guide
Phone support is available Monday through Friday, from 8:30 AM to 5:30 PM
Pacific time. To let our support staff quickly identify the exact item you have. If
you have your invoice with you, write down the invoice number too.
w Write down exactly what occurred, including the configuration of your
system and exact nature of the problem. Have this information ready
when you call tech support.
Getting Started

7
PCATX-R9 User’s Guide
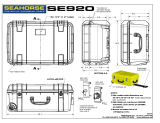
Unpacking Your Workstation
Your FieldGo PCATX-R9 workstation is shipped in a corrugated paper carton
with the workstation in its soft carrying case.
w Remove all packing materials from the workstation.
w Check for damage during shipping while unpacking the workstation. If
you notice any damage, notify the shipper to report the damage. Then
notify BSI customer service.
You should find the following items:
w PCATX-R9 portable workstation.
w Carrying case with telescopic handle and wheels.
Figure 2.1
Unpacking FieldGo PCATX-R9.
FieldGo PCATX-R9
workstation
Carrying case
Getting Started

8
PCATX-R9 User’s Guide
w Power cord.
w Hardware User’s Guide.
w Drivers and user’s manuals for installed components.
w Any software that you may have purchased with the system.
The LCD panel is covered with a clear plastic protective film. Peel it off before
you start your workstation. Save all packing materials in case you want to
transport it in the future.
Getting Started

9
PCATX-R9 User’s Guide
Figure 2.2
PCATX-R9 front view.
Identifying The Components
Take a moment to familiarize yourself with the components and external
controls/connectors of your workstation with the help of the following illustra-
tions.
PCATX-R9 Front View
Drive bay cover release screw
Keyboard
Keyboard tilt-up feet
Getting Started

10
PCATX-R9 User’s Guide
PCATX-R9 Front Controls And Components
1. Drive bay door release screw.
2. System Power ON and Hard Drive Busy LED indicators.
3. LCD on-screen display controls.
4. System reset.
5. Power ON/OFF push-button switch.
6. Touchpad pointing device (depending on the keyboard you selected, your
pointing device may differ from that shown in the illustration).
7. Primary and secondary pointing device buttons (on a standard keyboard).
Keyboard release latches -- slide
both latches up to release keyboard.
Figure 2.3
PCATX-R9 front view showing
components and controls.
Getting Started
1
3
4
5
6
2
7

11
PCATX-R9 User’s Guide
PCATX-R9 Drive Bay Side Layout
1. Filtered intake fan.
2. Two 5.25” drive bays.
3. Two drive bay cooling fans.
4. Two 3.5” shock-mounted drive bays.
Open drive bay cover plate to
access drives.
Figure 2.4
PCATX-R9 drive bay side view.
Tip:
You don’t have to remove the
metal cover unless to access the
drives. The metal cover has
ventilation holes to allow air flow
during system operation.
Getting Started
1
2
3
4

12
PCATX-R9 User’s Guide
PCATX-R9 Left Side Layout
1. Expansion slot covers.
2. Power supply and exhaust fan.
3. AC power connector.
4. Video adpater connector.
5. Input/output ports.
6. Fan speed switch.
7. Keyboard and pointing device connectors.
Figure 2.5
PCATX-R9 left side view.
Important:
If you find an INPUT VOLTAGE
selector switch near the power
supply fan, be sure it’s correctly
set for your local AC supply
voltage.
Getting Started
1
2
3
4
5
6
7

13
PCATX-R9 User’s Guide
Chapter 3
Using Your Workstation
Before you turn on your system, observing the following steps will prevent any
start-up problems.
w If you don’t have an auto-sensing power supply make sure the input
voltage selector switch on the power supply is set correctly to either
115V or 230V depending on your local outlet voltage.
w Heat generated by PCATX-R9 internal components is removed by fans
working in a push-pull fashion. A filtered intake fan and two drive bay
fans are located on the right-hand side of the chassis to draw air into the
chassis. On the left-hand side, the power supply has a built-in exhaust
fan. Leave enough space around your workstation to allow adequate
airflow through the system.
Starting Your System
Your PCATX-R9 is a self-contained portable computer with a flat panel LCD
and a detachable keyboard. The keyboard is securely attached to the chassis
by two latches. To start your system, follow these steps:
1. Set your workstation down on a flat and stable surface so you can
detach and lay down the keyboard.
Using Your Workstation

14
PCATX-R9 User’s Guide
2. Face the front of the chassis. Remove the keyboard by sliding the re-
lease latches up and pulling the keyboard away from the chassis as
shown in Figure 2.3.
3. The keyboard/pointing device cable should be already connected to their
sockets on the left side of the chassis. Remove the left side cover to
confirm; otherwise align the notches on the keyboard and pointing
device connectors to their respective sockets and firmly push them into
place.
4. Plug in the AC power cord. You are now ready to turn on your system.
5. Press the AC power ON/OFF switch to the ON position and then press
the front power ON/OFF button to start your system. If an operating
system is already installed, your workstation should boot to the operating
system’s start-up screen.
Figure 2.6
Power ON/OFF push-button switch.
Using Your Workstation
Power ON/OFF

15
PCATX-R9 User’s Guide
PCATX-R9 Video Subsystem
The PCATX-R9 series of portable workstations is available with different com-
binations of video controllers and LCDs. The LCD is an active matrix type
incorporating amorphous silicon thin-film-technology (TFT). The 15.1” model
has 1024x768 addressable pixels. The 15.4” model has 1280x1024 address-
able pixels. Both are capable of displaying color images from a palette of up
to 16 million colors.
The LCD is driven by either a single digital video card installed in the AGP slot,
or a combination of a PCI analog/digital conversion board and an AGP video
card. This configuration offers compatibility with standard off-the-shelf analog
video cards.
The LCD image is already optimized for many display modes. However, four
push-button controls located on the right side of the LCD panel are available
to adjust the following characteristics of your LCD through an OSD (on-screen
display) menu:
w Horizontal (H-Posi) and vertical (V-Posi) screen position: Adjusts the
horizontal or vertical image position within the display area of the LCD.
w Contrast: Adjusts image brightness in relation to the background.
w R, G, B-Contrast: Adjusts contrast levels for red, green and blue.
w Brightness: Adjusts overall image quality and background screen bright-
ness.
w Horizontal size (H-Size): If you select a display mode lower than
Using Your Workstation

16
PCATX-R9 User’s Guide
1024x768, this control can expand the image up to your LCD’s native
addressable pixels.
w Clock delay: LCD controller generates the pixel clock to ensure that the
red, green, and blue components of each pixel precisely align with each
other as each line is scanned. Adjust this to reduce noise in the video
signals that may show as shimmering in the image.
w Clock phase: Fine adjustment of the pixel clock.
w C-Temp: Selects a color mode. Four settings are available to set white
point reference in terms of color temperature measured in degrees
Kelvin. Your LCD is initially set at “USER” setting.
w Horizontal and vertical sync: Unlike CRTs, regular desktop monitors,
which benefit from high refresh rates, LCDs are inherently flicker-free.
There is little difference between 45Hz, 60Hz, or 75Hz refresh rates for
your LCD. These values are factory set and are not user adjustable.
w AutoReset: Resets all parameters to factory optimized setting.
w Luminance: Luminance affects the brightness of the display. This is an
on/off toggle switch that sets luminance to 100% or 50%. Lowering the
luminance prolongs the lifetime of the LCD backlight.
Follow these steps to activate the on-screen menu and make any adjust-
ments to suit your preference:
1. Turn on the system and wait for about twenty minutes before making
any screen adjustments. The LCD needs time to become thermally
stable to achieve more accurate results.
Using Your Workstation

17
PCATX-R9 User’s Guide
2. Press either menué or menuê
button (1) to invoke the on-
screen menu.
3. Press either menué or menuê
again to step through the op-
tions. The selected item will be
highlighted.
4. Press either
++
++
+ or
--
--
- button (2) to
modify the highlighted setting.
Pressing a button once in-
creases or decreases the nu-
merical setting by a single digit.
Holding down a button for more
than two seconds increases the
rate of change.
5. After you’ve made your ad-
justments release the button
and wait a few seconds for
the on-screen menu to auto-
matically disengage.
Figure 2.7
OSD menu controls.
Using Your Workstation
1
2
VESA
1024x768
H-POSI
CONTRAST
CONTRAST
CONTRAST
CONTRAST
V-POSI
128
128
128
128
128
128
Display Mode
Selected Item
Selected Item Level

18
PCATX-R9 User’s Guide
Using Your Input Devices
Your workstation is available with two types of keyboards. The standard
keyboard has an integrated touchpad pointing device compatible with the
Microsoft PS/2 mouse. A sealed membrane keyboard compliant with NEMA
4/12 specifications for water and dust resistance is available as an option. The
optional keyboard comes with a Hula-Point pointing device. You can configure
your pointing device through the operating system’s control panel. Please
refer to your operating system setup guide for more information.
Using The Standard Keyboard
To move the pointer, lightly glide your finger across the surface of the
touchpad. It responds best to a light touch; no pressure is required.
To ‘click’, do one of the following:
1. Press the left button. Button function is dependent on how the touchpad
is configured. The default setting configures the left button as the pri-
mary button--similar to how your left mouse button works.
2. Gently and quickly tap the surface of the touchpad. A single tap is a
single click while two rapid taps correspond to a double click.
To drag or highlight, do one of the following:
1. Move the pointer to the object you want to drag or to the location you
want to highlight. Press and hold down the left button and drag the
pointer.
Using Your Workstation

19
PCATX-R9 User’s Guide
2. Double tap the surface, hold on the second tap and drag to the desired
position. To drag further than the surface of the touchpad, press and
hold down the left button as you drag.
Using The Sealed Membrane Keyboard
To move the pointer, gently rock the ... with your finger.
To ‘click’, press the left button. Button function is dependent on how the
touchpad is configured. The default setting configures the left button as the
primary button--similar to how your left mouse button works.
To drag or highlight, move the pointer to the object you want to drag or to the
location you want to highlight. Press and hold down the left button and drag
the pointer.
Using Your Workstation

20
PCATX-R9 User’s Guide
Chapter 4
Adding Components
The multi-slot design of your PCATX-R9 portable workstation supports a wide
range of industry standard add-on cards through available expansion slots on
the system board. The number of available slots and slot types depends on
how your system was initially configured.
Your workstation has a total of 5 drive bays for storage devices. Two 5.25”
and two 3.5” drive bays are externally accessible. Your can install removable
media drives in any open drive bay. There is also an internal drive bay for a
3.5”, half-height hard drive.
This section provides you with procedures and illustrations to help you install
add-on cards and drives. Before you start, shut down the system, ground
yourself and disconnect the AC power cord.
Opening The System Chassis
Follow these steps to remove the back cover:
1. Place your workstation on a stable surface.
2. Face the back side of your workstation and remove the back cover by
first removing all the screws as shown in Figure 3.1.
Caution:
Always turn off the power,
disconnect the power cord and
ground yourself before you add or
remove internal components.
Adding Components
/