Overland Storage SnapServer EXP E2000 Expansion Array User manual

Type
User manual

Overland Storage SnapServer EXP E2000 Expansion Array is a reliable storage solution designed to expand the capacity of your SnapServer system. It offers scalability, performance, and data protection for businesses of all sizes. With its hot-swappable drive bays, you can easily add or replace drives without interrupting operations. The EXP E2000 supports various RAID configurations, allowing you to customize your storage to meet your specific data protection and performance requirements.

Overland Storage SnapServer EXP E2000 Expansion Array is a reliable storage solution designed to expand the capacity of your SnapServer system. It offers scalability, performance, and data protection for businesses of all sizes. With its hot-swappable drive bays, you can easily add or replace drives without interrupting operations. The EXP E2000 supports various RAID configurations, allowing you to customize your storage to meet your specific data protection and performance requirements.

10400284-101 02/2010 ©2010 Overland Storage, Inc. Page 1 of 2
2U Expansion Chassis Spare
For SnapServer
®
EXP E2000
This document describes how to remove and replace the
chassis in an SnapServer EXP E2000 expansion unit
from Overland Storage.
It is required that the work be done by an Authorized
Service Provider. Improper installation may result in
damage which voids existing warranties.
WARNING: To reduce the risk of electric shock or damage to
equipment, always remove the power cords.
CAUTION: While working with the unit, observe standard
Electrostatic Discharge (ESD) precautions to prevent damage
to micro-circuitry or static-sensitive devices.
Prepare the Unit
Disconnect and Power Off
1. Power off the unit by pressing the Power button on
the front of the server for no more than one second.
While there is no obvious change, the expansion unit
starts its shutdown process.
2. Wait 1-2 minutes, and then verify that the Power
LED is off before continuing.
3. Disconnect the power cords from the rear of the
power supplies.
4. Disconnect all data cables from the unit.
Remove the Disk Carriers
IMPORTANT: Overland recommends that you remove the drive
assemblies to lessen the unit’s weight prior to removal. The
assemblies must be reinstalled in the same slots.
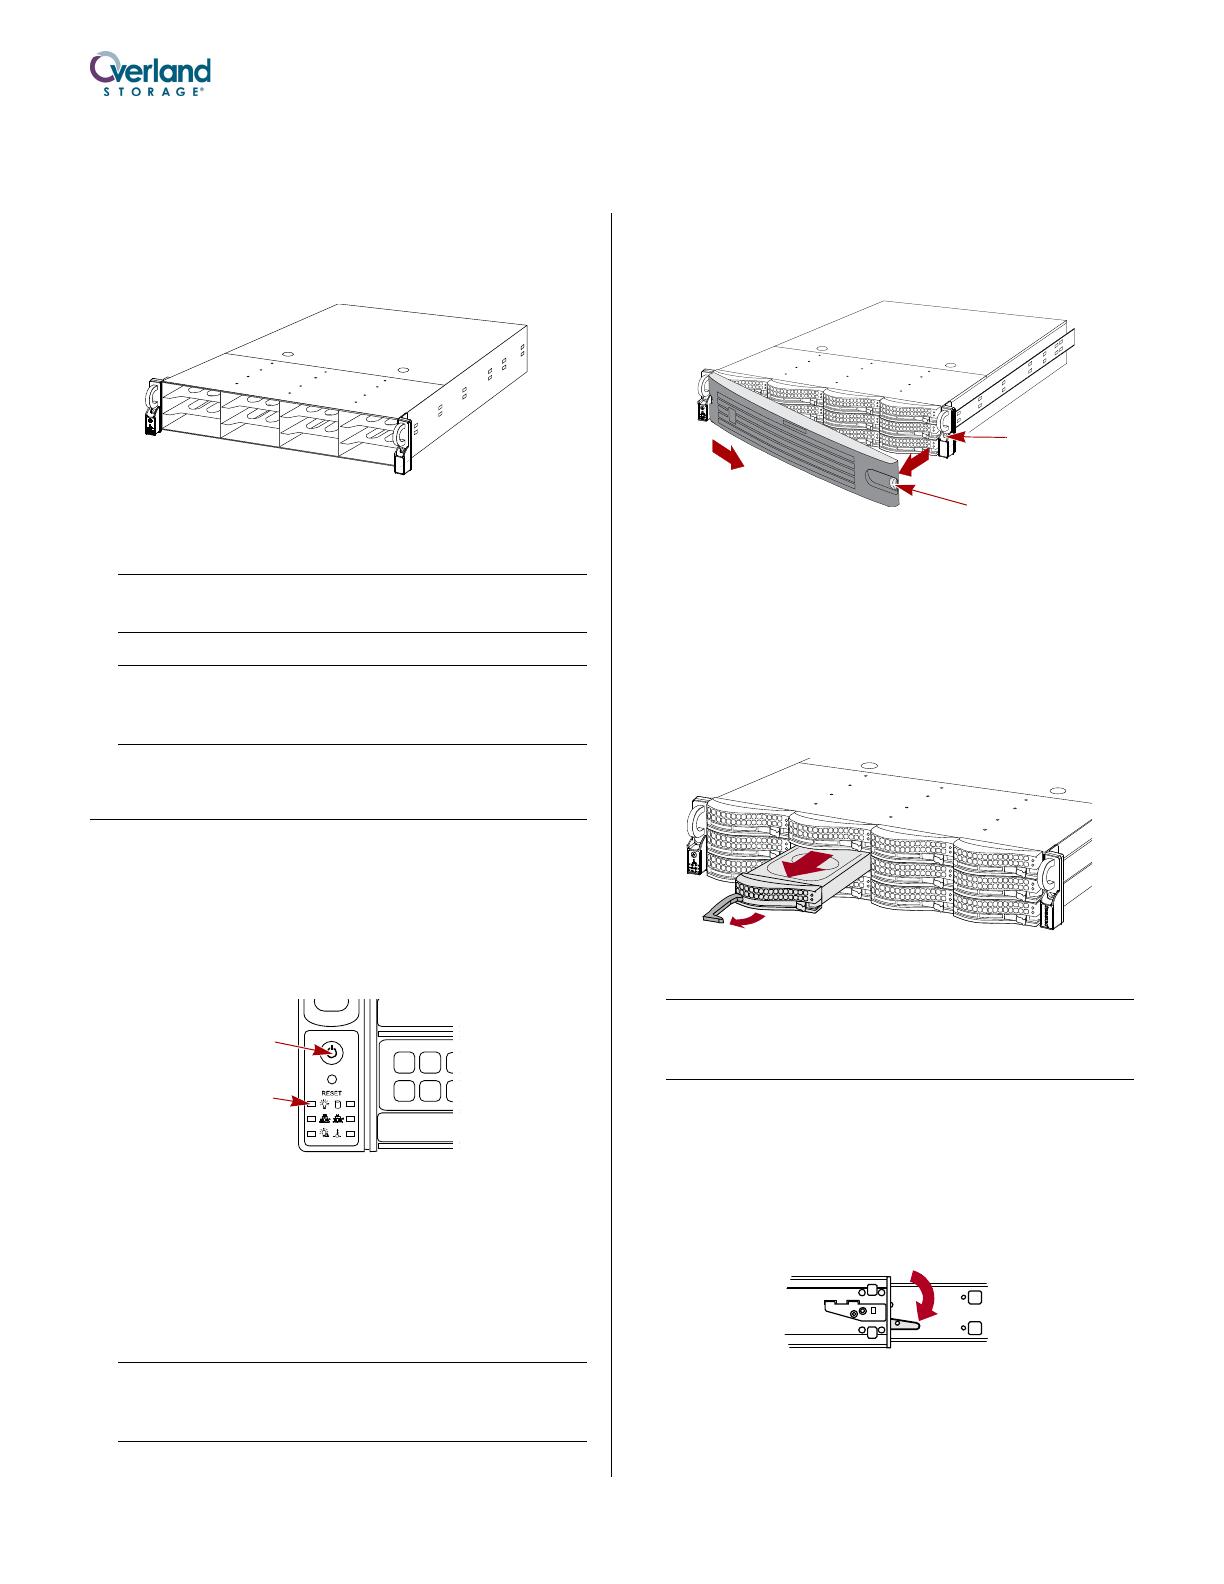
1. Remove the bezel by pressing the latch on the right
side, pulling the right side away from the unit, and
pulling the bezel off to the right. Set the bezel aside.
NOTE: Do not remove the disk drives from their carriers.
Doing so voids the drive warranty.
2. On the drive carrier, press the button to release the
assembly handle.
3. Use the handle to pull the assembly out.
4. Number the assembly and set it on an ESD surface.
5. Repeat Steps 2–4 for the remaining drive carrier
assemblies.
Remove Expansion Unit from Rack
WARNING: To prevent injury, it is recommended that a
mechanical lifter (or at least two people) be used during
installation or removal.
1. Remove and retain the screws holding the expansion
unit to the rack rails.
2. Using the two handles, pull the unit out until the
rails lock.
3. Press down both latches where the inner rail on the
expansion unit goes into the middle rail.
4. Keeping it parallel to the floor, pull the unit out of
the rack and place it on an ESD surface.
5. Unpack the new chassis and place it on the ESD
surface next to the old unit.
Power
Power
LED
Press
Rack
Screw
10400284-101 02/2010 ©2010 Overland Storage, Inc. Page 2 of 2
Move Power Supplies
For each power supply:
1. Press the release button toward the center of the
unit and use the handle to slide the power supply out.
2. Insert the power supply into the same bay in the new
chassis and push it in until it latches (clicks).
Move the Inner Rails
For each inner rail:
1. Remove and retain the screw holding the rail to the
side of the old unit.
2. Lifting the T-latch, slide the rail to the rear and off
the tabs.
3. Slide the rail onto the same side on the new chassis
until the T-latch clicks into place.
4. Using the retained screw, secure the rail.
Reactivate the Unit
1. Using two people to lift the unit, carefully slide the
expansion unit rail into the rack rail, and push
the unit to the rear of the rack.
2. Using the retained screws, secure the expansion
unit into the rack.
3. One at a time, insert the disk assemblies into the
new chassis:
a. Position the disk assembly at same slot in the
new chassis and use the lever to push it all the
way into the slot.
b. Push the lever close until it locks (clicks).
Figure 1. Insert Drive Carrier and Lock
4. Replace the bezel on the front of the unit by
inserting the left tabs and pushing the right side in
until it latches (clicks).
Reconnect and Power On
1. Reconnect the data cables.
2. Reconnect the power cords to the unit.
3. Press the power button once.
The expansion unit should power up and the LED
should turn green.
Check Operation
Restart the head unit. Using the GUI, verify that the
expansion unit is operating correctly.
Return Removed Parts to Overland
1. Place the old chassis in the anti-static bag and
secure it in the replacement part’s box using the
provided packing materials.
2. Return the old parts to Overland Storage.
Release
Handle
Screw
T-Latch
You can get additional technical support on the Internet at http://support.overlandstorage.com, or by contacting
Overland Storage using the information found on the Contact Us
page on our web site.
  • Page 1 1
  • Page 2 2

Overland Storage SnapServer EXP E2000 Expansion Array User manual

Type
User manual

Overland Storage SnapServer EXP E2000 Expansion Array is a reliable storage solution designed to expand the capacity of your SnapServer system. It offers scalability, performance, and data protection for businesses of all sizes. With its hot-swappable drive bays, you can easily add or replace drives without interrupting operations. The EXP E2000 supports various RAID configurations, allowing you to customize your storage to meet your specific data protection and performance requirements.

Ask a question and I''ll find the answer in the document

Finding information in a document is now easier with AI