Page is loading ...

MODEL NO.:
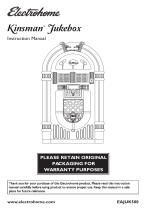
ENCODE CD ROCK ZERO 50X2 ('09)
INSTRUCTION MANUAL
(Please read before use)
Instructions for Disposal of Waste Equipment by Users in Private Household
This symbol on the product or on its packaging indicates that this product must not be
disposed of with your other household waste. Instead, it is your responsibility to dispose of
your waste equipment by handing it over to a designated collection point for the recycling
of waste electrical and electronic equipment. The separate collection and recycling of your
waste equipment at the time of disposal will help to conserve natural resources and ensure
that it is recycled in a manner that protects human health and the environment. For more
information about where you can drop off your waste equipment for recycling, please contact
your local city office, your household waste disposal service or the shop where you purchased
the product.
910-290400-0070-100
CAUTION: TO REDUCE
THE RISK OF ELECTRIC
SHOCK, DO NOT REMOVE
COVER (OR BACK). NO
USER - SERVICEABLE
PARTS INSIDE. REFER
SERVICING TO QUALIFIED
SERVICE PERSONNEL.
The lighting flash with
arrowhead symbol, within
an equilateral triangle, is
intended to alert user to
the presence of uninsulated
"dangerous voltage" within
the product's enclosure
that may be of sufficient
magnitude to constitute
risk of electric shock
to persons.
The exclamation point
within an equilateral
triangle is intended to
alert user to the
presence of important
operating and
maintenance (servicing)
instruction in the
literature accompanying
the appliance.
RISK OF ELECTRIC SHOCK
DO NOT OPEN
CAUTION
WARNING:
TO PREVENT FIRE OR SHOCK HAZARD, DO NOT EXPOSE THIS APPLIANCE TO
RAIN OR MOISTURE. DO NOT REMOVE COVER. PILOT LAMPS SOLDERED IN
PLACE. NO USER SERVICEABLE PARTS INSIDE. REFER SERVICING TO QUALIFIED
SERVICE PERSONNEL.
Specifications
Frequency Range : MW 522 - 1620 KHz
: FM 87.5 - 108 MHz
USB 2.0 Port : Full Speed 512MB - 4GB
SD Card Slot : Support Card size 512MB - 4GB
: (Support FAT16, FAT32)
Power Consumption : 90W
ANTENNA : External antenna for FM
: Built-in ferrite bar for AM
POWER SOURCE : AC 230V ~ 50Hz
SPEAKER SIZE : 6 1/2" Dynamic type x 2
: 2 1/2" Dynamic type x 2
SPEAKER OUTPUT : 15W RMS per channel
*NOTE : AM = MW
*DESIGN AND SPECIFICATIONS SUBJECT TO CHANGE WITHOUT NOTICE.
www.monkeygamesroom.co.uk

OPTIONAL EXTERNAL SPEAKERS
1. Optional external speakers (not supplied) can be connected to this unit.
2. The speaker jacks for external speakers are located on the back of the unit.
Along with the speaker jacks is a switch labelled Int./Ext..
When using external speakers, this switch must be switched to the EXT. position. Doing this turns the internal speakers in the unit off and redirects
the power to the external speakers.
3. If you decide not to use the external speakers, ensure the switch is switched to INT..
LED LIGHTING
The 7-colour changing LED lights in the front tubes are controlled by the LIGHTING SWITCH (RELEASE/HOLD) on the rear of the unit. The three front
round LED lights have a Sound-to-Light function, flashing in sync with the rhythm of the music.
TROUBLESHOOTING
There is no power
1. Make sure the unit is plugged in correctly.
2. Look at the STAND BY INDICATOR and check if the light is Red.
3. If the Red light is on, press the POWER / switch to turn the unit on.
There is No Sound
1. Make sure the Mute function is turned off.
2. Check that the Volume is turned up by pressing VOLUME UP / on the Remote.
Note: The Volume range on some units starts at level 15 and ends at level 40.
3. Make sure the INT./EXT. Switch on the back of the unit is switched to INT. (unless you are using external speakers, in which case it should be on
EXT. )
4. Check to make sure the AC Power is turned on.
CD does Not Play
1. Check to make sure the CD is inserted correctly (label side facing up).
2. Check to see that the surface of the CD is clean.
3. Make sure the Function Switch is set to CD Mode.
USB - There is No Music playing when PLAY/PAUSE (USB) is pressed
1. Make sure the MP3 device/Flash Drive has stored music files.
2. The unit will only play Flash Drives from 512MB up to 4GB.
3. Reset the USB by switching the unit Off or switching to another Mode.
4. Check if the file(s) is/are WMA file(s). The unit does not play WMA format, only MP3 format.
Remote is Not Working
1. Replace the battery (1 x 'CR2025' 3-volt lithium battery is required, spare not supplied).
2. Be sure to point the Remote handset towards the remote sensor when operating.
3. Remove obstacles in the path of the remote and the unit so the remote signal has a straight path to it.
Trademarks MPEG Layer-3 audio coding technology licensed from Fraunhofer IIS and Thomson
LIGHT
PRESET +
PRESET
STAND BY
INDICATOR
SENSOR
REC/
ERASE
FUNCTION
USB
PORT
PLAY/PAUSE
STOP/BAND
CD OPEN/CLOSE
REPEAT/ST
CD DOOR
DOWN / F.R.
TIMER
PROGRAM/CLOCK
SD
CARD
VOLUME
UP/DOWN
KNOB
LCD
DISPLAY
POWER
UP/ F.F.
SPEAKER
CONTROL LOCATORS
9 2
www.monkeygamesroom.co.uk

GETTING STARTED
Remove the Jukebox from its packaging as follows:
1. Carefully turn the box upside down or on its side and remove the bottom of the box. Carefully turn the box upright or on its side again and slide the
box off to release the unit. Remove the polystyrene packing* and place the unit in the required location.
*Note: Please ensure you remove the Remote Control handset, located in the PVC bag attached to the top polystyrene, where this Instruction Manual
was also packed. Please keep all packaging for future use, just in case the unit needs servicing.
2. The Remote Control battery has been factory fitted. When the Remote Control stops operating or its range seems reduced, replace the battery with
a new one (battery supplied - 1 x 'CR2025' 3-volt lithium replacement battery required), observing the correct polarities.
3. Unwind the FM Wire Antenna and allow it to hang straight down.
4. Unwind the AC power cord at the back of the unit.
5. Connect the plug to a 240V AC power wall outlet.
6. Press the MAIN POWER BUTTON on the back of the unit to switch the main power on - the unit will now be in Standby Mode.
The LED INDICATOR will light up.
7. Press the POWER / STANDBY BUTTON / to begin operating the unit.
8. Press the LIGHT button to switch the LED lighting system on.
POWER UP YOUR UNIT
Plug the AC power cord into the wall socket. This system switches to Standby mode automatically and the LCD will show the following:
To switch the unit on, press POWER / - the LCD BACKLIGHT will light up.
The STANDBY LED is turned off and the following:
BASIC OPERATION
Function selection
1. Press FUNCTION / to select the various functions in the following sequence:
2. When the set is on, press POWER / to switch the unit off. The LCD backlight will go off and GOOD BYE will show on the display for 2 seconds,
then the STANDBY LED lights up.
Note: In Standby Mode, the tone, sound settings, tuner presets and the volume level (up to a maximum volume level of 30) will be stored in the units
memory.
BATTERY BACK UP
The battery backup system will maintain your clock and alarm settings during a power cut. In the event of a power cut, the battery backup will save your
time and alarm settings until power is restored. The battery backup will not operate unless batteries are installed - please install two 1.5V/AAA size
batteries (not supplied). To install batteries, follow the instructions below:
INSTALLING BATTERIES AND BATTERY SAFETY
Open the battery compartment cover on the rear of the unit and insert 2 x 1.5V/AAA size (or equivalent) batteries (not supplied) observing the correct
polarities, as indicated inside the Battery Compartment.
Close the Battery Compartment Cover.
It is strongly recommended Alkaline batteries are used.
Do not mix new and old batteries and those of different manufacture.
Keep batteries out of the reach of children.
Do not expose batteries to heat or fire danger of explosion!
If the unit is not going to be used for a prolonged period of time, remove the batteries to
prevent possible leakage and corrosion of the battery terminals.
Ensure that exhausted batteries are disposed of safely, according to your Local Authority Regulations.
SETTING THE CLOCK
After connecting the system to the power supply, set the clock first.
1. Press POWER / to switch the unit to Standby Mode.
- The display shows the time.
- If you have not set the clock. 0:00 flashes on the display by default.
2 In Standby mode, press and hold PROGRAM / over 1 second.
- The Hours digit starts flashing.
3. Press the FF / or FB / repeatedly to set the Hours.
4. Press PROGRAM / again to confirm. The Minutes digit starts flashing.
5. Hold down FF / or FB / repeatedly to set the Minutes.
6. Press PROGRAM / again to confirm.
The Minutes digit stops flashing, the clock begins to run.
7. Press PROGRAM / to select between 12 AM and 24.00 hours, as shown below:
SD-Card Operation:
1. Press the FUNCTION / button to set the unit to CARD Mode.
2. Insert an SD Card into the card slot. READ is displayed as the system scans the contents of the SD card.
When inserting an SD Card into the SD Card slot, ensure it is inserted straight and without bending it, in the
direction of the arrow as shown in the diagram. To remove the card, press it in gently, it will partially eject and
can then be removed by hand.
3. Track no. 1 of the Root folder (Folder 1) will play back automatically after the unit has finished reading the SD card contents.
4. Press FF / or FB / once or repeatedly until the desired track number appears on the Display.
5. Press PRESET + / or PRESET / to select the desired Album.
6. Press STOP/BAND / to stop playback.
Remarks:
a) The USB connector does not support connection with a USB extension cable.
b) This unit is not designed for direct communication with a computer.
c) It is not guaranteed that all USB memory devices and SD cards will work on this audio system.
IMPORTANT:
Do not disconnect the USB device/SD Card during USB/SD mode, as this may damage the external device or its files. Please power off first or press
another Mode before safely disconnecting the USB device/SD Card.
USB Specification:
Interface
-USB 2.0 Full speed, HOST (USB HUB is not supported) Corresponding Flash memory
- Compatible with MPEG Audio 1, 2, 2.5
- Compatible with Layer 1, 2, 3
- Compatible with Bit rate: 128 320 Kbps
- Subfolder nest : 8 levels
- Number of track / titles max 999
- Support ID3 tag V2.0
Head/Earphone Jack Operation
To listen through Earphones or Headphones (not supplied), plug them into the Head/Earphone Jack.
Adjust the volume to a safe level.
NOTE: The sound from the internal speakers will be cut off when Head/Earphones are attached.
CD PLAYER
Playing a CD
1. Press the FUNCTION / to set the unit to CD Mode.
2. Press CD OPEN / CLOSE / to open the CD compartment.
3. Insert a disc with the printed side facing up. Press CD OPEN / CLOSE / again to close the compartment.
READ is displayed as the CD Player scans the contents of the disc.
4. Track no. 1 will play back automatically, after the contents of the CD disc has been read.
5. Press FF / or FB / once or repeatedly until the desired track number appears on the Display.
6. Press STOP/BAND / to stop playback.
MP3-CD Playback
1. Press CD OPEN / CLOSE / to open the CD Drawer and insert a MP3-CD format disc. Press the button again to close the compartment. READ
is displayed as the CD Player scans the contents of the disc.
2. Track no. 1 of the Root folder (Folder 1) will play back automatically after the contents of the MP3-CD Disc has been read.
3. Press FF / or FB / once or repeatedly until the desired track number appears on the Display.
4. PRESET + / or PRESET / to select the desired Album.
5. Press STOP/BAND / to stop playback.
7 4
USBAUX
TUNER CD
CARD
www.monkeygamesroom.co.uk

IMPORTANT SAFEGUARDS FOR AUDIO PRODUCTS
PLEASE READ CAREFULLY THE FOLLOWING IMPORTANT SAFEGUARDS THAT ARE APPLICABLE TO
YOUR EQUIPMENT.
1. Read Instructions - All the safety and operating instructions should be read before the
appliance is operated.
2. Retain Instructions - The safety and operating instructions should be retained for future
reference.
3. Heed Warnings - All warnings on the appliance and in the operating instructions should be
adhered to.
4. Follow Instructions - All operating and use instructions should be followed.
5. Water and Moisture - The appliance should not be used near
water-for example, near a bathtub, washbowl, kitchen sink, laundry tub,
in a wet basement, or near a swimming pool and the like.
6. Carts and Stands - The appliance should be used only with a cart or stand
that is recommended by the manufacturer.
6A.An appliance and cart combination should be moved with care. Quick stops, excessive force,
and uneven surfaces may cause the appliance and cart combination to overturn.
7. Wall or Ceiling Mounting - The appliance should be mounted to a wall or ceiling only as
recommended by the manufacturer.
8. Ventilation - The appliance should be situated so that its location or position does not interfere
with-its proper ventilation. For example, the appliance should not be situated on a bed, sofa,
rug, or similar surface that may block the ventilation openings; or, placed in a built-in installation,
such as a bookcase or cabinet that may impede the flow of air through the ventilation openings.
9. Heat - The appliance should be situated away from heat sources such as radiators, heat
registers, stoves, or other appliances (including amplifiers) that produce heat.
10.Power Sources - The appliance should be connected to a power supply only of the type
described in the operating instructions or as marked on the appliance.
11.Grounding or Polarization - Precautions should be taken so that the grounding or polarization
means of an appliance is not impeded.
12.Power - Cord Protection - Power-supply cords should be routed so that they are not likely
to be walked on or pinched by items placed upon or against them, paying particular attention
to cords at plugs, and the point where they exit from the appliance.
13.Cleaning - The appliance should be cleaned only as recommended by the manufacturer.
14.This product is designed for use with the antenna attached and should not be connected to
any other external antennas.
15.Non-use Periods - The power cord of the appliance should be unplugged from the outlet
when left unused for a long period of time.
16.Object and Liquid Entry - Care should be taken so objects do not fall and liquids are not
spilled into the enclosure through openings
17.Damage Requiring Service - The appliance should be serviced by qualified service personnel
when:
A. The power-supply cord of the plug has been damaged; or
B. Objects have fallen, or liquid has been spilled into the appliance; or
C. The appliance has been exposed to rain; or
D. The appliance does not appear to operate normally or exhibits a marked change
inperformance; or
E. The appliance has been dropped, or the enclosure damaged.
18. Servicing - The user should not attempt to service the appliance beyond that
described in the operating instructions. All other servicing should be referred to
qualified service personnel.
1
www.monkeygamesroom.co.uk

PROGRAMMING TRACKS
You may store up to 20 tracks in the desired sequence.
1. In the Stop position, press PROGRAM / to start programming. MEMORY and P0-01 start flashing on the display.
2. Press FF / or FB / once or repeatedly until the desired track number appears on the Display.
For MP3: PRESET + / or PRESET / to select the desired album.
3. Press PROGRAM / to confirm, the Display shows the stored track number and the next store position.
4. Repeat steps 2-3 to select and store all desired tracks. FULL is displayed if you attempt to program more than 20 tracks.
5. Press PLAY/PAUSE / to play the programmed tracks.
Erasing the Program
You can erase the contents of the memory as follows:
- Press STOP/BAND / once if in Stop position, press it twice during Playback.
-Press POWER / .
- Select another sound source.
- Open the CD drawer.
RECORDING
From CD to SD/USB
The system is capable to convert a whole CD disc to MP3 format and copy it to a USB mass storage device or SD card. It also has the ability to copy
one single MP3 track to and from on USB/SD card.
1. In CD playback mode, press REC / to start ripping to USB/SD card (default is USB if both devices are detected), playback will be stopped and
skips back to the beginning of the current track, the system will scan the contents of USB/SD card and create folder to store MP3 track. Resume
CD playback and start ripping from the moment. The corresponding target device icon USB / CARD start flashing.
2. Press STOP/BAND / to exit CD ripping.
MP3 Copying
1. In MP3-CD, USB or SD Card playback mode, press REC / to start MP3 copying from CD to USB/SD card, or USB to SD card or vice versa.
Playback will stop and the system will scan the contents of the USB/SD card and create a folder to store the MP3 tracks.
2. REC will show on the Display.
3. COPY 01 will be displayed, the proportional copied percentage will be shown on the decimal number.
4. The target device icon USB or CARD starts flashing, the decimal number will go up in increments from 01 as MP3 copying starts, the process
will stop as it reaches 100.
5. MP3 playback starts from the beginning.
From AUX to SD/USB
The system is capable of converting an audio signal from AUX input into MP3 format and store it on a USB mass storage device or SD card (the default
is USB if both devices are detected).
1. Press FUNCTION / once or more to select AUX.
2. Press REC / to start ripping, the system will scan the contents of the USB device / SD card and create a folder to store the
MP3 tracks.
3. REC and RIPP TO will be displayed, and AUX will start flashing.
4. The target device icon USB or CARD starts flashing as ripping begins.
5. Press STOP/BAND / to exit AUX ripping.
Note:
a) The message NO FUNCT will be displayed if the Function key is pressed during the AUX ripping process.
b) The message NO DEV will be shown if neither USB nor SD card are detected.
c) The message FULL will be displayed if not enough memory is left on the target device.
Deleting MP3 Tracks
The system can delete previously recorded MP3 or existing files.
1. In USB or SD card playback mode, press and hold REC/ERASE / for 2 seconds, the currently playing track is stopped and will be deleted.
2. The message delete is displayed.
CONTROL LOCATORS
3 8
POWER / STAND BY
EQ
PRESET +
REC
PRESET -
PLAY/PAUSE
SKIP BACKWARD -
RANDOM
ID3
STOP / BAND
0-9
CD OPEN / CLOSE
MUTE
SLEEP
VOLUME +
FUNCTION
VOLUME -
SKIP FORWARD +
PROGRAM
REPEAT
TIMER
MONO/STEREO
FM WIRE ANTENNA
POWER PLUG
EARPHONE
LIGHTING
RELEASE HOLD
MAIN POWER BUTTON
BATTERY BACKUP
LIGHTING SWITCH
(RELEASE/HOLD)
EARPHONE JACK
EXT.SPEAKER JACK
INTERNAL/EXTERNAL
SPEAKER SWITCH(INT./EXT.)
AUX IN JACK
EARPHONE
LIGHTING
RELEASE HOLD RED
BLACK
RED
BLACK
METAL CONDUCTOR
Speaker jack
www.monkeygamesroom.co.uk

Setting the Timer/Alarm
The unit can be used as an alarm clock, whereby the selected source - CD, TUNER, USB or SD CARD - starts playback at a preset time. NOTE: Make
sure the clock is set before using the Timer.
1. In Standby mode, press and hold TIMER / on the Remote over 1 second, the icon " " and message TURN ON start flashing on the display.
Press TIMER / again on the Remote to begin the SYSTEM POWER ON timer setting.
2. Press FF / or FB / repeatedly to set the Hours.
3. Press TIMER / on the Remote to enter the Minutes setting mode.
4. Press FF / or FB / repeatedly to set the Minutes.
5. Press TIMER / on the Remote again to begin the SYSTEM POWER OFF timer setting.
The icon " " and message TURN OFF start flashing on the Display.
6. Press TIMER / on the Remote again to begin timer setting.
7. Press FF / or FB / repeatedly to set the Hours.
8. Press TIMER / on the Remote to enter the Minutes setting mode.
Press FF / or FB / repeatedly to set the Minutes.
9. Press TIMER / on the Remote again to begin setting the source to wake up by.
The default is TUNER mode. The word TUNER starts flashing.
10. Press FUNCTION / to select the wake up source.
If TUNER mode is selected, the unit will wake you up with the last tuned in Radio Station.
11. Press TIMER / on the Remote again to complete the timer on/off setting.The icon " " will stay on the LCD Display to show the timer is set.
Note: The wake up sound level will increase gently to the preset volume level.
12. Press TIMER / on the Remote Control to turn the timer on or off. The icon " " will be either on or off.
SLEEP
You can set a certain period of time after which the set will switch automatically to Standby Mode.
On the Remote Control, press SLEEP / repeatedly to select the desired time period options (in Minutes):
- The Display shows in sequence: SLEEP 90, 80, 70, 60, 50, 40, 30, 20, 10.
- The Display briefly shows the selected option and returns to its previous status.
To cancel the Sleep Timer, press SLEEP / again to 00 , or press POWER / to switch the unit into Standby Mode.
VOLUME CONTROL
Press VOLUME UP / / VOLUME DOWN / on the remote control to adjust the volume. on the Remote Control or turn the Volume Control Knob
to adjust the Volume.
MUTE
You can temporarily switch the sound off without switching the unit off.
1. Press MUTE / on the Remote Control to switch the sound off, playback continues without sound.
2. To switch the sound on again:
- press MUTE / again.
- adjust the volume controls.
- change the source.
EQ
Press EQ / on the Remote Control to select the desired EQ Mode.
There are 5 modes of preset EQ:
RADIO
AM-FM Tuning
1. Press FUNCTION / to set the unit to TUNER mode.
2. Press STOP/BAND / repeatedly to select your desired waveband. FM or AM(MW)
3. Auto Tuning Press and hold FF / or FB / until the frequency begins to scroll and the radio automatically tunes into a station with sufficient
reception. If a station in received in Stereo, (ST) shows on the Display. Repeat step 3 if necessary until you find the desired station.
4. Manual Tuning Press FF / or FB / briefly and repeatedly until a station is found.
Programming Radio Stations
You can store up to a total of 40 radio stations (FM and AM) into memory, manually or automatically (Autostore):
1. Tune into your desired station.
2. Press PROGRAM / to activate programming, the icon MEMORY and P01 will start flashing.
3. Press PRESET + / or PRESET / to allocate a number from 1 to 20 stations.
4. Press PROGRAM / to confirm the setting, the Display shows the preset number Waveband and the Frequency of the preset station.
5. Repeat steps 1-4 to store other stations you wish to listen to. Press PRESET + / or PRESET / once or repeatedly until the desired
preset station is displayed.
To Listen to a Preset Station
Press PRESET + / or PRESET / once or more until the desired preset station in displayed.
Automatic programming of Radio Stations:
Automatic programming will start with preset 1, from this preset number upwards, previously programmed tuned in Radio Station will be erased.
1. Press and hold the PROGRAM / button until Auto appears on the Display.
- the word memory will start flashing.
- Any available radio stations are programmed.
- After all stations are stored, the last preset station will then be played.
ANTENNA
For FM Reception, the unit is provided with an FM WIRE ANTENNA - move the wire until reception is clear and without interference. For AM (MW)
Reception, the unit is provided with a directional built-in ferrite antenna - rotate the set to find the position in which the best reception is obtained.
WARNING: Do not connect the EXTERNAL FM WIRE ANTENNA to any outside antenna.
USB & SD-CARD OPERATION
USB Operation:
1. Press the FUNCTION / button to set the unit to USB Mode.
2. Plug-in a USB mass storage device or Flash Drive (not supplied).
Insert the plug of the MP3 device or Flash drive with MP3 songs (none supplied) direct into the USB port.
Do not use a USB extension cable. When plugging in a device with a USB plug, ensure the USB symbol
(if present) " " is facing upwards, making sure it is fully inserted.READ is displayed as the system
scans the contents of the USB device.
3. Track No. 1 of the Root folder (Folder 1) will play back automatically after the unit has finished reading the contents of the USB device.
4. Press FF / or FB / once or repeatedly until the desired track number appears on the Display.
5. Press PRESET + / or PRESET / to select the desired Album.
6. Press STOP/BAND / to stop playback.
7. When finished playing back the songs, ensure you first switch the Power Off or you switch to another Mode before pulling the USB Plug out straight.
5 6
CARDCD
TUNER AUX
USB
www.monkeygamesroom.co.uk
/