Page is loading ...

Welcome
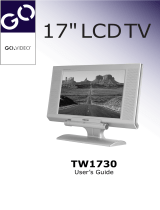
Congratulations on your purchase of this GoVideo LCD TV + PC Monitor. This Quick Reference Guide
will help you get started. Before you begin, make sure the following accessories are included with your
LCD TV:
1
Remote Control
2
AAA Batteries (2)
3
Power Cable
4
VGA Cable
5
RF Cable
6
TV Tuner (preinstalled)
7
AV Cable
8
User’s Guide &
Registration Card
-
+
+
-
In
Out
Quick Reference
Basic Setup & Operations
T2040
Step 1 - Insert the Remote Control Batteries
Install the supplied batteries, paying attention to the
correct polarities.
DISPLAY
1
4
7
10+
2
5
8
0
3
6
9
JUMP
CH+
VOL- VOL+
CH
-
RETURN
MENU
ENTE
R
MUTE
FAVORITES
INPUT
POWER
CHANNEL
SEARCH
ASPECT
CAPTIONS
AUDIO
PICTUR
E
MODE
1
2
3
4
8
7
6
5
Step 2 - Connect the Power Cable
1
Connect the supplied power cable to the AC In
jack on the back of the LCD TV.
2
Plug the power cable into a standard AC outlet.

©2004 GoVideo. All rights reserved. Printed in China.
GoVideo is a registered trademark. All other brand and product names are trademarks or registered trademarks of their respective companies.
Connect to Cable Box or
Satellite Receiver
Connect to Antenna
or Basic Cable
Connect to PC
RF Cable
VGA Cable
IN OUT
AUDIO
S-VIDEOVIDEO
L
R
OUTPUT
RF
Step 3 - Connect to an Antenna/Cable
Connect the LCD TV to your antenna or cable/satellite hookup as shown.
Note: You can also connect the supplied VGA cable from the VGA Out jack on your computer to the
VGA In jack on the back of the LCD TV (under the flap door). Press the AUTO button on top of the TV
to automatically adjust the PC display to fit the LCD screen; see the User’s Guide for details.
Step 4 - Turn on the TV
Press POWER on the remote control.
• The Power indicator will turn green.
• Press
POWER again to turn off the TV.
Step 5 - Search for Channels
Press SEARCH on the remote control.
• The LCD TV will automatically search for all
available channels.
• To change the tuning band or add/delete
channels, see the User’s Guide.
Step 6 - Select Channels/Inputs
You can select up to 69 antenna channels
(1-69) or 125 Cable TV channels (1 to 125)
on your LCD TV. To select a channel, use the
CH / buttons, or enter a 1-, 2- or 3 -digit
number as follows:
To select a 1- or 2-digit channel number
(e.g., channel 5)
1
Press the 0 button.
2
Press the 5 button.
* or simply press the 5 button.
To select a 3-digit channel number (e.g.,
channel 115)
Complete the following procedure within 4
seconds.
1
Press the 10+ button.
2
Press the 1 button.
3
Press the 5 button.
Note: Three-digit channel numbers can only
be selected when the Antenna Source is set
to Cable; see the User’s Guide for details.
To select another input
Press INPUT to change the on-screen view to
PC, TV, AV (Video In), SV (S-Video In) or YCbCr
(Component Video In).
Step 7 - Adjust the Volume
Press the VOL+/- buttons to adjust the volume.
• To mute the sound, press
MUTE.
Step 8 - Adjust the Screen Angle
To set the LCD TV to a comfortable viewing
angle, tilt the screen up to 5 degrees forward or
20 degrees backward.
/


