Page is loading ...

easy&cosy
digital thermostat
Installation guide
Paigaldusjuhend
Installasjonsveiledning
Installationsguide
Asennusopas
Installationsvejledning
Leiðbeiningar um uppsetningu
EN
EE
NO
SE
FI
DK
IS

2 VIIOI202
Table of content
Introduction 3
Button and display description 4
Installing and wiring the thermostat 5
Basic functionality
- Select how to control your
oorheatingsystem 6
-Recommendedsettings 7
-Settingtheclock 8
-Settingthemaximumoortemperature8
-Readingtheoortemperature 9
-Frostprotectionmode 9
Timer functionality
-ActivateTimerMode 10
-Programmingthetimer 10
Technical specications 14
Home Heating Warranty 15
EN

VIIOI202
3
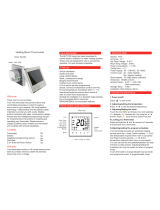
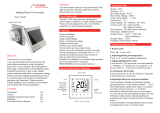
ENIntroduction
Easy&cosydigitalcontrollerisanadvanceddigitaltimerthermostat,
whichallowsyoutocontrolyouroorheatingsystembyeitherthe
oortemperature,theroomtemperatureorcombined.
Pleasefollowtheinstructionsinthismanualtoensuremanyyears
oftroublefreeusage.
CongratulationswithyournewHomeHeatingoorheatingsystem.
!Please notice that the thermostat must be installed by an
authorized electrician
4 VIIOI202
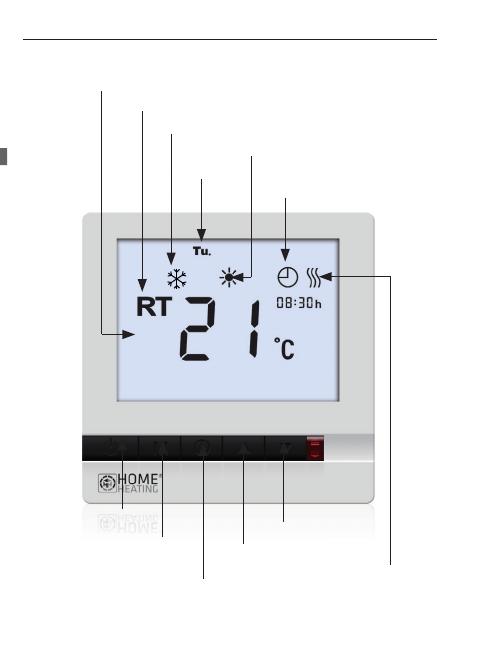
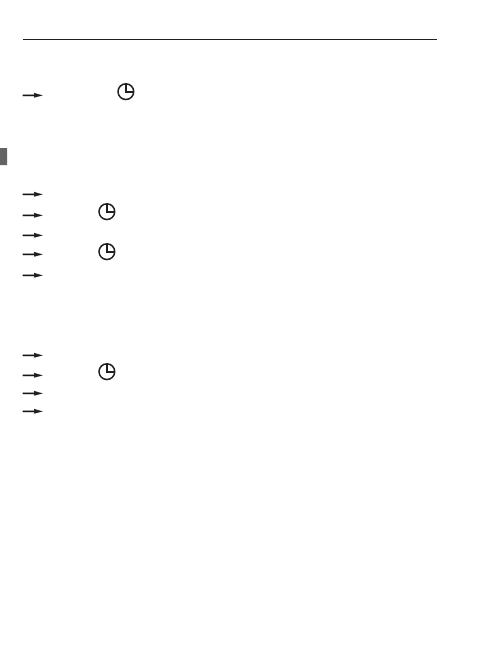
Buttonanddisplaydescription
Currentroomtemperature
Heatingelement
warming
Weekday
Thermostaton
On/off
Down
Up
Clock
Mode
Currentoortemperature
EN
Timermodeactivated
Frostprotectionmodeactivated
FT

VIIOI202
5
Installingandwiringthethermostat
Tomountthethermostattothewallbox/wallsocket,rstopenthe
thermostatbygentlypushingthetabsinthebuttomofthethermo-
stat.Toxthethermostat,screwinproperlysizedscrewsintothe
wallsocket/wallbox.
Whenproberlyfastendandcablesconnected(seediagrambelow),
mountthefrontpaneltothebackpartagain.
Electricalwall
box/socket
Wiring diagram
EN
Model: easy&cosy
digital controller
Mains voltage: 85-240V~
raIP ting: IP30
S1
L
Load
S2
L
N
Load
N
13A
Max. load:
Temperature: 0T30
MADE IN CHINA
Danfoss A/S, 6430 Nordborg, Denmark

6 VIIOI202
Basic functionality
POWER ON/OFF
Toturnthermostatonoroffpress“ ”
SELECT HOW TO CONTROL YOUR FLOOR HEATING SYSTEM
YourHomeHeatingoorheatingsystemcanbecontrolledeitherbythe:
• Floor temperature - program mode 2
Theheatingelementturnson/offaroundaoortemperature
setpoint(thetemperatureshowninthedisplayistheactual
oortemperature)
• Room temperature - program modes 1 & 4
Theheatingelementturnson/offaroundaroomtemperature
setpoint(thetemperatureshowninthedisplayistheactual
roomtemperature)
• Combined oor and room temperature - program modes
3 & 5
Theheatingelementturnson/offaroundaroomtempera-
turesetpointwitharequestedmax.oortemperature(oor
temperatureisprioritizedoverroomtemperature)
Change between the above oor heating modes:
Withthethermostatturnedoff.
Press“ ”and“ ”for6seconds
Selectmode1to5(seetableonnextpage)
Afterchoosingthedesiredmodedonotpressanyfurtherbuttonsand
thethermostatwillgobacktonormalstandbymode.
EN

VIIOI202
7
Basic functionality
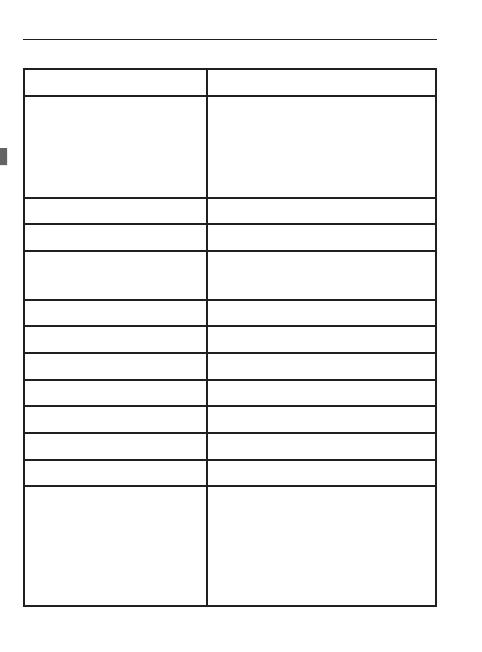
RECOMMENDED SETTINGS
HomeHeatingrecommendsthefollowingsettingsfordifferenttype
ofoorconstructions:
Topflooring
Programmode
Wooden
floor*
Tiled
floor**
1
(roomsensor)
Iftotaleffect:0W-1840W
x
2
(floorsensor)
Iftotaleffect:0W-2990W
x x
3
(combinedfloorandroomsensor)
Iftotaleffect:1840W-2990W
x x
4
(roomsensor)
Iftotaleffect:1840W-2990W
x
5
(combinedfloorandroomsensor)
Iftotaleffect0W-1840W
x x
*Topooring madeofparquet,laminate,massivewood,carpet,
linoliumorthelike.
**Topooringoftiles,concrete,marbleorthelike.
EN
8 VIIOI202
Basic functionality
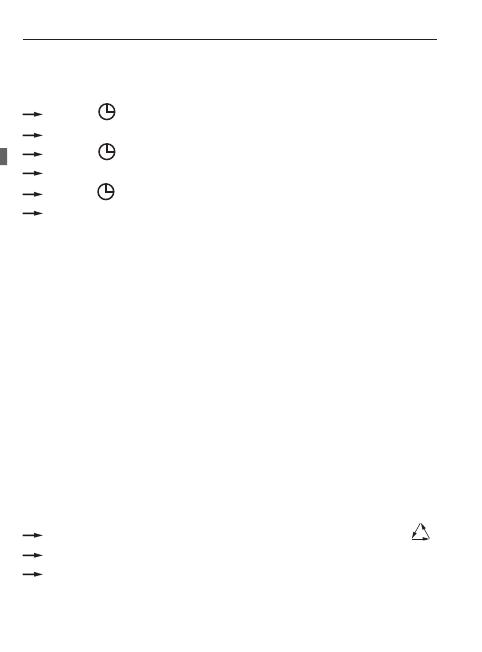
SETTING THE CLOCK
Withthethermostatturnedon.
Press“ ”once,hourwillbeash.
UsetheUp/Downkeytoselectthehours.
Press“ ”again,minutewillbeash.
UsetheUp/Downkeytoselecttheminutes.
Press“ ”buttonagain,tilltheweekdayashes.
UsetheUp/Downkeytoselectthedayoftheweek.
After settingweekdaydonotpressanyfurtherbuttonsandthe
thermostatwillgobacktonormaloperatingmodemode.
SETTING THE FLOOR TEMPERATURE MAX. LIMIT
Thisfunctionisusedforwoodenoorsmainlyandisonlyavailable
inprogrammodesusingtheoorsensor(programmode3and5)
Thetemperaturesettingshouldbemaximum35C,whichisalsothe
defaultsetpointofthethermostat.
Ifyouchoosetocontroltheoortemperaturesolelyby theoor
sensor(programmode2)themax.oortemperatureissetfor35C
andcan‘tbechanged.
Change the oor temperature max. limit (program mode
3 and 5)
Withthethermostatturnedoff.
Holdthe“M”buttonfor10secondsuntilthedisplayshows“ ”.
Nowletgoofthebutton“M”andthedisplaywillshow“SET”.
Youarenowpromptedtoenterthemaximumoortemperature
(temperaturerange20°C-45°C)
EN

VIIOI202
9
Basic functionality
READING THE FLOOR TEMPERATURE (only in program mode 3
and 5)
Withthethermostatturnedon.
Press“M”once,the“FT ”willbeashed,andthedisplaywill
showtheoortemperature.
Inprogrammode2(oorsensor)thedisplayalwaysshowsthecurrent
oortemperature.
Inprogrammode1and4(roomsensor)thedisplayalwaysshowsthe
currentroomtemperature.
FROST PROTECTION MODE
Toenablefrostprotectionmode.
Withthermostatturnedoff.
Press“M”for3seconds.
Select01(00=disabled)
Whenenabledandthermostathasbeenturnedoff,theheatingwillbe
activatediftheroom/oortemperatureislowerthan5°C;theheating
willbestoppediftheroom/oortemperatureishigherthan7°C.
Whenfrostprotectionmodehasbeenenabledthedisplaywillshow
“ ”.
EN

10 VIIOI202
ACTIVATE TIMER MODE
Whenusingthetimermode,youmustrstactivatethetimermode:
Withthethermostatturnedon,holdthe“M”buttonfor3seconds.
Youcanselectbelowsettings:
00=Override(disabletimerfunctionality)
01=Programmable.Andthedisplaywillshow“ ”.
Leavethethermostatanditwillgobacktonormaldisplaying.
PROGRAMMING THE TIMER - Mode 01
WhenprogrammingyouneedtoselectProgrammablefunctionand
thedisplaymustshow“ ”(seeabove)
Youcannowsettheheatingprograms.Thethermostatmusthave
4heatingperiodsfortheweekdaysand4heatingperiodsforthe
weekend.
Pleasenoticethattheprogrammingofthe wholecalendarweek
must take place in one continuous process,soitisagoodideato
have theperiodswrittendownforreference whenprogramming
thethermostat.
Note, for the weekend you will also need to program 2 periods. You
can choose one of the periods to be very short or in extension of
the other.
Timer functionality
EN

VIIOI202
11
Example, weekdays:
Period1startingat07.00-Temperaturesetting22C
Period2startingat08.30-Temperaturesetting18C
Period3staringat17.00-Temperaturesetting22C
Period4startingat23.00-Temperaturesetting18C
Example, weekend:
Period1staringat09.00-Temperaturesetting22C
Period2staringat23.00-Temperaturesetting18C
Period3staringat23.01-Temperaturesetting22C
Period4staringat23.02-Temperaturesetting18C
My settings:
Week days:
Period1on °C
Period2on °C
Period3on °C
Period4on °C
Weekend:
Period1on °C
Period2on °C
Period3on °C
Period4on °C
Timer functionality
EN
12 VIIOI202
How to progamme the timer:
Holdthe“ ”for3seconds,thenumber1and
“MoTuWeThFr”aredisplayed.
Thisindicatesthatyoucanprogramtherstswitchingtimeforthe
week-day.
UseUp/Downkeytosettherequiredstarttime.
Press“ ”toacceptthissetting.
UsetheUp/Downkeytosettherequiredtemp.
Press“ ”toacceptthissetting.
Repeatforswitchingtimes2-4week-day.
Afteryouhaveprogrammedtimes1-4fortheweekday,youarenow
abletosettheswitchingtimesforweekend“SaSu”willbedisplayed.
UseUp/Downkeytosettherequiredstarttime.
Press“ ”toacceptthissetting.
UsetheUp/Downkeytosettherequiredtemp.
Repeatforswitchingtimes2-4fortheweekend.
Todisablethetimer,select“Override”(Mode01)
How to override settings in TIMER MODE
Atanytimeyoucanchangethepresettimertemperaturesettings
bypressingtheUp/Downkey.
Yourmanualoverridewillapplyuntilthestartofthenexttimercycle.
Thereafterthethermostatwillresumeyourprogrammedsettings.
Timer functionality
EN

VIIOI202
13
EN
Notes
14 VIIOI202
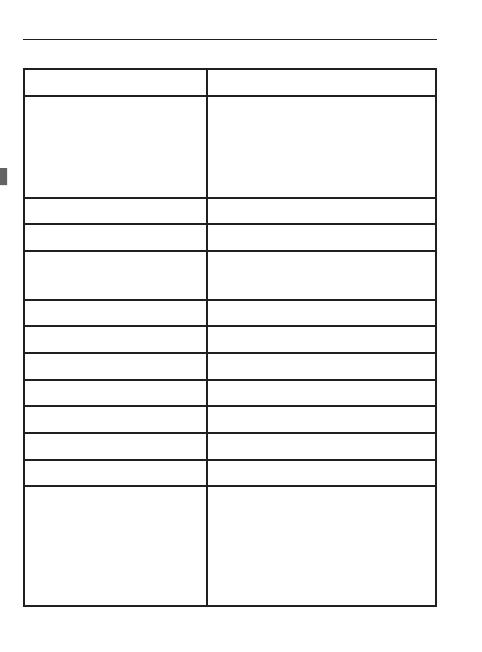
Technical specications
Externalsensor: NTC10kOhmat25°C
Sensorvalues:
15°C
18°C
20°C
22°C
14,8kOhm
13,1kOhm
12,1kOhm
11,2kOhm
Display: LCD
Powerconsumption: <2W
Set-pointrange: Room:5°C to 35°C
Floor:20°C to 35/45°C
Accuracy: ±1°C
Buttons: Touchpad
Switchcurrentrating: <13A(resistiveload)
Mainsvoltage: 85-240V~
Dimensions: 86x86x13mm(WxHxD)
Fixingscrewwidth: 60mm
Housing: ABS+PCFlameRetardent
Operatingrating: 0~30°C,5~95%RH(non-con-
densing)
EN

VIIOI202
15
Home Heating warranty
Warranty certificate
Electrician/installer:
Thermostatname:
Installationdate:
Articlenumber:
Stamp:
Stamp:
Please notice!
InordertoobtaintheHomeHeatingwarrantyanauthorizedelec-
trician/installermustllinthebelowelds.
Name:
Telephone:
Address:
Zipcode/City:
EN

16 VIIOI226
Sisukord
Sissejuhatus 17
Nuppude ja displei kirjeldus 18
Termostaadi paigaldamine ja ühendamine 19
Põhifunktsioonid
-Valige,kuidastesoovite
põrandaküttesüsteemijuhtida 20
-Soovituslikudsätted 21
-Kellaseadmine 22
-Maksimaalsepõrandatemperatuuriseadmine 22
-Põrandatemperatuurinäiduvaatamine 23
-Külmumiskaitserežiim 23
Taimeri funktsioonid
-Taimerirežiimiaktiveerimine 24
-Taimeriprogrammeerimine 24
Tehnilised andmed 28
Home Heating’u garantii 29
ET

27
VIIOI226
ET
Märkused
28 VIIOI226
Tehnilised andmed
Välisandur: NTC10kOhmtemperatuuril25°C
Anduriväärtused:
15°C
18°C
20°C
22 °C
14,8kOhm
13,1kOhm
12,1kOhm
11,2kOhm
Näidik: LCD
Voolutarve: <2W
Sättepunktivahemik: Tuba:5°Ckuni35°C
Põrand:20°Ckuni35/45°C
Täpsus: ±1°C
Nupud: Puutepaneel
Lülitusvool: <13A(aktiivkoormus)
Pinge: 85-240V~
Mõõdud: 86x86x13mm(LxKxS)
Kruvidevahelinekaugus: 60mm
Korpus: ABS+PCtulekindel
Töövahemik: 0~30°C,5~95%RH(mittekon-
denseeruv)
ET

29
VIIOI226
Home Heating’u garantii
Garantiikaart
Elektrik/paigaldaja:
Termostaadinimi:
Paigalduskuupäev:
Artiklinumber:
Pitsat:
Pitsat:
NB!
HomeHating’ugarantiikehtibainultjuhul,kuivolitatudelektrik/
paigaldajaontäitnudalljärgnevadväljad.
Nimi:
Telefon:
Aadress:
Indeks/Linn:
ET

30 VIIOI230
Innholdsfortegnelse
Introduksjon 33
Beskrivelse av knapper og skjerm 34
Installasjon og kabling av termostaten 35
Basisfunksjoner
-Velghvordanduvilstyregulvvarmesystemet 36
-Anbefalteinnstillinger 37
-Stilleklokken 38
-Stilleinnmaks.gulvtemperatur 38
-Leseavgulvtemperatur 39
-Frostsikrings-modus 39
Timer funksjonaliteter
-Velgtimer-modus 40
-Programmeringavtimer 40
Kalibrering av temperatur 44
Tekniske spesikasjoner 45
Home Heating garanti 46
NO
/