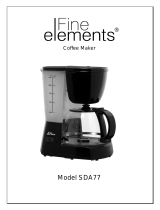
Igenix IG8225 User manual

Category
Coffee making accessories
Type
User manual

Igenix IG8225: Grind and brew fresh coffee beans or use pre-ground coffee to make up to 12 cups of your favorite coffee. Set the strength of your coffee with the adjustable strength control and choose the grind coarseness for your beans. The automatic start function lets you wake up to freshly brewed coffee, and the machine will keep your coffee warm for up to 35 minutes.

Igenix IG8225: Grind and brew fresh coffee beans or use pre-ground coffee to make up to 12 cups of your favorite coffee. Set the strength of your coffee with the adjustable strength control and choose the grind coarseness for your beans. The automatic start function lets you wake up to freshly brewed coffee, and the machine will keep your coffee warm for up to 35 minutes.

IG8225
Digital Filter Coffee Maker
with Integrated Bean Grinder
USER MANUAL
Please read these instructions carefully before use and retain for future reference
Before switching on you appliance
Always check for any damage which may have been caused in transit
Batch Code:
2
CONTENTS
Important safety instructions ...............................................3-4
Know your coffee maker ...........................................................5
Operation instructions ..........................................................6-7
Cleaning & maintenance ........................................................7-8
Hints & tips ...................................................................................8
Product disposal and recycling .................................................8
Troubleshooting Guide ..............................................................9
Igenix Warranty .................................................................. 10-11
3
IMPORTANT SAFETY INSTRUCTIONS
Important: When using electrical appliances, basic precautions
should always be followed, including the following:
1. Carefully read all instructions before operating and save for
future reference.
2. This appliance is for normal domestic use only.
3. This appliance can be used by children aged from 8 years and
above if they have been given supervision or instruction
concerning the use of the appliance in a safe way and understand
the hazards involved. Cleaning and user maintenance shall not be
made by children unless they are older than 8 years and
supervised.
4. Keep the appliance and its cord out of reach of children aged
less than 8 years.
5. Children shall not play with the appliance.
6. Appliances can be used by persons with reduced physical,
sensory or mental capabilities or lack of experience and
knowledge if they have been given supervision or instruction
concerning use of the appliance in a safe way and understand
the hazards involved.
7. If the supply cord is damaged, it must be replaced before further
usebythemanufacturer,aserviceagentorsimilarlyqualied
persons in order to avoid a hazard.
8. Before using the appliance check that the voltage of your
electricity supply is the same as that indicated on the rating plate
of the appliance. In the UK this is 220-240 Volts AC.
9. Unplug the appliance from the mains supply when not in use.
Allow the appliance to completely cool down before cleaning
any part of it.
10. Do not use the appliance outdoors or in damp or wet
conditions.
11. Do not immerse the appliance, the electrical cord or the plug
in water or any other liquids.
4
12. Do not use the appliance near a source of heat or on an
unstable surface.
13. Make sure that the power cord does not touch any hot surfaces
or overhang the edge of your work surface.
14. When unplugging the power cord, hold the plug top, not the
power cord.
15. Do not use attachments or accessories which are not
recommended by the manufacturer. They may cause malfunction
or injury.
16. Donotusetheapplianceforanypurposenotexpresslyspecied
in this manual.
17. Do not touch hot surfaces with your hands, use handles
or knobs
18. Neverusewarmorhotwatertollthewatertank.Onlyuse
cold water
19. Overllingcanalsocausescalding
20. Only ever use the coffee mill for grinding roasted coffee beans.
Never use it for other granular foods
5
KNOW YOUR COFFEE MAKER
CONTROL PANEL
Filter
Bean hopper lid
Funnel
Anti-drip valve
Funnel basket
Glass jug
Grind
control dial
Bean hopper
Water
reservoir lid
Filter release
button
Water level
indicator
Control panel
Automatic
Start Button
Filter Coffee
Mode
Strength
Control Button
(Mild / Medium
/ Strong)
Start Button
Set Minutes
Button
Set Hours
Button
Number of
Cups Selector
6
BEFORE FIRST USE
Check that all accessories are complete and the unit is not damaged.
We recommend cleaning the appliance and operating at least twice using only water to remove any dust
or residue that may remain in the system from the manufacturing process.
1. PresstheFilterReleaseButtontoopentheltercompartment,twistthefunnelbaskettotheleft
and remove the funnel and other detachable parts.
2. Clean them in warm water and if necessary you can add some detergents.
3. Once clean, insert them back into the funnel basket, twist back into place and close the
Filter compartment.
4. Open the water reservoir lid at the back of the appliance. Pour the desired amount of water into
the reservoir using the water level indicator. Close the reservoir lid ensuring Not to exceed the
12cuplineasthismaycausethecarafetooverow.
5. DoNotaddanycoffeeorlterpaper.
6. Ensure the glass carafe in placed in correct position and then plug the appliance in to the socket and
switch on.
7. Press‘’.Keytostart,thesymbolwillshowontheLCDpanel.Whentheprocesshasnished
and all of the water has transferred into the Glass Carafe, the will disappear and the machine will
beep 3 times – indicating that the process is complete.
OPERATION INSTRUCTION
MAKING COFFEE USING COFFEE BEANS
1. Open the water reservoir lid at the back of the appliance. Pour the desired amount of water into the
reservoir using the water level indicator. Close the reservoir lid ensuring Not to exceed the 12 cup
lineasthismaycausethecarafetooverow.
Note: The amount of coffee you get will be less than the water you have added as some water is
absorbed by ground coffee.
Note: Never pour hot water, milk, coffee powder or tea into the water tank.
2. PresstheFilterReleaseButtontoopentheltercompartment,checkthatthefunnelbasketand
lterareinthecorrectposition.Thenclosetheltercompartment.
3. Put coffee beans (no more than 200g) into the Bean Hopper and then cover with lid. To avoid the
coffee beans becoming moist, do not place too many in the Bean Hopper.
4. Plugapplianceintowallsocket.TheLCDdisplaywillilluminateinBlueandwillashtheunsettime
of “12:00”. Press the “Set Hour button” and “Set Minute button” to set the correct time.
Note: Thenumberwillashuntilthetimehasbeenset.Theautomaticfunctionisnotavailablewhen
thenumberisashing.
5. Set the number of cups required by pressing button (the LCD will display 2, 4, 6, 8, 10 or 12.
If you do not press this button to set the number of cups, the default number of cups is 12.
6. TurntheGrindControldialonthetopofthemachinetoselecthowcourseorneyouwishthe
ground coffee to be.
7. Press “ ” to increase or decrease the strength of the coffee. The lightest bean symbol
represents the weakest setting and the darkest bean represents the strongest setting.
8. Press the button, wait a few seconds and the grinder will start. A few seconds after the grinding
is complete, the LCD will display this picture “ ”, when the brewing process begins.
9. When brewing is complete the symbol on the LCD will disappear and the machine will beep
3 times.
10. The coffee will be kept warm automatically by the appliance for up to 35 minutes, unless it is
unplugged from the socket.
7
MAKING COFFEE WITH PRE-GROUND COFFEE
1. Open the water reservoir lid at the back of the appliance. Pour the desired amount of water into the
reservoir using the water level indicator. Close the reservoir lid ensuring Not to exceed the 12 cup
lineasthismaycausethecarafetooverow.
Note: The amount of coffee you get will be less than the water you have added as some water is
absorbed by ground coffee.
Note: Never pour hot water, milk, coffee powder or tea into the water tank.
2. PresstheFilterReleaseButtontoopentheltercompartment,checkthatthefunnelbasketand
lterareinthecorrectposition.Thenclosetheltercompartment.
3. Addthedesiredamountofpre-groundcoffeeintothelteraccordingtopreference,thenturnthe
funnel basket until it is locked into position.
4. Plugapplianceintowallsocket.TheLCDdisplaywillilluminateinBlueandwillashtheunsettime
of “12:00”. Press the “Set Hour button” and “Set Minute button” to set the correct time.
Note:Thenumberwillashuntilthetimehasbeenset.Theautomaticfunctionisnotavailablewhen
thenumberisashing.
5. Set the number of cups required by pressing button (the LCD will display 2, 4, 6, 8, 10 or 12.
If you do not press this button to set the number of cups, the default number of cups is 12.
6. Press the “ ” button once and the LED will illuminate in blue.
7. Then press the “ ” button and the LCD will display “ ”,when the brewing process begins.
8. When brewing is complete the symbol on the LCD will disappear and the machine will beep
3 times.
9. The coffee will be kept warm automatically by the appliance for up to 35 minutes, unless it is
unplugged from the socket.
AUTOMATIC START FUNCTION
1. Follow Steps 1-7 of “Making Coffee using Beans” or Steps 1-6 of “Making Coffee with
Pre-ground Coffee”
2. Pressthe“”buttonandholduntilthefunctionchangestotimermode(thenumberashes
“00.00”).
3. Set your required automatic start time by pressing the “Set Hour button” and “Set Minute button”
4. 3. Press the “ ” button again and a “ ” will show on the display. The LED next to the
button will illuminate blue to show the machine is in automatic mode
Note: The machine uses a 24 hour clock
5. The coffee maker will start to brew at the pre-set time and the blue LED next on the button will
go off. The “ ” indicator will be illuminated and the appliance will start to work automatically.
CANCELLING A PRE-SET PROGRAM
If the coffee maker has been automatically programed the “ ” button is illuminated in blue. If you want
to cancel this function and use the machine immediately press the “ ” button once and the blue light
will go off and the automatic mode has be cancelled.
CLEANING AND MAINTENANCE
Caution: Be sure to unplug this appliance and allow to cool before cleaning.
1. Cleanthefunnel,lterandcoffeecarafeaftereachuseinhot,soapywater
2. Wipe the Bean Hopper and the product’s exterior surface with a soft, damp cloth to remove stains
3. Use a damp cloth to gently wipe the warming plate, never use abrasive cleaners
8
IMPORTANT
THERE ARE NO USER SERVICEABLE PARTS INSIDE AND THE CASING SHOULD
NOT BE OPENED BY AN UNQUALIFIED PERSON
THIS APPLIANCE IS INTENDED FOR DOMESTIC USE ONLY
DISPOSAL INFORMATION
The European Directive 2012/19/EU on Waste Electrical and
Electronic Equipment (WEEE), requires that old household
electrical appliances must not be disposed of in normal unsorted
municipal waste. Old appliances must be collected separately in order to
optimise the recovery and recycling of the materials they contain and reduce the
impact on human health and the environment.
The crossed out “wheeled bin” symbol on the product reminds you of your
obligation, that when you dispose of the appliance it must be separately collected.
Consumers should contact their local authority or retailer for information
concerning the correct disposal of their old appliance.
DESCALING
It is strongly recommended that you descale the appliance from time to time. The frequency depends
upon the hardness of your tap water and how often you use the appliance.
1. Fill the tank with water and descaler to the maximum level (the scale of water and descaler is 4:1)
Only use “household descaler”.
2. Press the “ ” button and the blue indicator will be illuminated, then press the “ ” button once
and the appliance will start to brew.
3. Rinse by operating the appliance with clean water at least 3 times
HINTS FOR GREAT TASTING COFFEE
1. A clean coffee maker is essential for making great tasting coffee. Regularly clean the coffee maker as
speciedinthe“CleaningandMaintenance”section.Alwaysusefresh,coldwaterinthecoffeemaker
2. Store unused coffee grounds in a cool, dry place. After opening a package of coffee grounds, reseal it
tightly or store it in an air tight container to maintain its freshness.
3. Foranoptimumcoffeetaste,buywholecoffeebeansandnelygrindthemjustbeforebrewing
4. Donotreusecoffeegroundsasthiswillgreatlyreducethecoffee’savour.Reheatingcoffeeisnot
recommendedascoffeeisatitspeakavourimmediatelyafterbrewing
9
TROUBLE SHOOTING
Fault Possible Cause Solution
Appliance does
not work.
Mains plug is not plugged in or
is loose.
Insert mains plug.
Water not
heating up.
Thermostat is broken.
The motor is broken or the motor
connector has become loose.
Beans are being kept in an unsuitable
place i.e. fridge, freezer and collecting
condensation.
Contact Igenix 01473 271 272, with
product code and guarantee details.
Reduced or no
liquidow(only
producing 3 cups
when 12 have
been chosen).
Automatic start function has
been set.
Cancel the pre-set program, see
instruction manual for details
Water droplets
(condensation)
found on the
control panel.
Funnel has become blocked. Checkthatthelterisn’tdamagedand
allows lumps of coffee powder to form
in the funnel.
Condensation has gathered
after continuous use.
Allow the appliance to cool down
after each use.
Contact Igenix 01473 271 272, with
product code and guarantee details.
Fuse has blown or is
defective.
Check fuse, replace if necessary.
Socket is defective.
Mains malfunctions are to be
corrected by an electrician.
Liquid found under
the appliance.
Water tank may have a crack or
the water tube has split or broken.
Contact Igenix 01473 271 272, with
product code and guarantee details.
Not grinding at all.
Beans not grinding
properly.
Store beans in an air tight container in a
cool dark place to keep the beans dry.
Water tube has become blocked. Appliance needs descaling, see “Cleaning
and Maintenance” in the instruction
manual
LED display shows
an error i.e. wrong
number of cups set.
LED display defective. Contact Igenix 01473 271 272, with
product code and guarantee details.
Coffee powder
is not dissolving
properly.
Coffee powder has become
damp and has formed clumps as
condensation got into the powder.
Store coffee powder in an air tight
container in a cool dark place to keep
it dry. Only use dry coffee powder.
Making fewer cups
of coffee than the
water gauge says.
The coffee powder will soak up some
ofthewaterinltration.
Initially add a little more water that the
gauge says to allow for the short full,
ensuring not to go over the maximum.
Anti-drip valve at the bottom of
funnel is not released.
Close glass jug lid. The lid should be
closed before placing the jug in correct
position.
10
lgenix Warranty Terms & Conditions
This product is guaranteed for a period of 12 months as standard from the date of purchase
against mechanical and electrical defects. You can extend your warranty for a further 12 months by
registering your product.
Upon registration we will cover your product for a period of 24 months from the original purchase
date against any mechanical or electrical defects.
To qualify for the guarantee, the product must be used for domestic household use only and in
accordance with the instructions in the user manual. Any misuse of the product will result in the
warranty being void.
The guarantee does not cover accidental damage, misuse, neglect, tampering or incorrect
adjustment or installation.
The guarantee will be rendered invalid if the product is resold, has had its serial number removed
(or has an invalid serial number), or if an unauthorised person has carried out any repairs or
alterations.
The warranty does not cover accessories or consumable parts that require replacement under
normaluse.Thisincludesshelving,dials,lters,beltsandtraysetc.
In the unlikely event of a breakdown please refer to the Troubleshooting guide in your user manual
and check all plugs, fuses and the electricity supply.
If you still require assistance please contact our Customer Service department on
01473 271 272 or write to us at the following address:
Customer Service Department
38 Bluestem Road, Ransomes Europark
Ipswich, IP3 9RR
Please quote the Product Code which begins ‘IG’ or ‘DF’ and the Batch Coder beginning ‘5’ and give
details of the exact fault. We will then decide whether to repair or replace the item.
Before we arrange the repair or replacement you will be required to return a copy of your proof
of purchase. Please retain your original.
If an item is replaced within the agreed guarantee period, the guarantee for the replacement item
will be calculated from the purchase date of the original.
In the event that the product is inspected and no fault is found or the product is not within the
guarantee period you will be charged for the repair and any carriage costs.
11
Thank you for choosing lgenix
As a valued customer we would like to offer you a FREE 2 year warranty to cover your product
against any electrical or mechanical defects.
This means that in the unlikely event you develop a fault or problem with your product we will
happily repair or replace the item free of charge.
To qualify for the 2 year warranty you must register your product within 30 days of purchase. The
full Terms & Conditions of our warranty policy are shown on the opposite page. They are also
available on our website. www.igenix.co.uk
To register your product, please complete all sections of the form below and return to us at the
following address: lgenix, 38 Bluestem Road, Ransomes Europark, Ipswich, IP3 9RR.
Alternatively you can visit the lgenix website and complete the form online.
Customer Details:
Title: First Name Surname:
Address:
Post Code:
Email:
Telephone:
Product Information:
Product Code (Beginning IG or DF): Product Description:
Batch Number (Beginning 5): Serial Number (If applicable):
Date of Purchase:
Retailer Name:
Retailer Location:
PleasetickheretoconrmyouhavereadandacceptourTerms&Conditions
Please tick here if you DO NOT wish to receive marketing information from us
Customer Signature: Date:
38 Bluestem Road, Ransomes Europark, Ipswich, IP3 9RR
Tel. 01473 271 272
Disclaimer: Igenix operate a policy of continual improvement and development.
Wethereforereservetherighttochange/alterthespecicationandappearanceofourapplianceswithoutpriornotice.
All diagrams and images shown in this manual are for illustration purposes only.
  • Page 1 1
  • Page 2 2
  • Page 3 3
  • Page 4 4
  • Page 5 5
  • Page 6 6
  • Page 7 7
  • Page 8 8
  • Page 9 9
  • Page 10 10
  • Page 11 11
  • Page 12 12

Igenix IG8225 User manual

Category
Coffee making accessories
Type
User manual

Igenix IG8225: Grind and brew fresh coffee beans or use pre-ground coffee to make up to 12 cups of your favorite coffee. Set the strength of your coffee with the adjustable strength control and choose the grind coarseness for your beans. The automatic start function lets you wake up to freshly brewed coffee, and the machine will keep your coffee warm for up to 35 minutes.

Ask a question and I''ll find the answer in the document

Finding information in a document is now easier with AI