Page is loading ...

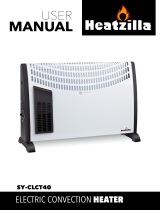
USER MANUAL
3kW Convection Heater
IG5300
Batch code:
Please read these instructions carefully before use and retain for future reference
Before switching on your appliance,
always check for any damage which may have been caused in transit

CONTENTS
Important Safety Instructions ............................... 2-4
Appliance Overview .............................................. 5
Specification ......................................................... 5
Feet Attachment ................................................... 5
Operating Instructions ........................................... 6
Cleaning and Maintenance .................................... 7
Fuse and Mains Plug Replacement ........................ 7
Trouble Shooting Guide ........................................ 8
Disposal Information ............................................. 8
Terms and Conditions and Warranty Information 10-11
IMPORTANT SAFETY INSTRUCTIONS
Read and follow all of the instructions even if you feel you are
familiar with the product, and find a place to keep this manual
handy for future reference.
Important: This appliance is not intended for use by persons
including children with reduced physical, sensory or mental
capabilities, or lack of experience and knowledge, unless they
have been given supervision or instruction concerning use of
the appliances by a person responsible for their safety.
• This product is intended for domestic use only.
• This product is for indoor use only. Do not use
the heater outdoors.
• Ensure that the electricity supply in your home is rated
at 220-240volts before operating the appliance.
• If the mains lead of this appliance becomes damaged
then it must be replaced by a suitably qualified person
using the same rated cable in order to avoid a hazard.
• Children should be supervised to ensure that they do not
play with the appliance.
• Always turn off and unplug the appliance before
attempting to move.
• Always turn off and unplug the appliance when not in use.
• Do not use the heater unless the feet are attached correctly.
2

• Do not use the heater in the immediate surroundings of a
bath, shower or swimming pool.
• Do not reach for an appliance that has fallen into water.
Switch off at supply and unplug immediately
• Never place the heater where it may fall into water, or
stand on a damp floor.
• Do not cover or obstruct any of the heat outlet
grilles of the heater.
• Do not place the heater on carpets with a deep pile.
• Always ensure that the heater is placed on a firm flat surface.
• Always operate upright.
• This appliance heats up when in use. To avoid burns, do
not let bare skin touch the hot surface. Switch off and let
the appliance cool before moving or touching.
• Ensure that the heater is not positioned close to
curtains or furniture as this may create a fire hazard.
• Do not place the heater in front of, or immediately
below a wall socket.
• Do not insert any objects through the heat outlet grilles.
• Do not use the heater in areas where flammable liquids
are stored or flammable fumes may be present.
• To protect against fire, electric shock or injury do not immerse
the heater, power cord or plug in water or any other liquid.
• Do not twist, kink or wrap the cord around the appliance,
this may cause the insulation to weaken and split
• Do not run the cord under carpeting, rugs or runners. Arrange
cord away from traffic so that it will not be tripped over. The use
of an extension cord with this appliance is not recommended.
• Do not operate with the cord coiled as a build up of heat
could be sufficient to become a hazard.
• Do not place the appliance close to a radiant heat source.
• Do not store the appliance while it is still hot.
• Do not remove plug from power socket by pulling the
power cord. Always grip the plug.
3

• Do not remove the plug socket until the
appliance is switched off.
• Do not use the appliance to dry clothes.
• Do not operate appliance with wet hands.
• The most common cause of overheating is deposits of dust or luff
in the appliance. Ensure these deposits are removed regularly by
unplugging the appliance and vacuum cleaning the grilles.
• Use this appliance only as described in the manual.
Any other use is not recommended by the manufacturer
and may cause fire, electric shock or injury.
WARNING: In order to avoid overheating, do not cover
the heater.
4

APPLIANCE OVERVIEW
Outlet Grilles
Control Panel
Feet
SPECIFICATION
Voltage
220-240V
50-60Hz
Power
2800-3000W
Dimensions (mm)
H 375
W 790
D 183
FEET ATTACHMENT
1. Ensure that the heater is unplugged
and that the power switches are off.
2. Turn the heater upside down.
3. Locate the two holes at each end of
the base of the heater.
4. Secure the feet to the base
through the holes using the self
tapping screws provided.
5. Turn the heater upright and plug into
the mains power socket.
5

OPERATING INSTRUCTIONS
Choose a suitable location for the heater ensuring you have taken
account of the safety instructions
NOTE: It is normal when the heaters are turned on for the first time or when
they are turned on not having been used for a long period of time that the
heaters may emit some smell and fumes. These will disappear when the
heater has been on a short while.
1. Switching the heater on
• Take out the heater from its box carefully. Please save the box for
off-season storage.
• Attach the feet as instructed on page 5.
• It is better not to use the same electrical socket as other high wattage
electrical appliances in order to avoid overloading the circuit.
• Plug in the unit.
2. Setting the temperature
• Turn the thermostat knob fully in a clockwise direction to gain the
maximum setting.
• Turn on the heating elements by means of the rocker heater switches.
• When the heating elements are on the switches will illuminate.
• For maximum heat output both switches should be turned on.
3. Maintaining the temperature
• When the desired room temperature has been reached, the thermostat
knob should be turned slowly anti-clockwise until the thermostat is heard
to click off and the lights on the element switches are seen to go out.
• After this the heater will keep the air temperature in the room at the
set temperature by switching on and off automatically.
6

CLEANING AND MAINTENANCE
Cleaning
Always unplug the heater from the wall socket and allow it to cool. Clean the
outside by wiping with a damp cloth (not wet). Do not use detergents or
abrasives materials. Do not allow for any water to enter the heater. You can
use a vacuum cleaner to remove dust from the grille.
Storing the Heater
When the heater is not used for long periods of time, it should be protected
from dust and stored in a clean dry place. The original packaging box can
be saved and used to store the heater away.
MAINS PLUG FUSE REPLACEMENT
Fuse Cover
Fuse Replacement (Class I)
This appliance must be eathed. Remove the fuse cover with a small
flat head screw driver. Take out the fuse and replace with a new fuse
of the same Amp. Replace the fuse cover and push back into place.
IF IN DOUBT CONSULT A QUALIFIED ELECTRICIAN – DO NOT
ATTEMPT TO CHANGE THE PLUG YOURSELF
If the mains lead becomes damaged consult a qualified electrician.
7

TROUBLE SHOOTING GUIDE
If you experience difficulties with the appliance, please check the
suggestions below before contacting customer services on 01473 271272:
Problem
Possible Cause
Possible Solution
The heater does not work.
The appliance is not properly
Plug the appliance in firmly.
plugged into the wall socket.
The appliance is not switched on.
Make sure the appliance is
switched on.
There is no electricity running
Check the fuse or breaker.
through the mains wall socket.
The heater is getting too hot.
Inadequate air flow.
Make sure there is circulating air
in the room.
Heat setting is too high.
Adjust the heat setting accordingly.
The vents are blocked.
Make sure all the vents are clear
and free from obstruction.
DISPOSAL INFORMATION
The European Directive 2012/19/EU on Waste Electrical
and Electronic Equipment (WEEE), requires that old
household electrical appliances must not be disposed of in
normal unsorted municipal waste.
Old appliances must be collected separately in order to optimise
the recovery and recycling of the materials they contain and reduce the
impact on human health and the environment.
The crossed out “wheeled bin” symbol on the product reminds you of your
obligation, that when you dispose of the appliance it must be separately
collected. Consumers should contact their local authority or retailer for
information concerning the correct disposal of their old appliance.
8

9

lgenix Warranty Terms & Conditions
This product is guaranteed for a period of 12 months as standard from the date of
purchase against mechanical and electrical defects. You can extend your warranty for a
further 12 months by registering your product.
Upon registration we will cover your product for a period of 24 months from the original
purchase date against any mechanical or electrical defects.
To qualify for the guarantee, the product must be used for domestic household use only
and in accordance with the instructions in the user manual. Any misuse of the product
will result in the warranty being void.
The guarantee does not cover accidental damage, misuse, neglect, tampering or
incorrect adjustment or installation.
The guarantee will be rendered invalid if the product is resold, has had its serial number
removed (or has an invalid serial number), or if an unauthorised person has carried out
any repairs or alterations.
The warranty does not cover accessories or consumable parts that require
replacement under normal use. This includes shelving, dials, filters, belts and trays etc.
In the unlikely event of a breakdown please refer to the Troubleshooting guide in your
user manual and check all plugs, fuses and the electricity supply.
If you still require assistance please contact our Customer Service
department on 01473 271 272 or write to us at the following address:
Customer Service Department
38 Bluestem Road, Ransomes Europark
Ipswich, IP3 9RR
Please quote the Product Code which begins ‘IG’ or ‘DF’ and the Batch Coder beginning ‘5’ and
give details of the exact fault. We will then decide whether to repair or replace the item.
Before we arrange the repair or replacement you will be required to return a copy of your
proof of purchase. Please retain your original.
If an item is replaced within the agreed guarantee period, the guarantee for the
replacement item will be calculated from the purchase date of the original.
In the event that the product is inspected and no fault is found or the product is not
within the guarantee period you will be charged for the repair and any carriage costs.
10

Thank you for choosing lgenix
As a valued customer we would like to offer you a FREE 2 year warranty to cover your
product against any electrical or mechanical defects.
This means that in the unlikely event you develop a fault or problem with your product
we will happily repair or replace the item free of charge.
To qualify for the 2 year warranty you must register your product within 30 days of purchase. The
full Terms & Conditions of our warranty policy are shown on the opposite page. They
are also available on our website.
To register your product, please complete all sections of the form below and return to us at
the following address: lgenix, 38 Bluestem Road, Ransomes Europark, Ipswich, IP3 9RR.
Alternatively you can visit the lgenix website and complete the form online.
Customer Details:
Title:
First Name
Surname:
Address:
Post Code:
Email:
Telephone:
Product Information:
Product Code
(Beginning IG or DF)
:
Product Description:
Batch Number
(Beginning 5)
:
Serial Number
(If applicable)
:
Date of Purchase:
Retailer Name:
Retailer Location:
Please tick here to confirm you have read and accept our Terms & Conditions
Please tick here if you DO NOT wish to receive marketing information from us
Customer Signature: Date:
11

38 Bluestem Road, Ransomes Europark, Ipswich,
IP3 9RR Tel. 01473 271 272
Disclaimer: Igenix operate a policy of continual improvement and development.
We therefore reserve the right to change/alter the specification and appearance of our appliances without prior notice.
All diagrams and images shown in this manual are for illustration purposes only.
/