Page is loading ...

INTRODUCTION
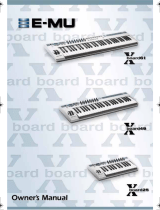
CMK 149 is a MIDI keyboard to he connected to a sound module (expander) or a PC sound card (game port).
With the CMK 149, beginners can take their first steps in music and professionals can use it as an instrument for
working on their own compositions.
The Piano-sized keys are Velocity Sensitive and allow you to expressively control all the nuances of your synthesizer
according to the way you play, from pianissimo to fortissimo, and everywhere in between.
Easy to connect
• Connect the MIDI to Game port Cable to the joystick connector on your soundcard
• Plug the MIDI Connector (5 pin DIN) labelled IN into the MIDI output of the keyboard
• External power adapter plugs into the power jack on the left hand side of the keyboard
Technical Specifications
49 full size synth action keys (4 octaves C-C)
Velocity Sensitive
Compatible with all PC Sound Cards and/or expanders
MIDI Out jack
3 power systems:
- Input for external power adapter
(9VDC, 500mA,Tip +)
- Battery (lx9V)
- PC sound card through the MIDI cable provided
Sustain Pedal Jack
ON/OFF switch with LED
1 switch for Program change
1 switch for Bank Select '
1 switch for Transpose
1 switch for Midi Channel
1 switch for DEMO SONG/ MEMORY functions
Dimensions: cm 81 x 18 x 6
Weight: kg 2,5
CMK-149 Contains
• CMK 149 - packed in cardboard carton
• 6 foot Game Port to MIDI converter cable (not supplied in USA)
• Instruction Manual
^

INSTRUCTIONS FOR USE
1) If the CMK 149 is to be connected to a MIDI sound module (expander), simply connect a MIDI cable from the MIDI
Out of the CMK 149 to the MIDI In of the sound module. Then connect the audio output of the sound module to a
mixing board, amplifier or multimedia speakers
2) If the CMK 149 is to be connected to a Computer, use the Game Port to MIDI converter cable provided, connecting
the Joystick (D-Sub 15) connector to the joystick port on the sound card of the computer and MIDI In (DIN) connector
to the MIDI Out of the CMK 149.
Press the POWER button.
CMK 149 is ready to transmit on MIDI channel 1 from the full range of 49 keys. Middle C is located at the start of the
third octave.
Pressing the keys of the CMK 149 keyboard sends MIDI note data with information about velocity (touch) sensitivity.
If you hold down one of the function buttons and then press the keys of the CMK 149, MIDI note data will not be
transmitted because the second octave of the keyboard is activated as a numeric entry field-to enter the values to
change the chosen parameters.
The keys (starting with C, by half steps) correspond to the following values: 0,1, 2, 3, 4, 5, 6,7,8,9,7H

CHANGING THE SETTINGS:
MIDI Channel button - The MIDI Channel function is used to select which MIDI channel you want the CMK-149 to
send messages on. You can select the MIDI channel number by pressing and holding the MIDI Channel button and
entering the number in the second octave/numeric entry field which corresponds to the channel you desire. Values
run from l-l6
The CMK 149 will transmit on the chosen channel when you let go of the button.
Example: If you want to transmit on MIDI Channel 8. hold down the MIDI Channel button, enter the number 8 on the
numeric entry field and let go of the MIDI Channel button. The CMK 149 keyboard will now transmit on MIDI
Channel8.
Program Change Button -The program change function is used to select which preset sound you want from your
MIDI module. You can select the program change number by pressing and holding the Program Change button and
entering the number in the second octave/numeric entry field which corresponds to the preset sound you desire.
When you release the Program Change button, the message will he sent. Values run from 1-128.
The CMK 149 will transmit the program change when you let go of the button.
Example:Ifyou want to play sound No. 56 on the MIDI device, hold down the Program Change button, enter the
number 56 on the numeric entry field and let go of the Program Change button. The CMK 149 will now play with
sound No. 56.
Bank Select Button - The bank select function allows you to change the patch bank of your MIDI module or key-
hoard. Due to different manufacturer approaches to this function, the fonnat for entering this parameter depends on
the model and manufacturer of your MIDI module or keyboard. Please refer to the MIDI Implementation Chart found
in the manual of your MIDI module or keyboard for information on the format that your unit requires.
1) If your module requires a value sent only on control channel 32. you will simply need to press and hold the Bank
Select button, and enter the hank number desired in the second octave/numeric entry field. When you release the
Bank Select button, the message will be sent.
2) If your module requires values to he sent on-control channel 32 and control channel 0. you will need to press and
hold the Bank Select button, and first enter the value needed for cc:32 in the second octave/numeric entry field. Then,
while continuing to hold the Bank Select button, press the key labeled "-/H" (indicates that what follows is the "higher
byte") and then enter the value needed for cc;0 in the second octave/numeric entry field. Wlien you release the Bank
Select button, the messages will he sent.
The CMK 149 will transmit the hank change when you let go of the button.
NOTE: Together with the Bank Select command, the CMK 149 also sends the last Program,Change number entered.
This is because not all MIDI devices will switch the bank unless they subsequently receive a Program Change.
Transpose Button - The Transposition function is used to transpose the output of the CMK-149. The transposition
range is +/- 24 semitones. You can select the transposition amount (up or down) by pressing and holding the
Transpose button and entering the number in the second octave/numeric entry field which con'esponds to the tran-
sposition amount you desire. Please note that to enter negative (down) transposition amount you must first enter"-",
which can be found on the "Bb" key (-/H)
When you let go of the button, the CMK-149 will now be transposed by the amount chosen.
If you want to cancel the transposition and return to a value of 0, just press the Transpose button once without ente-
ring any number.
Example:Ifyou want to obtain a transposition of pitch to 7 semitones higher (a 5th). hold down the Transpose but-
ton, enter the number 7 on the numeric entry field and let go of the Transpose button. The CMK 149 will now play 7
semitones higher. (EX: A played 'C' will sound as a 'G').
MEMORY FUNCTIONS.
The CMK-149 can store MIDI settings in 100 memory locations for quick recall.
To store a setting, hold down both the 1) Bank Select and 2) MEMO buttons and enter the memory location number
that you wish to store the settings to on the second octave/numeric entry field.
The CMK 149 will store your settings in the memory location when you let go of the buttons.
To recall a setting stored previously, hold down the MEMO button and enter your chosen memory location number.
The CMK 149 will quickly recall the stored setting when you let go of the button.
NOTE: If you become confused during programming and cannot remember what you have done. press the Bank Select but-
ton and enter the number 1 on the second octave/numeric entry field immediately after turning on Ac CMK 149. When you
let go of the button, the CMK 149 will send a Program Change command with number 1 and a Bank Select command with
number 1 so that you can he sure of finding the MIDI device in a known and controllable setting.
/


