Page is loading ...

75.0131.09 BOLLARD 20170926 Page 1 of 4
3
BOLLARD
2
4
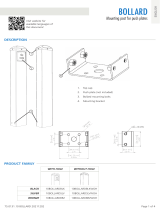
1. Top cap
2. Push plate (not included)
3. Bollard mounting bolts
4. Mounting bracket
1
WITH HOLE WITHOUT HOLE
BLACK 10BOLLARDBLK 10BOLLARDBLKWOH
SILVER 10BOLLARDSLV 10BOLLARDSLVWOH
BRONZE 10BOLLARDBRZ 10BOLLARDBRZWOH
75.0131.09 BOLLARD 20170926 Page 1 of 4
Mounting post for push plates
(US version)
DESCRIPTION
ENGLISH
PRODUCT FAMILY

Page 2 of 4 75.0131.09 BOLLARD 20170926Page 2 of 4 75.0131.09 BOLLARD 20170926
INSTALLATION
1
For hardwired
1
applications,
run activation wires through
center hole and into conduit.
Use mounting bracket to
mark four (4) mounting hole
locations on concrete.
Drill four (4)
3
⁄8" holes into
concrete.
Hammer and set four (4)
anchors into concrete.
Install mounting bracket and
securely tighten nuts.
Mounting Bracket
Shut off all power going to header before attempting any wiring procedures.
Maintain a clean & safe environment when working in public areas.
Constantly be aware of pedestrian traffic around the door area.
Always stop pedestrian traffic through the doorway when performing tests that may result in
unexpected reactions by the door.
ESD (electrostatic discharge): Circuit boards are vulnerable to damage by electrostatic discharge.
Before handling any board ensure you dissipate your body’s ESD charge.
Always check placement of all wiring before powering up to ensure that moving door parts will
not catch any wires and cause damage to equipment.
Ensure compliance with all applicable safety standards (i.e. ANSI A156.10) upon completion of
installation.
DO NOT attempt any internal repair of the components. All repairs and/or component replace-
ments must be performed by BEA, Inc. Unauthorized disassembly or repair:
1. May jeopardize personal safety and may expose one to the risk of electrical shock.
2. May adversely affect the safe and reliable performance of the product resulting in a
voided warranty.
PRECAUTIONS
2 3
4 5
NOTES:
1. For wireless applications, refer to wireless transmitter section on page 3.

75.0131.09 BOLLARD 20170926 Page 3 of 475.0131.09 BOLLARD 20170926 Page 3 of 4
INSTALLATION (cont.)
Align bollard to mounting bracket and attach using four (4)
mounting bolts.
Lubricate threads of bolts prior to installing. Secure bolts by hand only –
using power tools may cause galling and bolts to freeze.
Remove top cap to expose
transmitter mounting tray.
Velcro transmitter and battery
to mounting tray.
1,2
Attach transmitter leads to
NO and COM of push plate.
Push Plate
Wireless Transmitter
Assembly
Thread push plate mounting
screws into bollard, leaving
majority of screw exposed.
Attach push plate using
provided hex key (
5
⁄64"), and
tighten.
For Panther plates, mount to
bollard in the same manner as
you would a wall.
Refer to specific push plate user's guide for full mounting and installation instructions.
1
NOTES:
1. Do not allow transmitter to hang down into bollard as this may cause transmission interference.
2. Panther plates do not require a transmitter as it is integrated into the product.
1
1
2a 2b
2
3

Page 4 of 4 75.0131.09 BOLLARD 20170926
©BEA | 75.0131.09 BOLLARD 20170926
Dimensions (with cap) 41
1
⁄2" (H) x 6
1
⁄4" (W) x 4
1
⁄4" D
Material:
post
cap
bracket
powder-coated, carbon steel (interior and exterior)
UV-resistant ABS plastic
stainless steel
Push Plate Compatibility 4
1
⁄2" square
4
3
⁄4" square (including Panther)
Dual-vestibule
4
1
⁄2" round
NOTE: "Without hole" versions will
accommodate 6" square and 6" round Panther
plates as well as surface-mount card readers,
key pads, or other surface mount devices.
Weight 35 lbs (16 kg)
Color Black, bronze, or silver
Hardware
post
cap
bracket
1
⁄2" x 13 UNC x 1" socket-head bolts (4) –
5
⁄16" hex
#6 x
3
⁄4" sheet metal screws (3) and #6 finishing washers (3)
3" expansion anchors (4), lock washers (4), and nuts (4)
Specifications are subject to change without prior notice.
All values measured in specific conditions.
BEA, the sensor manufacturer, cannot be held responsible for incorrect installations or inappropriate adjustments of the sensor/device; therefore, BEA
does not guarantee any use of the sensor outside of its intended purpose.
BEA strongly recommends that installation and service technicians be AAADM-certifi ed for pedestrian doors, IDA-certifi ed for doors/gates, and factory-
trained for the type of door/gate system.
Installers and service personnel are responsible for executing a risk assessment following each installation/service performed, ensuring that the sensor
system installation is compliant with local, national, and international regulations, codes, and standards.
Once installation or service work is complete, a safety inspection of the door/gate shall be performed per the door/gate manufacturer recommendations
and/or per AAADM/ANSI/DASMA guidelines (where applicable) for best industry practices. Safety inspections must be performed during each service
call – examples of these safety inspections can be found on an AAADM safety information label (e.g. ANSI/DASMA 102, ANSI/DASMA 107, UL 325).
Verify that all appropriate industry signage and warning labels are in place.
BEA INSTALLATION/SERVICE COMPLIANCE EXPECTATIONS
Page 4 of 4 75.0131.09 BOLLARD 20170926
TECHNICAL SPECIFICATIONS
PLEASE KEEP FOR FURTHER USE - DESIGNED FOR COLOR PRINTING
Tech Support: 1-800-407-4545 | Customer Service: 1-800-523-2462 | General Tech Questions: T[email protected] | Tech Docs: www.BEAinc.com
| Original Instructions
/


