Page is loading ...

Installation GuidePicket Fence

We’re happy to help. Call 1-888-743-3673.
A simple solution that adds style to your landscape.
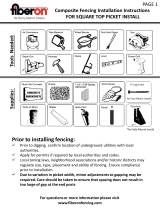
BOX CONTENTS
Each Fence Panel Box Includes:
Thank you for choosing to add beauty and warmth to your landscape with our premium quality picket
fence! Rest assured that our fencing will give you years of durable performance and maintenance-free
satisfaction. The bottom rail is also reinforced with aluminum for added strength and durability. This
guide will help make your installation easy. For questions, please call 1-888-743-3673 and welcome to
Weatherables.
All dimensions are in inches (“)
Welcome
1
0.070 wall thickness
.140 thickness
7/8
3
This Post & Cap not Included
(See note on left)
PLEASE NOTE:
YOU WILL NEED TO PURCHASE ONE EXTRA POST
KIT TO COMPLETE EACH OF YOUR FENCE RUNS
Post Cap (1)
Top Rail (1)
Picket Caps (15*)
*varies by model
Hole Cover (4)
Post (1)
Pickets (15*)
*varies by model
Bottom Rail (1)
Additional Post & Cap (1)
Sold Separately:
Aluminum Insert (1)
*located in bottom rail
Tube of Glue (1)

We’re happy to help. Call 1-888-743-3673.
This fence can be trimmed down in width to accommodate
custom applications
Product Specifications
*Check local code before installing around a pool
2
49
13
3.5
29
3.5
1.75 x 3.5 x 95.75 Rail
7/8 x 3 x 44-7/8*
7/8 x 3 x 43-1/4*
7/8 x 3 x 44-7/8*
7/8 x 3 x 43-1/4*
7/8 x 3 x 41-7/8*
7/8 x 3 x 41-7/8*
7/8 x 3 x 40-3/4*
7/8 x 3 x 40-3/4*
7/8 x 3 x 40*
7/8 x 3 x 40*
7/8 x 3 x 39-3/8*
7/8 x 3 x 39-3/8*
7/8 x 3 x 39*
7/8 x 3 x 39*
7/8 x 3 x 38-7/8*
3 Spacing*
33
96
Flat Panel:
Scalloped Panel:
35
49
96
2
7
1.75 x 3.5 x 95.75
3 Spacing*
33
Ground
3.5
1.75
0.120 wall thickness
0.120 wall thickness
4.0
4.0
TAB
Top View
3.5
1.75
84

We’re happy to help. Call 1-888-743-3673.
Installation
• We recommend installing 1 post and section at a time but other methods work too. Alter this method
to suit your installation needs.
• Prior to construction, check with your regulatory agency for special code requirements in your area.
• Contact your utility supplier to locate and mark underground lines before excavation.
• Sketch out the layout of your fence and calculate the number of panels, gates and posts required (to
nish a fence run, one extra post kit is needed).
• Careful planning and measuring of your fence is essential. Keep in mind that moving posts after the
concrete sets is extremely dicult.
Important Reminders:
3
Fast2k Tip! Wherever concrete is used in installation, use Fast2K instead to simplify the process.
Fast2K is a concrete alternative that is much easier to use and set.
2. Dig your second hole 96” on center to your rst hole, your third hole 96” on center to your second
hole, and so on. Be sure to dig only 3-4 holes at a time to ensure proper spacing.
1. String your fence line and begin by digging your rst post hole: 10” wide x 32”-36” deep.
Fast2K Tip! For Fast2k install, dig hole 6”wide x 32” deep.
96.0
36.0
10.0
1

We’re happy to help. Call 1-888-743-3673.
Installation
4
2
B
A
1. Insert rail with aluminium (bottom rail) into
bottom route of post A and then into the
bottom route of post B.
1. Slide pickets through holes in bottom rail.
3
First post is already
concreted
Next post is in hole
with no concrete
B
A
1. Insert post A into hole and set concrete. Post B may be loosely laying in hole until panel is fully
installed. Repeat process down the line.
Fast2K Tip! Add one 12.4 oz. bag to the hole. Hold post in place to prevent movement and follow
mixing instructions on the bag. Pour around post and plumb during expansion.
2. To set posts in concrete, hold post in place and prevent movement to ensure the post stays straight.
Be prepared to use a minimum of (2) 60lb. bags of concrete for each post hole.
3. Mix concrete and pour wet.
4. Fill hole around and in concrete hole to ground level and plumb.
4
B
A

We’re happy to help. Call 1-888-743-3673.
Installation
5
Under some conditions, panels may be reduced in length. If this applies, be sure to cut the top and
bottom rails the same length to ensure proper picket alignment. When eliminating pickets from a
“scalloped” panel, remember that you will have to insert the pickets in such a way that it resembles the
scallop, or slope of the original panel.
PANEL ADJUSTMENTS:
This fence panel can rack up to 9” over
an 8ft. span. If more material is needed,
please call 1-888-743-3673.
1. Insert top rail into the opposite post.
2. Straighten and level next post.
3. Pour in mixed concrete.
4. Insert post hole covers into unused
holes of rst post. Repeat steps down
the line.
5. Insert (and glue) picket caps into pickets
by putting a small strip of glue inside
the picket, NOT on picket cap. Repeat
down the line.
7
6
B
A
5
B
A
1. Insert top rail into post A and place each
pick into holes along the top rail.
The larger routed holes should face
toward the ground. Once inserted
into bottom rail, pickets cannot be
removed.
Picket end withTABS
are inserted first.
/