Page is loading ...

www.tmatlantic.com
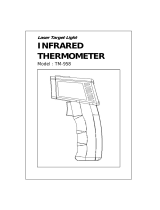
Infrared Thermometer
User’s Manual
ATE-2530
ATE-2532
ATE-2533
www.tmatlantic.com

www.tmatlantic.com
www.tmatlantic.com
2
NOTE: This manual is for three models, which are distinguished by ATE-2530, ATE-2532 and ATE-2533 hereinafter.
ATE-2530 ATE-2532 ATE-2533
Emissivity adjustable Temperature Alarming
1. SAFETY INFORMATION
Please read the following information carefully before using the meter.
Safety symbols:
Danger/Important Information prompt.
Comply with CE safety standards.
This instrument is compatible with the following standards:
EN61326-1
EN61010-1
EN60825-1
Warning! Do not point laser directly at eye or indirectly off reflective surfaces.
2. PRECAUTIONS
• After abrupt ambient temperature changes, allow instrument temperature to stabilize for 30 minutes before using
for measurement.
• Avoid operating near strong electromagnetic fields such as arc welders, induction furnaces, etc.
• Do not expose thermometer to excessive ambient temperatures.
• Keep the thermometer clean and avoid getting dust into the detector’s optics.
• Do not use solvents to clean the meter.
3. FEATURE LOCATIONS
1. Sighting Groove
2. Laser orifice
3. Detector orifice
4. Tripod nut
5. Trigger
6. Battery cover
7. LCD
8. Laser button
9. Emissivity reduction button (ATE-2532)
Temperature reduction button (ATE-2533)
10. Mode button
11. Emissivity addition button (ATE-2532)
Temperature addition button (ATE-2533)
12. Backlight button
13. °C/°F button
4. LCD ILLUSTRATION
ATE-2530:
1. Laser-On Indicator
2. Holding indicator
3. The first temperature display
4. Low power indicator
5. Average value indicator
6. MAX/MIN indicator
7. The second temperature display
8. °F temperature unit
9. °C temperature unit
10. Emissivity display
11. Measurement indicator
ATE-2532: (Emissivity adjustable)
1. Laser-On Indicator
2. The first temperature display
3. Average value indicator
4. MAX/MIN indicator
5. Emissivity display
6. The second temperature display

www.tmatlantic.com
www.tmatlantic.com
3
7. °F temperature unit
8. °C temperature unit
9. Low power indicator
10. Holding indicator
11. Measurement indicator
ATE-2533: (Temperature alarm)
1. Laser-On Indicator
2. Holding indicator
3. The first temperature display
4. Average value indicator
5. MAX/MIN indicator
6. Temperature alarming indicator
7. The second temperature display
8. °F temperature unit
9. °C temperature unit
10. Low power indicator
11. Emissivity display
12. Measurement indicator
5. MEASUREMENT PRINCIPLE
Infrared thermometers detect infrared energy emitted by objects. The instrument focuses energy through its lens,
changing the temperature of a special material that creates an electrical signal. A microcomputer processes this signal
and displays the output on the panel of the thermometer. The laser is used only for sighting the instrument and has no
other effect on temperature measurement.
6. MEASUREMENT METHOD
1. To measure the temperature of an object, aim the unit at the object and press the trigger. As long as you hold
the trigger, you can measure temperature continuously. After releasing the trigger, the LCD will hold the temperature
values. The first display indicates the current value. The second display indicates the calculated (Avg., MAX, MIN or
MAX-MIN).
2. Use the laser button to activate the laser for aiming at distant objects.
3. Use the backlight button to illuminate the display in low-light conditions.
4. Press the “MODE” button to change the second temperature display. This display can show AVG (average), MAX
(maximum), MIN (minimum), MAX-MIN (span) or Alarm (Only ATE-2532).
5. Press the °C/°F button to change the unit of measure.
6. (Only ATE-2532) Press “+” button to add the emissivity, and press “-” to reduce the emissivity.
(Please refer to the chapter 8 “Emissivity”.)
7. (Only ATE-2533) Press “MODE” button, when “ALARM” symbol appears, you can set the alarming temperature
value. Press “+” to add the alarming temperature value, and press “-” to reduce it. (Please refer to the chapter 9
“Temperature alarming function”.)
7. DISTANCE TO SPOT RATIO
The thermometer has an optical angle and spot size as shon below.
The target should be larger than the unit’s optical spot size. The distance to spot ratio for this thermometer is 12:1
(12mm spot at 1meter) as shown below.
8. EMISSIVITY
Emissivity is a term used to describe the energy emitting characteristics of a material. The higher the emissivity
value a material has, the more infrared energy it will emit at a particular temperature. And the meter’s emissivity is more
close to the material’s emissivity, the more particular measurement result you can get. So, it is important to set a just
emissivity according to the material.
1. ATE-2530 and ATE-2533 have a fixed (non-adjustable) emissivity of 0.95. Most organic materials and oxidized
metal range in emissivity between 0.85 and 0.98.
2. ATE-2532 has an adjustable emissivity from 0.10 to 1.00. For different materials, you can set a different
emissivity. An object’s emissivity is relative to its material, finish, color and temperature etc. The attached sheet is the
emissivity of different substances in the normal temperature.

www.tmatlantic.com
www.tmatlantic.com
4
Substance Emissivity Substance Emissivity
Asphaltum 0.90 - 0.98 Plastic 0.8 – 0.95
Concrete 0.70 – 0.75 Plastic film 0.5 – 0.95
Sand 0.8 – 0.9 Ceramic glaze 0.85 – 0.95
Soil 0.85 – 0.96 Marble 0.90 – 0.94
Water 0.92 – 0.98 Quartz 0.90
Ice 0.96 – 0.98 Aluminium (oxidized) 0.7 – 0.8
Snow 0.83 Copper(oxidized) 0.7 – 0.8
Glass 0.9 – 0.95 Iron (oxidized) 0.78 – 0.82
Keramics 0.9 – 0.94 Lead (oxidized) 0.3
Gypsum 0.89 – 0.91 Zinc (oxidized) 0.1
Red brick 0.75 – 0.90 Zincified iron 0.3
Drygoods 0.93 – 0.98 Cast iron (polished) 0.2
Charcoal 0.96 Iron plate (oxidized) 0.75 – 0.82
Hominine skin 0.98 Steel plate (oxidized) 0.8 – 0.9
Leather 0.75 – 0.80 Stainless steel (Polished) 0.1
Paper 0.8 – 0.94 Gold (polished) 0.1
Lignum 0.8 – 0.9 Silver (polished) 0.1
Asbestus 0.95 Copper(polished) 0.1
Paint 0.9 – 0.98 Aluminium (polished) 0.1
Rubber 0.90 – 0.98 Chromium (polished) 0.1
You also can get an object’s emissivity by the following method.
(1) Attach a black adhesive tape or spread some black paint on to the surface.
(2) Set the thermometer’s emissivity at 0.95, and then point the meter to the surface of the black adhesive tape (/
black paint), and make the measurement. Then you can get a measurement value (say for T1).
(3) Clear the black adhesive tape (/black paint), and point the meter to the same place. Adjust emissivity during
measuring; when the measurement value is T1, the emissivity value on LCD is about the object’s emissivity.
(4) For some object (e.g. water or with high temperature) that can’t be attached a black adhesive tape or spread
the black paint, you can use a contact thermometer make measurement first, and then use the same method as the
above to get the emissivity.
9. TEMPERATURE ALARMING FUNCTION
(ATE-2533)
Press “MODE” button, and when the “ALARM” symbol appears on LCD, you can set the alarming temperature
value. Press “+” to add the value, and press “-” to reduce the value. When the measurement temperature is more than
the setting value, the inside buzzer will sound.
This function can help operator find the high temperature points by “scan” an object.
10. SPECIFICATIONS
LCD Display: 2-temperature, 4 digits
Distance to Spot Ratio: 12:1
Emissivity:
Fixed at 0.95 (ATE-2530, ATE-2533)
Adjusted from 0.10 to 1.00/step: 0.01 (ATE-2532)
Spectral Response: 8-14μm
Measurement Range:
-20°C ~ 537°C / -4°F ~ 999°F
Alarming temperature range (ATE-2533):
30°C ~ 535 °C / 86°F ~ 995°F
Accuracy: -20°C ~ 50°C: ±2.5°C
50°C ~ 537°C ± (reading×1%+1°C)
Response Time: 1.5 seconds
Laser Power: Less than 1 mW
Auto-off: After 10 seconds
Backlight: White
Operating Environment: 0~ 40°C, 10~90%RH
Storage Environment: -10°C ~ 60°C, <75%RH
Battery: 9Volt, 6F22
Size: 162mm (L) × 56mm (W) × 190mm (H)
11. CHANGING THE BATTERY
When the battery is nearly exhausted, the low battery symbol will appear on the display. The
battery should be replaced soon after this occurs. Pinch the “OPEN” characters to swing the
battery cover open.
12. ACCESSORIES
9V battery………………………….1 pcs
Operating manual………………...1 pcs
Carrying bag………………………1 pcs
/