Page is loading ...

IS200FE 5/16
! DANGER
All associated apparatus must be de-energized before performing any installation. Do not touch or move en-
ergized product by hand. Be sure that the connectors are rated for the intended application. Failure to follow
this instruction may result in serious or fatal injury, as well as damage to the product.
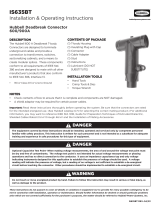
Hubbell Fused Loadbreak Elbow
15kV & 28kV Class Elbows
DESCRIPTION
The Hubbell 15kV & 28kV Class Fused
Loadbreak Elbows, combine a fully-shielded
and insulated loadbreak elbow with full
range current-limiting fuse protection. These
elbows connect underground dielectric
cable to transformers, switching cabinets,
and junctions equipped with comparable
devices that conform to IEEE Std. 386. All
Hubbell Fused Elbows are designed and
tested to meet the requirements of IEEE Std.
386 -latest revision.
• 15kV 200A Class (8.3kV and 8.3/14.4kV)
• 28kV 200A Class (15.2kV and 15.2/26.3kV)
CONTENT OF PACKAGE
Housing
Compression Connector
Probe Connector
Probe Connector Wrench
Loadbreak Probe
Probe Wrench
Lubricant (DO NOT SUBSTITUTE)
Installation Instructions
NOTE: Fuses sold seperately.
INSTALLATION TOOLS
• Insulating Hotstick
• Crimp Tools & Dies
• Hand Tools
! CAUTION
The equipment covered by these instructions should be installed, operated and serviced only by competent
personnel familiar with safety practices. This instruction is written for such personnel and is not intended as a
substitute for adequate training and experience in safe procedures for this type of equipment.
These instructions do not purport to cover all details or variations in equipment nor to provide for every possible contingency to be met in connection with
installation, operation or maintenance. Should further information be desired or should particular problems arise which are not covered sufficiently for the
purchaser’s purposes, the matter should be referred to Hubbell Power Systems, Inc.
IS200FE 5/16
! CAUTION
Capacitive Test Point- When making voltage measurements, the area of and around the voltage test point must
be dry and free of contaminants. The voltage test point is not intended for actual voltage measurements or
phasing operations and has no direct connection to the conductor. It uses an impedance capacitance tap and
only voltage indicating instruments designed for this application to establish the presence of voltage should
be used. A voltage reading will indicate the presence of voltage, but a reading of no voltage is not sufficient to
establish a de-energized circuit before touching the connector. Other procedures should be implemented to
establish a de-energized circuit.
IS200FE
Installation & Operating
Instructions
Important: Read these instructions thoroughly before operating the system. Be sure that the Fused
Elbows are rated for their intended energized use. Visually inspect parts for damage before using.
© Copyright 2006 Hubbell Power Systems Printed in U.S.A.
! CAUTION
The Operator should always use personal protective equipment as designated by internal company standards
or safe operating practices.
! CAUTION
Do not connect two different phases of a multiple-phase system. Make sure both ends of the loop are the
same phase before closing a single-phase loop.
NOTE: Operating area should have stable footing and be free of obstructions so that the operator can
have full control of the loadbreak elbow during and immediately after operation.
OPERATION (Loadmake / Loadbreak)
LOADMAKE
1. The mating part must be prepared for loadmake operation following applicable instructions for the device.
2. Use an 8’ insulated hotstick tool for all operations. Attach the tool to the loadbreak elbow operating eye and tighten
firmly. Avoid any off-axis operation.
3. Establish an operating position that will provide firm footing and secure grasp on the hotstick tool throughout the
range of movement required for the operation sequence.
4. Place the loadbreak elbow receptacle area over the mating part interface and insert the probe tip (white arc follower)
into the mating part chamber until the first slight resistance is felt. Immediately thrust forward with a firm, quick motion
to lock the elbow on the mating part. Test for proper locking by gently pulling on the elbow to ensure a secure connec-
tion. If the elbow has not made a proper connection, pull elbow from mating part and repeat this step until the connec-
tors are properly locked.
LOADBREAK
1. Use an 8’ insulated hotstick tool for all operations. Attach the tool to the loadbreak elbow operating eye and tighten
firmly. Avoid any off-axis operation.
2. Establish an operating position that will provide firm footing and secure grasp on the hotstick tool throughout the
range of movement required for the operation sequence.
3. Twist the hotstick tool clockwise until the loadbreak elbow rotates slightly on the bushing. Then pull the loadbreak
elbow straight away from the mating part with a firm, quick motion until it is clear of any ground planes.
FAULT CLOSE
1. It is not recommended that operations be made on known faults.
REPLACING A CLEARED FUSE
1. See manufacturers instructions.
NOTE: Because Hubbell has a policy of continuous product improvement, we reserve the right to change design and specifications without notice.
1850 Richland Ave. East • Aiken, SC 29801 • Phone: 573-682-5521 • Fax: 573-682-8714
E-mail: [email protected] • Website: http://www.hubbellpowersystems.com

Step 1. Train & Remove Jacket
A. Train the cable into the final assembled position per
the transformer standard practices. Allow sufficient slack
in the cable to pull the elbow connector at least one foot
away from , and in line with, the center line of the mating
part during loadbreak operation.
B. Measure down from top of the cable 21. Remove cable
jacket to expose neutral wires. Provide sufficient length of
neutral wires for grounding after installation.
Bend Neutral wires down and parallel to cable. Make
square cut from top of the cable 13” See Figure 2.
Step 2. Cable Preparation
A. Measure 4 3/4” down from the end of the cable and
remove shield to expose the insulation. Cut squarely,
making sure not to nick the conductor.
B. Measure 1 1/4” from the end of the cable and remove
the insulation to expose the bare conductor. Cut squarely,
making sure not to nick the conductor. See Figure 3.
C. Use a wire brush to clean the exposed conductor.
Place the compression lug on the conductor and rotate to
spread inhibitor.
D. Rotate the tool between each successive crimp to
prevent connector distortion. Clean excess inhibitor.
See Figure 4.
E. Place a 1/8” maximum bevel on the insulation to ease
elbow installation.
CABLE PREPARATION
INSTALLATION
IS200FE 5/16
Step 3. Assemble Body to Cable
A. Clean cable and housing, then lubricate with supplied
lubricant. DO NOT SUBSTITUTE.
B. Slide the straight body onto the cable, using a back
and forth twisting motion, and final seating of the straight
body should align the hexagonal metal end connector.
See Figure 6.
C. Slide the fuse into the straight body, threaded end first.
D. Thread fuse clockwise by hand or hex wrench until
tight. Confirm and check dimension as show. See Figure 7.
Note: Preassemble probe into lug to verify proper
threading before the lug is crimped to the conductor.
E. Slide the probe connector onto the fuse. Make sure
to align the flats of the probe connector parallel to the
bushing.
F. Using supplied probe connector wrench, thread the
two set screws until they bottom out on the end post of
the fuse, then tighten each set screw an additional 1/8-1/4
turn until tight. See Figure 8.
Step 4. Assemble Elbow to Body
A. Clean then lubricate with supplied lubricant to elbow
body and straight body as show. DO NOT SUBSTITUTE.
B. Slide the elbow body onto the fuse, using a back and
forth twisting motion until it covers yellow ring. The final
seating of the elbow should align elbow and threaded
portion of lug. See Figure 9.
C. Hand thread the probe into the lug to avoid cross
threading. Once the probe has been properly started,
use the supplied wrench to fully tighten probe into lug until
wrench permanently deforms. Keep probe free from dirt at
all times.
D. Using one or more neutral wires, connect the
concentric neutral to the elbow body and straight body
grounding tab near the cable entrance. A tight connection
will provide positive grounding for the elbow body and
straight body shield. See Figure 11.
IS200FE 5/16
NOTE: These instructions will cover jacketed concentric neutral cable applications so please
refer to cutback instructions from shield adapter kits for steps on how to prepare other types
of underground power cables.
/