Aeg-Electrolux E4107-5-M User manual
- Category
- Ovens
- Type
- User manual
This manual is also suitable for
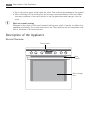
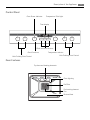
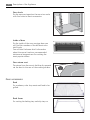
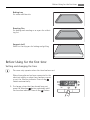
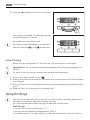
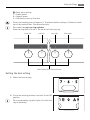
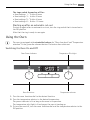
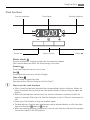
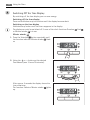
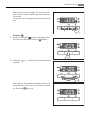
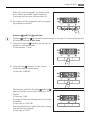
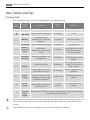
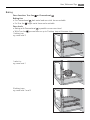
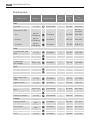
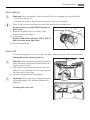
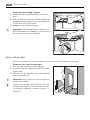
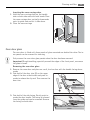
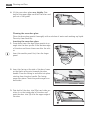
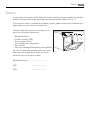
Aeg-Electrolux E4107-5-M EU(ML) comes with a variety of features designed to make cooking easier and more efficient. Its fan heating element ensures even cooking results, while the top heat and heating elements allow for precise temperature control. The oven also boasts a light, a fat filter, and a steam vent for added convenience. With its multiple oven functions, including grill and defrost, this oven offers versatility and flexibility for a wide range of culinary creations.
Aeg-Electrolux E4107-5-M EU(ML) comes with a variety of features designed to make cooking easier and more efficient. Its fan heating element ensures even cooking results, while the top heat and heating elements allow for precise temperature control. The oven also boasts a light, a fat filter, and a steam vent for added convenience. With its multiple oven functions, including grill and defrost, this oven offers versatility and flexibility for a wide range of culinary creations.


-
 1
1
-
 2
2
-
 3
3
-
 4
4
-
 5
5
-
 6
6
-
 7
7
-
 8
8
-
 9
9
-
 10
10
-
 11
11
-
 12
12
-
 13
13
-
 14
14
-
 15
15
-
 16
16
-
 17
17
-
 18
18
-
 19
19
-
 20
20
-
 21
21
-
 22
22
-
 23
23
-
 24
24
-
 25
25
-
 26
26
-
 27
27
-
 28
28
-
 29
29
-
 30
30
-
 31
31
-
 32
32
-
 33
33
-
 34
34
-
 35
35
-
 36
36
-
 37
37
-
 38
38
-
 39
39
-
 40
40


Aeg-Electrolux E4107-5-M User manual
- Category
- Ovens
- Type
- User manual
- This manual is also suitable for
Aeg-Electrolux E4107-5-M EU(ML) comes with a variety of features designed to make cooking easier and more efficient. Its fan heating element ensures even cooking results, while the top heat and heating elements allow for precise temperature control. The oven also boasts a light, a fat filter, and a steam vent for added convenience. With its multiple oven functions, including grill and defrost, this oven offers versatility and flexibility for a wide range of culinary creations.
Ask a question and I''ll find the answer in the document
Finding information in a document is now easier with AI
Related papers
-
Aeg-Electrolux E4107-5-M User manual
-
-
-
-
-
Aeg-Electrolux BOGZ-M User manual
-
Aeg-Electrolux BOGZR-M User manual
-
-
-
Aeg-Electrolux EHB-B User manual