Page is loading ...

Please carefully read the operating instruction before using our product
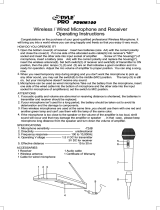
Basic operation and attention of wireless microphone
Open the battery box correctly and install the battery. Attention shall be paid to the cathode and anode of the battery.
Turn the power switch on microphone to “ON”. If the power indicator lamp does not flash or always lights, inspect
whether the battery voltage is insufficient or the polarity of battery is installed oppositely.
Before using wireless microphone, please extend the rod antenna and make it vertically upward, so as to reach a
better receiving effect.
Adjust the microphone volume knob on the audio amplifier and adjust its position according to the sound volume
when singing, so as to reach the ideal effect.
If you have to use wireless microphone temporarily during the singing process, you can put the microphone switch in
mute status; once using is stopped, you can turn the microphone switch in off status. The microphone will pick up
sound to amplify it and input to the horn of the audio amplifier no matter it is in mute or off status.
The receiving antenna shall not get access to the metal surface, wall or other obstacles; if it is too closed to them,
the performance will be reduced dramatically, influencing the receiving effect.
The effective using distance of wireless microphone is within 30m, please never use it beyond the effective range in
order not to affect the singing effect; when the electricity quantity of battery is reduced or the wireless interference
signal of the using environment is too strong, the using distance shall be shortened accordingly.
To reach the best singing effect, the distance between mouth and microphone shall be 5-15CM and the best angle is
45degrees.
After the microphone is used for a very long time and lacks of electricity, the indicator lamp for electricity insufficiency
will light. Please timely change the battery in order not to affect the singing effect.
Please never use the microphone in the same frequency point for singing within short distance since it may cause
silence or interference noise.
If you have purchased more than two sets of active audio amplifiers matched with wireless microphone from the
company and intend to use them together, please select the varieties in different standard frequencies. If the
frequency is identical, two sets machines can not be used until they are separated from each other for 100m, so as
to avoid mutual interference and other unnecessary troubles! Never get the machine to VCD/CD/DVD and other
equipments with strong interference frequency when they are used, so as to avoid mutual interference between the
same frequency and directly affecting the normal work of wireless receiving of microphone!
Maintenance guidance of common faults
Common simple faults and guidance for operation and repair
Fault phenomenon
Failing to electrify
No sound
External
microphone has
no sound
Problems with
wireless
microphone
Simple fault analysis
The power switch is not opened
The electricity quantity of built-in battery is
totally consumed
Failing to input sound source
Failing to establish signal line
Main volume is switched to minimum
U disk playing has no sound
Faults with external signal source
Poor contact or damage of external signal
line
External microphone is not fully inserted in
the jack
The external microphone switch is not
opened
The volume knob of microphone is off
The switch of wireless microphone is not
opened
The wireless microphone is not inserted in
the battery
The sound of wireless microphone is in
distortion
Troubleshooting
Open power switch
Use power adaptor to charge the battery
Change signal source
Reconnect signal line
Properly adjust the volume knob
Inspect U disk or audio switch
Change signal source
Readjust or change signal line
Totally insert the microphone to the jack
Open the switch of wireless microphone
Properly adjust the volume knob of
microphone
Open the switch of wireless microphone
Insert electrical apparatus to the battery box
of wireless microphone
Change the battery of wireless microphone
If there is still fault after the inspection above, please contact the nearest local maintenance department! The
product technology of our company is upgraded continuously and we will not inform of the change of product
specification and function additionally!
USER GUIDE
BT-300
Mic1
Mic2
VOLUME
M.VOL
ECHO
MIN
USB
MAX
SD/MMC
BASS
LED
MID
BASS
TRE
MID
LEFT CHANNEL
RIGHT CHANNEL
TRE
BASS
MID
TRE
MID
BASS
TRE
+
+
-
-
INPUT
HD
SOUND

Product features
Ultra-low distortion amplifying circuit
Digital karaoke, treble and bass
independent adjustment
Built-in MP3 encoding supporting
U disk
Unique acoustic appearance design
Professional treble and bass gain
controlling circuit
Built-in battery for outdoor activities
Built-in professional wireless
microphone system
Professional high-effective
loud-speaking unit
Compatible to DVD/VCD/PC
and other sound sources
Suitable for adaptor and charging
Intelligent power switch charging
circuit
Attention
The product has been installed with battery, making it applicable to the outdoor singing, advertisement, recreation and
other activities. Please charge the battery before using it outdoors, so as to guarantee that the machine can be used
for a longer time outdoors. The machine has been set with power switch circuit. When you connect the adaptor to the
power and insert the plug to the charging interface, the machine will switch to the power supplied by the adaptor
automatically and charge the built-in battery. When the adaptor interrupts the power, the machine will intelligently
switch to the built-in battery for work continuously. When adaptor is used to charge the battery, the integrated
intelligent charging circuit within the machine will give hints about charging and the charging indicator lamp will light.
After charging is finished, the intelligent charging circuit will give hint to that that the charge has been fully charged and
light the charging indicator lamp. At this moment you can close the AC power of the adaptor. If you still use adaptor in
the machine to work, the charging circuit will automatically cut off the charging circuit and it is unnecessary for you to
worry about the charging breaking. You shall notice that the battery has certain service life and it is beyond the
warranty scope of the company. Under general circumstances, the built-in battery needs charging 8-10 hours. With
more charging times, the battery volume will change and full charging time will reduce accordingly. When the battery is
out of charge after being used for a short time, please change the built-in battery. The user shall also notice that if the
electricity quantity of the battery is reduced when using the machine outdoors, please close the power switch on the
rear plate and charge the built-in battery within 24hours. If the electricity quantity of battery is totally consumed, the
situation that the battery can not be charged and the service life is expired will happen. When you don’t use the
machine for a long time and leave it alone, please charge the battery every six months, so as to avoid the invalidity of
battery.
Panel/rear plate/MP3 function and operation
When you need to use the built-in MP3 encoding function, please format your USD disk (U disk for short below) as F
A-
T32 format in computer first and then copy the file in MP3 format in U disk. When reading U disk, the encoding system
will engage in encoding playing according to the generation sequence of MP3 songs file. Therefore, the song which is
copied to U disk first will be played in priority or vice versa. When the user needs to play according to the specific
sequence, they can arrange the copying sequence. If the files copied to U disk can not be played, please inspect
whether the file format is in MP3 format. If not, please switch to MP3 format in computer and then copy to U disk in
order to play normally. When copying MP3 file, you shall copy to the catalogue of U disk. It is suggested to delete all
the unnecessary files and file catalogues in order to reduce the occurrence of reading error when the encoding is
played. When the user buys U disk, please select the ones with better quality and internal encoding supporting
64MB/128MB/256MB/512MB/1GB/2GB/4GB/8GB and other volumes. During the playing process, please make it far
away from the places with high temperature, high magnetic field and high frequency interference. In case of crash,
please close the power and restart for recovery!
Volume: it is used to adjust the sound of volume.
TREBLE (treble): it is used to adjust the gain of music treble. Bass: it is used to adjust the gain of music bass.
EQ (equilibrium): it is used to adjust music frequency curve and gain and attenuation within certain frequency.
Instruction of U disk MP3 encoding playing
MIC. VOL (microphone volume): it is used to adjust the volume of microphone
MIC. TREBLE (microphone treble): it is used to adjust the gain of microphone treble.
MIC. BASS (microphone bass): it is used to adjust the gain of microphone bass.
ECHO (microphone echo): it is used to adjust the echo depth of microphone.
DELAY (microphone delay): it is used to adjust the effect of microphone echo delay.
MIC1 MIC2 (microphone 1 and microphone 2): they are used to connect the plug interface of the wire microphone.
GT 1, GT2 (guitar 1 and guitar 2): they are used to connect the interface of guitar audio wire.
GUITAR. VOLUME (guitar volume): it is used to adjust the volume after the guitar input function is amplified.
DC FUSE (DC fuse): it is used for the power to supply the fuse of the whole machine with the protective tube of
F10A/250V.
POWER (power switch): the switch break-make power is applicable to the power control of sound amplifier of the
whole machine instead of that of charging power. When the adapter is connected, the battery charging is not
controlled by the switch.
DC15V IN (15V DC power input): the interface of external power adaptor; please use the original adapter.
CHARGING (indicator lamp of battery power): after the power adaptor is connected, the indicator lamp will be on and
battery starts to be charged
FULL (indicator lamp of full charge): when adapter is used to charge the battery, it means full charge when the
indicator lamp is on.
WIRELESS MIC ANT (built-in microphone antenna): when you use wireless microphone, please make the antenna
vertically upward, so as to reach a better receiving effect.
12V BATTERY IN (external 12V battery interface): please carefully check the anode and cathode when connecting
and the applied connection line can not be smaller than 0.75 square meters. Attention shall also be paid to the
firmness when connecting it.
LINE IN (external audio interface): it is used to connect the compatible audio equipment such as DVC and computer.
Display screen of MP3 encoding player: it is used to display the playing track, playing time or the receiving rate under
receiving status.
USD interface (U disk interface): when MP3 function of U disk is needed, insert the U disk with MP3 songs to the
interface.
SD/MMC CARD (interface of SD card and MMC card): insert SD card or MCC card with copied MP3 songs to the
interface.
Key: pressing the key to switch pause status under playing status or vice versa.
Stop key: pressing the key to stop playing under playing status; you are suggested to stop the key and change U
disk when you want to change U disk.
MP3/LINE-MODE (audio input switch): it is used to switch to use the external audio or built-in MP3 encoding sound
as the signal source of audio amplifier.
VOL-key: select the previous song for playing: the volume will be reduced by pressing the key for longer than
3seconds.
VOL+ key: select the next song for playing: the volume will be increased by pressing the key for longer than 3
seconds.
REPEAT (repetitive playing): press the key for repeating of single song or total songs.
Operation of FM receiving function
SCAN key-pressing: press the key and the radio will scan the local radio station and save it automatically.
CH+ key-pressing: press the key and the radio will read the saved radio station and select the next one in ascending
order;
CH- key-pressing: press the key and the radio will read the saved radio station and select the previous one in
descending order;
Note: MODE key is used to switch radio status in order to use radio key-pressing function; if the receiving frequency
needs inputting manually, press the numbers on remote control directly to input the frequency of radio station.
/