Page is loading ...

TOOLS YOU WILL NEED
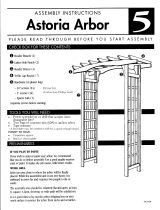
CHECK BOX FOR THESE CONTENTS
PLEASE READ COMPLETELY BEFORE YOU BEGIN ASSEMBLY
Longevity Arbor
ASSEMBLY INSTRUCTIONS
10
PRELIMINARIES
Trellis Caps (16)
Headers (2)
Braces (4)
Lattice Side Panels (2)
1
2
3
4
• Phillips screwdriver (electric driver recommended)
•
Small hammer
•
Two bags of concrete mix (60#) to anchor the arbor
If you wish to stain or paint your arbor, we recommend
that you do so before assembly, it makes the job easier.
Be careful not to cover up guide marks on top of headers
ARBOR PAINTING:
HANDY TO HAVE
• Tape measure
•
Needle nose pliers
WORK AREA
Select an area close to where the arbor will be finally placed. While the assembled unit is not very heavy, it is
awkward to move far and requires two people to do so easily.
The assembly area should be relatively flat and open, at least 8’x6’. A lawn, driveway or wide path will be satis-
factory.
1
2
4
3
HARDWARE
- 1” Wood screws (32)
- 2” Wood screws (16)
- 2 1/2” Wood screws (8)
- Anchoring kit.
- Brass medallion and nails (2)

Page 2
CONNECTING THE MEDALLIONS TO THE HEADERS
We recommend installing the medallion on the header
prior to final assembly. Needle nose pliers can be help-
ful in holding the 1/2” nail.
STEP 1
1
CONNECTING THE BRACES TO THE HEADER
Install all 4 braces on the ends of the headers
into the pre-drilled holes using 2” screws.
Important note:
Placing screws into pre-drilled holes ensures proper align-
ment of side panels.
STEP 2
2
CONNECTING THE SIDE PANEL TO THE HEADERS
Line up the top of the brace and the top of the side panel.
Position the side panel against the back of the brace.
Connect the side panel to the header using the 2” wood
screws.
Connect the brace to the side panel using 2 1/2” wood
screws.
Repeat on both ends of the header.
Important note:
When positioning side panel for attachment to header make
sure the staples in side panel lattice face to the outside of
arbor.
STEP 3
3
2 1/2” screws
2 ” screws

Page 3
TURNING THE ARBOR 180 DEGREES TO ATTACH SECOND HEADER
4
After attaching the first header to the side panels,
Turn the assembly over by lifting the sides and moving backward.
Then, turn and lower the arbor over the second header.
Attach the second header following the same method as the first
header.
STEP 4
BLOCKING
Support the arbor with a block or other item to allow clearance for the
attachment of the trellis caps.
STEP 5
ATTACH THE CAPS TO THE HEADERS
Install the top caps on both side of the medallion using 1” screws in the locating holes.
Use the supplied 2” spacer to install the rest of the caps.
STEP 6
Block
1” screws

LWO Corporation
3841 N. Columbia Blvd.
Portland, Oregon 97217
(503) 286-5372
(800) 459-8718
www.arboria.com
INSTALLING THE ARBOR
/


