Page is loading ...

Tools You Will Need
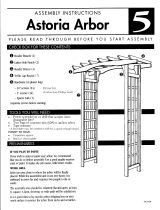
Check Box For These Contents
Please Read Completely Before Starting Assembly
Tuscany Arbor
Assembly Instructions
TS
Preliminaries
Trellis Caps (8)
Rafter Boards (4)
Header Boards (2)
Side Panels (2)
Metalwork (2)
1
2
3
• Phillips Screwdriver
•
Power Drill / Screwdriver
• Concrete Mix, 60#, (2 bags—optional for anchoring arbor)
Your arbor has been submerged in high quality stain to provide lasting beauty. Painting is not required. If you
choose to paint your arbor, we recommend that you do so before assembly, it makes the job easier. Be careful not
to cover up pre-drilled holes or guide marks on top of headers.
The Following Items are Handy to Have
• Tape Measure
•
Carpenter’s Square
• Stool or Short Ladder
Work Area
Select an area close to where the arbor will be installed. This arbor is quite heavy, and may be difficult to move
once assembled. Two people are required to move the assembled arbor.
The assembly area should be relatively flat and open, at least 8’x6’. A lawn, driveway or wide path will be satis-
factory. It is a good idea to lay out the arbor box on your work surface to protect the arbor from nicks and
scratches.
Hardware
4
• 3/4” screws (4)
• 4” Screws (8)
• 2 1/2” Screws (28)
•
Arbor Anchor stake kit
4
2
1
3
445.35.43 Page 1 of 4 10/31/2008
Division of LWO Corporation / P.O. Box 17125 / 3841 North Columbia Boulevard / Portland, Oregon 97217
Toll Free 800.459.8718 / Fax 503.286.4092 / Web www.arboria.com
5
5

Step 1
Take two of the rafter boards and place them together at the top, with the tapered ends outward (a).
Holding each rafter board apart, drive one 2 1/2” screw at an angle into the pre-drilled hole in the tip. The screw
should almost protrude through the other side.
Place the two boards on a hard, flat working surface and line them together at the rafter peak (see Fig. A). Holding
them tightly together, drive one of the screws until it is tightly set. Then drive in the screw on the other side, keeping
the two pieces snugly together.
Repeat procedure for remaining two rafters. Set aside both rafter sections until step 3.
445.35.43 Page 2 of 4 10/31/2008
Division of LWO Corporation / P.O. Box 17125 / 3841 North Columbia Boulevard / Portland, Oregon 97217
Toll Free 800.459.8718 / Fax 503.286.4092 / Web www.arboria.com
IMPORTANT: Each rafter board has diagonal pencil guide marks toward
the tapered end. Make sure these marks are to the same side as you prepare
to connect them.
Figure A
Drive screws into
pre-drilled holes.
When drilling, rafter points must be kept snugly
together and end surfaces must be flush.
Lay the header boards flat on the working surface perpendicular to the side frame and flush to the end of the side
frame post (see Fig. B).
Secure the upper corner of one side panel to one end of a header
board using 4” wood screws through the pre-drilled holes.
Repeat procedure at the other end of the header to attach to the
other side panel.
Figure B
Step 2
Turn the arbor over 180° and attach the second header board
following the same method as the first.

Lift the lower header, raising the upper end of the assembled frame, then slide one rafter section underneath the
frame’s corners. Adjust the frame assembly so the top and outside edges of the corner posts line up with the pencil
guide marks on the rafter section (see Fig. C).
445.35.43 Page 3 of 4 10/31/2008
Division of LWO Corporation / P.O. Box 17125 / 3841 North Columbia Boulevard / Portland, Oregon 97217
Toll Free 800.459.8718 / Fax 503.286.4092 / Web www.arboria.com
Step 3
Step 4
Slide rafter section, with guide marks upright,
under assembled frame.
Figure C
Place one horizontally positioned trellis
cap under the lower end of each side
panel to level out the assembled frame.
Secure the assembled frame to the raf-
ter section using two 2 1/2” screws in
each post. Make sure pencil marks stay
aligned.
Use trellis caps for support.
Place one of the metalwork pieces between the header and
rafter section. Using two 1” screws, attach as shown through
the screw holes in the metalwork (see Fig. D).
Carefully stand the arbor upright, then lay it over on the op-
posite side and repeat steps 3 and 4 for attaching the other
rafter assembly and metalwork to the opposite side.
Figure D
Attach metalwork using
3/4” screws.

LWO Corporation
3841 North Columbia Blvd.
Portland, Oregon 97217
Toll Free 800.459.8718
Fax 503.286.4092
www.arboria.com
With the arbor still on its side, raise the rafter end slightly using
blocks or cap boards under the header board.
Start 2 1/2” screws through each pre-drilled hole in the trellis
caps. The screw points should protrude slightly through the
rounded side.
Install the trellis caps by centering them between the corre-
sponding two guide marks on the rafters. Center the protruding
points of each screw in between the lines, then drive in each
screw to attach. Repeat process for each cap.
Congratulations! The arbor is assembled and is now ready to be
secured in place.
445.35.43 Page 4 of 4 10/31/2008
Step 5
Figure E
Step 6
Arbor post
Anchor
Soil
Concrete
Figure G
Figure F
This arbor may be secured using a variety of techniques. These in-
clude attaching to an existing structure or anchoring with gravel or
river rock instead of concrete. The instructions below represent se-
cure mounting with concrete. Use caution when moving the arbor
to its final placement. Two people are required to lift or move the
arbor; always use caution.
1. Attach all four anchors to the bottom of the arbor using the pro-
vided screws, two screws per anchor, staggering the screws.
2. Measure the distance in between all anchors and dig four 8”
diameter holes to accommodate the anchors.
3. Carefully lift the arbor and position in place, avoid tilting the
arbor on the anchors
4. Plumb and level the arbor.
5. Mix concrete according to the manufacturer's instructions, fill
each hole within 1/4” of the bottom of each post, posts should
not be set in the concrete.
Use blocks to
elevate frame.
Visit Arboria.com for more product
information, accessories and the latest
new products from Arboria.
Creating positive space outdoors.
/
