StarTech.com SV231USBAN User manual
- Category
- KVM switches
- Type
- User manual
This manual is also suitable for
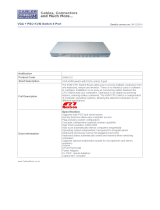
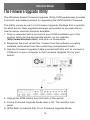
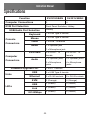
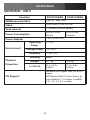
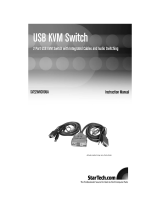
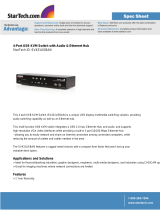
StarTech.com SV231USBAN is a versatile KVM switch with built-in USB 2.0 hub, 3-port Ethernet switch, and audio support, allowing you to control multiple computers and share peripherals, network connectivity, and audio devices with ease.
StarTech.com SV231USBAN is a versatile KVM switch with built-in USB 2.0 hub, 3-port Ethernet switch, and audio support, allowing you to control multiple computers and share peripherals, network connectivity, and audio devices with ease.


-
 1
1
-
 2
2
-
 3
3
-
 4
4
-
 5
5
-
 6
6
-
 7
7
-
 8
8
-
 9
9
-
 10
10
-
 11
11
-
 12
12
-
 13
13
-
 14
14
-
 15
15
-
 16
16
-
 17
17
-
 18
18
-
 19
19
-
 20
20
-
 21
21
-
 22
22
-
 23
23
-
 24
24
-
 25
25
-
 26
26
-
 27
27
-
 28
28
-
 29
29
-
 30
30


StarTech.com SV231USBAN User manual
- Category
- KVM switches
- Type
- User manual
- This manual is also suitable for
StarTech.com SV231USBAN is a versatile KVM switch with built-in USB 2.0 hub, 3-port Ethernet switch, and audio support, allowing you to control multiple computers and share peripherals, network connectivity, and audio devices with ease.
Ask a question and I''ll find the answer in the document
Finding information in a document is now easier with AI
Related papers
-
 StarTech.com SV221MICROUA Datasheet
-
 StarTech.com SV431USBA Datasheet
-
 StarTech.com SV231DVGAU2A Operating instructions
-
StarTech.com USB Cable KVM Switch 2 Port + Audio User manual
-
-
 StarTech.com SV231USBANGB User manual
-
StarTech.com SV215MICDVIA User manual
-
StarTech.com SV231DVIUAHR Owner's manual
-
 StarTech.com SV431USBANGB Datasheet
-
StarTech.com SV831DUSBAU User manual