Page is loading ...

MiniView™
DVI 2/4 PORT USB KVMP Switch
User Manual (GCS1762 / GCS1764)
®

Thank you for purchasing one of the most feature-rich DVI KVM with USB peripheral sharing and audio
technology on the market. You can save money and space by eliminating the need for multiple DVI monitors,
keyboards, mice, and USB peripheral devices such as printers, scanners, and more. Up to 127 USB
devices can be daisy chained from this KVMP switch. Sharing speakers and a microphone also offers extra
value and convenience for the users.
USB and KVM technology together makes cross-platform management easy. A single USB console can
control a PC and a MAC workstation, and share peripherals and audio between the computers.
We hope you enjoy using your Miniview DVI USB KVMP switch, yet another first-rate connectivity solution
from IOGEAR
©2005 IOGEAR. All Rights Reserved. PKG-M0140
IOGEAR, the IOGEAR logo, are trademarks or registered trademarks of IOGEAR, Inc. Microsoft and Windows are registered trademarks of Microsoft
Corporation. IBM is a registered trademark of International Business Machines, Inc. Macintosh, G3/G4 and iMac are registered trademarks of Apple
Computer, Inc. All other brand and product names are trademarks or registered trademarks of their respective holders. IOGEAR makes no warranty of any
kind with regards to the information presented in this document. All information furnished here is for informational purposes only and is subject to change
without notice. IOGEAR, Inc. assumes no responsibility for any inaccuracies or errors that may appear in this document.
Welcome

Table of Contents
02
03
04
05
06
10
13
15
29
37
38
40
41
42
Package Contents
Overview
Features
System Requirements
Introduction
Installation
Basic Operation
Hotkey Operation
Firmware Upgrade Utility
Appendix
Specifications
Technical Support
Radio & TV Interference Statement
Limited Warranty

2
Package Contents
This package contains:
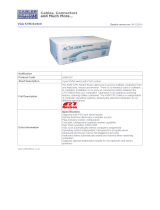
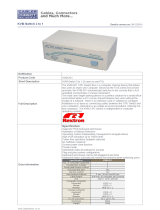
1 x GCS1762 or GCS1764 KVMP Switch
2 x Custom 6’ KVM Cables (GCS1762)
4 x Custom 6’ KVM Cables (GCS1764)
1 x Firmware Upgrade Cable
1 x Power Adapter
1 x User Manual
1 x Quick Start Guide
Check to make sure that all the components are present and that nothing was damaged in shipping. If you
encounter a problem, contact your dealer.
Read this manual thoroughly and follow the installation and operation procedures carefully to prevent any
damage to the unit, and/or any of the devices that connect to it.

3
Overview
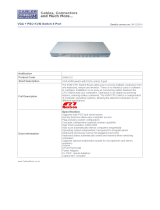
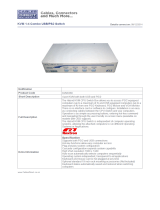
The GCS1762/GCS1764 DVI KVM Switch charts a revolutionary new direction in KVM switch functionality by
combining a switch with a 2 port USB hub at the same time as it provides an interface for a digital monitor
(DVI). The new IOGEAR GCS1762/GCS1764 enhances some of the great features found in the MiniView
KVM line and adds DVI technology into the mix.
The independent (asynchronous) switching feature, allows the KVM focus to be on one computer while the
USB peripheral/Audio focus is on another computer. This gives the user greater control over and more
flexibility. It also eliminates the need to purchase a separate USB hub as well as additional speakers set for
your other computers; thus reducing cost and maximizing user space.
The Miniview DVI USB KVMP Switch fully supports the DVI specification for both digital video input (flat panel
displays, data projectors, plasma displays) and analog video input (traditional monitors).

4
Features
• Independent switching of KVM video, audio and USB hub
• Fully compliant with USB 1.1 specs for data transfer rates of up to 12 Mbps
• DVI digital and analog monitor support – fully compliant with the DVI specifications
• Computer selection via front panel switches and hotkeys
• LED display for easy status monitoring
• Auto Scan mode for monitoring of all computers
• Complete keyboard emulation for error free booting
• Superior video quality – 1600 x 1200; DDC2B
• Hot pluggable – add or remove computers without powering down the switch
• Supports Windows and MAC systems

5
System Requirements
Console
DVI monitor compliant with DVI-I specs that can support resolution of KVM switch
USB style mouse
USB style keyboard
Microphone and speakers*
*Must be set of powered speakers
Computer
Available DVI port for video**
Type A USB port
Audio ports
**If computer has VGA port only; you will need to use a DVI to VGA converter
Cables
GCS1762 includes set of 2 cables (6’ long)
GCS1764 includes set of 4 cables (6’ long)

Front View
AUTO SCAN
ON LI N E
SEL ECT ED
USB LINK
CONSOL E
1. Port selection buttons
• Press selection button for less than two (2)
seconds to bring only the KVM focus to the
computer attached to its corresponding port
• Press selection button for longer than two (2)
seconds to bring KVM, Audio, and USB Hub
focus to the computer attached to its
corresponding port.
• Press selection button 1 and 2 simultaneously for
two seconds to start
Auto Scan Mode
.
2. Ports LEDs
The Ports LEDs are built into the port selection
switches. The upper ones are the KVM port LEDs;
the lower ones are the USB LEDs.
KVM LEDs
• Lights DIM ORANGE to indicate that the
computer attached to the corresponding port is
up and running (On Line).
• Lights BRIGHT ORANGE to indicate that the
computer attached to its corresponding port is
the one that has the KVM focus (Selected)
• Flashes to indicate that the computer attached to
its corresponding port is being accessed under
Auto Scan mode.
6
Introduction

USB LED
• Lights GREEN to indicate that the computer
attached to its corresponding port is the one
that has access to the USB Peripherals.
3. USB Console ports
Your USB keyboard and USB mouse plug in here.
7
Introduction

Back View
1. Firmware Upgrade port
The included Firmware Upgrade cable that
transfers the firmware upgrade data from the
administrator’s computer to the GCS1762/
GCS1764 plugs into this connector.
2. USB Hub ports
Plug your USB peripherals (printers, scanners,
etc.) into these ports
3. Console ports
Connect the cables from DVI monitor and
speakers to these ports.
4. CPU ports
The cables included with KVM switch plug into
here and the other end to your computers.
5. Power Jack
The power adapters plugs into this jack.
1
2
3
4
5
8
Introduction

USB KVM Cable
AUTO SCAN
ON LINE
SELECTED
USB LINK
CONSOLE
9
Introduction
Cable
The USB KVM Cables are included in the package.

Before you Begin
1. Make sure that power to all the devices you will be connecting up has been turned off. You must unplug
the power cords of any computers that have the Keyboard Power On function. Otherwise, the switch will
receive power from the computer.
2. To prevent damage to your installation, make sure that all devices on the installation are properly
grounded.
AUTO SCAN
ON LINE
SELECTED
USB LINK
CONSOLE
10
Installation

1. Plug your USB keyboard and USB mouse into their corresponding USB ports located on the KVM’s
front panel.
2. Plug your DVI monitor, microphone, and speaker cables into the Console ports located on the unit’s
rear panel (left-most section labeled “console”).
3. Using one of the included KVM cables, plug the DVI, USB, and Audio connectors into one of the CPU
ports on the KVM
4. Plug the other end of the KVM
cable to the respective ports on
the computer that is part of your
installation.
5. Plug the USB peripherals that
you want to be part of your KVM
setup into the rear USB hub
ports
11
Installation
Setup and Installation

6. Repeat steps 3 and 4 for any other computers
you are connecting
7. Plug the power adapter cable into the switch’s
power jack, then plug the power adapter into
an AC power source
8. Turn on the power to the computers
12
Installation
(Connection for USB Computers)

Hot Plugging
The GCS1762/GCS1764 supports USB hot plugging – components can be removed and added back into
the installation by unplugging their cables from the USB hub ports without the need to shut the unit down.
Powering Off and Restarting
If it becomes necessary to Power Off the KVM unit, before starting it back up you must do the following:
1. Shut down all the computers that are attached to the switch.
2. Unplug power adapter cable from the switch
3. Wait 10 seconds, then plug the switch’s power adapter cable back in.
4. After the switch is up, Power On the computers.
NOTE: If the KVM switch has become unresponsive or shows erratic behavior, it is highly suggested that you unplug all
cables from the KVM (all KVM cables and power cable) and leave the unit disconnected for 30 minutes. After this, plug all the
KVM cables back and power ON the unit.
13
Basic Operation

Port ID Numbering
Each CPU port on the GCS1762/GCS1764 switch is assigned a port number (1 or 2 for GCS1762; 1 to 4 for
GCS1764). The port numbers are marked on the rear panel of the switch.
The Port ID of a computer is derived from the CPU port number it is connected to. For example, a computer
connected to CPU port 2 has a Port ID of 2.
The Port ID is used to specify which computer gets the KVM USB peripheral, and audio focus with the
Hotkey port selection method.
Port Switching
There are two ways to access the computers in your KVM setup:
· Manual switching – pressing the push-buttons on the unit’s front panel
· Hotkey switching – entering commands from the keyboard
14
Basice Operation

Manual Switching
1. Press and release a port selection switch to bring the KVM focus to the computer attached to its
corresponding port. The USB and Audio focus does not change; they stay on the port that they’re already
on.
2. Press and hold a port selection switch for more than 2 seconds to bring the KVM, USB, and Audio focus
to the computer attached to its corresponding port
3. Press and hold port selection switches 1 and 2 for more than two seconds to start Auto Scan Mode. Tip:
To stop Auto Scan mode, simply press any of the port selection switches on the KVM.
15
Hotkey Operation

Hotkey Operation
The GCS1762/GCS1764 provides an extensive, easy-to-use, hotkey function that makes it convenient to
control and configure your KVM installation from the keyboard.
NOTE: The table shown next page assumes the use of a PC-compatible keyboard with the
Scroll Lock
key.
If you are using a MAC keyboard (or a keyboard that does not have Scroll Lock key), refer to the section in
the manual “
Alternate Port Switching Keys
” for information on re-configuring the KVM’s hotkeys
PC keyboard
Scroll Lock
16
Hotkey Operation

Port Switching
HOTKEY ACTION
[Scroll Lock] [Scroll Lock] [Enter] Brings the KVM, USB hub, and Audio focus from the current por to the nex port on the
KVM.
[Scroll Lock] [Scroll Lock] [K] [Enter] Brings only the KVM focus from the curren port to the next por on the installation The
USB hub and Audio focus remain where they are.
[Scroll Lock] [Scroll Lock] [U] [Enter] Brings only the USB hub focus from the curren port to the next port. The KVM and
audio focus remain where they are.
[Scroll Lock] [Scroll Lock] [S] [Enter] Brings only the audio focus form the current por to the next port. The KVM and USB
hub focus remain where they are.
[Scroll Lock] [Scroll Lock [n] [Enter] Brings the KVM, USB hub, and audio focus to the computer attached to the port
corresponding to the specified Port ID.
[Scroll Lock] [Scroll Lock [n] [K] [Enter] Brings only the KVM focus to the computer attached to the specified port. The USB hub
and audio focus remain where they are.
[Scroll Lock] [Scroll Lock [n] [U] [Enter] Brings only the USB hub focus to the computer attached to the specified port. The KVM
and audio focus remain where they are.
[Scroll Lock] [Scroll Lock] [n] [S] [Enter] Brings only the audio focus to the computer attached to the specified port. The KVM
and USB hub focus remain where they are.
[Scroll Lock] [Scroll Lock [n] [K] [U] [Enter] Brings the KVM and USB hub focus to the computer attached to the specified port. The
audio focus remains where i is.
[Scroll Lock] [Scroll Lock [n] [K] [S] [Enter] Brings the KVM and audio focus to the computer attached to the specified port The
USB hub focus remains where it is.
[Scroll Lock] [Scroll Lock [n] [U] [S] [Enter] Brings the USB hub and audio focus to the computer attached to the specified port.
The KVM focus remains where i is.
t
t
17
Hotkey Operation
Note: The n stands for the computer’s Port ID number (1, 2, 3, or 4). Replace the n with the appropriate
Port ID when entering hotkey combinations.

18
OSD Operation
Auto Scanning
Hotkey Operation
Hotkey Action
[Scroll Lock] [ Scroll Lock] [A] [Enter] Starts Auto Scan The KVM focus cycles from port to por a 5 second intervals.
[Scroll Lock] [ Scroll Lock] [A] [n] [Enter]
Starts Auto Scan The KVM focus cycles from port to por at n second intervals The
value for n can be 1 to 99.
Note:
• While Auto Scan is active, ordinary keyboard and mouse functions are suspended – only Auto Scan
mode compliant keystrokes and mouse clicks can be entered. You must exit Auto Scan mode to regain
normal console control.
• Although the video focus switches from port to port, the keyboard, mouse, and USB focus doesn’t switch.
/