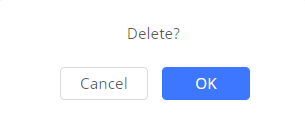
then Click on the button to perform the action.
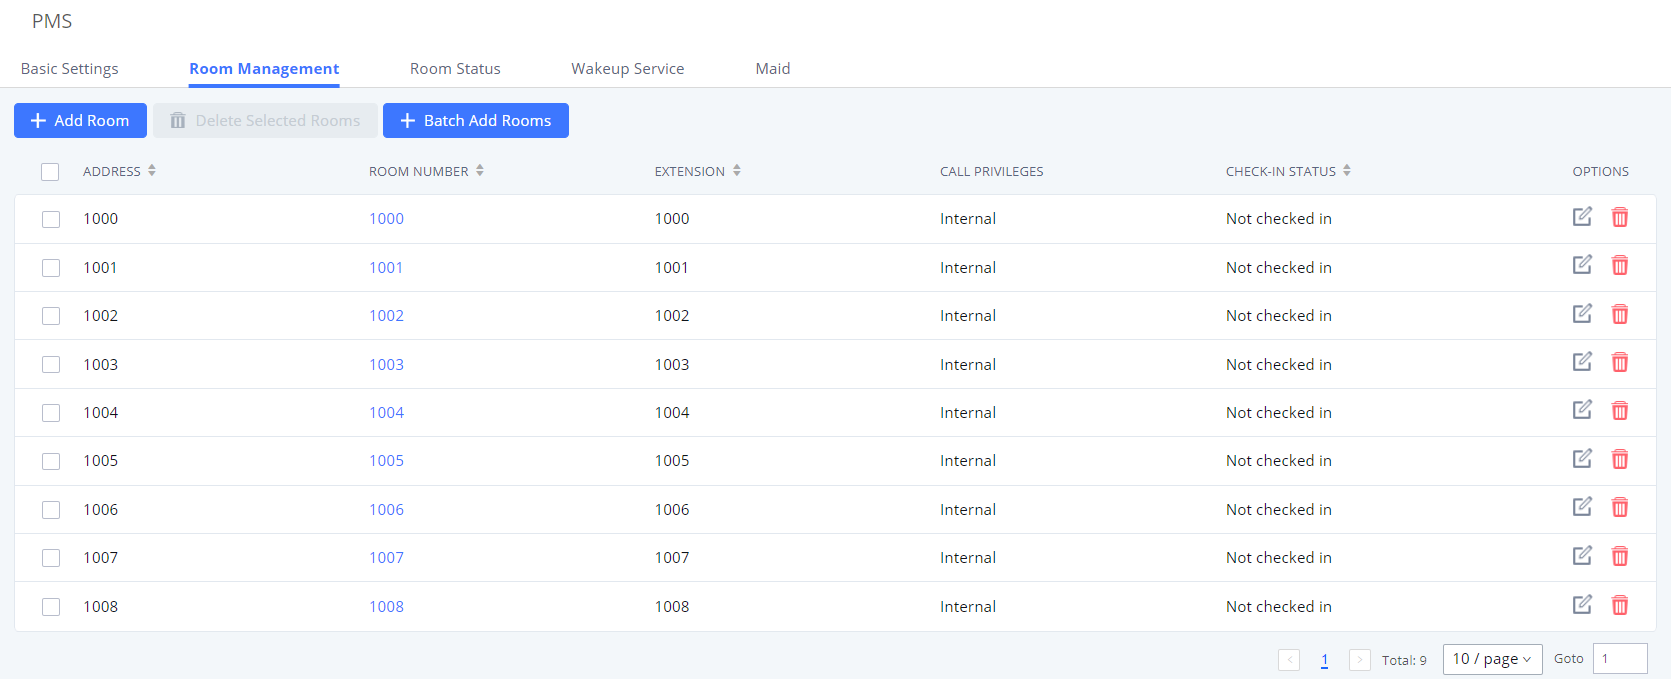
To delete all rooms, select all available rooms then click
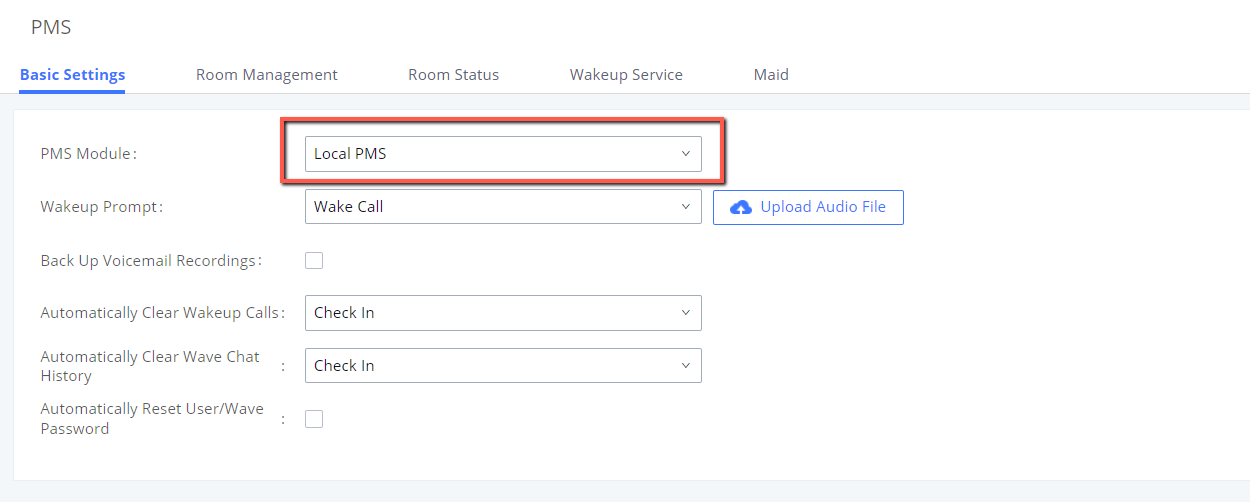
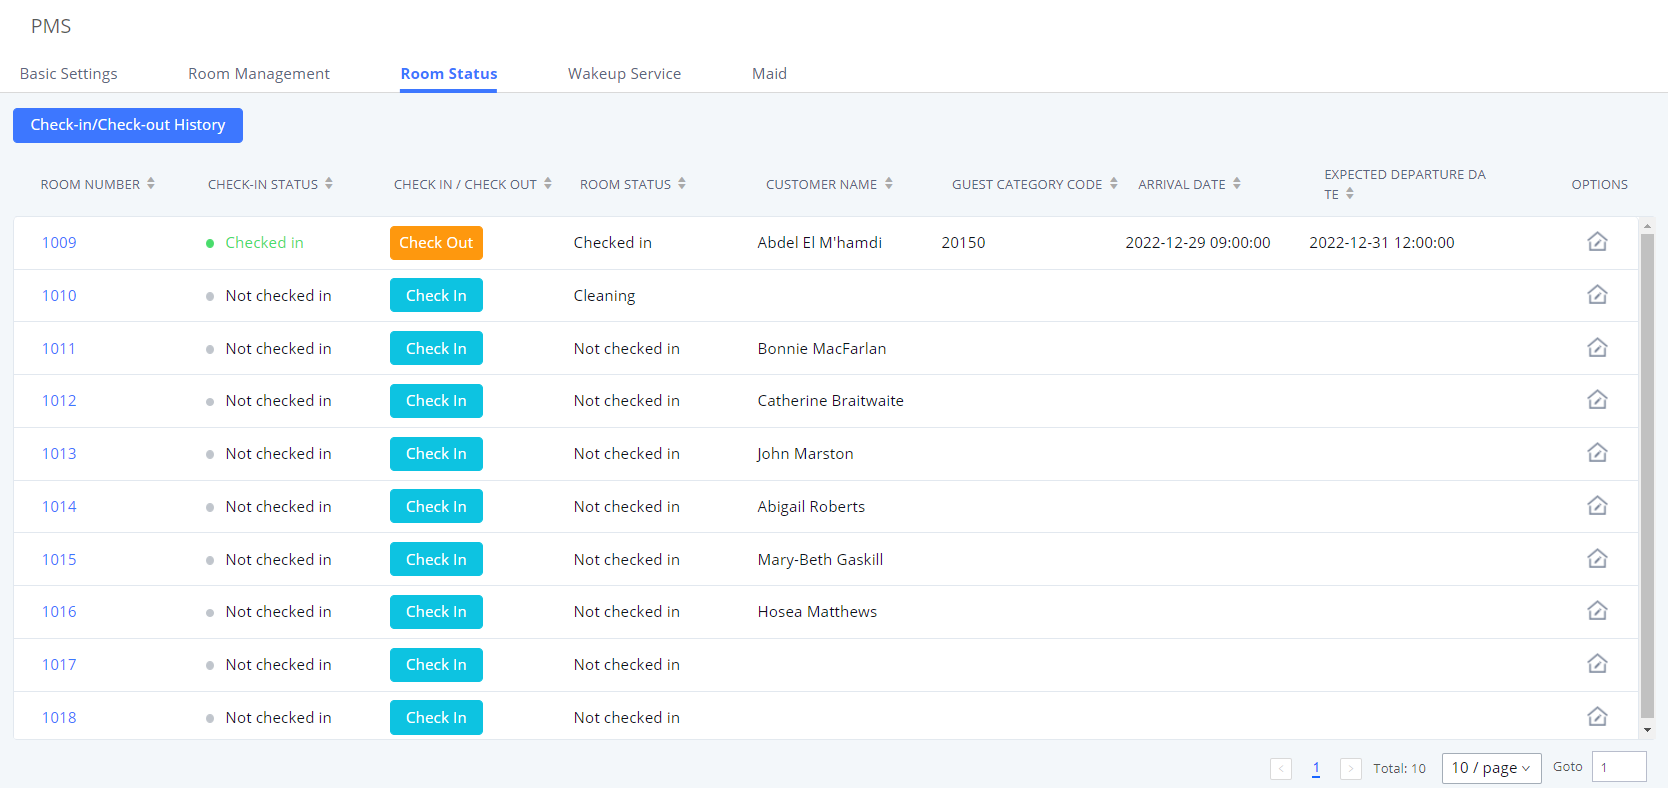
Room Status
Once the rooms are created, they will all be displayed in the Room status section with the status being either Check-out or
Check-in, The attributes that are displayed are :
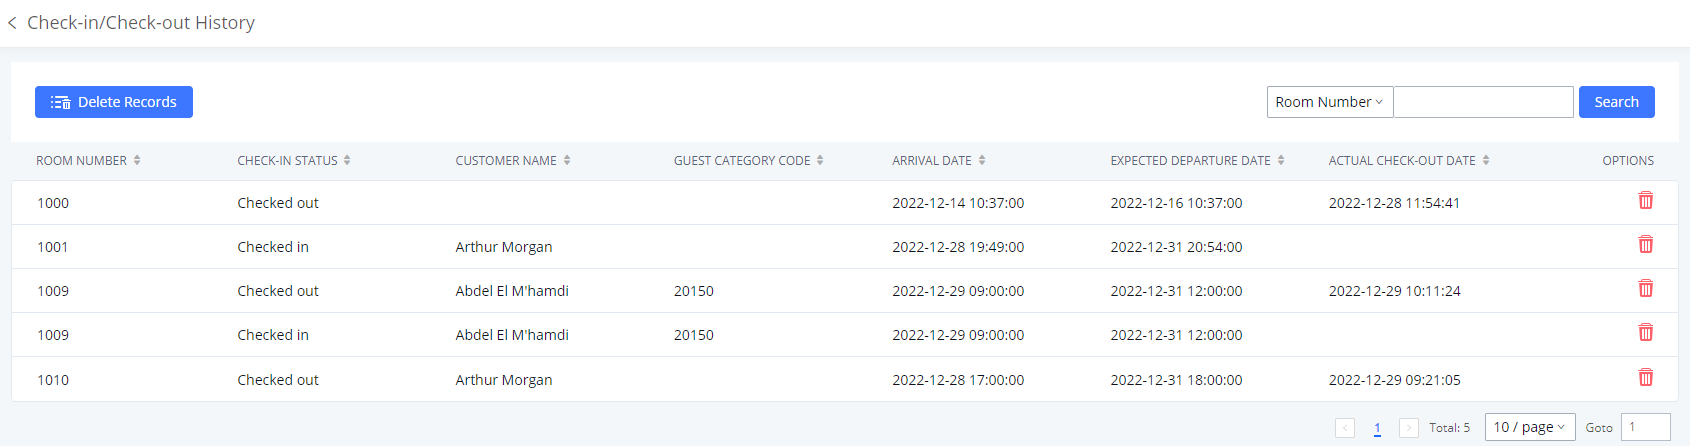
Room Number: Displays the Room Number.
Check-in status: Displays Check-in Status, either Checked-in or Not Checked-in.
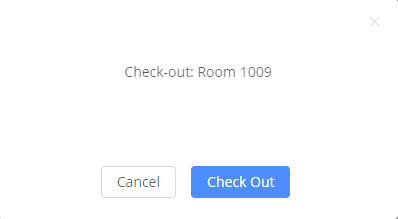
Check-in / Check-out: Changes the Check-in state of the room.
Room Status: Displays the current Room Status of the room, it can be set to Available, Cleaning, Repairing, Cleaned,
Room dirty, or Room closed, this gives the hotel staff a global view of the current state of all Property Rooms.
Customer name: Displays the Customer’s first and last name.
Guest Category Code: Displays the Guest Category code, Guest codes are individualized to residents so they can be
issued to their visitors.
Arrival date: Displays the Customer’s Arrival date.
Expected departure date: Displays the Customer’s Expected departure date.
Options: By clicking the icon you can configure other hidden attributes related to the Room occupation.
Room Status
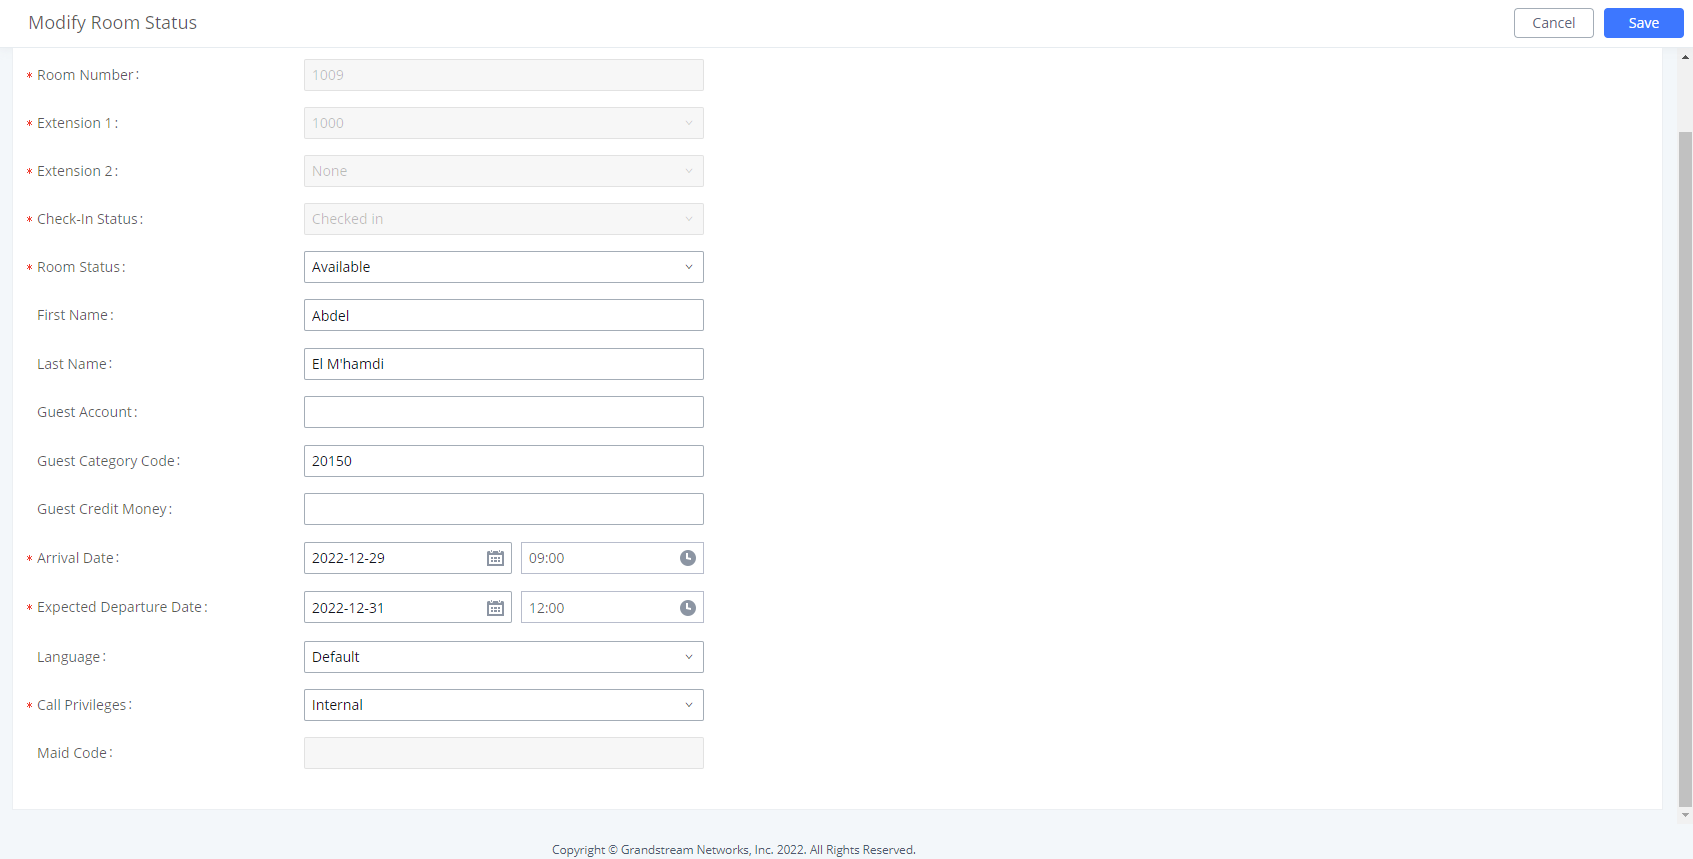
Modify Room Status
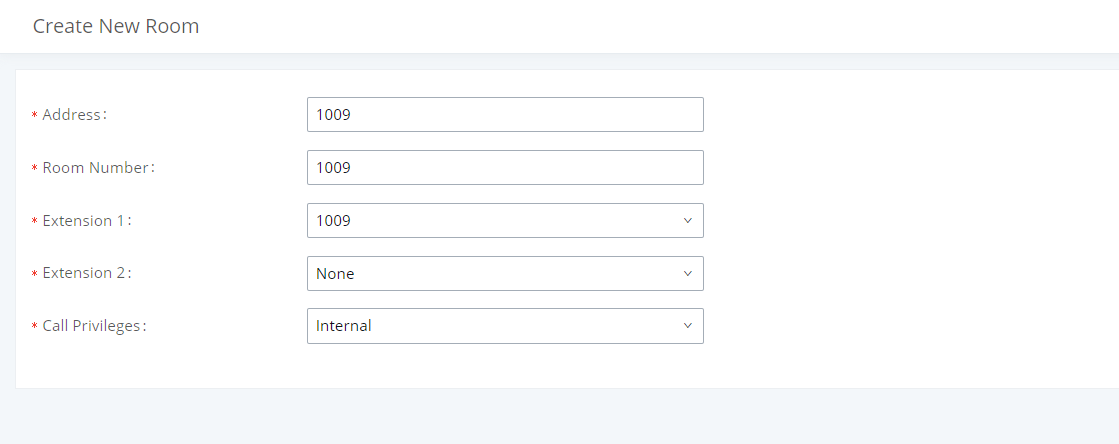
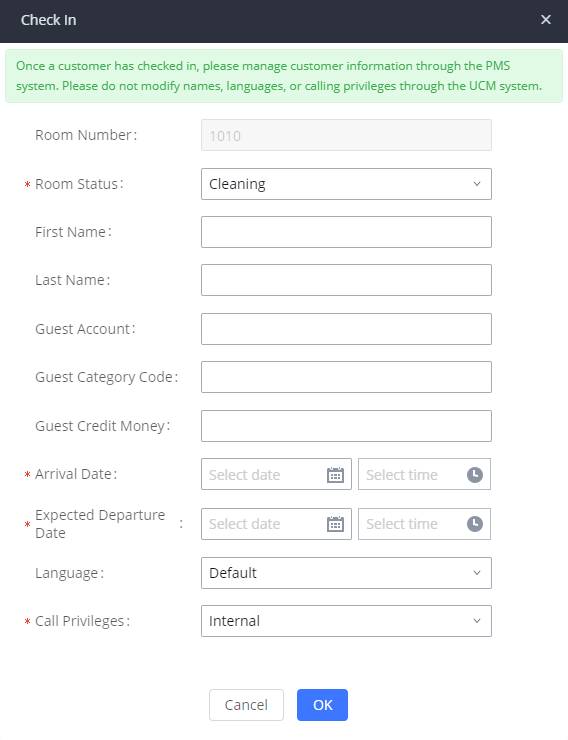
Once the room is created, you can configure additional attributes that are not displayed on the main page, to do that :
1. Click the Edit options Icon
2. the mandatory fields with the red star next to them will be already set since a Room status can not be marked as
Checked-in if these attributes are not defined.
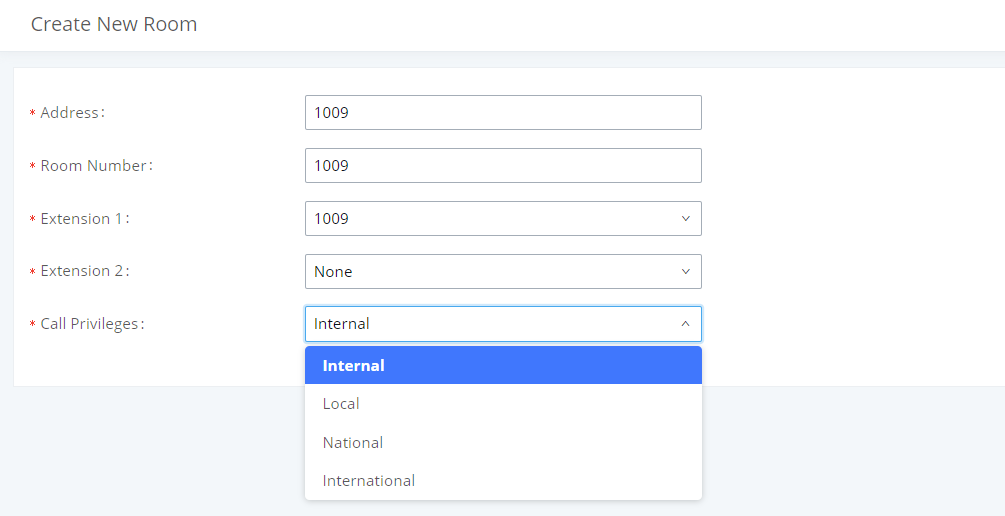
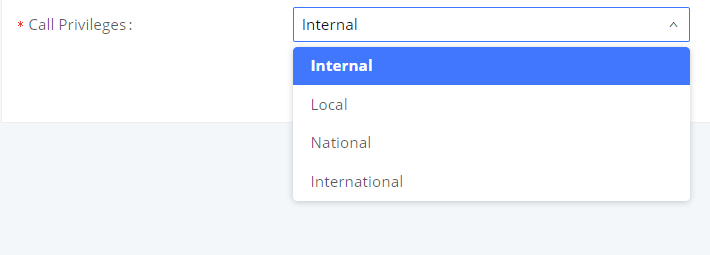
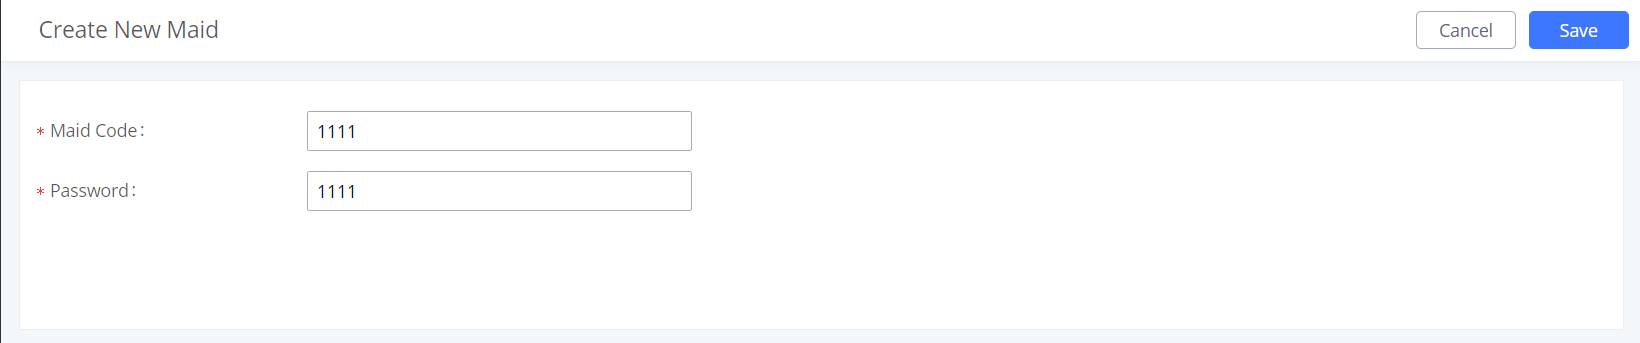
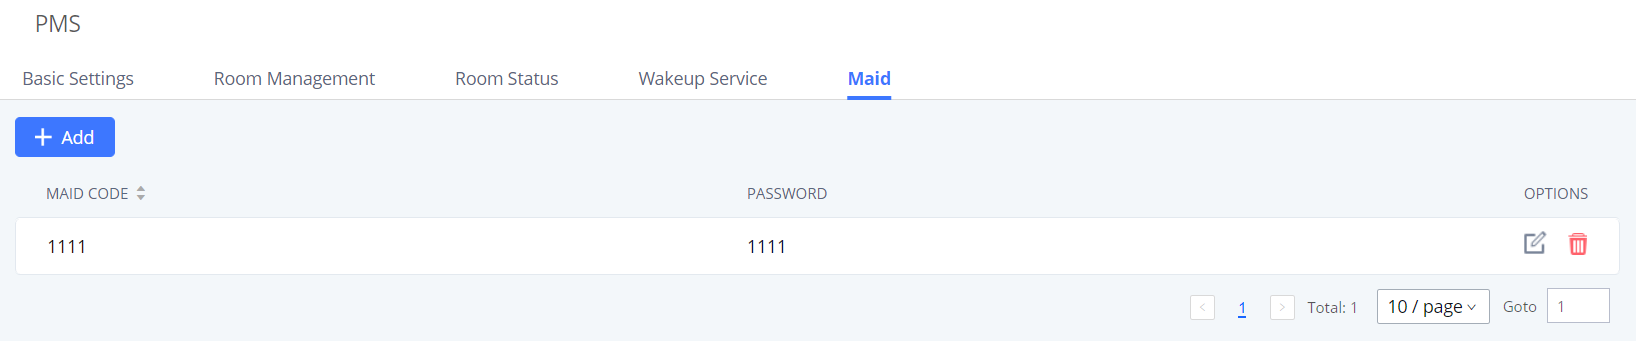
3. Define additional attributes such as Guest account, Guest Credit Money, Guest’s Language, Call privileges ( Set to internal
by Default ), and the Maid code that is defined on the Maid service tab.


