Page is loading ...

2 In 1 Shower System
Sistema de ducha 2 en 1
Instruction Manual
Manual de Instrucciones
Models:
JP-120 and NML-659 Combo
TRS-523 and TRS-553 Combo
Modelos:
JP-120 y NML-659 Combinado
TRS-523 y TRS-223 Combinado
Actual product may not match that shown.
El producto real puede ser diferente del
modelo que se muestra.
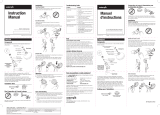
COMPONENTS
Your showerhead comes with the respective
hardware set shown below.
Waterpik
®
brand showerheads are equipped with an
OptiFlow
®
regulator that limits maximum water
flow to 2.5 gallons per minute at 80 psi as
mandated by U.S. federal law.
Diverter
COMBO SYSTEM INSTALLATION INSTRUCTIONS
1) Remove old showerhead from shower arm. Clean shower arm pipe threads thoroughly.
2) Attach diverter valve by threading clockwise onto shower arm with diverter bracket
facing right.
3) Attach wall mount showerhead to front-facing end of diverter.
4) Attach one end of the hose to hand shower and the other end to the bottom of the
diverter.
5) Point all showerheads away from you and turn on the water full force. Check for leaks.
Re-tighten all attachments if necessary.
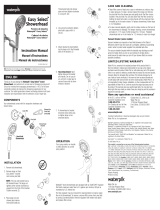
OPERATION
1) Spray pattern is controlled by outside trim ring.
2) To change between the hand-held or
fixed mount spray, turn the tabs on
the diverter clockwise or counter
clockwise.
CARE AND CLEANING
Polish with moist, soft cloth. For heavier cleaning, submerge in household vinegar. If
other cleansers contact product, rinse immediately.
NOTE
Vacuum Breaker
The state of Wisconsin and the City and County of Los Angeles, California, U.S.A.
require vacuum breakers on all hand-held showerheads. Vacuum breakers are required
by certain plumbing codes in order to protect water supplies from potential back-flow.
Installation
The vacuum breaker is located on the end of the hose. Hand tighten the vacuum breaker
clockwise onto the bracket. DO NOT ATTACH VACUUM BREAKER TO SHOWERHEAD.
This would stop the flow of water.
LIMITED LIFETIME WARRANTY
Water Pik, Inc. warrants to the original purchaser of this product that it is free from
defects in material and workmanship for as long as the original purchaser owns this
product. Water Pik will replace any part of the product, which in our opinion is defective,
provided that the product has not been abused, misused, altered or damaged after
purchase. (This includes damage due to use of tools or harsh chemicals). In the event an
item has been discontinued, we will replace with what we deem to be the closest product.
Water Pik is not responsible for labor charges, installation, or other consequential cost.
The responsibility of Water Pik shall not exceed the original purchase price of the product.
This warranty gives you specific legal rights. You may also have other rights that vary
where you reside. Save your receipt, as proof of purchase is required for warranty action.
Have questions or need assistance?
Visit www.waterpik.com
or call for Customer Service at
1-800-525-2774
8:00 a.m. to 4:00 p.m.,
Mountain Standard Time, Monday-Friday
Water Pik, Inc.
1730 East Prospect Road
Fort Collins, CO 80553-0001
FN 20009959-F AC
Waterpik
®
(stylized) is a trademark of Water Pik, Inc. registered in the EU, Switzerland,
Mexico, Canada, and United States.
Waterpik
®
is a trademark of Water Pik, Inc. registered in Argentina, Australia, Austria,
Canada, China, Czech Republic, Hungary, India, Japan, Poland, Russian Federation,
South Africa, Switzerland, Ukraine, and the United States.
OptiFlow
®
is a trademark of Water Pik, Inc. registered in Australia, Canada, the EU,
Korea and the United States.
© 2010 Water Pik, Inc. Printed in China. Made in China.
Filter screen
Flow regulator
Flow regulator
Vacuum breaker
(some models)
Hand-held bracket
DATE: 21 May 2010 CLIENT: Water Pik, Inc.
FILENAME: FN20009959-FAC_ComboInst.indd DESCRIPTION: 2 in 1 Shower System Instruction Manual
FILE TYPE: Adobe InDesign CS4 PREPARED BY: Brian Colon FORM: 20009959-F AC
SIZE FLAT: 11” x 8.5” SIZE FOLDED: 3.6875” x 4.25” FOLDS: Indicated.
DIELINE: N/A INK: Black
NOTES:
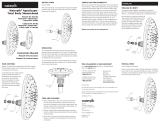
TROUBLESHOOTING GUIDE
Problem Solution
No water flow from installed
shower head:
a Confirm previous shower washer is not in the
j-pipe.
b Confirm the hose is properly installed, try
switching ends.
c Confirm there is only one washer in the pivot
ball.
Low water pressure or
missing spray patterns
a Clean shower head in vinegar/water solution.
(See care section).
b Clean screen and flow regulator.
Leaking at pipe pivot ball
connection:
a Confirm one single washer is seated on top of
the screen.
b Grate bar of soap across the j-pipe threads to
act as a sealant.
Showerhead and/or bracket
stiff to change angle
a Immerse pivot ball and large nut of the bracket
in hot water or use a blow dryer for several
minutes and then use a towel to loosen the
large nut.
For Fixed Mount: install FM shower head to
provide additional leverage to change angle of
spray. (Contact Waterpik for further assistance).
/


