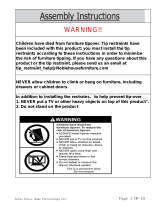
WARNING!!
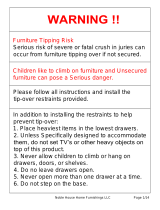
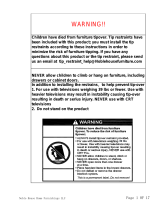
Furniture Tipping Risk.
Serious risk of severe or fatal crush injuries can occur from
furniture tipping over if not secured.
Children like to climb on furniture and Unsecured furniture can
pose a serious danger.
Please follow all instructions and install the tip-over restraints
provided.
In addition to installing the restraints, to help prevent tip-over:
1. Unless specifically designed to accommodate, do not set TV’
s or other heavy objects on top of this product.
2. Never allow children to climb or hang on the shelves.
3. Do not step on the Bookshelf base.
Noble House Home Furnishings LLC. 1 OF 11

Label Picture Description QTY
AWooden Shelf 4
BLeft Frame 1
CRight Frame 1
D"X" Iron Stretcher 1
Caution : You must read this before you proceed
NOTE: It is recommended that you have a partner to assist during the entire assembly process.
Bookcase
Noble House Home Furnishings LLC. 2 OF 11

Label Picture Description QTY
①Bolt (M6*15mm) 22
②Allen Key (M6mm) 1
③Flat Washer 20
④
Screws (5cm Self
Tapping)
2
⑤L-shape Metal
Brackets 2
⑥Cabinet Restraint Strap 2
⑦
Screwdriver (Not
provided)
1
⑧
Power Drill (Not
provided)
1
⑨Plastic anchor 2
⑩
Hammer (not provided) 1
Cabinet Restraint Device Hardware
Before
Beginning
Assembly:
Noble House Home Furnishings LLC. 3 OF 11

Overview
This Bookcase has multiple parts and may require up to 30 minutes to
assemble. To give you an overview of the Bookcase parts, the above picture
is to help you put the various parts into perspective. Please read through the
instructions herebelow to familiarise the parts and steps before assembly.
Step 1
Wooden Shelf(A)
Right Frame(C)
Left Frame(B)
"X" Iron
Stretcher(D)
FRONT FACING
Noble House Home Furnishings LLC. 4 OF 11

Open the carton and place all parts onto a clean, non-marring surface.
Place the Right Frame(C) on it's side as shown.
Attach Wooden Shelf(A) first to Right Frame(C), with pre-attached nut is
upward, using Bolts(①) with Allen Key(②).
Only do not fully tighten the Bolts.
Attach Left Frame(B), with pre-attached nut is upwards, using Bolts(①) with
Allen Key(②).
Only loosely tighten the Bolts.
Step 2
Step 3
Place the Bookcase face down as shown.Repeat the process from Step 2 to
attach the remaining Wooden Shelves.
Only loosely tighten the Bolts.
Noble House Home Furnishings LLC. 5 OF 11

Repeat the process from Step 3 to attach the remaining Wooden Shelves.
Only loosely tighten the Bolts.
Step 5
Step 4
Rotate the "X" Iron Stretcher(D) to the required position as shown.
Attach "X" Iron Stretcher(D) to Right Frame(C)&Left Frame (b) using Bolt(①)
with Allen Key(②).
Only loosely tighten the Bolts.
Step 6
Noble House Home Furnishings LLC. 6 OF 11

Tighten all Bolts,And Stand the bookcase up as shown.Then Check for
stability.
DO NOT fully tighten a BOLT in one go and then move on to the next.
Rather, in a sequential manner, gradually tighten each Bolt until all Bolts are
evenly secured. This methodology will ensure maximum evenness once all
Bolts are fully tightened.
Note: This step is done better with the assistance of a second adult.
Your Bookcase is ready for use.
This Bookcase can only be used on a flat, level surface.
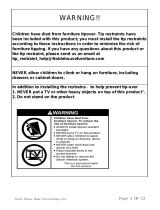
! WARNING
Serious or fatal crushing injuries can occur from tipping
furniture.
To help prevent tip-over: ALWAYS secure this furniture to the
wall using Cabinet Restraint Device.
See product instructions for more ways to help prevent
furniture tip-over.
Step 7
Noble House Home Furnishings LLC. 7 OF 11

Usage For Cabinet Restraint Device:
For Cabinet against wall,fix 2pcs L-Shape Metal Brackets(⑤) on wall and
2pcs L-Shape Metal Brackets(⑤) on product,use Cabinet Restraint Strap(⑥)
to connect the L-Shape Metal Bracket(⑤) on wall and product. Find details
as below:
Firstly, turn back the bookcase outwards as shown above.
Step 8
⑩
⑧
⑧⑦④⑤⑨
Step8.2
Step8.1
50‘’
⑨
Noble House Home Furnishings LLC. 8 OF 11

Step 9
8.1) Use Power Drill(⑧) Drill two mounting positions on wall at same height,
bury Plastic Anchor(⑨) into the mounting position with a hammer(⑩)
(Caution: The distance from Brackets to ground should be 50")
8.2) Attach Metal Brackets(⑤) to Plastic anchor(⑨)using Screws(④) with
Screwdriver(⑦).
Note: The Metal Brackets need to be secured to solid, load bearing surface.
Please use a Stud Finder(not supplied) if needed to locate the Wall Frame.
A: Firstly, turn back the bookcase outwards as shown above.
Then fix one L-Shape Metal Bracket (⑤) on the marked place on the back of
bookcase by the Screw(5cm Self Tapping)(④) . The mark will be different
based on products.
Repeat this step to fix another L-Shape Metal Bracket(⑤) on product, as
shown above.
Noble House Home Furnishings LLC. 9 OF 11

B:Find out the screw mounting positions on the wall. First, mark the point at
same height as L-shaped Metal Bracket (⑤) on product. You can find these
same points in two ways as below:
1.Move the Bookcase back to the wall ,make these points on the wall and
produtc are at same height
2.Measure the height of the L-Shape Matel Bracket on the walll by ruler
,keep them are accurately and same height on the bookcase.
Step 11
C: Move the bookcase against the wall. Then pull the Cabinet Restraint
Strap(⑥) through two L-Shape Metal Brackets(⑤) one by one, lock tight the
Cabinet Restraint Strap(⑥), as shown above.
Bookcase Restraint Device is installed and bookcase is ready for use.
This Bookcase can only be used on a flat, level surface.
Step 10
Noble House Home Furnishings LLC. 10 OF 11

Noble House Home Furnishings LLC. 11 OF 11
/
