Page is loading ...

INSTALLATION INSTRUCTIONS
Product No.
33022
75144
87490
SMALL PARTS
PACKAGE 36573
PLYMOUTH, MI
WARNING: DO NOT LUBRICATE THREADS, BOLT FAILURE MAY
OCCUR DUE TO OVER TIGHTENING.
WARNING: DO NOT DRILL OR WELD TO THIS HITCH.
IMPORTANT NOTES
USE ONLY Towing Products SUPPLIED OR APPROVED BOLTS,
LOCKNUTS, AND WASHERS TO INSTALL THIS HITCH
(OVER)
TOYOTA T100 PICKUP
2WD & 4WD
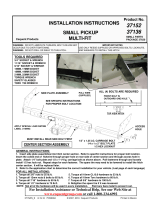
1. All trucks, remove the two inner bolts along the bottom of the bumper using an allen wrench.
2. 4x4 trucks, Remove the four (2 each side) 12mm bolts that secure the frame reinforcement to the frame. This is
inside the frame - above the leaf spring.
3. Install the frame brackets (A) and (B) with the flanges pointing outward. Position the brackets over the holes where
the hardware was removed. Install bolt (D), lock washer (H), serrated washers (J), and nut (I). On 4x4 trucks, use
the existing nuts in the reinforcement brackets. On 2wd trucks, use the existing nut in the frame. When you have
finished installing this hitch on a 4x4 truck, there will be extra nuts and washers remaining in the parts bag.
N33022_B 3-17-08 PCN10616 © 2002, 2003 TOWING PRODUCTS Printed in México
(J) SERRATED WASHER
(I) NUT
(J) SERRATED WASHER
(D) M12 X 1.25 X 35mm BOLT
(H) HELICAL LOCK WASHER
(E) 3/8-16 X 1-1/4 LG. BOLT
(F) 3/8 HELICAL LOCK WASHER
(L) 3/8 SERRATED WASHER
(A) LEFT FRAME BRACKET
(B) RIGHT FRAME BRACKET
TOOLS REQUIRED
9/16" SOCKET
18mm WRENCH
7/32" ALLEN WRENCH
TORQUE WRENCH
(C) CENTER SECTION
NOTE: FASTENERS TYPICAL
BOTH SIDES
(K) BUMPER BAR
(H) HELICAL LOCK WASHER
(D) M12 X 1.25 X 35mm BOLT
(I) NUT
TWO WHEEL DRIVE
ATTACHMENT HOLES
ATTACHMENT HOLES
FOUR WHEEL DRIVE

Towing Products warrants its Hitches, custom Hitch Receivers, and Sway Controls from date of purchase against defects in material and
workmanship under normal use and service, ordinary wear excepted, for the ownership life of the original consumer purchaser. Towing Products
will replace FREE OF CHARGE any part which proves defective in material or workmanship when presented to any Towing Products dealer,
Towing Products Warehouse, or returned to factory, TRANSPORTATION CHARGES PREPAID, at the address below. THIS WARRANTY IS
LIMITED TO DEFECTIVE PARTS REPLACEMENT ONLY. LABOR CHARGES AND/OR DAMAGE INCURRED IN INSTALLATION OR
REPLACEMENT AS WELL AS INCIDENTAL AND CONSEQUENTIAL DAMAGES CONNECTED THEREWITH ARE EXCLUDED. Some states do
not allow the exclusion or limitation of incidental or consequential damages, so the above limitation or exclusion may not apply to you. Any damage
to the Hitch, Custom Hitch receiver or Sway Control as a result of misuse, abuse, neglect, accident, improper installation, or any use violative of
instructions furnished by Towing Products Products, WILL VOID THE WARRANTY.
This warranty gives you specific legal rights, and you may also have other rights which vary from state to state. In the event of a problem
with warranty service or performance, you may be able to go to a small claims court, a state court, or a federal district court.
LIMITED WARRANTY
This product complies with safety specification and requirements for the State of New York and VESC regulation V-5 for connecting devices and
towing systems. Weight distributing hitch rating is 7000 lb max gross trailer weight and 700 lb max tongue weight. Weight carrying hitch rating is
5000 lb max gross trailer weight and 500 lb max tongue weight. Consult vehicle owner’s manual for towing recommendations and limitations.
4. Position the center section (C) between the frame brackets (A) and (B). Adjust the center section (C) so that the
rear end of the hitch is just below the bumper. Install bolts (D) through the center section (C) and the frame
brackets (A) and (B). Install lock washers (H) and nuts (I) on the bolts.
5. Adjust the hitch so that the holes in bar (K), at the end of the hitch, are under the bolt holes in the bottom of the
bumper. Install bolts (E) with lock washers (F) and serrated washers (L) into the bottom of the bumper.
6. First, torque the 3/8" bolts (E) to 35 ft•lb. Next, torque the four 12mm nuts (I) to the center section (C). Torque
these nuts to 75 ft•lb. Finally, torque the six 12mm bolts (D) in the frame brackets (A) and (B). Torque these bolts
to 75 ft•lb.
Towing Products
PO Box 8102
47774 Anchor Ct.
Plymouth, MI 48170
Towing Products
2351 Winston Park Drive
Oakville, Ontario
Canada L6H6R7
N33022_B 3-17-08 PCN10616 © 2002, 2003 TOWING PRODUCTS Printed in México
/


