Page is loading ...

Protect yourself and others by observing all safety information, warnings, and cautions. Failure to
comply with instructions could result in personal injury and/or damage to product or property.
Please retain instructions for future reference.
Model: RAFNG
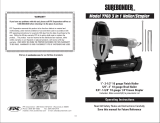
50MM FINISHING NAILER
• •


NAIL DISCHARGE
NOSE

SAFETY WARNING!!!
READ AND UNDERSTAND ALL OF THE OPERATING INSTRUCTIONS, SAFETY
PRECAUTIONS AND WARNINGS IN THE INSTRUCTION MANUAL BEFORE OPERATING OR
MAINTAINING THIS NAILER.
Most accidents that result from the operation and maintenance of Nailers are caused by the failure to observe basic
safety rules or precautions. An accident can often be avoided by recognizing a potentially hazardous situation before it
occurs, and by observing appropriate safety procedures.
Basic safety precautions are outlined in the “SAFETY” section of this Instruction Manual and in the sections which
contain the operation and maintenance instructions.
Hazards that must be avoided to prevent bodily injury or machine damage are identied by DANGERS and
WARNINGS on the Nailer and in this Instruction Manual.
EMPLOYERS RESPONSIBILITY
1. Ensure that this INSTRUCTION MANUAL is available to operators and personnel performing maintenance.
2. Ensure that Nailers are used only when operators and others in work area are wearing protective equipment.
3. Enforce the use of protective equipment by operators and others in work area.
4. Keep Nailers in safe working order.
5. Maintain Nailers properly.
6. Ensure that Nailers that require repair are not used before they are repair.
SAVE THIS MANUAL AND KEEP IT AVAILABLE FOR OTHERS!
SPECIFICATIONS
Nail capacity (Qty): 90 pcs
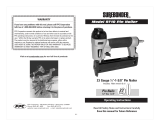
Nail size: 20mm (3/4”) to 50mm (2”) 16 Gauge nishing nails
Recommended operating pressure: 4-7 bar (60 -100 PSI)
Maximum pressure: 8.3 bar (120 PSI)
Air inlet: Nitto style connector
Dimensions: 80 x 280 x 303mm
Weight: 2.3 kg
SAFETY
1. ALWAYS WEAR EYE PROTECTION. When operating the Nailer, always wear eye protection, and
make sure others in work area wear eye protection. Eye protection must conform to the requirements of
Australian Standards and provide protection against ying particles both from the front and side. The employer
must enforce the use of eye protection by the nailer operator and others in work area.
2. STAY ALERT. Watch what you are doing, and use common sense when operating a power Nailer. Do not
use Nailer while tired or under the inuence of drugs, alcohol, or medication, A moment of inattention while
operating power Nailers may result in serious personal injury.
3. NEVER USE BOTTLED GASES. Never use oxygen, combustible gases or any other bottled gases as
a power source for the nailer. Use of the above gases is dangerous, as the Nailer will explode. Use only clean,
dry, regulated compressed air.

4. DO NOT EXCEED 120 PSI 8.3 BAR. Do not exceed maximum recommended air pressure 120 psi (8.3
bar 8.5 kgf/cm2). Never connect the Nailer to pressure which potentially exceeds 200 psi (13.7 bar 14 kgf/cm2)
as the nailer can burst.
5. NEVER POINT NAILER TOWARD YOURSELF OR ANYONE ELSE. Always assume the Nailer
contains fasteners. Never point the Nailer toward yourself or anyone else, whether it contains fasteners or not.
6. NEVER CARRY WITH FINGER ON TRIGGER.
A. Remove nger from trigger when not driving fasteners.
B. Never carry the Nailer with nger on trigger since you could drive a fastener unintentionally and injure
yourself. If fasteners are mistakenly driven, it can lead to severe injuries.
C. Never engage in horseplay with the Nailer. Respect the Nailer as a working implement.
7. ALWAYS PICK UP THE NAILER BY THE HANDLE ONLY. Do not pick up the nailer by the maga-
zine, hose or the nose area in case fasterers are accidentally driven.
8. ALWAYS WEAR EAR AND HEAD PROTECTOR. Always wear ear protector to protect your ears
from loud noise. Always wear head protector to protect your head from ying objects.
9. STORE NAILER PROPERLY. When not in use, the Nailer should be stored in a dry place. Keep out of
reach of children. Lock the storage area.
10. KEEP WORK AREA CLEAN. Cluttered areas invite injuries. Clear all work areas of unnecessary Nailers,
debris, furniture, etc.
11. NEVER USE IN PRESENCE OF FLAMMABLE LIQUIDS OR GASES. The Nailer produces
sparks during operation. Never use the Nailer in sites containing lacquer, paint, benzenes, thinner, gasoline,
gases, adhesive agents, and other materials which are combustible or explosive.
12. KEEP VISITORS AWAY. Do not let visitors handle the nailer. All visitors should be kept safely away from
work area.
13. DRESS PROPERLY. Do not wear loose clothing or jewellery as they can be caught in moving parts. Gloves
and nonskid footwear are recommended when working outdoors. Wear protective hair covering to contain long
hair.
14. NEVER USE NON RELIEVING COUPLER ON NAILER. If a non relieving coupler is used on the
Nailer, the Nailer can remain charged with air after disconnecting and thus will be able to drive a fastener even
after disconnecting. The Nailer and air hose must have a hose coupling such that all pressure is removed from
the Nailer when the coupling joint is disconnected.
15. CHECK PUSH LEVER BEFORE USE. Make sure the push lever operates properly. ( The push lever
may be called “safety”. ) Never use the Nailer unless the push lever is operating properly, otherwise the Nailer
could drive a fastener unexpectedly. Do not tamper with or remove the push lever, otherwise the push lever
becomes inoperable.
16. KEEP ALL SCREWS AND COVERS TIGHTLY IN PLACE. Keep all screws and covers tightly
mounted. Check their condition periodically Never use the Nailer if parts are missing or damaged or loose.
17. DO NOT LOAD FASTENERS WITH TRIGGER OR PUSH LEVER DEPRESSED. When load-
ing fasteners into the Nailer or when connecting the air hose,
1) Do not depress the trigger;
2) Do not depress the push lever; and
3) keep the nailer pointed downward.
18. KEEP HANDS AND FEET AWAY FROM NOSE (DISCHARGE AREA) DURING USE. Never
place your hands or feet closer than 8 inches - 200 mm from the nose . A serious inquiry can result if the fasten-
ers are deected by the work piece, or are driven away from the point of entry.
19. PLACE NAILER PROPERLY ON WORK PIECE. Do not drive fasteners on top of other fasteners or
with the Nailer at too steep of an angle; the fasteners can ricochet and cause an injury.
20. TAKE CARE OF DOUBLE FIRE DUE TO RECOIL. If the push lever is unintentionally allowed to
re-contact the work piece following recoil, an unwanted fastener will be driven. In order to avoid this undesirable
double re.
1) Do not push the Nailer on the work piece with strong force;
2) Take the Nailer completely away from the work piece using recoil, and keep the push lever away
from the work piece until the next desirable shot ; and
3) Pull the trigger and release it QUICKLY when performing intermittent operation (trigger re)
SAFETY ... CONT

21. DO NOT DRIVE FASTENERS INTO THIN BOARDS OR NEAR CORNERS AND EDGES
OF WORK PIECE. The fasteners can be driven through or away from the work piece and hit someone.
22. NEVER DRIVE FASTENERS FROM BOTH SIDES OF A WALL AT THE SAME TIME. The
fasteners can be driven into and through the wall and hit a person on the opposite side.
23. CHECK FOR LIVE WIRES. Avoid the risk of severe electrical shock by checking for live electrical wires
that may be hidden by walls, oors or ceilings. Turn off the breaker switch to ensure there are no live wires.
24. NEVER CARRY NAILER BY HOSE. Never carry the nailer by the air hose or pull the hose to move the
nailer or a compressor. Keep hoses away from heat, oil and sharp edges. Replace any hose that is damaged,
weak or worn. Personal injury or Nailer damage could occur.
25. DO NOT OVERREACH. Keep proper footing and balance at all times.
26. NEVER USE NAILER WHICH IS DEFECTIVE OR OPERATING ABNORMALLY. If the nailer
appears to be operating unusually, making strange noises, or otherwise appears defective, stop using it
immediately.
27. DO NOT DISCONNECT AIR HOSE FROM NAILER WITH FINGER ON TRIGGER. The nailer
can re when re-connected to an air supply.
28. DISCONNECT AIR HOSE FROM NAILER.
WHEN Doing maintenance, inspecting, clearing a jam, it is not in use, leaving work area, or moving it to another
location. Never attempt to clear a jam or repair the Nailer unless you have disconnected air hose from the
Nailer and removed all remaining fasteners from the Nailer. The nailer should never be left unattended since
people who are not familiar with the Nailer might handle it and injure themselves.
29. HANDLE NAILER CORRECTLY. Operate the Nailer according to this Manual. Never allow the Nailer to
be operated by children, individuals unfamiliar with its operation or unauthorized personnel.
30. NEVER USE NAILER FOR APPLICATIONS OTHER THAN WHAT IT WAS DESIGNED.
Unpredictable safety issues can result.
31. HANDLE NAILER CAREFULLY. Because of high air pressure in the nailer, cracks in the surface are
dangerous. To avoid this, do not drop the Nailer or strike the Nailer against hard surfaces; and do not scratch or
engrave signs on the Nailer. Handle the nailer carefully.
32. MAINTAIN NAILER WITH CARE. Keep the Nailer clean and lubricated for better and safer performance.
Ensure all screws correctly tightened. Replace any damaged or worn components. Only appropriate service
personnel should repair the nailer.
33. USE ONLY PARTS, ACCESSORIES OR FASTENERS SUPPLIED OR RECOMMENDED
BY MANUFACTURER. Unauthorized parts, accessories, or fasteners may void your warranty and can
lead to malfunction and resulting injuries.
34. DO NOT MODIFY THE NAILER.
Finishing nailer designed for installing door and window trim and decorative trim, small cabinetwork, nishing work on
panelling.
OPERATING INSTRUCTION
Description
WARNING!: Never free-re the Nailer at high pressure
● Use clean, Dry and Regulated compressed air at 4-7 bar (60-100psi)
● Never exceed maximum and minimum pressure. Too low or too high pressure would cause noise, excessive
wear or misring.
● When connecting air supply always keep hands and body from the nose (nail discharge) area of Nailer.
● A lter-regulator-lubrication is required and should be located as close to Nailer as possible. (See below)
SAFETY ... CONT

WARNING!: Always disconnect the Nailer from the compressed air before loading. When loading the
Nailer always point the Nailer away from yourself and others. Make sure that you are not holding
the Nailer with trigger depressed while loading the Nailer.
Loading fastener and operation
● Disconnect the Nailer from the air supply Grasp the nailer rmly with one hand. Press the latch with your thumb
and pull the magazine back. Insert a strip of fasteners into magazine Keeping it point down.
● Release the latch and pusher, slid the pusher against the nails until it contacts the nails and lock into place. The
Nailer is now ready for use.
● Connect the Nailer to the air supply. Make sure the air pressure is in the correct range denoted in the Technical
Data.
● Then test the driving depth in a sample piece of wood before using. If the fasteners are being driven too far or
not far enough, adjust the regulator to provide less air pressure or more air pressure.
OPERATING INSTRUCTION .....CONT
WARNING!: Never operate the Nailer unless safety nose is contact with work-piece. Do not operate
Nailer without fasteners or damage to Nailer may result.
WARNING!: Never re fasteners into air because fasteners may injury operator or others and
damage to Nailer may result.
MAINTENANCE
WARNING!: Disconnect the Nailer from the air compressor before adjusting, clearing jams, servicing,
maintenance, relocating and when not in use.
Failing to maintain the Nailer can properly will result in a dangerous Nailer!
● Regular lubrication, if your Nailer is used without an in-liner automatic oilier, place 2 or 6 drops of pneumatic
Nailer oil into the air inlet before each work day or after 2 hours of continuous use depending on the
characteristic of work-piece or type of fasteners.
● Air-operated Nailers must be inspected periodically, and worn or broken parts must be replaced to keep the
Nailer operating safely and efciently. Check and change all worn or damaged O-rings, seals, etc. Check all nut
bolts and screws are tight.
● Make regular inspection for free movement of trigger and safety mechanism to assure safe system is complete
and functional: no loose and missing parts, no building or sticking parts.
● Keep magazine and nose (ring area) of Nailer clean and free of any dirt lint or abrasive particles.
● When temperatures are below freezing, Nailers should be kept warm by any convenient, safe method.
● Keep air lter clean. A dirty lter will reduce the air pressure to the Nailer causing a reduction in power and
efciency.
● Be sure all connections in air supply system are sealed to prevent air loss.

TROUBLESHOOTING
WARNING: IF ANY OF THE FOLLOWING SYMPTOMS APPEARS DURING YOUR
OPERATING, STOP USING THE NAILER IMMEDIATELY, OR SERIOUS
PERSONAL INJURY COULD RESULT. Only a qualied persons or an authorized
service centres should perform repairs.
SYMPTOM PROBLEM SOLUTIONS
Air leak near top of Nailer
or in trigger area
1. O-ring in trigger valve are
damage.
1. Check and replace O-ring.
2. Trigger valve head are dam-
age.
2. Check and replace.
3. Trigger valve stem ,seal or
O-ring are damaged.
3. Check and replace trigger valve
stem, seal or O-ring
Air leak near bottom of
Nailer.
1. Loose screws. 1. Tighten screws.
2. Worn or damaged O-rings
or bumper.
2. Check and replace O-rings or
bumper.
Air leak between body and
cylinder cap.
1. Loose screws. 1. Tighten screw.
2. Worn or damaged O-rings
or seals.
2. Check and replace O-rings or
bumper.
Blade driving fastener too
deep.
1. Worn bumper. 1. Replace bumper.
2. Air pressure is too high. 2. Adjust the air pressure.
Nailer does not operate
well: can not drive fastener
or operate sluggishly.
1. Inadequate air supply. 1. Verify adequate air supply.
2. Inadequate lubrication. 2. Place 2 or 6 drops of oil into air
inlet.
3. Worn or damaged O-rings
or seals.
3. Check and replace O-rings or
seal.
4. Exhaust port in cylinder
head is blocked.
4. Replace damaged internal parts.

Nailer skips fasteners. 1.Worn bumper or damaged
spring.
1.Repalce bumper or pusher
spring.
2.Dirt in front plate. 2.Clean drive channel on front
plate.
3.Dirt or damage prevents
fasteners from moving freely
in magazine.
3.Magazine needs to be cleaned.
4.Worn or dry O-ring on pis-
ton or lack of lubrication.
4.O-ring need to be replaced.And
lubricate.
5.Cylinder cover seal leaking. 5.Replace Sealing washer.
Nailer jams. 1.Incorrect or damaged fas-
teners.
1.Change and use correct fas-
tener.
2.Damaged or worn driver
guide.
2.Check and replace the driver.
3.Magazine or nose screw
loose.
3.Tighten the magazine.
4.Magazine is dirty. 4.Clean the magazine.


NOTES

WARRANTY:
Our goods come with guarantees that cannot be excluded under the Australian Consumer
Law. You are entitled to a replacement or refund for a major failure and for compensation for
any other reasonably foreseeable loss or damage. You are also entitled to have the goods
repaired or replaced if the goods fail to be of acceptable quality and the failure does not
amount to a major failure.
This product is guaranteed against faulty materials and workmanship for 12 months from the
date of purchase.
Please retain your receipt as proof of purchase.
If the product is found to be defective within the relevant time period, we will either
replace all defective parts or, at our discretion, replace the unit free of charge.
This warranty will not apply:
(i) where this product has been subjected to misuse, abuse, accident or want of care;
(ii) where this product has been used for a purpose for which it was not designed or is
not suited;
(iii) where the service of this product has been undertaken by a non-authorised person
or company or if non-approved parts have been used;
(iv) where this product has been used for industrial purposes.
Should service become necessary during the warranty period, the purchaser should
contact an Authorised Service Centre or White International In order to obtain warranty service,
the purchaser must present the store receipt showing the name of the retailer and the
date of purchase.
The period of the warranty begins from the original date of purchase, notwithstanding
any subsequent repair or parts replacement.
Purchaser shall be responsible for all transport charges to and from the Authorised
Service Centre.
Damage in transit is not covered by this warranty. The purchaser should remove from
the product any liquids (if applicable) before sending the tool for service or repair.
Any accessories should be packed securely to prevent damage.
Warranty exclusions
Wear parts or service related parts required when performing normal and regular
maintenance of this product are not covered by warranty unless it is found to be defective
by an Authorised Service Centre. These include, but are not limited to:
accessories, bumpers, driver blades, “o” rings, seals, gaskets, air ttings, lubricants, tune-ups, lters.
Distributed in Australia by White International Pty Ltd
PO Box 304 Milperra LPO NSW, 2214
Inquiries phone 1800 251 338
The White International policy is one of continuous improvement and the company reserves the
right to alter designs, colours and speci cations without notice.
/