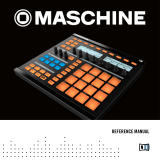
Akai MPC Element User manual

Category
Musical instruments recorders
Type
User manual

This manual is also suitable for

User Guide
English
Manual Version 1.0
2
Table of Contents
Welcome to the MPC .................................................................................................................................. 5
System Requirements and Product Support ..................................................................................... 5
About This Manual ................................................................................................................................ 6
Important Notes..................................................................................................................................... 7
Installation ............................................................................................................................................. 7
MPC Hardware Overview ........................................................................................................................... 9
MPC Element ......................................................................................................................................... 9
Top Panel .......................................................................................................................................... 9
Quick Start ................................................................................................................................................ 12
Starting Up ........................................................................................................................................... 12
Recording a Drum Sequence ............................................................................................................. 12
Organizing Samples and Editing Note Events ................................................................................. 14
Recording a Bass Sequence .............................................................................................................. 15
Creating a Song................................................................................................................................... 17
Exporting the Song ............................................................................................................................. 17
Operation (Software) ................................................................................................................................ 18
General Features ................................................................................................................................. 19
Adjusting the Controls ..................................................................................................................... 19
Program Types ................................................................................................................................ 21
File Browser ..................................................................................................................................... 26
Mode Tab Section ........................................................................................................................... 28
Transport Section ............................................................................................................................ 30
The Grid ........................................................................................................................................... 32
Software Menus ............................................................................................................................... 38
Main Mode............................................................................................................................................ 50
Q-Link Section ................................................................................................................................. 50
Pad Bank Section ............................................................................................................................ 52
Sequence Section ........................................................................................................................... 53
Project Information Section ............................................................................................................. 56
3
Program Edit Mode ............................................................................................................................. 58
Master Section ................................................................................................................................. 59
Simultaneous Play Section (Drum Programs Only) ......................................................................... 59
Mute Target Section (Drum Programs Only) ................................................................................... 60
Keygroup Play Modes Section (Keygroup Programs Only) ............................................................. 60
Key Group Section (Keygroup Program Only) ................................................................................ 61
Edit Layers Section .......................................................................................................................... 62
Filter Section .................................................................................................................................... 65
Pad Play Modes Section (Drum Programs Only) ............................................................................ 67
Velocity Sensitivity Section .............................................................................................................. 68
LFO Section ..................................................................................................................................... 68
Controller Mod Section (Keygroup Program Only) .......................................................................... 69
Pad Insert Effects Section ............................................................................................................... 69
Program Edit Mode for MIDI Programs and Plugin Programs ......................................................... 70
Program Mixer Mode .......................................................................................................................... 71
Levels .............................................................................................................................................. 72
Panning............................................................................................................................................ 72
Mute ................................................................................................................................................. 72
Insert Effects .................................................................................................................................... 72
Next Sequence Mode .......................................................................................................................... 73
Sequence Playlist ............................................................................................................................ 74
Pad Bank Section ............................................................................................................................ 74
Next Sequence Section ................................................................................................................... 75
Project Information Section ............................................................................................................. 75
Sample Record Mode ......................................................................................................................... 76
Waveform Display ........................................................................................................................... 77
Record Control Section ................................................................................................................... 78
Project Information Section ............................................................................................................. 80
4
Sample Edit Mode ............................................................................................................................... 81
Waveform Display ........................................................................................................................... 82
Edit Section...................................................................................................................................... 83
Pad Section ..................................................................................................................................... 84
Settings Section ............................................................................................................................... 85
Process Section ............................................................................................................................... 86
Project Information Section ............................................................................................................. 88
Chop Mode ...................................................................................................................................... 88
Song Mode ........................................................................................................................................... 94
Sequence Playlist Section ............................................................................................................... 95
Pad Bank Section ............................................................................................................................ 96
Song Section ................................................................................................................................... 96
Edit Step Section ............................................................................................................................. 97
Step Section .................................................................................................................................... 97
Project Information Section ............................................................................................................. 97
Pad Mute Mode .................................................................................................................................... 98
Pad Mute ......................................................................................................................................... 98
Pad Group ....................................................................................................................................... 99
Project Information Section ............................................................................................................. 99
Step Sequence Mode ........................................................................................................................ 100
Pad Section ................................................................................................................................... 101
MIDI Control Mode ............................................................................................................................ 102
Effects ................................................................................................................................................ 105
Operation (Plugin) .................................................................................................................................. 106
Differences Between the MPC Essentials Plugin and Standalone Application ............................. 106
Appendix ................................................................................................................................................. 108
Keyboard Shortcuts .......................................................................................................................... 108
Effects and Parameters .................................................................................................................... 110
Glossary ............................................................................................................................................. 142
Trademarks and Licenses ................................................................................................................ 147
5
Welcome to the MPC
Thanks for choosing the MPC!
Fusing Akai Professional's legendary MPC layout and workflow with the power of your computer, MPC
Essentials is an unrivaled instrument for music production.
The essential instrument for computer-based music production, MPC Element brings powerful music-
making capability to your computer in a slimline design that's made to produce. You get cutting-edge
features, including MPC Note Repeat and Swing, along with the all-new MPC Essentials software. With
the included 1GB sound library, MPC Essentials empowers you with the essential sounds of modern
music production, and you can easily import your own sound samples. MPC Essentials can operate
standalone and can also work seamlessly with your current DAW as a plugin. MPC Element comes with
everything you need to make music right away, and, because it operates via standard MIDI, you can also
use MPC Element to control MIDI music software you already have. An 1/8-inch MIDI input and an 1/8-
inch MIDI output are both onboard and 1/8-inch to 5-pin MIDI cables are included.
Welcome to the MPC family.
— The Akai Professional Team
System Requirements and Product Support
For complete system requirements, compatibility information, and product registration, visit the Akai
Professional website: akaiprompc.com.
For additional support, visit akaiprompc.com/support.
6
About This Manual
This manual was written to help you get familiar with the MPC Element hardware and MPC Essentials
software.
To avoid confusion, the terminology in this manual is based on the MPC parameter names. You will find
the various terms explained in the Glossary at the end of this manual.
We also used a uniform set of symbols to show topics of particular interest or significance:
Information: Important or helpful information on a given topic.
Hardware: How to use a software feature with your MPC hardware's controls. Note that these
paragraphs are not the only parts of the manual that mention the MPC hardware.
All buttons, controls, and parameters are highlighted in bold characters throughout the manual.
Examples:
• "Press the Prog Edit button."
• "Turn the Level dial."
Specific settings or values are indicated in italic characters.
Examples:
• The Velocity ranges from 0 to 127.
• Set your Sample Play to One-Shot or Note-On.
Some parts of this manual refer to other relevant sections, which are cited in bold and italic characters.
Examples:
• Read the Important Notes section before proceeding.
• For more information about installing the necessary drivers and software, please see the
Installation section.
7
Important Notes
• Read the included Safety and Warranty Manual before using the MPC hardware.
• Before getting started and connecting devices to the MPC hardware or turning the hardware on/off,
make sure all devices are switched off.
Installation
Before installing the MPC software, make sure your computer meets the system requirements described
at akaiprompc.com. This applies whether you'll use MPC software as a plugin or standalone application.
Windows
®
1. Open the folder where the downloaded .zip file is located.
2. Double-click the file to extract it.
3. Double-click the MPC Essentials installer icon. This launches a special installation program.
4. Follow the on-screen instructions.
Important: After installing the MPC software, you need to unlock the program on your computer.
Please refer to Unlocking MPC Essentials.
Mac
®
OS X
®
1. Open the folder where the downloaded .zip file is located.
2. Double-click the file to extract it.
3. Double-click the MPC Essentials installer icon. This launches a special installation program.
4. Follow the on-screen instructions.
Important: After installing the MPC software, you need to unlock the program on your computer.
Please refer to Unlocking MPC Essentials.
8
Unlocking MPC Essentials
Follow these steps to unlock the MPC software before using it.
1. Connect your MPC hardware to a USB port on your computer.
2. Power on the MPC hardware.
3. Open the MPC software.
4. In the dialogue box that appears, click Unlock Now.
5. Enter your information in the window that appears.
6. If your computer is connected to the Internet, click Unlock Now, and enjoy your MPC!
7. If your computer is not connected to the Internet, follow these additional steps:
8. Click Use Web Form.
9. The window that appears will have your name, serial number, and software ID number. Click Save
Details to save this information as a .txt file, or copy the information from each field into another file
of your choosing.
10. On a computer connected to the Internet, go to authorizations.akaipro.com/MPC, enter the copied
information, and click Unlock My MPC.
11. Copy the unlock code from the window that appears.
12. In your MPC software, go to the window from Step 5 and click Enter Code.
13. Enter your name and the unlock code generated by the webpage.
14. Click Unlock, and enjoy your MPC!
9
MPC Hardware Overview
This chapter explains the features and functions of your MPC Element.
MPC Element
Top Panel
1
2
3
4
5
6
7
8
9
10
11
12
13
14
15
16
17
18
18
19
20
10
1. USB Port: Use the included USB cable to connect this USB port to an available USB port on your
computer. This connection allows MPC Element to send/receive MIDI data to/from the software.
2. MIDI In: Use the included 1/8"-MIDI adapter and a five-pin MIDI cable to connect the MIDI Out of an
optional external MIDI device to the MIDI In of MPC Element.
Important: Do NOT connect audio devices (e.g., headphones, monitors, etc.) to the 1/8" MIDI In or
MIDI Out jacks. Use the included 1/8"-MIDI adapters to connect MIDI devices only.
3. MIDI Out: Use the included 1/8"-MIDI adapter and a five-pin MIDI cable to connect the MIDI Out of
MPC Element to the MIDI In of an optional external device.
4. Main: Press this button to view the Main screen in the display and software.
5. Play: Press this button to play the Sequence from the audio pointer's current position.
6. Play Start: Press this button to play the Sequence from its start point.
7. Stop: Press this button to stop playback.
8. Rec: Press this button to record-arm the Sequence. Press Play or Play Start to start recording.
Recording in this way (rather than using Overdub) erases the events of the current Sequence. After
the Sequence plays through once while recording, Overdub will be enabled.
9. Overdub: Press this button and simultaneously press Play or Play Start to enable Overdub. This
allows you to record note events in a Sequence without overwriting any previously recorded note
events. You can enable Overdub either before or during recording.
10. Undo: Press this button to undo your last action.
11. Erase: As a Sequence is playing, hold this button down and press a pad to delete the note event for
that pad at the current playback position. This is a quick way to delete note events from your
Sequence without having to stop playback.
12. Pads: Use these pads to trigger drum hits or other samples in your software. The pads are velocity-
sensitive and pressure-sensitive, which makes them very responsive and intuitive to play. The pads
will light up different colors, depending on how hard you play them (ranging from yellow at a low
velocity to red at the highest velocity).
13. Full Level: Press this button to activate/deactivate Full Level. When activated, the pads always play
back at a maximum velocity (127), no matter how hard or soft you hit them.
11
14. 16 Level: Press this button to activate/deactivate 16 Level. When activated, the last pad that was hit
will be temporarily copied to all 16 pads. The pads will now output the same note number as the
initial pad, but a selectable parameter will be fixed at values that increase as the pad numbers
increase (e.g., Pad 1 is the minimum, Pad 16 is the maximum), regardless of how hard you hit them.
In the software, in the window that appears, click the Type menu to select the parameter: Velocity,
Tune, Filter, Layer, Attack, or Decay.
You can change the pad by clicking the Pad drop-down menu in the window that appears.
Alternatively, you can press and hold the 16 Level button, press the desired pad, and then release
both.
15. Note Repeat: Hold this button down and press a pad to retrigger that pad's sample at a rate based
on the current Tempo and Time Correct settings. Vary the pressure on the pad to increase or
decrease the velocity of the notes being played.
16. Tap Tempo: Press this button in time with the desired tempo to enter a new tempo (in BPM) in the
software.
17. Pad Bank: Press and hold down this button and then press a pad with a letter (A – H) above it to
select that Pad Bank. The pad representing the current bank will be lit red while the others will be lit
amber.
18. Track Up / Down: Use these buttons to move to the next or previous instance of the MPC plugin in
your host software.
19. Mute Track: Press this button to mute the currently selected instance of the MPC plugin in your host
software.
20. Solo Track: Press this button to solo the currently selected instance of the MPC plugin in your host
software.
12
Quick Start
Starting Up
1. Power on your computer, and make sure the MPC hardware driver and software are both properly
installed on your computer.
2. Connect your MPC hardware to your computer with a standard USB cable. After that, open the MPC
software.
Now, you're ready to go!
Recording a Drum Sequence
First, let's set up a Program so we can record a drum Sequence:
1. Make sure the Sequence Section in the lower half of the window shows the Program Type as Drum
and the Program as Program 001 (this is the default when you open MPC Essentials).
2. In the Project Information Section on the right, right-click the new Program (Program 001) and
enter a name (e.g., Drums).
Now, let's load some drum sounds:
1. Click the File Browser's drop-down
menu for an overview of your hard disk
structure and select a location. Double-
click any displayed folder in the File Browser to open it.
2. Locate and select a drum sample. Click the Preview button to preview any selected audio
sample. Let's load a bass drum first.
3. Click and drag a sample onto the desired pad to assign it to the pad (this will also automatically add
the sample to the Project). To keep things simple, let's load it to Pad A01. Now, you can press Pad 1
to play the bass drum sample.
4. To create a simple drum set, repeat the above steps for other pads. We recommend loading a snare
drum, a closed hi-hat, and an open hi-hat. Feel free to add a crash cymbal, too.
13
Let's record a drum Sequence:
1. Click the Rec button to activate Record Mode.
2. To start the actual recording, click Play. The pre-count will count one measure before the software
starts to record. We recommend recording only one sound (pad) at a time, especially if you aren't
familiar with playing on the pads.
3. Play a simple bass drum pattern. The note events you just recorded will automatically be placed in
the grid (in this case, on 16th notes). The initial measure length is two bars. After the two bars, the
recording will enter Overdub Mode automatically; the Sequence plays again from the beginning and
keeps looping, allowing you to record further notes. Don't stop the recording!
4. Play the snare drum part, then a hi-hat part.
5. When you're done recording, click Stop.
6. To repeat the recording, keep in mind that the pads you play in your new recording will automatically
replace existing notes played with the same pads. To prevent this, you can start again from Step 1
but click Overdub instead of Rec; Overdub lets you record additional note events over the existing
Sequence.
7. The Undo button functions differently while in Record Mode. Normally, pressing Undo will undo just
the last event. When there is an event to undo, the Undo button will be lit solid. While recording, the
Undo button will flash. In this case, pressing Undo will erase all events from that recording (i.e.,
since Play or Play Start was pressed).
14
Organizing Samples and Editing Note Events
We recommend doing some naming and editing before recording further. Let's use the software, which is
easier for editing.
The collection of drum samples you loaded earlier (and their respective pad assignments) are arranged in
a Program:
• To rename a Program, right-click the Program in the Project Information panel, and select
Rename. Enter a suitable name for the Program.
• To rename a sample, right-click the name of a sample (e.g., Bassdrum-01), and select
Rename. Enter a suitable name for the sample. Repeat this for the other samples in the
Program. This will help keep your Program organized if you add more samples to it.
In the grid, you can see your recorded note events. Click and drag a note to move it to a different position.
By default, you can position notes only by quantization values, defined by the Time Correct value. You
can change the value by clicking the Time Correct drop-down menu. We recommend working with 8 or
16 values. Hold down your keyboard's Shift key and use the arrow keys to nudge events without
restricting ("snapping") them to the grid.
Hold down your keyboard's Control key (Windows) or Command key (Mac OS X) and click and drag a
note to copy it. Double-click a note to delete it.
Velocity data can be easily edited in the velocity lane below the grid. Click a note event or place the
mouse over a velocity bar in the lane. A small round handle will appear at the top of the velocity bar.
Move the mouse vertically to change its value.
Let's make some basic edits to the sound of the Sequence.
15
Recording a Bass Sequence
Recording a melodic instrument like piano or bass works differently in the software from recording drums.
Unlike a drum kit, it's important to be able to play and record a bass sound chromatically, so this will be
slightly different than setting up the drum kit.
Let's set up a Program so we can record a bass Sequence:
1. In the Sequence Section in the lower half of the window, click the Type drop-down menu, and select
Keygroup.
2. In the Project Information Section on the right, right-click the new Program (with the piano icon
next to it) and enter a name (e.g., Bass).
Now, let's load a bass sound:
1. Click the File Browser's drop-down
menu for an overview of your hard disk
structure and select a location. Double-
click any displayed folder in the File Browser to open it.
2. Locate and select a bass sample. Click the Preview button to preview any selected audio
sample.
3. Double-click a sample to add it to the Project. (Keep in mind that the sample is not yet assigned to a
pad.)
Let's continue to set up the Keygroup Program:
1. Click the Program Edit tab to enter Program Edit Mode.
2. In the Layer section, click the Layer 1 drop-down menu and
select the bass sample you just loaded (you'll see your drum
samples in this list, as well). Because you're working with a
Keygroup Program instead of a Drum Program, this sample is
now playable across all pads.
Tip: On your MPC hardware, press the Pad Bank D button to switch to Pad Bank D and hit Pad 13.
You should hear the bass sample played back with its original pitch. You can use the other pads to
play your sample chromatically.
16
Let's add a second layer and set the Layers' velocity ranges so our bass sounds different when played at
a higher velocity (as a real bass would):
1. Go back to the File Browser and select a different bass sample that sounds similar but a little bit
brighter.
2. Double-click a sample to add it to the Project.
3. Back in the Layer section, click the Layer 2 drop-
down menu and select the new bass sample. Hit a
pad—both samples will sound at once. Maybe this
new sound is interesting as it is, but let's make some
quick edits to get as close as we can to a real-life
bass sound.
4. Set Layer 1's Velocity slider to cover the velocity range from 0 to 80, and set Layer 2's Velocity
slider to cover the range from 81 to 127.
Now when you hit a pad, the lower velocities will trigger the Layer 1 sample only, while higher velocities
will trigger the Layer 2 sample only.
Let's record that bass line now. Prepare your recording as described earlier, and record some bass notes.
You can edit your recording just like we've done earlier.
17
Creating a Song
This section explains how to make a Song out of your Sequences.
Before starting, make sure that you have recorded some Sequences (which we described earlier in this
chapter)!
Click the Song tab to open Song Mode. Each of the Sequences you've created in this Project is assigned
to a pad.
Click and drag a pad with the desired Sequence onto the
Sequence Playlist to the left of the pads. Alternatively, if you
prefer viewing a horizontal timeline, you can click and drag it
onto the workspace above the pads.
As a Song plays, it moves through the each Step, which has a
Sequence you assigned. Each Sequence may (or may not) be
repeated, determined by the value in the Repeats (Rpts)
column (a Rpt value of 1 means the Sequence will play through
only once).
Each Step can be set to play its Sequence at an independent tempo, determined by the value in the BPM
column. The Bars column indicates the total number of bars or measure that will elapse when playing that
Step.
Click any drop-down menu in the Sequence column to select a new Sequence for that Step. Click and
drag up or down on a Rpts value to change it.
Exporting the Song
Want to share your new Song with your friends? All you need to do is export it.
Click the File menu, navigate to Export, and select As Audio Mixdown.
In the Audio Mixdown window, you can select your mixdown settings.
• Set the Start field to 1, and set the End field to the last bar of your Song.
• Choose a save location.
Click Export to start exporting the Song.
18
Operation (Software)
This chapter explains the complete features and functions of the MPC Essentials software.
Important: When using the MPC Essentials software as a plugin, its features and functions are very
similar to how it's described in this chapter but with some notable differences, discussed in the Operation
(Plugin) chapter.
Remember:
• In this manual, whenever the MPC Element can be used to control a parameter or a function, this is
explained separately in a light red box labeled Hardware.
• We strongly recommend using the MPC Element to control the MPC Essentials software; its intuitive
and fast operation will greatly enhance your workflow.
19
General Features
Adjusting the Controls
Tip: If you use a computer mouse with scroll wheel, you can use it to affect some of these controls: move
your mouse pointer over the control and use the scroll wheel to change it. If you hold down your
keyboard's Shift key while doing this, you can increase the resolution.
The MPC software uses the following types of control elements:
Knobs
To set a value, click the knob, hold the mouse button, and drag the knob
up and down. Alternatively, you can edit values by using your mouse
scroll wheel.
Parameter Values
To set a value, click and hold the mouse button on the field, and drag the
mouse up and down.
Drop-Down Menus
Click the downward arrow (T) to open a drop-down menu where
you can select the desired setting or parameter.
20
Switches
Switches are represented by "LEDs." If a function is active, its LED will be lit
red. To activate a function, click it. Any other LEDs in its set will be
automatically deactivated.
Buttons
Click a button to activate or deactivate its function. Buttons are red
when they are activated.
Envelope Displays
Click the respective "handle" of an envelope and drag into the
desired direction to change an envelope parameter.
Pencil and Select Box Icons
Clicking this icon will switch between Draw Mode (the Pencil Tool) and Select Mode
(the Select Box tool). When the grid is active (i.e., when you have clicked somewhere in
it), you can press your computer keyboard's 1 key to enter Draw Mode or 2 key to enter
Select Mode.
Draw Mode:
• Click once on an empty square in the grid to place a note event in that square.
• Double-click a note event to erase it.
Select Mode:
• Click and drag the box over note events on the grid to highlight them.
• Double-click an empty square in the grid to add a note event.
• Double-click a note event to erase it.
  • Page 1 1
  • Page 2 2
  • Page 3 3
  • Page 4 4
  • Page 5 5
  • Page 6 6
  • Page 7 7
  • Page 8 8
  • Page 9 9
  • Page 10 10
  • Page 11 11
  • Page 12 12
  • Page 13 13
  • Page 14 14
  • Page 15 15
  • Page 16 16
  • Page 17 17
  • Page 18 18
  • Page 19 19
  • Page 20 20
  • Page 21 21
  • Page 22 22
  • Page 23 23
  • Page 24 24
  • Page 25 25
  • Page 26 26
  • Page 27 27
  • Page 28 28
  • Page 29 29
  • Page 30 30
  • Page 31 31
  • Page 32 32
  • Page 33 33
  • Page 34 34
  • Page 35 35
  • Page 36 36
  • Page 37 37
  • Page 38 38
  • Page 39 39
  • Page 40 40
  • Page 41 41
  • Page 42 42
  • Page 43 43
  • Page 44 44
  • Page 45 45
  • Page 46 46
  • Page 47 47
  • Page 48 48
  • Page 49 49
  • Page 50 50
  • Page 51 51
  • Page 52 52
  • Page 53 53
  • Page 54 54
  • Page 55 55
  • Page 56 56
  • Page 57 57
  • Page 58 58
  • Page 59 59
  • Page 60 60
  • Page 61 61
  • Page 62 62
  • Page 63 63
  • Page 64 64
  • Page 65 65
  • Page 66 66
  • Page 67 67
  • Page 68 68
  • Page 69 69
  • Page 70 70
  • Page 71 71
  • Page 72 72
  • Page 73 73
  • Page 74 74
  • Page 75 75
  • Page 76 76
  • Page 77 77
  • Page 78 78
  • Page 79 79
  • Page 80 80
  • Page 81 81
  • Page 82 82
  • Page 83 83
  • Page 84 84
  • Page 85 85
  • Page 86 86
  • Page 87 87
  • Page 88 88
  • Page 89 89
  • Page 90 90
  • Page 91 91
  • Page 92 92
  • Page 93 93
  • Page 94 94
  • Page 95 95
  • Page 96 96
  • Page 97 97
  • Page 98 98
  • Page 99 99
  • Page 100 100
  • Page 101 101
  • Page 102 102
  • Page 103 103
  • Page 104 104
  • Page 105 105
  • Page 106 106
  • Page 107 107
  • Page 108 108
  • Page 109 109
  • Page 110 110
  • Page 111 111
  • Page 112 112
  • Page 113 113
  • Page 114 114
  • Page 115 115
  • Page 116 116
  • Page 117 117
  • Page 118 118
  • Page 119 119
  • Page 120 120
  • Page 121 121
  • Page 122 122
  • Page 123 123
  • Page 124 124
  • Page 125 125
  • Page 126 126
  • Page 127 127
  • Page 128 128
  • Page 129 129
  • Page 130 130
  • Page 131 131
  • Page 132 132
  • Page 133 133
  • Page 134 134
  • Page 135 135
  • Page 136 136
  • Page 137 137
  • Page 138 138
  • Page 139 139
  • Page 140 140
  • Page 141 141
  • Page 142 142
  • Page 143 143
  • Page 144 144
  • Page 145 145
  • Page 146 146
  • Page 147 147
  • Page 148 148

Akai MPC Element User manual

Category
Musical instruments recorders
Type
User manual
This manual is also suitable for

Ask a question and I''ll find the answer in the document

Finding information in a document is now easier with AI