Page is loading ...

All Rights Reserved © APEC Water Systems
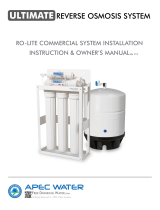
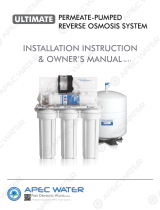
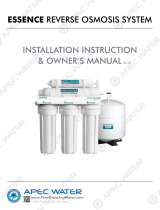
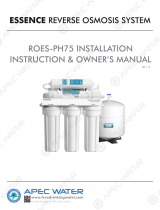
INSTALLATION INSTRUCTION
& OWNER’S MANUAL
Ver 1.2
WHOLE HOUSE WATER FILTERS


1 2
Before Installation:
• Inspect the system: Please take the system and all the
components out of the box. Inspect the system and all the
connection fittings carefully, make sure nothing is damaged
during shipping. If any part is cracked or broken, please do
not proceed with the installation and contact APEC or your
distributor for an exchange or diagnosis.
• Use the whole house water filter on a potable, safe-to-drink,
home COLD water supply only. The filter cartridge WILL
NOT make unsafe water safe to drink.
• Protect the whole house water filter and piping from freezing.
Water freezing in the water filter will damage it.
• This water filter system will withstand up to 90 psi water pres-
sure. If your house’s water pressure is higher than 90 psi, in-
stall a pressure reducing valve before the system is installed.
• DO NOT install on HOT WATER. The temperature of the
water supply to the water filter must be between 40F mini-
mum and 100 F maximum.
• DO NOT solder any fittings directly on the unit. The heat
from the soldering process will damage the unit.
• DO NOT install the water filter in an outside location or
anywhere it will be exposed to direct sunlight.
Copyright:
This manual is copyrighted by APEC Inc. Under the copyright laws, this manual may
not be reproduced in any form, in whole or part, without the prior written consent of
APEC Inc. Manual print ver. 2.0, 2015 Jun.
Thank you for choosing APEC Water Systems.
You now own the finest water filter in America.
Please read and become familiar with instructions and parts needed
before proceeding with the installation.
(This manual is constructed for standard APEC 10” and 20” BB Whole
House Water Filters.)
General Installation / Operation / Maintenance Requirements
• Use a Licensed Plumber to Install this product.
• Check with your state and local public works department for
plumbing and sanitation codes. You must follow these guidelines
as you install the whole house water filter. the water filter.
• Do not use with water that is microbiologically unsafe or of un-
known quality without adequate disinfecting before or after.
Required tools list:
• 2 adjustable wrenches
• Pipe cutter or hacksaw
• File
• Emery paper
• Screwdriver
• Teflon tape
Contents included with the system:
• Filter housing and cap
• Filter cartridge
• Product literature
Additional installation parts may be required (self-provide):
• 2 adapter fittings to connect household plumbing to 1” female
NPT threads on filter housing.
• 3 shut-off valves
• Grounding clamps and 6-gauge copper grounding wire.
• Mounting Bracket
• Housing wrench

3 4
Fig.2A
Fig.2B
Fig.3A
Fig.3B
Fig.1A
Fig.1B
STEP BY STEP INSTALLATION INSTRUCTIONS

5 6
Installation Overview
1. Be sure to allow a minimum space of 4” under the filter for removing
the sump to change the cartridge.
2. Select a location for the filter that is:
• Protected from freezing.
• Not exposed to direct sunlight.
3. Whole house water filter setup (Fig 1A,2A,3A):
***It is strongly recommended to install a bypass connection and shut
off valves for this filter (see Fig 1-3A) and a filter housing mounting
bracket.
A. Normal operation: Water flows in to shut-off valve A, filter system,
then out through valve B into the home. Always turn on valve A & B
and turn off valve C.
B. If filter needs to be replaced, please turn off the shut-off valve A
and C and turn on the nearest faucet to release pressure so the filter
housing can be easily removed. B valve should still be turned on.
C. If filter housing is leaking, please turn off shut-off valve A and
B and turn on C valve so water can flow into the home bypassing
valves A & B to stop the leak. B valve needs to be turned off to avoid
water backflow into the filter housing.
Fig. 4
Step 2: Cut Water Line
1. Turn off the water supply and open a nearby faucet to drain water out
of pipes.
2. Remove the nut and brass ferrule from both adapter fittings and set aside.
Using a tape measure or ruler, measure the distance “D” as shown below.
The distance to cut will vary for the Single, Duo and Trio unit. See Fig
5.
NOTE: It is recommended that the shut off valve be placed before and
after the filter as shown in the Installation Overview illustration. See
Fig 1, Page 2.
3. Select the location for the filter. Mark the distance “D” on the pipe.
4. Using a pipe cutter or hacksaw, cut pipe. Sand file cut ends of pipe to
assure that they are square and smooth.
Fig.5
Step 1: Install Adapter Fittings
Instructions are for installing similar adapter (fittings) onto copper
plumbing. If the unit is to be installed on any other type of tubing (plas-
tic, PVC, galvanized), different hardware must be purchased.
1. Apply 10 to 15 wraps of Teflon tape, in a clockwise direction, to the
pipe threads of each adapter. DO NOT use joint compound on any
parts connecting to filter canister.
2. Assemble an adapter fitting to the inlet and outlet of the canister cap.
Start each fitting by hand to make sure they don’t cross thread.
3. Use an adjustable wrench to tighten the fittings firmly. DO NOT
OVERTIGHTEN. About one to two thread(s) should remain visible.

7 8
Step 4: Installing the Unit
1. Align the filter canister with pipe ends making certain that the incom-
ing water supply is going into the filter port marked “IN’” It may be
necessary to spread the pipe ends apart to install filter.
2. Using two adjustable wrenches, hold incoming adapter securely with
one wrench and tighten nut with second wrench. Repeat this proce-
dure for outgoing adapter.
3. If necessary, support the water pipes on either side of the filter unit.
Step 5: Installing the Ground Wire (Optional) if your house
plumbing is plastic, this step should be skipped
IMPORTANT: A copper or galvanize house cold water pipe is often used
to ground electrical outlets in the home. Grounding protects you from
electrical shock. The water filter housing may have broken this ground
path. To restore connections install an 18” long, 6 gauge copper wire
across the filter, clamped using 1/2”-1” bronze grounding clamps. Zinc
clamps should not be used on copper plumbing.
1. Clean copper pipe and ends of ground wire with emery paper. Bare
wire is recommended. If insulated wire is used, it should be stripped
3/4” at each end before cleaning with emery paper.
2. Attach bronze clamps to copper pipe. Tighten screws.
3. Attach wire to clamps as shown. Tighten screws.
Step 6: Put Cartridge into The Housing
1. Remove wrapping from new filter cartridge. Put cartridge into hous-
ing, make sure the housing O-ring is in place. Turn housing count-
er-clockwise to close. DO NOT OVERTIGHTEN.
2. Slowly turn on water supply.
3. Check entire system for leaks. If leaking, shut off water supply and
tighten or reseal fittings.
4. After installation, flush the cartridge for 5 minutes, wait one hour,
then flush again for 5 minutes before using the water.
Step 3: Attach Adapter Fittings to Water Line.
1. Slip a compression nut onto each pipe.
2. Next, slip the brass ferrule onto each pipe. See Fig.6
Fig 6

9 10
FILTER CARTRIDGE REPLACEMENT
You should change your filter cartridge when the water flow is notice-
ably reduced or at least every 6 to 12 months.
1. Turn off water to the filter. Water must be shut off from Valve A (and
Valve C if it is installed). See Fig. 1A, Page 2
2. Turn on the faucet nearest to the filter housing to release pressure.
3. Unscrew the filter canister and discard used cartridge. Wash the filter
canister with mild soap and water. Do not use harsh cleaners or hot
water.
4. Inspect the filter canister O ring. Make sure it is lightly lubricated and
completely seated in the groove. It is recommended that you replace
the O ring when you replace the filter.
5. Place a new filter cartridge into the canister, make sure it is centered
and completely seated on the bottom seal.
6. Reinstall the canister to its cap. Hand tightening is all that is required
to seal the unit. You can use a wrench to slightly give the canister an
additionl 1/2 turn, but DO NOT OVERTIGHTEN.
7. Slowly turn on water to the filter by using the upstream shut-off valve
(if there is one).
8. After installation, flush the cartridge for 5 minutes, wait one hour,
then flush again for 5 minutes before using the water.
Fig 7
Head
Filter Canister
O-ring Seal
Filter
cartridge
Turn Counter clockwise
to tighten
Turn Clockwise
to remove canister

11 12
LIMITED PRODUCT WARRANTY
Conditions of Validity of this Limited Product Warranty
Even though the Product has extremely high endurance for operating conditions such as pH,
maximum TDS, temperature, and optimum water pressure, THIS LIMITED PRODUCT WAR-
RANTY SHALL ONLY BE VALID IF:
1. The replaceable filters are changed and maintained on a regular basis as directed in
the Manual. Moreover, depending on local water input water quality, regular mainte-
nance may need to be increased.
2. The Product is operated within the confines of the following standard operating condi-
tions:
Water Pressure Water Temp.
10” & 20” Whole HouseWater Filter Max. 90 psi Max.100 F
Any information or suggestion by APEC with respect to the Product concerning applications,
specifications or compliance with codes and standards is provided solely for your convenient
reference and is made without any representation as to accuracy or suitability. You must
verify and test the suitability of any information with respect to the Product for your specific
application.
Non-Covered Defects
THIS LIMITED PRODUCT WARRANTY DOES NOT COVER DEFECTS CAUSED BY:
1. Improper storage, installation, maintenance, handling, use and/or alterations of the
Product, including, but not limited to, non-compliance with the installation, mainte-
nance and standard operation conditions stated in the Manual and this Limited Product
Warranty.
2. Unreasonable use, unintended use, or misuse of the Product for something other than
its intended purpose.
3. Use of replacement parts, filters, or other accessories that are not sold or manufactured
by APEC for use with this particular Product.
4. Damage not resulting from manufacturing defects that occur while the Product is in the
original purchaser’s possession.
5. Installation of the Product with known or visible manufacturing defects at the time of
installation.
6. Damage caused by freezing, flood, fire or Act of God.
Scope
APEC takes pride in selling a superb line of products, including this 10” or 20”
Whole House Water Filter (“Product”). As such, APEC expressly warrants to the
original purchaser that, for a period of one (1) year from the date of purchase, the
Product will be reasonably free of defects in materials and workmanship. With-
in that one (1) year period from the original purchase, APEC will, at its option,
repair or replace the Product without charge, or refund the cost of the Product, if
the Product fails or does not perform as warranted solely due to a manufacturing
defect within the warranty period, subject to the limitations and exclusions set forth
in this Limited Product Warranty. This Limited Product Warranty only applies when
the Product is used, stored, handled, fabricated and/or installed in the manner
recommended by APEC in the Installation Instruction & Owner’s Manual (“Manu-
al”).
Repair or Replacement
Repair or replacement during this one (1) year warranty shall include reasonable
labor charges necessary to repair or replace the defective Product, but shall not
include freight charges or any other local labor charges from third parties other
than APEC, unless APEC expressly approves such charges in writing. During the
entire one (1) year warranty, APEC’s obligation to repair or replace shall further
be limited to repair or replacement with the styles, models, products, colors, etc.
of the Product that are available at the time of the repair or replacement, and
shall be limited to the repair or replacement of only the specific Product that
fails due to a manufacturing defect. Any repaired or replaced product shall also
remain subject to the original one (1) year warranty from the date of the original
purchase, and any repair or replacement shall not extend the original warranty
period in any manner or start a new warranty period.

13 14
CONDITIONS THAT RENDER THIS LIMITED PRODUCT WARRANTY VOID
THIS LIMITED PRODUCT WARRANTY SHALL BE VOID IF:
1. The Product is not operated in compliance with normal municipal water conditions
for which the particular model of this Product is intended.
2. The person seeking to invoke the warranty is not the original purchaser. That is, this
Limited Product Warranty only extends to original purchasers.
3. The Product is purchased used. That is, this Limited Product Warranty only covers new
products.
4. The Product is purchased from someone other than APEC or one of APEC’s autho-
rized dealers. This is because, unless the Product was sold by APEC or one of its
authorized dealers, APEC cannot verify or guarantee the integrity or authenticity of
the Product.
General Conditions
The warranties set forth herein are the only warranties made by APEC in connec-
tion with the product. APEC cannot and does not make any implied or express
warranties with respect to the product, and disclaims all other warranties, includ-
ing, but not limited to, any warranty of merchantability or fitness for a particular
purpose. Products sold by APEC are sold only to the specifications specifically set
forth by APEC in writing. Other than the limited product warranty set forth herein,
APEC makes no other warranties, express or implied. APEC’s sole obligation under
this warranty shall be repair or replacement of a non-conforming product or parts
of the product, or at the option of APEC, return of the product and a refund of the
purchase price. Buyer assumes all risk whatsoever as to the result of the use of
the product purchased, whether used singularly or in combination with any other
products or substances.
No claim by the buyer/owner of any kind, including claims for indemnification,
shall be greater in amount than the purchase price of the products in respect to
which damages are claimed. In no event shall APEC be liable to buyer/owner in
tort, contract or otherwise, for any special, indirect, incidental, consequential, reli-
ance, statutory, special, punitive or exemplary damages, including, but not limited
to, lost profits, loss of use, loss of time, inconvenience, damage to good will or rep-
utation, or loss of data, even if advised of the possibility of such damages or such
damages could have been reasonably foreseen, in connection with, arising out of,
or as a result of, the sale, delivery, servicing, use or loss of use of the products sold
hereunder, or for any liability of buyer to any third party with respect thereto.
Obtaining Warranty Coverage or General Inquiries
If coverage is available, you may obtain coverage under this Limited Product Warranty by
providing APEC with proof of original purchase, and that you are the original purchaser.
For service under this Limited Product Warranty, you must notify APEC by phone at 1-800-
880-4808, by email at techsupport@freedrinkingwater.com, or in writing at 1320 S.
Johnson Dr., City of Industry, CA 91745. In making the claim, please provide your name,
address, phone number, a description of the product involved, and an explanation of the
defect.


Advanced Purification Engineering Corp.
1320 S Johnson Drive
City of Industry, CA 91745
For questions or comments please visit our website at:
FreeDrinkingWater.com
For technical support contact us at:
Techsupport@freedrinkingwater.com
1-800-880-4808
/