Page is loading ...

1
Hodedah
www.hodedah.com
support @hodedah.com
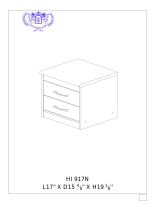
HIK 69-MOP
L47
5
8
" X D17
4
8
" X H37
2
8
"

PART & HARDWARE LIST
2
M1
CAP
902 MAGNET PLATE
902 MAGNET
Hodedah
www.hodedah.com
support @hodedah.com
A
PLASTIC DOWEL M8 X 25MM
32
B
CB SCREW M3 X 12MM
2
H
I
J1
CSK CAP M6 X 40MM
23
J2
POWER NAIL 6/8
4
K
PVC SHELF SUPPORT 12
DOOR SUPPORT SPRING
2
O
HANDLE SV 48 (SILVER)
24
P/H SCREW M4 X 24MM
N
4+4
16
4
2
2
O1
O2
K1
K2
C CB SCREW M3.5 X 12MM
24
D
CB SCREW M3.5 X 16MM
24
E
CB SCREW M4 X 25MM
4
F
CB SCREW M4 X 35MM
16
G
2
MINIFIX 5654
6
P/H SCREW M4 X 40MM
DRAWER SLIDE 14"
Q
1
ALLEN KEY
2ALUMINIUM PIPE (384MM)
R
L
M2
M3
1
3
2
4
5
6
7
8
9
10
11
11
14
13
12
15
16
17
18
19
17
17
18
17
19
20
21
22
23
23
P
6
ABS SQUARE LEG (H100MM)

3
- This product contains small components, please ensure that they are
kept away from small children.
- THIS INSTRUCTION BOOKLET CONTAINS IMPORTANT SAFETY
INFORMATION. PLEASE READ AND KEEP FOR FUTURE
REFERENCE.
STOP
DO NOT RETURN PRODUCT TO THE STORE.
If a part is missing or damaged, email our customer
service. We will gladly ship your replacement parts
FREE of charge.
email us at
For prompt, reliable service; please have your
assembly manual ready.
Need Parts or Assistance?
Hodedah
www.hodedah.com
support @hodedah.com

4
Thank you for purchasing from Hodedah
To learn more about hodedah and our products visit
www.hodedah.com
READ BEFORE BEGINNING ASSEMBLY
- Read each step carefully. It is very important that each step of instruction is performed in the
correct order. If these steps are not followed in sequence, assembly difficulties will occur.
- Make sure all parts are included. Most parts are labeled or stamped on the raw edge.
- Work in spacious area, preferably on a carpet, near the place the unit will be used.
- Do not use power tools to assemble your furniture. Power tools may strip or damage the parts.
HELPFUL HINTS
- Call us if you need assistance.
- Move your new furniture carefully, with two people lift and carry the unit to it's new location.
- Never push, drag or pull your furniture (especially on carpet).
Warranty Information
Hodedah warrants this product to be free from defects in material and workmanship agrees to
remedy any such defect. This warranty covers one year from the date of original purchase. This is
solely limited to be repair or replacement of defective parts and no assembly labor is included.
This warranty does not apply to any product which has been improperly assembled, subjected to
misuse or abuse or which has been altered or repaired in any way.
To obtain warranty, purchaser must present original bill of sale. Components repaired or
replaced warranted through the remainder of the original warranty period only. The defective
components will be repaired or replaced without charge, subject to the terms and conditions
described above.
For help with assembly, identifying parts, product information or to
order parts, please contact us :
Call us at :
718-456-0505
Monday - Friday
9:00am - 5:00pm
Visit our website :
www.hodedah.com
Hodedah
www.hodedah.com
support @hodedah.com

STEP 1
A
PLASTIC DOWEL M8 X 25MM 32
5
Hodedah
www.hodedah.com
support @hodedah.com
- Insert 32 x Plastic dowel (A) into Panels (1), (2) (3), (4), (5), (6), (7), (8), (9) & (10) using a plastic hammer.
- Insert 12 x Pvc shelf support (H) into panels (4), (8), (9) & (10) by push with thumb.
RIGHT VIEW
H
A
LEFT VIEW
RIGHT VIEW
LEFT VIEW
RIGHT VIEW
LEFT VIEW
H
12
PVC SHELF SUPPORT
7
6
5
4
8
9
10
2
3
1
4
8 9
10

STEP 2
6
Hodedah
www.hodedah.com
support @hodedah.com
- Assemble 2 x Drawer slide (O1) to Panel (1) & (5) with 6 x CB Screw M3.5 x 12m (C) using Philips head
screwdriver.
- Insert 4 x Door support spring (I) into Panel (13) & (14) by push with thumb.
- Attach 2 x Handle SV 48 (M1) to Panel (13) & (14) front with 2 x P/H Screw M4 x 24mm (M2) using a
Philips head screwdriver.
2
C
DOOR SUPPORT SPRING
4
HANDLE SV 48 (SILVER)
P/H SCREW M4 X 24MM
2
M1
BOTTOM VIEW
12
CB SCREW M3.5 X 12MM
I
M2
DRAWER SLIDE 14"
4
O1
K2
O1
C
I
M1
M2
20
21
FRONT VIEW
MINIFIX 5654
6
K2
14
77
10
4
RIGHT VIEW
LEFT VIEW

STEP 3
7
Hodedah
www.hodedah.com
support @hodedah.com
- Fix 2 x Magnet plate (J1) to Panel (20) & (21) back with 2 x CB Screw M3 x 12mm (B) using a Philips
head screwdriver.
- Insert 2 x Magnet (J2) to Panel (8) & (9) by using a Plastic Hammer.
- Attach Panel (1) to Panel (4) with 2 x CSK Cap M6 x 40mm (G) using an Allen Key (Q) & insert 2 x Cap (L).
- Attach Panel (2) to Panel (1) with 1 x CSK Cap M6 x 40mm (G) using an Allen Key (Q) & insert 2 x Cap (L)
- Slot 2 x Alluminium pipe (R) into Panel (1).
- Attach Panel (3) to Panel (2) & (4) with 3 x CSK Cap M6 x 40mm (G) using an Allen Key (Q) & insert
2 x Cap (L)
2
902 MAGNET
2
B
HANDLE SV 48 (SILVER)
P/H SCREW M4 X 24MM
2
M1
CB SCREW M3 X 12MM
2
J2
M2
1
J1
B
BACK VIEW RIGHT VIEW
LEFT VIEW
RIGHT VIEW
RIGHT VIEW
Q
G
L
L
Q
G
CSK CAP M6 X 40MM
G
6
902 MAGNET PLATE
2
J1
6
CAP
L
ALLUMINIUM PIPE (384MM)
2
ALLEN KEY
Q
R
20 21
J1
8
9
R
R
4
1
2
3

STEP 4
8
Hodedah
www.hodedah.com
support @hodedah.com
L
4
G
CSK CAP M6 X 40MM
9
- Attach Panel (5) & (6) into Panel (4). Insert 2 x Csk Cap M6 x 40 (G), tighten with Allen key (Q) & insert
2 x Cap (L).
- Attach Panel (7) into Panel (5) & (6). Insert 2 x Csk Cap M6 x 40 (G), tighten with Allen key (Q).
- Attach Panel (8) & (9). Insert 4 x Csk Cap M6 x 40mm (G), tighten with Allen key (Q).
- Attach Panel (10) to Panel (5) & (6) insert 2 x Csk Cap M6 x 40mm (G), tighten with Allen key (Q). Insert
2 x Cap (L).
Q
1ALLEN KEY
CAP
L
Q
G
Q
G
L
L
Q
G
Q
G
4
5
7
6
8
9
10

6
ABS SQUARE LEG (H100MM)
P
STEP 5
9
Hodedah
www.hodedah.com
support @hodedah.com
G
8
D
CSK CAP M6 X 40MM
24
- Slot 2 x Panel (11) into Panel (4), (8), (9) & (10) groove.
- Attach Panel (12) to Panel (4), (8), (9) & (10) with 8 x CSK Cap M6 x 40mm (G), tighten with Allen key (Q).
- Fix 6 x ABS Square leg (P) into Panel (12) base. Use 24 x Csk M3.5 x 16mm (D) & tighten using Phillips
Head screwdriver.
Q
1ALLEN KEY
CB SCREW M3.5 X 16MM
Q
G
D
P
11
11
12
12

STEP 6
10
Hodedah
www.hodedah.com
support @hodedah.com
K1
6
MINIFIX 5654
6
E
CAP
L
CB Screw M4 X 25MM
4
- Slot 1 x Panel (13) into Panel (4) & (10) groove.
- Attach panel (14) to panels (4), (8), (9) & (10), insert 6 x Minifix (K1), tighten with Allen key (Q). Insert
6 x Cap (L).
- Insert 4 x CB Screw M4 x 25mm (E) to Panel (15) & (16) back using a Philips head screwdriver.
- Attach 2 x Panel (17) into Panel (15). After that attach 1 x Panel (18) into both Panel (17) with
8 x CB Screw M4 x 35mm (F). Tighten using Phillips head screwdriver. Repeat for the next drawer.
- Fix 2 x Handle (M1) to Panel (15) & (16) front. Insert 2 x P/H Screw M4 x 40mm (M3) & tigthen with
Phillips head screwdriver.
K1
L
K1
Q
Q
1ALLEN KEY
M1
M3
13
14
E
16
15
F CB Screw M4 X 35MM
16
2
HANDLE SV 48 (SILVER)
P/H SCREW M4 X 40MM
2
M1
M3
17
18
15
&
16

STEP 7
Hodedah
www.hodedah.com
support @hodedah.com
RIGHT
LEFT
- Fix 4 x Drawer slide 14" (O2) into Panel (17) using 12 x CB Screw M3.5 x 12mm (C) & tighten with
Philip head screwdriver.
- Slot 2 x Panel (19) into Panel (10) groove & use 24 x Power nail (N) for fix it. Knock by using a hammer.
- Slide the drawer box into the drawer slide at the Panel (4), (7) & (10).
- Place Panel (22) into the center of Kitchen Cart.
- Slide 2 x Panel (23) between Panel (4), (8), (9) & (10).
C
12
CB SCREW M3.5 X 12MM
DRAWER SLIDE 14"
4
O2
N
24
POWER NAIL
6
8
"
O2
C
O2
11
17
19
C
N
16
15
23
22
23

TOP
BOTTOM
STEP 8
12
Hodedah
www.hodedah.com
support @hodedah.com
Job Complete !
In the interest of our environment please dispose of all packaging throughtfully.
- Press & insert the Door support spring (I) at the panel (20) & (21) top into the hole at bottom of Panel (5).
- Press the Door support spring (I) at the panel (20) & (21) base & insert into the hole at panel (12).
20 & 21
5
I
12
I
20
21
20 & 21
/