Sony DCR IP1E User manual

Category
Camcorders
Type
User manual

This manual is also suitable for

E:\CX4800\revision2\SDL\updated1_final_Delivery\EU\GB.FR\3084862121DCR-
IP1ECEE\01GB00COV.fm
master:Right
DCR-IP1E
3-084-862-12(1)
3-084-862-12(1)
© 2003 Sony Corporation
Camera Operations Guide [GB] / Mode d’emploi du caméscope [FR]
Camera
Operations Guide
Mode d’emploi
du caméscope
Read this first
A lire en priorité
GB
FR
Digital Video Camera Recorder
DCR-IP1E
2
DCR-IP1E
3-084-862-12(1)
E:\CX4800\revision2\SDL\updated1_final_Delivery\EU\GB.FR\3084862121DCR-IP1ECEE\01GB01REG.fm
master:Right
Read this first
Before operating the unit, please read this
manual thoroughly, and retain it for future
reference.
WARNING
To prevent fire or shock hazard, do not
expose the unit to rain or moisture.
To avoid electrical shock, do not open
the cabinet.
Refer servicing to qualified personnel
only.
“Memory Stick”
FOR CUSTOMERS IN THE UNITED
KINGDOM
NOTICE ON THE SUPPLIED AC POWER
ADAPTOR
A moulded plug complying with BS1363 is
fitted to this equipment for your safety and
convenience.
Should the fuse in the plug supplied need to be
replaced, a fuse of the same rating as the
supplied one and approved by ASTA or BSI to
BS1362 (i.e., marked with or mark)
must be used.
If the plug supplied with this equipment has a
detachable fuse cover, be sure to attach the fuse
cover after you change the fuse. Never use the
plug without the fuse cover. If you should lose
the fuse cover, please contact your nearest Sony
service station.
FOR CUSTOMERS IN EUROPE
ATTENTION
The electromagnetic field at the specific
frequencies may influence the picture and sound
of this camcorder.
This product has been tested and found
compliant with the limits set out in the EMC
Directive for using connection cables shorter
than 3 meters. (9.8 feet)
b Note
If static electricity or electromagnetism causes
data transfer to discontinue midway (fail),
restart the application or disconnect and connect
the USB cable again.
N50
E:\CX4800\revision2\SDL\updated1_final_Delivery\EU\GB.FR\3084862121DCR-IP1ECEE\01GB01REG.fm
master:Right
3
DCR-IP1E
3-084-862-12(1)
GB
Notes on use
You can use only MICROMV
cassettes in your camcorder.
Your camcorder is based on the MICROMV format.
You can use only MICROMV cassettes with micro
Cassette Memory in your camcorder.
Notes on the MICROMV format
Records and plays back for about 60 minutes with
quality equal to that of DV (digital video).
The micro Cassette Memory feature is provided with
all
MICROMV cassettes. Your camcorder can
access any scene easily using the memory (Multi-
picture search function).
Adopts the MPEG2 format as a data compression
method. This format is the same as the one for DVD
(digital versatile disc). Records in 12Mbps bit rate to
obtain a higher quality of image.
Transition between the last scene you recorded and
the next scene is the still image. This is not a
malfunction.
The mark is indicated on the MICROMV
cassette.
Note on the type of “Memory Stick” you
can use in your camcorder
You can use only a “Memory Stick Duo,” which is
about half the size of an ordinary “Memory Stick,” in
your camcorder (p. 97).
The mark is indicated on the
“Memory Stick Duo.”
Notes on recording
Before starting to record, test the recording function
to make sure the picture and sound are recorded
without any problems.
Compensation for the contents of recordings cannot
be provided, even if recording or playback is not
possible due to a malfunction of the camcorder,
storage media, etc.
TV color systems differ depending on the countries/
regions. To view your recordings on a TV, you need
a PAL system-based TV.
Television programs, films, video tapes, and other
materials may be copyrighted.Unauthorized
recording of such materials may be contrary to the
copyright laws.
Notes on the LCD panel and lens
The LCD screen is manufactured using extremely
high-precision technology, so over 99.99% of the
pixels are operational for effective use.
However, there may be some tiny black points and/
or bright points (white, red, blue, or green in color)
that appear constantly on the LCD screen.
These points are normal results of the manufacturing
process and do not affect the recording in any way.
Exposing the LCD screen or the lens to direct
sunlight for long periods of time may cause
malfunctions. Be careful when placing the camera
near a window or outdoors.
Do not aim at the sun. Doing so might cause your
camcorder to malfunction. Take pictures of the sun
only in low light conditions, such as at dusk.
Note on connecting other device
Before connecting your camcorder to other device
such as a VCR or a computer with an USB or i.LINK
cable, be sure to insert the connector plug in the proper
direction. If you insert the connector plug forcibly in
the wrong direction, the terminal may be damaged.
This may cause a malfunction of your camcorder.
Note on using this manual
The images of the LCD screen used on this manual
are captured using a digital still camera, and thus
may appear different from what you see.
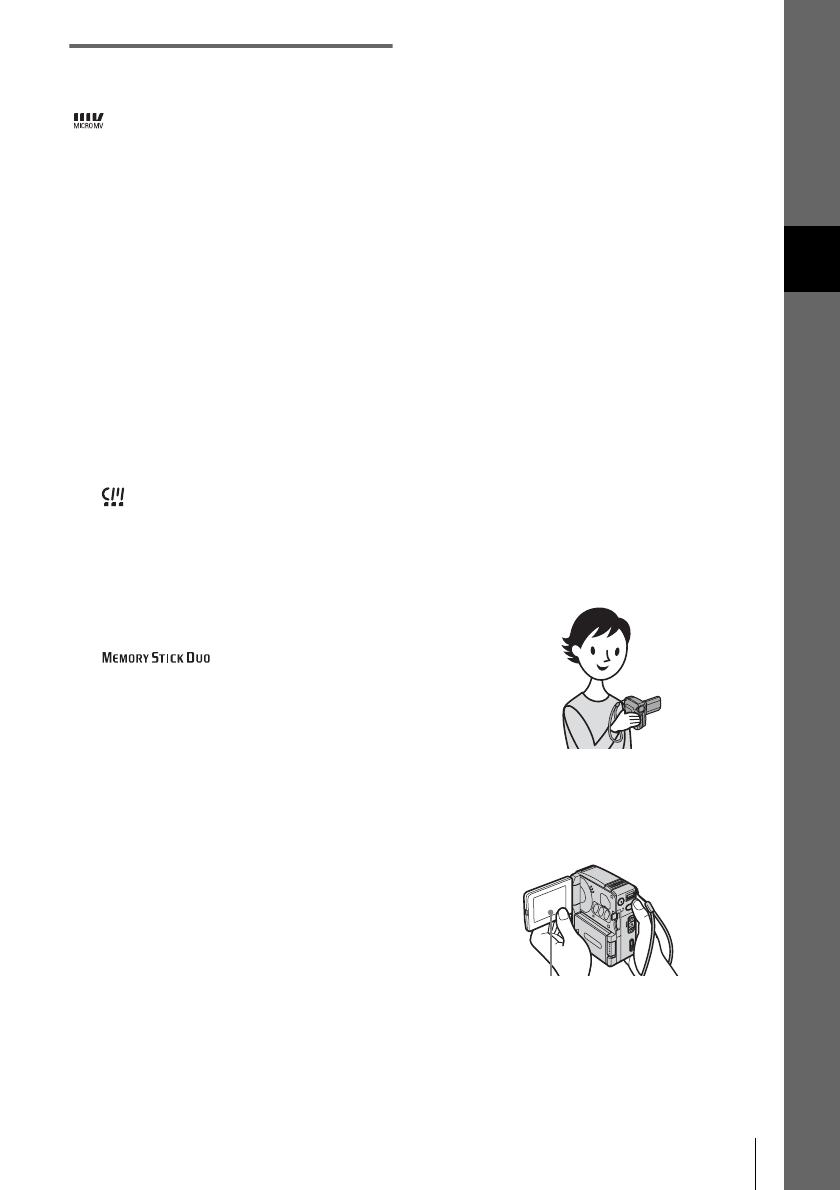
Notes on using the camcorder
Hold your camcorder with your hand through the
loop of the hand strap as shown in the following
illustration.
Be careful not to touch the lens.
When you are using the touch panel, place your hand
on the back side of the LCD panel to support it.
Then, touch the buttons displayed on the screen.
You can change the language to be used for screen
display on your camcorder (p. 20).
Touch the button on the LCD
screen.
,continued
4
DCR-IP1E
3-084-862-12(1)
E:\CX4800\revision2\SDL\updated1_final_Delivery\EU\GB.FR\3084862121DCR-IP1ECEE\01GB01REG.fm
master:Right
Do not hold the camcorder by the following parts.
Notes on handling the Handycam
Station
When attaching your camcorder to the Handycam
Station, insert your camcorder in the direction of the
arrow as shown in the following illustration. Be sure
to insert it all the way.
When removing your camcorder from the
Handycam Station, hold both your camcorder and
the Handycam Station as shown in the following
illustration, and remove it from the Handycam
Station.
b Notes
When disconnecting the AC Adaptor from the
Handycam Station, hold both the DC plug and the
Handycam Station and disconnect the AC Adaptor.
Be sure to turn the power of your camcorder off
before inserting it into or removing it from the
Handycam Station.
You may not be able to attach your camcorder to the
Handycam Station when the jack cover on your
camcorder is opened.
LCD panel Battery pack
E:\CX4800\revision2\SDL\updated1_final_Delivery\EU\GB.FR\3084862121DCR-IP1ECEE\01GB00TOC.fm
master:Right
5
DCR-IP1E
3-084-862-12(1)
Read this first............................................................................................. 2
Quick Start Guide
Recording movies on a tape ...................................................................... 8
Recording still images on a “Memory Stick Duo”..................................... 10
Getting started
Step 1: Checking supplied items.............................................................. 12
Step 2: Charging the battery pack............................................................ 13
Using an outside power source ................................................................................. 15
Step 3: Turning the power on................................................................... 16
Step 4: Adjusting the LCD panel.............................................................. 16
Step 5: Setting the date and time............................................................. 17
Step 6: Inserting the recording media...................................................... 18
Inserting a cassette tape ........................................................................................... 18
Inserting a “Memory Stick Duo” ................................................................................ 19
Step 7: Setting the screen language........................................................ 20
Recording
Recording movies .................................................................................... 21
To select the recording mode of the MPEG format picture ....................................... 22
Using zoom ...............................................................................................................23
Recording in mirror mode ......................................................................................... 24
Using the self-timer ................................................................................................... 24
Recording still images — Memory photo recording ........................... 25
Selecting image quality or size ................................................................................. 26
Using the self-timer ................................................................................................... 27
Recording a still image on a “Memory Stick Duo” while recording movies on a tape 28
Adjusting the exposure............................................................................. 28
Adjusting the exposure for backlit subjects ............................................................... 28
Fixing the exposure for the selected subject — Flexible spot meter ......................... 28
Adjusting the exposure manually .............................................................................. 29
Recording in a dark place — Color Slow Shutter............................... 30
Adjusting the focus................................................................................... 31
Adjusting the focus for an off-center subject — SPOT FOCUS ................................ 31
Adjusting the focus manually .................................................................................... 31
: Features available for tape only.
: Features available for “Memory Stick Duo” only.
Table of Contents
,continued
6
DCR-IP1E
3-084-862-12(1)
E:\CX4800\revision2\SDL\updated1_final_Delivery\EU\GB.FR\3084862121DCR-IP1ECEE\01GB00TOC.fm
master:Right
Recording a picture using various effects................................................ 32
Fading in and out of a scene — FADER ..............................................................32
Using special effects — Digital effect ..................................................................33
Overlaying still images on tape movies — MEMORY MIX ........................................35
Searching for the last scene of the most recent recording
— END SEARCH................................................................................ 37
Playback
Viewing movies recorded on a tape ................................................... 38
Playing back in various modes ..................................................................................39
Viewing recordings with added effects — Digital effect .............................................39
Viewing recordings on a “Memory Stick Duo” .................................... 40
Playing back in various modes on a “Memory Stick Duo” .........................................41
Various playback functions ...................................................................... 42
Magnifying pictures — Tape playback zoom/Memory playback zoom ......................42
Displaying the screen indicators ................................................................................43
Displaying the date/time and camera settings data — Data code .............................43
Playing the picture on a TV...................................................................... 45
Locating a scene on a tape for playback ........................................... 46
Searching quickly for a particular scene — Multi-picture search ..............................46
Searching for a scene using titles — Title search .....................................................47
Searching for a scene by date of recording — Date search ......................................47
E:\CX4800\revision2\SDL\updated1_final_Delivery\EU\GB.FR\3084862121DCR-IP1ECEE\01GB00TOC.fm
master:Right
7
DCR-IP1E
3-084-862-12(1)
Advanced operations
Using the Menu
Selecting Menu items .........................49
Using the (CAMERA SET) menu
— PROGRAM AE/WHITE BAL./16:9
WIDE, etc. ....................................51
Using the (MEMORY SET) menu
— BURST/QUALITY/IMAGE SIZE/
ALL ERASE/NEW FOLDER, etc.
......................................................55
Using the (PICT. APPLI.) menu
— PICT. EFFECT/SLIDE SHOW/
INT.REC-STL, etc. .......................59
Using the (EDIT/PLAY) menu
— MULTI-SEARCH /TITLE/TAPE
TITLE, etc. ....................................63
Using the (STANDARD SET) menu
— USB-CAMERA, etc. .................67
Using the (TIME/LANGU.) menu
— CLOCK SET/WORLD TIME, etc.
......................................................72
Customizing Personal Menu ..............73
Dubbing/Editing
Connecting to a VCR or TV ...............76
Dubbing to another tape ...............77
Recording pictures from a VCR or TV
......................................................78
Dubbing pictures from a tape onto a
“Memory Stick Duo” .....................79
Dubbing still images from a “Memory
Stick Duo” onto a tape ..................80
Deleting recorded pictures ...........81
Changing the still image size
— Resize ......................................82
Marking recorded images with specific
information
— Image protection/Print mark ....83
Troubleshooting
Troubleshooting .................................85
Warning indicators and messages .....92
Additional Information
Using your camcorder abroad ............96
Usable cassette tapes ........................96
About the “Memory Stick” ...................97
About the “InfoLITHIUM” battery pack
....................................................100
About i.LINK .....................................101
Maintenance and precautions ..........102
Specification .....................................105
Quick Reference
Identifying parts and controls ...........108
Index ................................................114
Refer also to other operating instructions
supplied with your camcorder:
Editing images with your computer
cComputer Applications Guide
cMovieShaker Application Guide
Quick Start Guide
8
DCR-IP1E
3-084-862-12(1)
E:\CX4800\revision2\SDL\updated1_final_Delivery\EU\GB.FR\3084862121DCR-IP1ECEE\01GB02GET.fm
master:Right
Quick Start Guide
Recording movies on a tape
1 Attach the charged battery pack to the camcorder.
To charge the battery, see page 13.
2 Insert a cassette into the camcorder.
a Slide the BATT (battery release)
lever in the direction of the arrow as
shown in the illustration and remove
the battery terminal cover.
b Attach the battery pack with its
terminal side facing your camcorder
as shown in the illustration and press
down the battery pack until it clicks.
a Slide the
lever in the direction of
the arrow, then open
the cassette lid.
The cassette compartment
comes out automatically.
b Insert the cassette with
the window-side facing
the cassette lid, then
push the center of the
back of the cassette
lightly.
c Lightly push the
cassette compartment
in with the cassette lid.
Close the cassette lid after
the cassette compartment
slides back in by itself.
BATT (battery release) lever
OPEN/EJECT
lever
OPEN/EJECT
Window-side
Quick Start Guide
E:\CX4800\revision2\SDL\updated1_final_Delivery\EU\GB.FR\3084862121DCR-IP1ECEE\01GB02GET.fm
master:Right
Quick Start Guide
9
DCR-IP1E
3-084-862-12(1)
3 Start recording while checking the subject.
The date and time is not set up in the default setting. To set the date and time, see page 17.
4 View the recorded picture.
a Open the LCD panel.
b While pressing the
green button, slide
the POWER switch
down to light up the
CAMERA-TAPE lamp.
The power turns on and the
lens cover opens.
c Press START/STOP.
Recording starts. To
change to standby mode,
press START/STOP again.
a Slide the POWER switch
repeatedly until the PLAY/
EDIT lamp lights up.
The lens cover closes.
b Touch (rewind).
c Touch (play) to start the
playback.
To stop, press .
To turn off the power, slide the POWER
switch up to (CHG)OFF.
3
2
1
1
3
2
Quick Start Guide
10
DCR-IP1E
3-084-862-12(1)
E:\CX4800\revision2\SDL\updated1_final_Delivery\EU\GB.FR\3084862121DCR-IP1ECEE\01GB02GET.fm
master:Right
Recording still images on a “Memory
Stick Duo”
1 Attach the charged battery pack to the camcorder.
To charge the battery, see page 13.
2 Insert a “Memory Stick Duo” into the camcorder.
a Slide the BATT (battery release)
lever in the direction of the arrow as
shown in the illustration and remove
the battery terminal cover.
b Attach the battery pack with its
terminal side facing your camcorder
as shown in the illustration and press
down the battery pack until it clicks.
Insert it so that the b mark
in the bottom left corner is
facing down. Push it in
until it clicks.
BATT (battery release) lever
b mark
Quick Start Guide
E:\CX4800\revision2\SDL\updated1_final_Delivery\EU\GB.FR\3084862121DCR-IP1ECEE\01GB02GET.fm
master:Right
Quick Start Guide
11
DCR-IP1E
3-084-862-12(1)
3 Start recording while checking the subject.
The date and time is not set up in the default setting. To set the date and time, see page 17.
4 View the recorded picture.
a Open the LCD panel.
b While pressing the
green button, slide the
POWER switch
repeatedly until the
CAMERA-MEM lamp
lights up.
The power turns on and the
lens cover opens.
c Press PHOTO lightly.
A short beep sound is heard
when the focus is adjusted.
d Press PHOTO fully.
A shutter sound is heard, and
the still image is recorded on
a “Memory Stick Duo.
a Slide the POWER
switch repeatedly
until the PLAY/EDIT
lamp lights up.
The lens cover closes.
b Touch .
The most recently recorded
image is displayed.
c Touch (next) or
(previous) to
view images in
sequence.
To turn off the power, slide the
POWER switch up to
(CHG)OFF.
2
34
1
1
3
+
P-MENU
P-MENU
2
Getting started
12
DCR-IP1E
3-084-862-12(1)
E:\CX4800\revision2\SDL\updated1_final_Delivery\EU\GB.FR\3084862121DCR-IP1ECEE\01GB03PRE.fm
master:Right
Getting started
Step 1: Checking
supplied items
Make sure you have following things
supplied with your camcorder.
The number in parentheses indicates the number
of that item supplied.
“Memory Stick Duo” 8MB (1)
You can use only a “Memory Stick Duo,” which is
about half the size of an ordinary “Memory Stick,” in
your camcorder. See page 97 for details.
Memory Stick Duo adaptor (1)
If you attach a Memory Stick Duo adaptor to a
“Memory Stick Duo,” you can use a “Memory Stick
Duo” with any of the devices compatible with an
ordinary “Memory Stick.”
AC Adaptor (1)
Mains lead (1)
Handycam Station DCRA-C100 (1)
Wireless Remote Commander (1)
A button-type lithium battery is already installed.
A/V connecting cable (1)
USB cable (1)
Hand strap (1)
Attached to the camcorder.
Rechargeable battery pack NP-FF51 (1)
The silver-colored model of battery pack NP-FF51 is
sold only with the camcorder.
Battery terminal cover (1)
Attached to the camcorder.
CD-ROM “SPVD-010 USB Driver” (1)
CD-ROM “MovieShaker Ver.3.1 for
MICROMV” (1)
Cleaning cloth (1)
Camera Operations Guide <This
manual> (1)
Computer Applications Guide (1)
MovieShaker Applications Guide (1)
21-pin adaptor (1)
The models with mark printed on their bottom
surfaces only.
Getting started
E:\CX4800\revision2\SDL\updated1_final_Delivery\EU\GB.FR\3084862121DCR-IP1ECEE\01GB03PRE.fm
master:Right
Getting started
13
DCR-IP1E
3-084-862-12(1)
Step 2: Charging the
battery pack
You can charge the battery by attaching the
“InfoLITHIUM” battery pack (F series) to
your camcorder.
b Notes
You cannot use batteries other than the
“InfoLITHIUM” battery pack (F series) (p. 100).
Do not short-circuit the DC plug of the AC Adaptor
with any metallic objects. This may cause a
malfunction.
Use a nearby wall socket when using the AC
Adaptor. Disconnect the AC Adaptor from the wall
socket immediately if any malfunction occurs.
1 Slide the BATT (battery release)
lever in the direction of the arrow as
shown in the following illustration and
remove the battery terminal cover.
2 Attach the battery pack with its
terminal side facing your camcorder as
shown in the following illustration and
press down the battery pack until it
clicks.
3 With the v mark on the DC plug
facing up, connect the AC Adaptor to
the DC IN jack on the Handycam
Station.
4 Connect the mains lead to the AC
Adaptor.
5 Connect the mains lead to the wall
socket.
6 Insert your camcorder into the
Handycam Station.
7 Set the POWER switch to (CHG)OFF.
To the wall socket
DC IN jack
AC Adaptor
Handycam Station
DC plug
Mains lead
BATT (battery
release) lever
DC IN jack
v mark
,continued
Getting started
14
DCR-IP1E
3-084-862-12(1)
E:\CX4800\revision2\SDL\updated1_final_Delivery\EU\GB.FR\3084862121DCR-IP1ECEE\01GB03PRE.fm
master:Right
The CHG (charge) lamp lights up and
charging starts.
To charge the battery pack using only
the AC Adaptor
You can charge the battery pack on a trip, even
if you have not brought the Handycam Station
along. With the v mark on the DC plug facing
up, connect the AC Adaptor to the DC IN jack
on your camcorder as shown in the illustration.
After charging the battery
The CHG (charge) lamp turns off when the
battery is fully charged (full charge).
Disconnect the AC Adaptor from the DC IN
jack.
To remove the battery pack
1
Set the POWER switch to (CHG)OFF.
2 Slide the BATT (battery release)
lever in the direction of the arrow as
shown in the illustration and remove the
battery pack.
b When you store your camcorder
Attach the battery terminal cover to protect the
battery terminals of your camcorder. If you do
not use your camcorder for a long time, store
your camcorder and the battery pack after
having used the battery pack up on your
camcorder. Refer to page 100 for details about
storage of the battery pack.
b Note
While removing the battery pack, hold down the
battery pack lightly with your hand not to let the
battery pack fall.
To check the remaining battery – Battery
Info
You can check the battery’s current charge level
and its current possible recording time while
charging the battery or when the POWER
switch is turned off.
1 Set the POWER switch to (CHG)OFF.
2 Open the LCD panel.
3 Press DISPLAY/BATT INFO.
The battery information appears for about 7
seconds.
Keep the button pressed to view it for about
20 seconds.
CHG (charge) lamp
AC Adaptor
To the wall socket
DC IN jack
DC plug
Mains lead
BATT (battery
release) lever
POWER
switch
DISPLAY/
BATT INFO
50% 100%0%
BATTERY INFO
BATTERY CHARGE LEVEL
REC TIME AVAILABLE
LCD SCREEN: 76 min
A
B
Getting started
E:\CX4800\revision2\SDL\updated1_final_Delivery\EU\GB.FR\3084862121DCR-IP1ECEE\01GB03PRE.fm
master:Right
Getting started
15
DCR-IP1E
3-084-862-12(1)
A Battery charge level: Displays the
approximate remaining power of the
battery pack.
B Possible recording time.
Charging time
Approximate number of minutes required when
you fully charge a fully discharged battery pack
at 25°C (77°F). (10 – 30°C (50 – 86°F)
recommended.)
Recording time
Approximate number of minutes available
when you use a fully charged battery pack at
25°C (77°F).
When the LCD BACKLIGHT is set to ON
When the LCD BACKLIGHT is set to OFF
* Approximate number of minutes when recording
while you repeatedly record, start/stop, set the
POWER switch to another mode, and zoom. The
actual battery life may be shorter.
Playing time
Approximate number of minutes available
when you use a fully charged battery pack at
25°C (77°F).
* With the LCD BACKLIGHT set to ON.
b Notes
The power will not be supplied from the battery pack
when the AC Adaptor is connected to the DC IN jack
of your camcorder, even if its mains lead is
disconnected from the wall socket.
The recording and playback time will be shorter
when you use your camcorder in low temperature.
The CHG (charge) lamp flashes during charging, or
the battery information will not be correctly
displayed in following conditions.
– The battery pack is not attached correctly.
– The battery pack is damaged.
– The battery pack is fully discharged. (For battery
information only.)
Using an outside power source
You can use the AC Adaptor as the power
source (mains) when you do not want the
battery to run out. While you are using the
AC Adaptor, the battery pack will not lose its
charge even when it is attached to your
camcorder.
PRECAUTION
Even if your camcorder is turned off, AC
power (mains) is still supplied to it while
connected to the wall socket via the AC
Adaptor.
Connect your camcorder as shown in
“Step 2: Charging the battery pack”
(p. 13).
Battery pack
NP-FF50 120
NP-FF51 (supplied) 130
NP-FF70 150
NP-FF71 170
Battery pack Continuous
recording
time
Typical*
recording
time
NP-FF50 75 40
NP-FF51
(supplied)
85 50
NP-FF70 160 95
NP-FF71 170 100
Battery pack Continuous
recording
time
Typical*
recording
time
NP-FF50 75 40
NP-FF51
(supplied)
85 50
NP-FF70 165 95
NP-FF71 175 100
Battery pack LCD panel opened*
NP-FF50 80
NP-FF51 (supplied) 90
NP-FF70 175
NP-FF71 190
Getting started
16
DCR-IP1E
3-084-862-12(1)
E:\CX4800\revision2\SDL\updated1_final_Delivery\EU\GB.FR\3084862121DCR-IP1ECEE\01GB03PRE.fm
master:Right
Step 3: Turning the
power on
You need to slide the POWER switch
repeatedly to select the desired mode to
record or play.
When using this camcorder for the first time,
the CLOCK SET screen appears (p. 17).
While pressing the green button, slide the
POWER switch in the direction of the
arrow.
The power turns on.
To enter the recording or playing mode, slide
the switch repeatedly until the respective lamp
for the desired power mode lights up.
When the POWER switch is set to the
CAMERA-TAPE or CAMERA-MEM mode,
the lens cover opens.
CAMERA-TAPE mode: To record on a tape.
CAMERA-MEM mode: To record on a
“Memory Stick Duo.”
PLAY/EDIT mode: To play or edit pictures on
a tape or “Memory Stick Duo.”
To turn off the power
Slide the POWER switch up to (CHG)OFF. The
lens cover closes.
Step 4: Adjusting the
LCD panel
You can adjust the angle and brightness of
the LCD panel to meet various recording
situations.
Even when there are obstructions between you
and the subject, you can check the subject on the
LCD screen during recording by adjusting the
angle of the LCD panel.
Open the LCD panel 90 degrees to the
camcorder, then rotate it to the desired
position.
To adjust the brightness of the LCD
screen
1
Touch .
2 Touch LCD BRIGHT.
If the item is not displayed on the screen,
touch / . If you cannot find it, touch
MENU, select the (STANDARD
SET) menu, then touch LCD SET.
3 Adjust the item with / , then
touch .
z Tips
The recorded pictures will not be affected by this
adjustment.
If you rotate the LCD panel 180 degrees to the lens
side, you can close the LCD panel with the LCD
screen facing out.
If you are using the battery pack for power source,
you can adjust the brightness by selecting [LCD
SET], then [LCD BL LEVEL] on the
(STANDARD SET) menu
(p. 67).
Maximum
180
degrees
Maximum 90
degrees
LCD BACKLIGHT
Getting started
E:\CX4800\revision2\SDL\updated1_final_Delivery\EU\GB.FR\3084862121DCR-IP1ECEE\01GB03PRE.fm
master:Right
Getting started
17
DCR-IP1E
3-084-862-12(1)
When you use your camcorder in bright conditions
using the battery pack, press LCD BACKLIGHT to
turn off the backlight for the LCD panel. This setting
saves battery power.
You can turn off a confirmation beep sound for
operation on the touch panel when you set [BEEP] to
[OFF] on the (STANDARD SET) menu
(p. 70).
Step 5: Setting the
date and time
Set the date and time when using this
camcorder for the first time. If you do not set
the date and time, the CLOCK SET screen
appears every time you turn the power on.
b Note
If you do not use your camcorder for about 3
months, the built-in rechargeable button-type
battery gets discharged and the date and time
settings may be cleared from the memory. In that
case, charge the rechargeable button-type battery
(p. 105) and then set the date and time again.
1 Turn on your camcorder (p. 16).
2 Open the LCD panel.
When you set the clock for the first time,
skip to step 7.
3 Touch .
POWER
switch
0:00:00
1/3
SPOT
METER
FOCUS
EXPO-
SURE
SPOT
FOCUS
LCD
BRIGHT
MENU
STBY
,continued
Getting started
18
DCR-IP1E
3-084-862-12(1)
E:\CX4800\revision2\SDL\updated1_final_Delivery\EU\GB.FR\3084862121DCR-IP1ECEE\01GB03PRE.fm
master:Right
4 Touch MENU.
5 Select (TIME/LANGU.) with /
, then touch .
6 Select CLOCK SET with / ,
then touch .
7 Set Y (year) with / , then touch
.
You can set any year up to the year 2079.
8 Set M (month), D (day), hour and
minute in the same way as was done in
step 7, then touch .
Step 6: Inserting the
recording media
Inserting a cassette tape
You can use only MICROMV cassettes
marked with .
For details on these cassettes (such as write-
protection), see page 96.
b Note
Do not force the cassette into the compartment. This
may cause a malfunction of your camcorder.
1 Slide the lever in the
direction of the arrow and open the
cassette lid.
The cassette compartment automatically
comes out and opens up.
2 Insert the cassette with the window-
side facing
the cassette lid.
0:00:00
CAMERA SET
PROGRAM AE
SPOT METER
EXPOSURE
.
.
.
STBY
OK
0:00:00
MENU ROTATE
A. SHUT OFF
CLOCK SET
WORLD TIME
LANGUAGE
PROGRAM AE
DISPLAY
STBY
OK
––:––:––
0:00:00
CLOCK SET
STBY
OK
DATE
2003Y 1M 1D 0: 00
0:00:00
CLOCK SET
DATE
2004Y 1M 1D 0: 00
STBY
OK
OPEN/EJECT
lever
OPEN/EJECT
Cassette lid
Window-side
Push the center of the
back of the cassette
lightly.
Getting started
E:\CX4800\revision2\SDL\updated1_final_Delivery\EU\GB.FR\3084862121DCR-IP1ECEE\01GB03PRE.fm
master:Right
Getting started
19
DCR-IP1E
3-084-862-12(1)
3 Lightly push the cassette compartment
in with the cassette lid.
The cassette compartment automatically
slides back in.
4 Close the cassette lid.
To eject the cassette
1
Slide the lever and open
the cassette lid.
The cassette compartment automatically
comes out.
2 Take out the cassette.
3 Lightly push the cassette compartment
in with the cassette lid.
The cassette compartment automatically
slides back in.
4 Close the cassette lid.
Inserting a “Memory Stick Duo”
For details on the “Memory Stick Duo,” see
page 97.
b Note
You can use only a “Memory Stick Duo,” which is
about half the size of an ordinary “Memory Stick,”
in your camcorder (p. 97). Do not try to force any
other type of “Memory Stick” into the “Memory
Stick” slot.
Insert the “Memory Stick Duo” with the b
mark in the bottom left corner facing
down until it clicks.
To eject a “Memory Stick Duo”
Lightly push the “Memory Stick Duo” in once.
b Notes
If you force the “Memory Stick Duo” into the
“Memory Stick” slot in the wrong direction, the
“Memory Stick” slot may be damaged.
Do not insert anything other than a “Memory Stick
Duo” into the “Memory Stick” slot. Doing so may
cause a malfunction of your camcorder.
When the access lamp is lit or flashing, your
camcorder is reading/writing data from/to the
“Memory Stick Duo.” Do not shake or knock your
camcorder, turn the power off, eject the “Memory
Stick Duo,” or remove the battery pack. Otherwise,
image data may be damaged.
OPEN/EJECT
b mark
Access lamp
Lightly push in once.
Getting started
20
DCR-IP1E
3-084-862-12(1)
E:\CX4800\revision2\SDL\updated1_final_Delivery\EU\GB.FR\3084862121DCR-IP1ECEE\01GB03PRE.fm
master:Right
Step 7: Setting the
screen language
You can select the language to be used on the
LCD screen.
1 Turn on your camcorder.
2 Open the LCD panel.
3 Touch .
4 Touch LANGUAGE.
If the item is not displayed on the screen,
touch / . If you cannot find it, touch
MENU, then select it from the (TIME/
LANGU.) menu (p. 72).
5 Select the desired language with /
, then touch .
z Tip
Your camcorder offers [ENG[SIMP]] (Simplified
English) when you can not find your native tongue
among the options.
POWER
switch
0:00:00
1/3
SPOT
METER
FOCUS
EXPO-
SURE
SPOT
FOCUS
LCD
BRIGHT
MENU
STBY
0:00:00
1/3
LANGUAGE: ENGLISH
ENG
[SIMP]
DEU
TSCH
ENG
LISH
STBY
1 / 1

Sony DCR IP1E User manual

Category
Camcorders
Type
User manual
This manual is also suitable for

Ask a question and I''ll find the answer in the document

Finding information in a document is now easier with AI

Ask the document

in other languages