Page is loading ...

1
AIR FRYER OVEN
INSTRUCTION MANUAL
TT-AF32MFD
www.zline-world.com

2
Thank you for choosing:
AIR FRYER OVEN by TurboTronic®.
Enjoy easy home cooking, produces nutritious healthy food in a convenient and consistent fashion. This
air fryer lets you cook your favorite foods with little to no oil. same great taste. Thanks to Rapid air
technology there is no need to add oil to prepare fried foods. This technique uses the hot 360° air
circulating with speed and precision to make healthier versions of your favorite fried foods. with a
temperature range of 80°C – 230°C, the fryer allows you to prepare a variety of dishes from crispy fries
to juicy wings with little to no oil, Up to 80% less fat.
Save this instruction
For Household Use Only!
Indicates to read and review instructions to understand operation and use of product.
Indicates the presence of a hazard that can cause personal injury, death or substantial
property damage if the warning included with this symbol is ignored.
Take care to avoid contact with hot surface. Always use hand protection to avoid burns.
For indoor and household use only.

IMPORTANT SAFETY INSTRUCTIONS
When using your Electric Oven, basic safety precautions should always be
observed, including the following:
1. Do not touch hot surfaces. Always use handles or
knobs.
2. Close supervision is necessary when any appliance
is used by or near children.
3. To protect against electric shock, do not immerse
cord, plug or any parts of the oven in water or any
other liquids.
4. Do not let cord hang over edge of table or counter,
or touch hot surfaces.
5. Do not operate an appliance with a damaged cord
or plug or after the appliance malfunctions or has
been damage in any manner. Return the appliance
to the nearest authorized service facility for
examination, repair or adjustment.
6. The use of accessory attachments not
recommended by the appliance manufacturer may
cause hazard or injury.
7. Do not place on or near a hot gas or electric burner.
8. When operating the oven, keep at least four inches
of free space on all sides of the oven to allow for
adequate air circulation.
9. Unplug from outlet when not in use and before
cleaning. Allow to cool before putting on or taking off
parts and before cleaning.
10. To disconnect, turn the time control to OFF, then
remove the plug. Always hold the plug, and never
pull the cord.
11. Extreme caution must be used when moving a drip
pan containing hot oil or other hot liquids.
12. Do not cover any part of the oven with metal foil.
This may cause the oven to overheat.
13. Use extreme caution when removing the tray, racks
or disposing of hot grease or other hot liquids.
14. Do not clean the inside of the oven with metal
scouring pads. Pieces can break off the pad and
touch electrical parts, creating a risk of electric
shock.
15. Oversized foods or metal utensils must not be
inserted in a toaster oven as they may create a fire
or an electric shock.
16. A fire may occur if the oven is covered or touching
flammable material, including the curtains,
draperies, walls, and the like, when in operation. Do
not store any item on top of the appliance when in
operation.
17. Extreme cautions should be exercised when using
cooking or baking containers constructed of
anything other than metal or ovenproof glass.
18. Be sure that nothing touches the top or bottom
elements of the oven.
19. Do not place any of the following materials in the
oven: cardboard, plastic, paper or anything similar.
20. Do not store any materials other than the
manufacturer’s recommended accessories in this
oven when not in use.
21. Always wear protective, insulated oven gloves when
inserting or removing items from the hot oven.
22. This appliance has a tempered, safety glass door.
The glass is stronger than ordinary glass and more
resistant to breakage. Tempered glass can still
break around the edges. Avoid scratching the door
surface or nicking the edges.
23. This appliance is OFF when the Timer Control
button is in the “OFF” position.
24. Do not use outdoors. For house usage only.
25. Do not use this appliance for other than its intended
use.
26. Do not touch hot surfaces. Use handles, or knobs.
Hot surfaces symbol as below:
27. The appliance is not to be used by persons
(including children) with reduced physical, sensory
or mental capabilities, or lack of experience and
knowledge, unless they have been given
supervision or instruction.
28. The instructions shall state that the appliances are
not intended to be operated by means of an external
timer or separate remote-control system.
29. The temperature of the door or the outer surface
may be high when the appliance is operating.

1
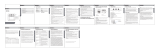
Getting to Know Your Electric Oven
MAIN COMPONENT:
A: Housing
B: Temperature control for air fry function
C: Temperature control for oven function
D: Function/Switch Control knob
E: Timer Control knob
F: Handle
G: Foot
H: Crumb tray
I: Bake tray
J: Rotisserie fork set
K: Wire rack
L: Rotisserie handle
M: Tray handle
N: Air fry basket

2
Technical Specifications
Voltage & Power: 220-240V~ 50/60Hz
1700W for oven
1700W for air fry function
Before using your Electric oven
▲Before using your electric oven for the first time, be sure to:
1. Read all of the instruction included in this manual.
2. Make sure that the oven is unplugged and the Switch & Timer control are in the “OFF”
position.
3. Wash all the accessories in hot, soapy water or in the dishwasher.
4. Thoroughly dry all accessories and re-assemble in the oven. Plug the oven into outlet
and you are ready to use your new toaster oven.
5. After re–assembling your oven, we recommend that you run it at the highest temperature
(230℃)on the toast function for approximately 15 minutes to eliminate any packing
residue that may remain after shipping. This will also remove all traces of odor initially
present.
Please Note: Initial start-up operation may result in minimal smell and smoke (about
15 minutes). This is normal and harmless. It is due to burning of the
protective substance applied to the heating elements in the factory.
Using your electric oven
Please familiarize yourself with the following oven functions and accessories prior to first
use:
● AF Temperature Control: choose the desired temperature from 100 to 230℃ for air fry
function.
● Oven Temperature Control: choose the desired temperature from 100 to 230℃ for
regular oven usage.
● Function/Switch Control: There are five stages switch selector: / /
/ . These marks are: air fry function with rotisserie (fan motor will work in
high speed) /off / for oven normal usage: upper heater with rotisserie (fan motor will
work in low speed) / for oven normal usage: lower heater with rotisserie / for oven
normal usage: upper & lower heater with rotisserie (fan motor will work in low speed).
In addition, this knob will control inner lamp.
● Timer Control: To choose your desired cooking time. There is a bell rings at the end of
the programmed time. Total 60mins adjustable time range.

3
● Power “ON” Neon Light: It shows the oven is connecting with electricity power.
● Bake Tray & Wire Rack: For use in broiling and roasting meat, poultry, fish and various
other foods.
● Tray Handle & Rotisserie Handle: Allows you to pick up the wire rack, bake tray or
rotisserie fork set when they are hot.
● Air Fry Basket: Use it with bake tray. Put it upon the bake tray during air fry function.
Usually for cooking French Fries, chicken etc.
IMPORTANT NOTE
Correct way to use Air Fry Function
Operation:
a) Insert the removable air fry basket with food, and put it upon the bake tray.
b) Keep the glass door closed.
c) Select the desired air fry temperature range, usually choose the highest temperature
230℃.
d) Turn the switch/heat selector knob to Air Fry function . Rotisserie function is
workable if needed.
e) Turn the timer knob to the desired cooking time.
f) When finish Air Fry program, the timer knob will point to “OFF” stage. Alternatively, you
can turn the timer to “OFF” position directly during cooking.
HOW TO BROIL
Operation:
a) Insert the removable bake rack with food and bake tray.
b) Keep the glass door close.
c) Select the desired oven temperature.
d) Turn the switch selector knob to Broil . Rotisserie function is workable if needed.
e) Turn the timer knob to the desired cooking time.
f) When finish broiling, the timer knob will point to “OFF” stage. Alternatively, you can turn
the timer to “OFF” position directly during cooking.
HOW TO BAKE
Operation:
Please note that BAKE function will use bottom-heating elements.

4
a) Place the removable rack with food into the desired position.
b) Insert the bake tray if needed, and close the oven door.
c) Select the desired oven temperature.
d) Turn the heater selector knob to Bake . Rotisserie function is workable if needed.
e) Turn the timer knob to the desired cooking time.
f) When finish baking, the timer knob will point to “OFF” stage. Alternatively, you can turn
the timer to “OFF” position directly during cooking.
HOW TO TOAST
Operation:
a) Place food to be toasted on the wire rack and put them into the oven.
b) Close the oven door.
c) Set the oven temperature knob to 230℃.
d) Turn the function control knob to Toast . Rotisserie function is workable if needed.
e) Turn the timer knob to the desired cooking time.
f) When finish toasting, the timer knob will point to “OFF” stage. Alternatively, you can
turn the timer to “OFF” position directly during cooking.
Positioning of the Wire Racks
Cookies – Use bottom or middle Support Guides.
Layer Cakes – Use bottom Support Guide only (bake one at a time).
Pies – Use bottom or middle Support Guides.
CAUTION: Always use extreme care when removing bake
tray, wire rack or any hot container from a hot
oven. Always use the rack handle, or an oven mitt
when removing hot items from the oven.
Care & Cleaning
Warning: Be sure to unplug the oven and allow it to cool before
cleaning.
Your oven features a continuous clean coating that automatically cleans itself during
normal operation. Any spattering that occurs while cooking and comes into contact with the
continuous coating is oxidized while the oven is in operation. If desired, wipe the walls with
a damp sponge, cloth or nylon scouring pad and mild detergent. DO NOT USE STEEL
WOOL SCOURING PADS, ABRASIVE CLEANERS OR SCRAPE THE WALLS WITH A
METAL UTENSIL, AS ALL OF THESE METHODS MAY DAMAGE THE CONTINUOUS
CLEAN COATING.
All accessories should be washed in hot soapy water or can be cleaned in a dishwasher.

5
The door can be wiped with a damp sponge and wiped dry with a paper or cloth towel.
Clean the outside with a damp sponge. DO NOT USE AN ABRASIVE CLEANER AS IT
MAY DAMAGE THE EXTERIOR FINISH.
DO NOT USE AN ABRASIVE CLEANER OR STEEL WOOL SCOURING PAD ON THE
DRIP PAN AS IT MAY DAMAGE THE PORCELAIN ENAMEL FINISH.
LET ALL PARTS AND SURFACES DRY THOROUGHLY PRIOR TO PLUGGING OVEN
IN AND USING.
Due to continuous product improvement, specifications subject to change without prior
notice.
WARNING
This appliance is not intended for use by persons (including children) with reduced physical
sensory or mental capabilities, or lack of experience and knowledge, unless they have
been given supervision or instruction concerning use of the appliance by a person
responsible for their safety. Children should be supervised to ensure that they do not play
with the appliance.
1. Never use the device unsupervised! Switch off the device whenever you are not using
it, even if this only for short while.
2. This appliance is not intended to be operated by means of an external timer or separate
remote-control system.
3. If the supply cord is damaged, it must be replaced by the manufacturer, it’s service
agent or similarly qualified persons in order to avoid a hazard.
4. Do not immerse this product in liquid.
This appliance shall not be used by children,
Keep the appliance and its cord out of reach of children.
Caution: Hot surfaces
All outer surfaces may get hot when the appliance is operating.
DISPOSAL OF OLD ELECTRICAL APPLIANCES
The European directive 2002/96/EC on Waste Electrical and Electronic
Equipment (WEEE), requires that old household electrical appliances must
not be disposed of in the normal unsorted municipal waste stream. Old
appliances must be collected separately in order to optimize the recovery
and recycling of the materials they contain, and reduce the impact on
human health and the environment. The crossed out “wheeled bin” symbol on the product
reminds you of your obligation, that when you dispose of the appliance, it must be

6
separately collected.
Consumers should contact their local authority or retailer for information concerning the
correct disposal of their old appliance.
LIMITED WARRANTY
Limited Warranty applies to purchases made from authorized retailers of TurboTronic®.
TurboTronic® Warranty coverage applies to the original owner and to the original product
only and is not transferable.
TurboTronic® warrants that the unit shall be free from defects in material and workmanship.
Limited Warranty apply only when it is used under normal household conditions and
maintained according to the requirements outlined in the Owner’s Guide, subject to the
following
conditions and exclusions:
What is covered by this warranty?
1. The original unit and/or non-wearable parts deemed defective, in TurboTronic® sole
discretion, will be repaired or replaced
2. TurboTronic® reserves the right to replace the unit with one of equal or greater value.
What is not covered by this warranty?
1. Normal wear and tear of wearable parts (such as blending vessels, lids, cups, blades,
blender bases, removable pots, racks, pans, etc.), which require regular maintenance
and/or replacement to ensure the proper functioning of your unit, are not covered by this
warranty.
2. Any unit that has been tampered with or used for commercial purposes.
3. Damage caused by misuse, abuse, negligent handling, failure to perform required
maintenance (e.g., failure to keep the well of the motor base clear of food spills and other
debris), or damage due to mishandling in transit.
4. Consequential and incidental damages.
5. Defects caused by repair persons not authorized by TurboTronic®. These defects
include damages caused in the process of shipping, altering, or repairing the TurboTronic®
product (or any of its parts) when the repair is performed by a repair person not authorized
by TurboTronic®.
6. Products purchased, used, or operated outside Europe.
Illustrations may differ from actual product.
We are constantly striving to improve our products, therefore the specifications contained
herein are subject to change without notice.
TurboTronic® and Z-Line® are registered trademarks of Z-GLOBAL B.V.B.A ®
PRINTED IN PRC

7
/